
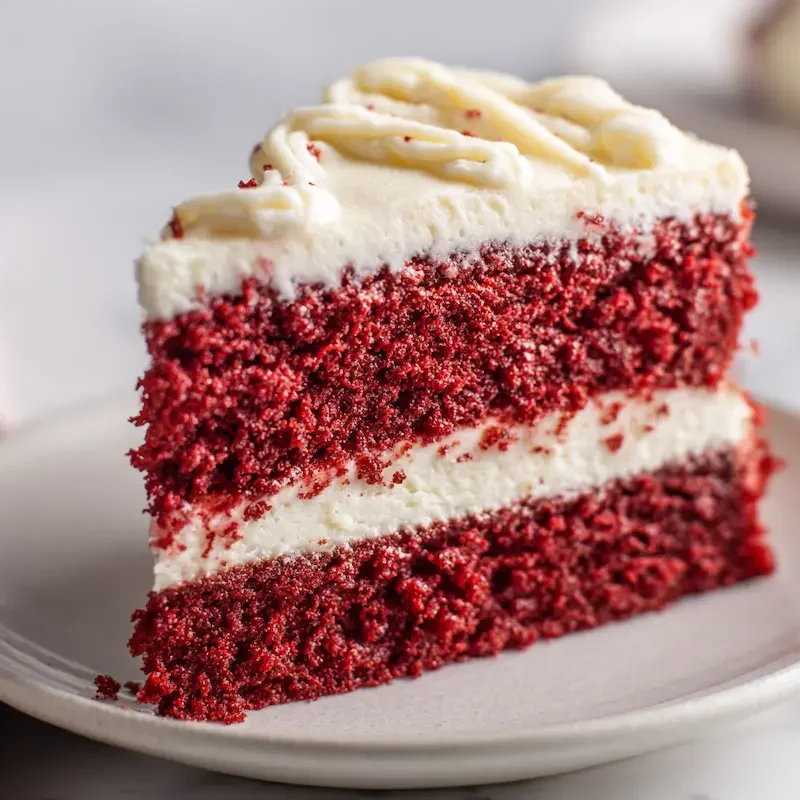
This Red Velvet Cheesecake Cake combines two classic desserts into one show-stopping layer cake, complete with a creamy cheesecake center and rich cream cheese frosting.
Red Velvet Cheesecake Cake – Where Love Meets Layers
The first time I made this Red Velvet Cheesecake Cake, I honestly didn’t expect the reaction I got. It was a snowy Sunday in February, and my oldest, Lily, had just turned twelve. She’d asked for something red and creamy but not just red velvet again. Challenge accepted.
So I decided to surprise her with a layered red velvet cheesecake, a full-on celebration of flavor and texture. Moist, tender red velvet cake with a homemade cheesecake layer tucked right inside, and all of it wrapped in silky cream cheese frosting. When we sliced into it and saw that beautiful contrast, deep red cake hugging the cheesecake center, the kids gasped. And then, they devoured it.
Now, it’s our go-to cake for birthdays, holidays, and anytime we want to make someone feel extra loved. I’ve even shaped it into a heart for Valentine’s Day or added crushed cookies on top for a little crunch. You can peek at more Valentine’s Day dessert ideas if you’re feeling festive.
There’s just something magical about this red velvet cheesecake cake. It’s not just pretty, it tastes like joy.
Eva’s Note: If a classic red velvet cake and a creamy New York-style cheesecake had a love child, this would be it.
Ingredients You’ll Need
There are three dreamy layers to this Red Velvet Cheesecake Cake, the rich red velvet cake, the creamy cheesecake center, and the tangy-sweet cream cheese frosting that ties it all together.
Here’s exactly what you’ll need to bring it to life.
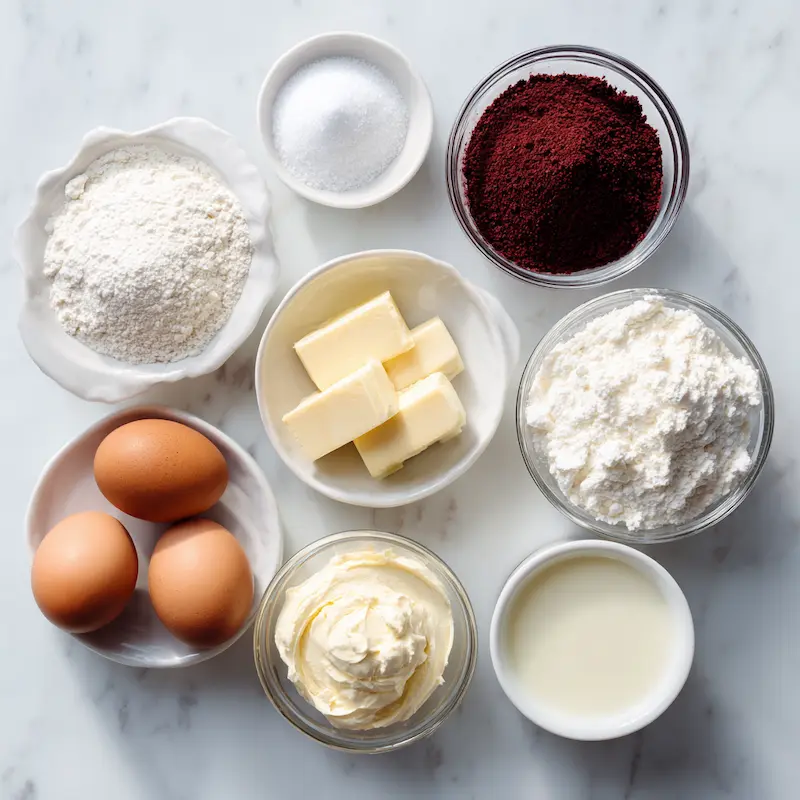
For the Red Velvet Cake
- 2 ½ cups flour
- 1 ½ cups sugar
- 2 large eggs
- 1 cup vegetable oil
- 1 cup buttermilk
Eva’s Tip: I love using Kate’s Real Buttermilk. The flavor is rich and makes a difference in texture. - 2 tbsp cocoa powder
- 1 tbsp red food coloring
Gel food coloring gives a deeper color with less liquid, which keeps the batter from getting runny.
For the Cheesecake Layer
- 16 oz cream cheese, softened
My go-to brand is Philadelphia. It’s smooth and never grainy. - ½ cup sugar
- 2 large eggs
Eva’s Note: Let the cream cheese come to room temperature before mixing. Cold cream cheese gets lumpy, and no one wants that in their cheesecake.
For the Cream Cheese Frosting
- 1 ½ cups cream cheese frosting (homemade or store-bought)
If I have time, I make a double batch of my homemade version, but store-bought works just fine when life gets busy.
Ready to layer up some love. Let’s bake.
Step-by-Step Instructions
This Red Velvet Cheesecake Cake comes together in three parts: baking the creamy cheesecake layer, making the red velvet cake, and assembling it all into one unforgettable dessert. If this is your first time making a layered red velvet cheesecake, don’t worry. I’ll walk you through every step, spills and all.
1. Bake the Cheesecake Layer
You’ll want to start with this step, since it needs time to cool and freeze.
Preheat your oven to 325°F (163°C). Line the bottom of a 9-inch springform pan with parchment paper and lightly grease the sides.
In a large bowl, beat 16 oz softened cream cheese and ½ cup sugar until smooth.
Add 2 eggs, one at a time, beating just until incorporated. Don’t overmix.
Pour the cheesecake batter into the prepared pan and smooth the top.
Bake for 35 to 40 minutes, or until the center is set and only slightly jiggly.
Turn the oven off, crack the door, and let the cheesecake sit for 30 minutes. Then remove and cool completely at room temperature.
Freeze the cheesecake for at least 2 hours, or overnight, once cooled.
Eva’s Note: Don’t skip this. Freezing the cheesecake keeps your layers tidy and stops the frosting from melting.
How I messed this up once: I rushed layering with a warm cheesecake. The frosting slid off like a landslide. Lesson learned.
2. Make the Red Velvet Cake
This red velvet cake with cheesecake center starts with my classic red velvet cake base, adapted for perfect layering.
Preheat oven to 350°F (177°C). Grease and line two 9-inch round cake pans.
In a large bowl, whisk together 2 ½ cups flour, 1 ½ cups sugar, 2 tbsp cocoa powder, and a pinch of salt.
In another bowl, whisk 2 eggs, 1 cup vegetable oil, 1 cup buttermilk, and 1 tbsp red food coloring. Gel is best.
Pour the wet ingredients into the dry and stir gently until combined. Don’t overmix, as that can make the cake dense.
Divide the batter evenly between the pans and smooth the tops.
Bake for 25 to 30 minutes, or until a toothpick comes out clean.
Let cakes cool in the pans for 10 minutes, then turn out onto a rack to cool completely.
Eva’s Note: If your cakes dome in the middle, use a serrated knife to gently level them.
“It’s like giving your cake a little haircut. It helps everything stack just right.”
3. Assemble the Red Velvet Cheesecake Cake
Now comes the fun part, bringing all those gorgeous layers together.
Place one red velvet cake layer on a serving plate or cake stand.
Carefully unwrap and center the frozen cheesecake layer on top.
Add the second red velvet cake layer on top of the cheesecake.
Eva’s Note: I use a small offset spatula to nudge things into place. It’s like stacking pillows. Gentle hands help.
Apply a thin crumb coat of cream cheese frosting all over the cake. Chill for 15 minutes.
Frost the entire cake with the remaining cream cheese frosting. You can go smooth and classic or swirl it with a spoon for a rustic finish.
Eva’s Note: Let your frosting come to room temperature before spreading.
“Cold frosting can tear a soft cake. Let it sit out, just like buttering soft bread.”
Tips for Perfect Layers & Assembly
Layered cakes can feel a little intimidating, especially when you’re sandwiching a cheesecake between two soft cake rounds. But with a few of my tried-and-true tricks, you’ll be slicing into your Red Velvet Cheesecake Cake with confidence and clean lines.
Keeping the Layers Aligned
- Freeze the cheesecake layer before assembling.
This is my number one tip for a reason. A firm, frozen cheesecake is so much easier to handle. It won’t bend, break, or smudge your frosting as you work.
Eva’s Note: I usually bake the cheesecake on a Friday night, freeze it, and then layer everything Saturday morning. That way, I’m not rushing, and it actually feels like fun instead of a mess waiting to happen.
- Level your cake layers.
Even if they bake up with just a small dome, trimming them helps everything stack neatly. A serrated bread knife works beautifully here. - Chill between steps.
After your crumb coat, that first thin layer of frosting, let the cake rest in the fridge for 15 to 20 minutes. This seals in crumbs and gives you a smooth surface for your final coat.
Crumb-Coat First
A crumb coat is a thin layer of frosting that catches any stray crumbs. It doesn’t need to be perfect. It’s like priming your wall before painting.
- Spread a light layer of cream cheese frosting over the whole cake.
- Chill briefly.
- Then add your final, thicker frosting layer.
Eva’s Note: If you’ve got a rotating cake stand, now’s the time to pull it out. I’ve had the same $12 one from a craft store for years, and it makes frosting feel like less of an arm workout.
Bonus: How to Layer Cheesecake in a Cake Without Sliding
This is one of the top questions I get.
To keep your cheesecake cake from shifting:
- Make sure the cheesecake is frozen solid when you layer.
- Trim the red velvet cakes flat so the cheesecake sits evenly.
- Don’t overload the filling between layers. A thin layer of frosting is plenty.
- Chill again before the final coat to help it all set.
Just like that, your cheesecake cake from scratch becomes a beautiful, sturdy, sliceable showstopper.
Serving & Storing Red Velvet Cheesecake Cake
One of the best parts of making a red velvet cheesecake cake from scratch is that moment when you slice into it and see the gorgeous layers. The rich red velvet cake, the creamy white cheesecake center, it’s a little bit dramatic in the best way and always gets a wow at the table.
Here’s how I serve, store, and prep this cake ahead so it stays beautiful and delicious every time.
Serving
- Chill first, then slice.
This cake slices best when it’s been chilled for at least an hour. Use a sharp knife and wipe it clean between cuts for those picture-perfect layers.
Eva’s Note: This is the kind of cake that looks bakery-fancy but tastes like something Grandma would’ve made, rich, soft, and comforting.
- Add a festive twist.
For Valentine’s Day, I’ve baked it in a heart-shaped pan or topped it with crushed red velvet cookies or shaved white chocolate. It also looks gorgeous with a few fresh raspberries or strawberries on top.
Make-Ahead Tips
- Bake the cheesecake layer ahead of time.
You can make it up to 2 days in advance. Freeze it after it cools. It actually makes the layering easier. - Bake the red velvet cake the day before.
Wrap the layers in plastic wrap once they’re cool and store at room temperature overnight. - Assemble and frost the morning of.
This way, the cake has time to chill before slicing, and your kitchen doesn’t feel like a bakery at 9 PM.
Freezing Leftovers
Wondering can you freeze cheesecake cake? Yes, and it freezes beautifully.
- Slice the cake into pieces.
- Wrap each slice tightly in plastic wrap, then foil.
- Freeze for up to 1 month.
- Thaw slices in the fridge overnight.
Eva’s Note: Even weeks later, my kids still fight over the last frozen slice. It’s like discovering treasure in the back of the freezer.
And if you’re planning a full spread for guests, this cake pairs wonderfully with something savory and make-ahead like these savory mashed potato cheese puffs. A little sweet, a little salty, balance is everything.
Frequently Asked Questions about Red Velvet Cheesecake Cake
I’ve gotten so many sweet messages and a few frosting emergencies about this layered red velvet cheesecake. So let’s answer your most common questions with a little extra love and some real-life advice from my kitchen to yours.
Q: Can I make the cheesecake layer ahead of time?
Yes, and you should. In fact, it’s best to bake the cheesecake a day ahead, let it cool fully, and then freeze it before assembling.
Eva’s Note: This is my go-to move when hosting. I’ll bake the cheesecake on Friday, freeze it overnight, and then stack and frost everything Saturday morning before guests arrive. It makes things feel calm, not chaotic.
Q: Can I use boxed red velvet cake mix instead of making it from scratch?
You can, but the texture and flavor balance better with homemade. Boxed mixes tend to be sweeter and a little more delicate, which can make layering tricky.
Eva’s Note: I’ve used box mix when life got hectic. Just add a splash of vanilla and a little extra cocoa powder to deepen the flavor.
But if you have 15 extra minutes, the classic red velvet cake base we use in this recipe is so worth it.
Q: How do I keep the layers from sliding around?
The key is to freeze the cheesecake and chill between steps. Leveling your cake layers makes a big difference too.
Eva’s Note: I always chill the cake after stacking and before the final frosting. It firms everything up, and the result is a photo-ready finish, even if your frosting skills are more homey than pro.
Q: Can I freeze the whole cake?
Yes. Slice it first for easier thawing.
- Wrap each piece tightly in plastic wrap, then foil.
- Store in a freezer-safe container or bag.
- Freeze for up to 1 month.
Eva’s Note: Honestly, the frozen slices are a hidden treat. I’ve caught Noah sneaking one at breakfast before school, and I couldn’t even be mad.
This Red Velvet Cheesecake Cake really is the gift that keeps on giving, whether it’s made for a holiday, a birthday, or just because you feel like baking something beautiful.
Print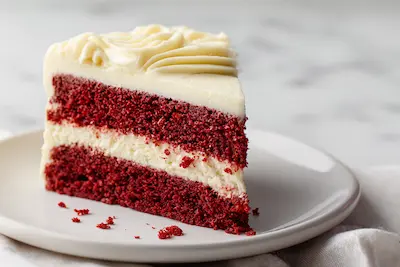
Red Velvet Cheesecake Cake (A Family-Favorite Layered Dessert)
- Total Time: 4 hours
- Yield: 12 slices 1x
- Diet: Vegetarian
Description
This Red Velvet Cheesecake Cake combines rich red velvet cake, a creamy cheesecake center, and silky cream cheese frosting for the ultimate layered dessert.
Ingredients
2 ½ cups flour
1 ½ cups sugar
2 large eggs
1 cup vegetable oil
1 cup buttermilk
2 tbsp cocoa powder
1 tbsp red food coloring
16 oz cream cheese, softened
½ cup sugar
2 large eggs
1 ½ cups cream cheese frosting (homemade or store-bought)
Instructions
1. Preheat oven to 325°F. Line and grease a 9-inch springform pan.
2. Beat softened cream cheese and sugar until smooth. Add eggs one at a time.
3. Pour into the pan, bake 35–40 mins until center is set. Cool, then freeze 2 hours or overnight.
4. Preheat oven to 350°F. Grease and line two 9-inch round cake pans.
5. Whisk flour, sugar, cocoa powder, and salt in one bowl.
6. Whisk eggs, oil, buttermilk, and red food coloring in another bowl.
7. Combine wet and dry, stir gently, then divide into pans.
8. Bake for 25–30 mins. Cool completely.
9. Level cake layers if domed. Place one cake layer on a plate.
10. Add frozen cheesecake layer on top, then second cake layer.
11. Spread thin crumb coat of frosting, chill 15 minutes.
12. Frost entire cake with cream cheese frosting. Chill before slicing.
Notes
Let cream cheese soften to avoid lumps in your cheesecake.
Freeze cheesecake layer before stacking to keep layers clean and even.
Use gel red food coloring for vibrant color without thinning the batter.
Trim cake layers flat with a serrated knife for easy stacking.
Chill cake before slicing for sharp, clean pieces.
- Prep Time: 30 minutes
- Cook Time: 1 hour
- Category: Dessert
- Method: Baking
- Cuisine: American
Nutrition
- Serving Size: 1 slice
- Calories: 580
- Sugar: 43g
- Sodium: 340mg
- Fat: 37g
- Saturated Fat: 18g
- Unsaturated Fat: 16g
- Trans Fat: 0g
- Carbohydrates: 55g
- Fiber: 1g
- Protein: 6g
- Cholesterol: 120mg