
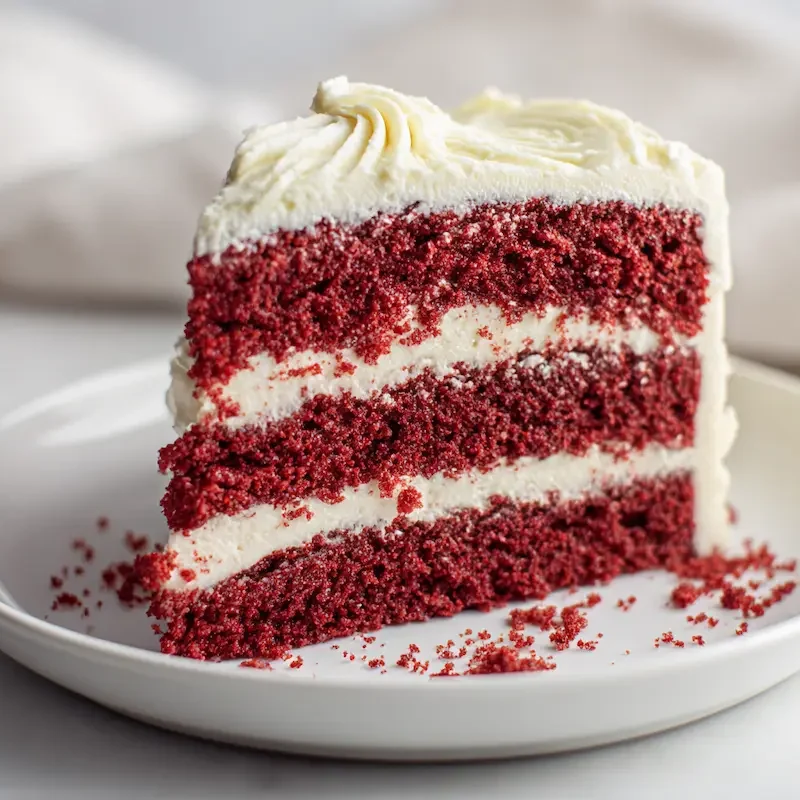
Meta Description: This classic red velvet cake is soft, rich, and layered with fluffy cream cheese frosting. A family favorite made with buttermilk and a hint of cocoa.
A Southern Classic: Red Velvet Cake That Never Goes Out of Style
There’s something about a classic red velvet cake that feels like home. It’s that deep red color, the tender crumb, the way the tangy cream cheese frosting melts just slightly over each slice. This cake has been showing up on our family table for as long as I can remember, birthdays, holidays, “just because” Sundays. It’s a traditional red velvet cake recipe that carries stories in every bite.
I still remember the first time I watched my Aunt Mae make it from scratch. She wore an apron embroidered with daisies and hummed along to Patsy Cline while mixing the batter by hand. The whole kitchen smelled sweet and a little sharp, thanks to the buttermilk and vinegar. I was maybe eight, sitting on a stool with red-stained fingers after sneaking a taste from the mixing spoon. She always let me help with the frosting, even if my swirls were more “abstract art” than bakery-ready.
Now, I make this classic red velvet cake with my kids, especially around Valentine’s Day when it feels extra festive. (If you’re planning ahead, I’ve rounded up some more romantic Valentine’s Day cakes at https://notedrecipes.net/14-valentines-day-cakes/ too.)
But truth be told? We don’t wait for special occasions. This cake is the celebration.
What Makes a Red Velvet Cake “Velvet”?
Let’s clear something up first, is red velvet cake just chocolate cake with food coloring? Not quite. While it does have a little cocoa in it, the flavor is lighter, tangier, and much more layered than your typical chocolate cake. That’s part of what makes a classic red velvet cake so special, it’s its own thing entirely.
The “velvet” in the name refers to the texture. Thanks to ingredients like buttermilk, vinegar, and a bit of baking soda, the cake turns out incredibly soft and tender. Almost melt-in-your-mouth soft. Back in the early 1900s, “velvet” cakes were all the rage, named for their fine, smooth crumb. This one stuck around for a reason.
And as for what makes red velvet cake red? Traditionally, the natural acids in the buttermilk and vinegar would react with cocoa powder (which used to be less processed) and give off a reddish hue. These days, most recipes, including mine, use red food coloring to get that bold, vibrant color we expect. But the flavor? That tangy-sweet magic? That’s still all thanks to the vinegar, buttermilk, and just enough cocoa to keep things interesting.
I like to call it the cake version of a southern drawl, smooth, slow, and full of character.
Ingredients for the Perfect Classic Red Velvet Cake
When it comes to baking a truly classic red velvet cake, your ingredients matter, but they don’t need to be fancy. In fact, most of these are pantry staples, with a few key players that give red velvet its iconic flavor and color. Here’s everything you’ll need for both the cake and the cream cheese frosting.
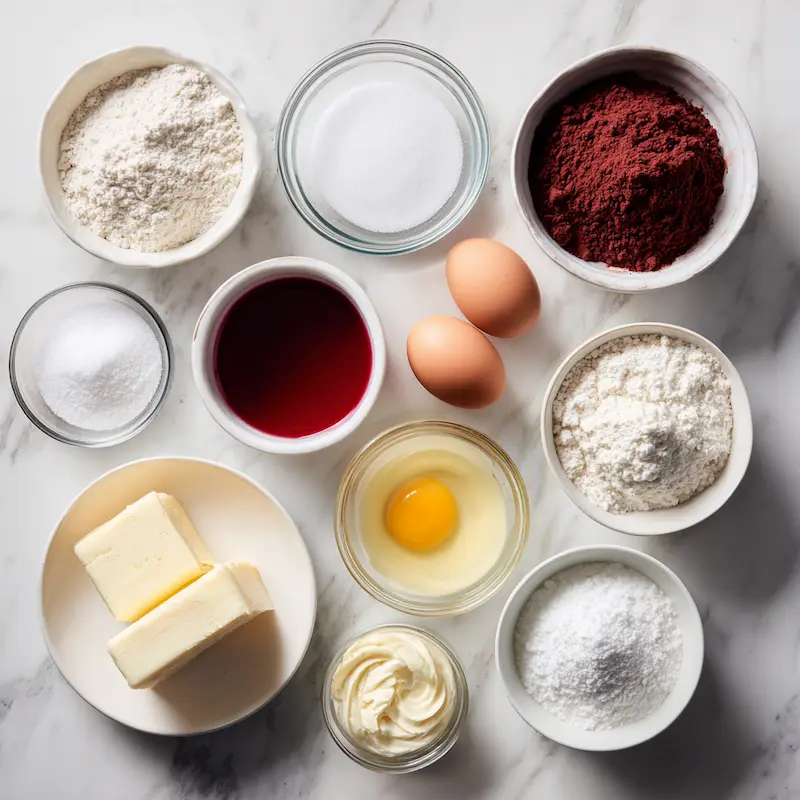
For the Cake:
• 2 ½ cups all-purpose flour
• 1 ½ cups sugar
• 1 tsp baking soda
• 1 tsp cocoa powder, Just a touch is all you need; I like natural unsweetened cocoa for that subtle hint of chocolate.
• 1 tsp salt
• 2 eggs
• 1 cup vegetable oil, Keeps the cake moist and tender.
• 1 cup buttermilk, Essential for that signature tang and soft crumb.
• 1 tbsp white vinegar, Don’t skip it! It reacts with the baking soda for lift and velvety texture.
• 1 tsp vanilla extract
• 2 tbsp red food coloring, Liquid or gel both work. Eva’s Tip: You can swap this for beet powder or beet juice if you prefer a more natural touch, Aunt Dee used to swear by it.
For the Cream Cheese Frosting:
• 8 oz cream cheese, softened
• ½ cup (1 stick) butter, softened
• 2 cups powdered sugar, sifted if lumpy
• 1 tsp vanilla extract
Eva’s Note:
If you’ve got time, let the cake layers chill in the fridge before frosting. It makes it easier to stack, spread, and get clean edges, especially helpful if little hands are helping you in the kitchen (and in this house, they always are).
Step-by-Step: How to Make Classic Red Velvet Cake
This classic red velvet cake is as comforting to bake as it is to eat. There’s a rhythm to it, whisking the dry ingredients, swirling in the color, folding everything together. I like to put on a playlist (usually something old and soulful), let the kids crack the eggs (carefully), and make a little memory while the oven warms the kitchen.
Below you’ll find step-by-step instructions for both the cake and the cream cheese frosting. Nothing fancy, just a traditional red velvet cake recipe that works every time.
To Make the Cake:
- Preheat your oven to 350°F (175°C).
Grease and flour two 9-inch round cake pans, or line them with parchment paper rounds. - In a medium bowl, whisk together the dry ingredients.
That’s your flour, sugar, baking soda, cocoa powder, and salt. Set aside. - In a large mixing bowl, combine the wet ingredients.
Beat the eggs, oil, buttermilk, vinegar, vanilla, and red food coloring until smooth and well mixed. - Slowly add the dry ingredients to the wet.
I do this in thirds, mixing gently between each addition. You don’t want to overmix, just until everything’s incorporated. - Pour the batter evenly into the prepared pans.
Use a spatula to smooth the tops. - Bake for 30–35 minutes.
You’re looking for cakes that spring back lightly when touched and a toothpick that comes out clean. Start checking at 30 minutes.
Eva’s Note:
Red velvet can go dry if overbaked, so trust your nose and your toothpick more than the timer.
- Cool in the pans for 10 minutes.
Then remove the cakes and let them cool completely on a wire rack before frosting.
To Make the Cream Cheese Frosting:
- Beat together the cream cheese and butter.
Let them come to room temp first, it makes everything smoother. Use a hand mixer or stand mixer for best results. - Add the powdered sugar gradually.
One cup at a time, beating well after each addition. Scrape the sides of the bowl as needed. - Stir in the vanilla extract.
Mix until creamy and fluffy.
Assembling Your Cake:
- Place one cooled cake layer on a serving plate.
Spread a generous scoop of frosting over the top. - Top with the second layer.
Spread the remaining frosting over the top and sides.
Eva’s Note: Try a crumb coat!
If you want clean edges, apply a thin “crumb coat” of frosting first, then chill the cake for 30 minutes. Then do your final, prettier layer of frosting. My girls say it’s like spackling a cake, messy but fun.
Optional: Chill before serving.
Chilling helps the cream cheese frosting set and makes for beautiful slices.
If you love this cake, you might also enjoy baking another beautiful layered cake at https://notedrecipes.net/layered-chocolate-delight-cake/ for your next gathering.
Tips for Baking the Best Red Velvet Cake
After years of making classic red velvet cake, for birthdays, bake sales, and even a wedding once (yes, really!), I’ve picked up a few tricks that keep the cake moist, the frosting smooth, and the whole process a little less stressful. If you’re aiming for a cake that’s not only delicious but also pretty enough to share, these are for you.
Eva’s Favorite Red Velvet Cake Baking Tips:
• Use room temperature ingredients.
This helps everything blend smoothly, especially when creaming butter and cream cheese for the frosting.
• Don’t skip the vinegar.
It might seem strange, but it reacts with the baking soda and cocoa to give that soft, velvety texture red velvet is known for.
• Measure your flour properly.
Spoon it into the measuring cup and level it off, don’t scoop directly from the bag, or you’ll pack too much in and risk a dense cake.
• Want perfectly flat cake layers?
Eva’s Tip: Wrap your pans with water-soaked cake strips. They keep the edges from baking faster than the center and help your layers rise evenly, no dome, no trimming.
• Let it cool completely before frosting.
This is how to make red velvet cake moist and keep the frosting from melting or sliding off.
• Chill the layers before stacking and frosting.
Just 30 minutes in the fridge makes the cake sturdier and the process so much smoother. (Plus, it gives you time to make coffee.)
How to Store & Serve Red Velvet Cake
One of the best things about a classic red velvet cake? It stores beautifully. I’ve made it ahead for birthdays, holidays, and even a baby shower once when I had a toddler clinging to my leg and no time to bake the day-of. Whether you’re prepping in advance or just hoping for leftovers (which never last long in our house), here’s how to keep your cake fresh and delicious.
Storing Red Velvet Cake
• In the fridge (frosted):
Wrap the cake gently with plastic wrap or store slices in an airtight container. It’ll stay fresh for 3 to 4 days. I recommend letting it sit at room temp for 15 to 20 minutes before serving so the frosting softens.
• In the freezer (unfrosted):
Eva’s Tip: Wrap each cooled layer in plastic wrap and then foil. I slip parchment paper between layers to prevent sticking. Stored this way, the cake keeps well for up to 1 month. Thaw overnight in the fridge before frosting.
Serving Suggestions
• Serve it slightly chilled or at room temp, both are lovely.
• Add fresh berries on the side for color and a bright contrast.
• Turn leftovers into cake parfaits with layers of frosting and fruit.
• Want to switch it up? Make red velvet cupcakes instead. My kids love decorating them with sprinkles for school parties.
If you’re stocking your dessert table for the season, check out these holiday-ready desserts at https://notedrecipes.net/peppermint-bark-cookies/ that store just as well.
Make It Your Own: Variations & Decorating Ideas
One of my favorite things about a classic red velvet cake is how easy it is to customize. Over the years, I’ve made it into cupcakes for classroom birthdays, heart-shaped layers for Valentine’s Day, and even added a few unexpected twists to suit the season or the guest of honor. The base is so reliable, you can get creative without fear.
Here are some of my go-to variations and decorating tricks, tried and loved by my family (and most of the neighbors).
Favorite Red Velvet Cake Variations
• Red Velvet Cupcakes
Same batter, just scoop into lined muffin tins and bake for about 18 to 20 minutes. Great for parties and kid-decorating stations.
• Natural Color Option
Eva’s Tip: Skip the food dye and try beet juice or beet powder. The color is more muted, like a soft burgundy, but it gives a subtle earthiness that’s surprisingly delicious. Aunt Dee swore it was “cleaner baking.”
• Heart-Shaped Cake
Use a heart-shaped pan (or cut a circle and square to shape your own) for anniversaries, Valentine’s Day, or just because.
• Coconut Topping
Sprinkle sweetened shredded coconut between layers or over the top for a little texture and visual flair. Emma loves adding this, mostly because she says it looks “like snowy sprinkles.”
• Citrus Zest Twist
Eva’s Tip: For spring, I grate in a bit of orange or lemon zest into the batter. It adds a bright note that plays beautifully with the tangy cream cheese frosting.
• Layered Cake with Filling
Want something extra-special? Split each layer in half horizontally and add a thin layer of raspberry jam or whipped cream cheese filling between them.
• Crumb Coat for Smooth Frosting
This one’s part decorating, part sanity saver. Do a thin base coat of frosting, chill for 30 minutes, then do your final coat. Looks polished without being fussy.
Frequently Asked Questions About Classic Red Velvet Cake
You’ve got questions, I’ve got cake crumbs and answers. Over the years, friends, neighbors, and Noted Recipes readers have asked me everything from “Can I make this ahead?” to “Why is it red again?” Here’s a roundup of the most common ones, all about the beloved classic red velvet cake.
What makes red velvet cake red?
Traditionally, the red color came from a natural chemical reaction between the natural cocoa powder, buttermilk, and vinegar. Back in the day, cocoa was less processed and had more anthocyanins, compounds that turned reddish when mixed with acids. These days, most of us use red food coloring to boost that signature hue.
Eva’s Note:
My kids used to huddle around the bowl and watch the batter turn deep red, every time, it felt like magic. “It’s like we’re baking a sunset,” Emma once said.
Is red velvet cake just chocolate cake with food coloring?
Not exactly. While it has a little cocoa powder, a classic red velvet cake is lighter, tangier, and softer than traditional chocolate cake. That’s thanks to the combo of buttermilk, vinegar, and oil. So yes, it has cocoa, but no, it’s not just chocolate in disguise.
Family Memory:
My brother-in-law used to call it “red chocolate cake” until I made him try a slice. “Oh,” he said, mid-bite, “this is… way better than chocolate cake.” He’s been requesting it for his birthday ever since.
How do you make red velvet cake moist?
This one’s all about the balance of fat and acid. The oil gives softness, the buttermilk adds tenderness, and the vinegar works with the baking soda to create lift. Also: don’t overbake. That’s the fastest route to a dry cake.
Eva’s Tip:
Start checking for doneness at 30 minutes. A toothpick should come out with just a few moist crumbs, not dry, not wet.
Can I make this red velvet cake ahead of time?
Absolutely! I often make it the day before an event, sometimes even earlier if the week’s chaotic (read: always).
• Fridge: Keeps well, fully frosted, for 3 to 4 days.
• Freezer: Freeze the unfrosted layers, wrapped tightly with parchment between them, for up to 1 month.
Eva’s Note:
Around the holidays, I bake and freeze the layers weeks in advance. That way, I can focus on frosting and decorating when things aren’t quite so crazy. Well… less crazy.
Classic Red Velvet Cake (Moist, Tangy & Velvety Soft!)
- Total Time: 1 hour
- Yield: 12 servings 1x
Description
This classic red velvet cake is moist, tender, and full of rich, tangy flavor from buttermilk and cream cheese frosting.
Ingredients
2 ½ cups all-purpose flour
1 ½ cups sugar
1 tsp baking soda
1 tsp cocoa powder
1 tsp salt
2 eggs
1 cup vegetable oil
1 cup buttermilk
1 tbsp white vinegar
1 tsp vanilla extract
2 tbsp red food coloring
8 oz cream cheese, softened
½ cup (1 stick) butter, softened
2 cups powdered sugar
1 tsp vanilla extract
Instructions
1. Preheat oven to 350°F (175°C). Grease and flour two 9-inch round cake pans or line with parchment.
2. In a medium bowl, whisk together flour, sugar, baking soda, cocoa powder, and salt.
3. In a large bowl, beat together eggs, oil, buttermilk, vinegar, vanilla, and red food coloring until smooth.
4. Gradually mix dry ingredients into wet in three additions, stirring just until combined.
5. Divide batter evenly between prepared pans and smooth the tops.
6. Bake 30–35 minutes, or until a toothpick comes out clean. Do not overbake.
7. Cool in pans for 10 minutes, then transfer to wire rack to cool completely.
8. To make frosting, beat cream cheese and butter until smooth and fluffy.
9. Add powdered sugar gradually, beating well between additions.
10. Stir in vanilla extract and mix until creamy.
11. Frost the cooled cake layers, stacking and covering top and sides.
12. Optional: Chill frosted cake 30 minutes for cleaner slices and firmer texture.
Notes
Let cake layers cool completely before frosting to prevent sliding.
Chilling the layers before assembling makes stacking and spreading easier.
For a natural color variation, substitute beet juice or beet powder for red food coloring.
A crumb coat helps catch crumbs and create a smooth final layer.
- Prep Time: 20 minutes
- Cook Time: 35 minutes
- Category: Dessert
- Method: Baking
- Cuisine: Southern
Nutrition
- Serving Size: 1 slice
- Calories: 430
- Sugar: 38g
- Sodium: 320mg
- Fat: 24g
- Saturated Fat: 10g
- Unsaturated Fat: 12g
- Trans Fat: 0g
- Carbohydrates: 50g
- Fiber: 1g
- Protein: 4g
- Cholesterol: 55mg