
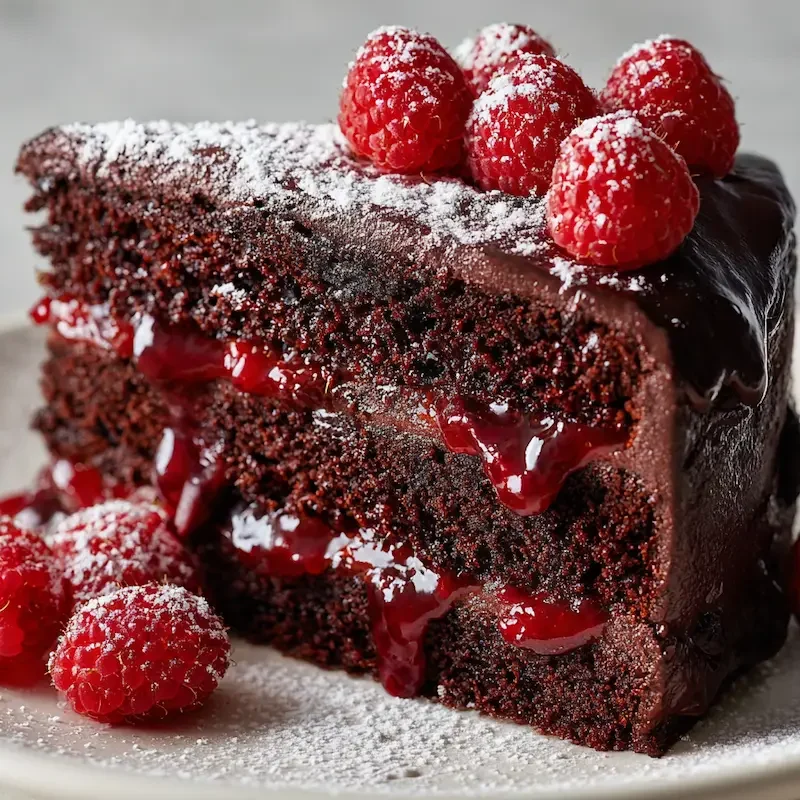
This rich and moist Raspberry Chocolate Layer Cake is filled with raspberry jam and topped with fresh raspberries — a decadent dessert perfect for Valentine’s Day or any celebration.
A Love Letter to Chocolate and Raspberries
If you’ve been searching for a cake that feels like a warm hug and a romantic gesture, this Raspberry Chocolate Layer Cake is it. There’s something undeniably magical about the way dark chocolate and tart raspberries come together — like old friends who always bring out the best in each other.
The first time I made this cake, it was a snowy February afternoon. I remember because Noah had just discovered a love for raspberries, and Lily was testing a chocolate cake recipe for her “baking badge” in Scouts. Emma? She was in charge of licking spoons, naturally. The plan was to make a simple chocolate cake, but as I stared at a jar of raspberry jam in the pantry, inspiration struck. What if we added jam between the layers?
And oh, did it work.
The result was this raspberry chocolate cake — tender, rich, and just sweet enough. The jam added a glossy burst of berry flavor that balanced the cocoa beautifully. Since then, it’s become our go-to Valentine’s Day cake, though honestly, I’ve made it for birthdays, dinner parties, and even once just because Tuesday needed cheering up.
There’s a rhythm to baking this one that feels soothing. Mixing the dark cocoa into flour, warming the jam just enough to spread easily, layering everything with care… it’s more than a recipe. It’s a little ritual of love.
Eva’s Note:
When I was about ten, we lived in a tiny town outside Milan, and my mom would buy these gorgeous raspberry-chocolate tarts from the bakery on the corner. I’d always sneak an extra raspberry off the top before we even got home. This cake brings back that same joy — simple, indulgent, and full of memory.
If you’re looking for more romantic cake ideas, I’ve shared a few other favorites here that might catch your eye too.
Ingredients for Raspberry Chocolate Magic
Let’s talk ingredients — because every great Raspberry Chocolate Layer Cake begins with the right building blocks. I’ve kept things straightforward here, but every element plays an important role. This cake leans into bold chocolate flavor, a glossy raspberry jam center, and a topping that feels like the icing on the (literal) cake.
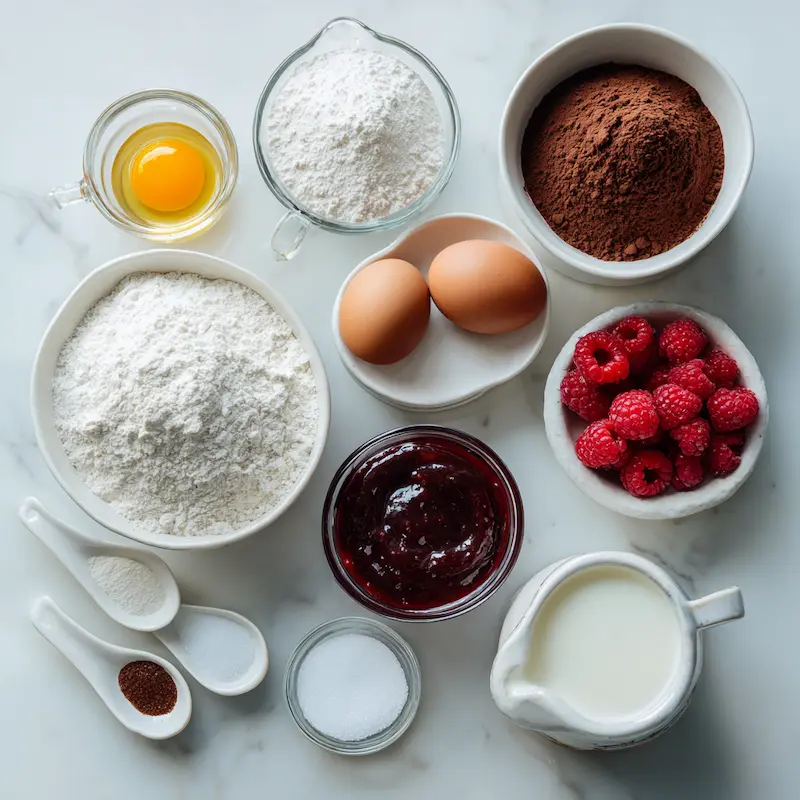
Here’s what you’ll need to bring this chocolate raspberry cake to life:
For the Cake Layers (the base of it all)
• 1 ¾ cups flour – All-purpose is perfect here
• ¾ cup cocoa powder – Use a rich, unsweetened natural cocoa for that deep chocolate flavor
• 1 ½ cups sugar – Granulated works great, balancing the cocoa’s bitterness
• 2 eggs – Let these sit out to reach room temp before using (see note below)
• ½ cup oil – Gives the cake its tender crumb. I use canola or vegetable
• 1 cup milk – Whole milk adds the most richness, but 2% will work too
• 1 tsp baking soda
• 1 tsp baking powder
• ½ tsp salt
Eva’s Note:
Use room-temperature ingredients — especially eggs and milk. Cold ingredients can “shock” the batter and make your cake bake unevenly. I usually set mine out while preheating the oven.
For the Filling (that jammy burst of flavor)
• 1 cup raspberry jam – I recommend seedless if you want smooth layers, but I’ve used both. The jam adds sweetness and moisture without overpowering the cake.
Not only is jam easy, but it also holds up beautifully between layers. It gives you that chocolate cake with fruit filling effect without needing to cook a compote or puree.
For the Topping (simple but striking)
• Fresh raspberries – About 1 cup for decorating the top
• Optional: powdered sugar – A light dusting gives a bakery-style finish
This combo makes a stunning raspberry chocolate dessert that tastes far more impressive than the work it takes. And yes, if you’re curious — other jams can work here too! Blackberry, cherry, or even strawberry are all lovely choices. But raspberry? It just feels right with chocolate.
How to Make Raspberry Chocolate Layer Cake
Alright, aprons on — let’s get baking. This Raspberry Chocolate Layer Cake is surprisingly low-fuss for how special it looks (and tastes!). The steps are easy to follow, and with a few of my family tips, you’ll get a beautifully moist, rich chocolate raspberry cake every time.
Step 1: Prep your pans and oven
Preheat your oven to 350°F (175°C)
Grease and line two 8-inch round cake pans with parchment paper. This helps the layers release cleanly and keeps the edges soft.
Step 2: Mix your dry ingredients
In a large bowl, whisk together:
• 1 ¾ cups flour
• ¾ cup cocoa powder
• 1 tsp baking soda
• 1 tsp baking powder
• ½ tsp salt
Set this aside.
Step 3: Combine wet ingredients
In another bowl, beat:
• 2 eggs
• 1 ½ cups sugar
• ½ cup oil
• 1 cup milk
Eva’s Note:
Cold milk and eggs straight from the fridge? Nope. Let them sit out while your oven heats. This was one of the first lessons my mom taught me — it makes a big difference in the texture of your batter.
Whisk until smooth. No need for a stand mixer — just good old-fashioned elbow grease (or a hand whisk).
Step 4: Bring it all together
Slowly add the dry ingredients to the wet, stirring until just combined. The batter will be thick and glossy — a good sign.
Don’t overmix. Just stir until you don’t see any more dry streaks.
Step 5: Bake the cake layers
Divide the batter evenly between your two prepared pans.
Bake at 350°F for 28–32 minutes, or until a toothpick inserted in the center comes out clean.
Let the cakes cool in the pans for 10–15 minutes, then transfer to a wire rack to cool completely.
Step 6: Level the layers (optional but helpful)
Eva’s Note:
If your cakes puff up in the middle, no worries. Use a serrated knife to gently slice off the domed tops. My grandma used to call this the “baker’s snack” — she’d hand us the warm trimmings with a little jam on top.
Leveling helps your chocolate layer cake with jam stack up evenly and slice cleanly.
Step 7: Warm the jam
Place 1 cup raspberry jam in a microwave-safe bowl and heat for about 10 seconds.
Tip:
Just a little warmth makes the jam glide over the cake like a dream. It also prevents tearing the delicate crumb as you spread.
Step 8: Assemble your cake
Place the first cake layer on your serving plate.
Spread the warmed jam evenly over the top — I like using an offset spatula for this.
Carefully place the second cake layer on top.
That’s it. No frosting needed — the jam shines through and gives you that gorgeous chocolate cake with fruit filling effect.
Step 9: Decorate
Top the cake with fresh raspberries — either scattered or in a neat ring
Dust with powdered sugar if you’d like a snowy finish
Optional: Want to turn this into a showstopper?
Drizzle with chocolate ganache and add a few birthday candles.
Eva’s Note:
I once made this for Lily’s birthday and added a swirl of ganache on top. She said it looked like it belonged in a Parisian bakery — and honestly, I didn’t disagree.
If you’ve made my classic red velvet cake, the layering process here will feel very familiar. Same care, just a jammy twist.
Presentation Tips & Occasions
Now that your Raspberry Chocolate Layer Cake is beautifully stacked and topped with glossy berries, it’s time to make it shine — whether you’re slicing it for a cozy family dinner or setting it out as the crown jewel of your celebration table.
This raspberry chocolate dessert doesn’t need much fanfare. Its deep chocolate layers, vibrant jam center, and fresh raspberry topping already make a statement. But here are a few ideas to take your presentation from “yum” to “wow” without adding stress to your day.
How to Serve It
• Slice with a warm knife – Dip your knife in hot water, wipe dry, and slice. This helps glide through the soft cake and jam without dragging
• Dust with powdered sugar just before serving for a soft, snowy finish
• Garnish with mint leaves if you want a fresh pop of color — totally optional but pretty
Perfect For…
• Valentine’s Day cake – Pair with candlelight and a cozy blanket
• Birthday parties – Add a swirl of chocolate ganache and some candles
• Dinner guests – A slice of this and a good cup of coffee is all you need
• Just because – One rainy Tuesday, I baked it with Emma while Noah did math at the kitchen table. It made the day feel warmer somehow
Eva’s Tip:
Want a well-rounded meal? Try pairing it with a fresh, savory side like these green beans. It’s the kind of contrast that brings balance to a rich dessert like this.
Raspberry Chocolate Layer Cake (With Jam-Filled Layers!)
- Total Time: 1 hour
- Yield: 1 8-inch layer cake 1x
- Diet: Vegetarian
Description
A rich and moist Raspberry Chocolate Layer Cake filled with raspberry jam and topped with fresh raspberries — perfect for Valentine’s Day or any celebration.
Ingredients
1 ¾ cups flour
¾ cup cocoa powder
1 ½ cups sugar
2 eggs
½ cup oil
1 cup milk
1 tsp baking soda
1 tsp baking powder
½ tsp salt
1 cup raspberry jam
1 cup fresh raspberries
Powdered sugar (optional, for dusting)
Instructions
1. Preheat oven to 350°F (175°C). Grease and line two 8-inch round cake pans with parchment.
2. In a bowl, whisk together flour, cocoa powder, baking soda, baking powder, and salt.
3. In a separate bowl, beat eggs, sugar, oil, and milk until smooth.
4. Slowly mix the dry ingredients into the wet ingredients until just combined.
5. Divide the batter evenly between pans and bake for 28–32 minutes. Cool completely.
6. Level the cake layers with a serrated knife if domed.
7. Warm the raspberry jam slightly to make it easier to spread.
8. Place one cake layer on a serving plate and spread jam on top. Add the second layer.
9. Top with fresh raspberries and dust with powdered sugar if desired.
10. Slice with a warm knife and enjoy!
Notes
Make sure eggs and milk are at room temperature for a smoother batter.
Warming the jam helps it spread easily without tearing the cake.
Cake layers can be made ahead and frozen for up to 2 months.
You can use seedless raspberry jam or experiment with other fruit jams like cherry or strawberry.
Pairs beautifully with coffee or a savory side like garlic butter green beans.
- Prep Time: 20 minutes
- Cook Time: 30 minutes
- Category: Dessert
- Method: Baking
- Cuisine: American
Nutrition
- Serving Size: 1 slice
- Calories: 410
- Sugar: 35g
- Sodium: 210mg
- Fat: 22g
- Saturated Fat: 6g
- Unsaturated Fat: 14g
- Trans Fat: 0g
- Carbohydrates: 50g
- Fiber: 3g
- Protein: 5g
- Cholesterol: 47mg