
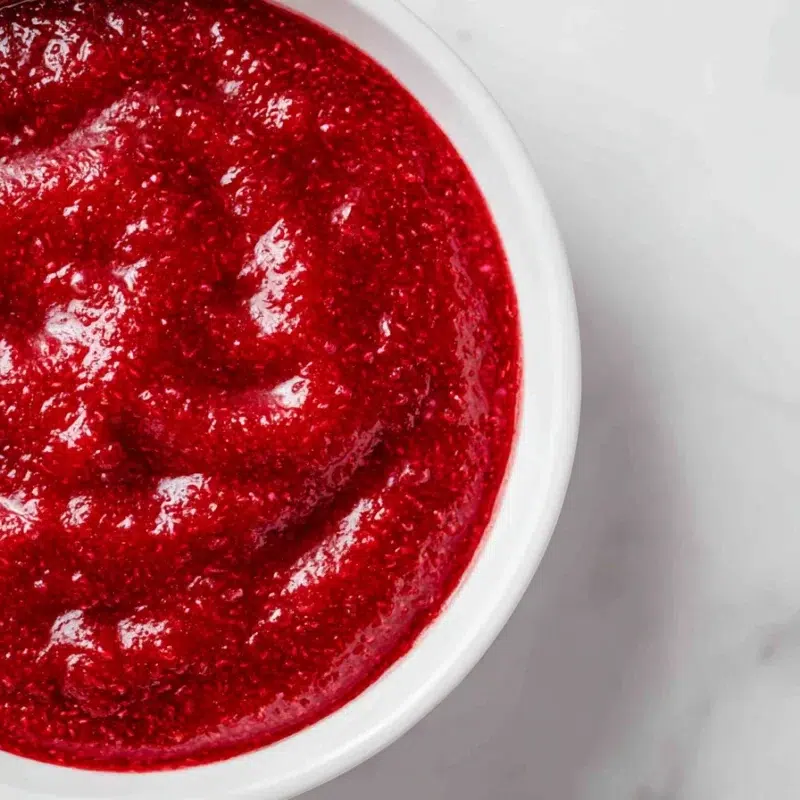
The first time I tried making Raspberry Cake Filling, I was feeling very confident, right up until I sliced the cake and watched a bright pink “river” slide right out the side. My kids thought it was hilarious. I, on the other hand, learned a very important lesson that day: a thick raspberry filling is not about luck, it’s about a tiny, simple thickening step and letting it cool.
Now, when I’m standing at the stove and that warm berry smell hits, sweet and a little tangy, I know I’m about 10 minutes away from a glossy, spoonable raspberry sauce for cake filling that actually stays put. It’s the kind of small kitchen win that makes a regular weeknight feel a little more special.
- Fast and reliable: A quick homemade filling that thickens beautifully.
- Works for cakes and cupcakes: Perfect raspberry filling for layer cake or a raspberry cupcake filling.
- Flexible: Use fresh or frozen berries, and go seedless if you want.
Why This Raspberry Cake Filling Works
This is the Best Raspberry Cake Filling for real life baking because it’s built on a simple formula: fruit + sugar + a little lemon + a quick thickener. The berries break down into a vibrant sauce, the sugar pulls out juices and rounds out the tartness, and lemon juice keeps the flavor bright instead of flat.
The cornstarch slurry is what gives you that “bakery-style” finish, thick, glossy, and sliceable once it cools. It’s an Easy Raspberry Filling For Cake that saves the day when you need something special fast, like when you promised cupcakes for school and remembered at 9 p.m.
Texture goals: spoonable, not runny. You want it to mound gently on a spoon, not pour like syrup.
Ingredients You’ll Need
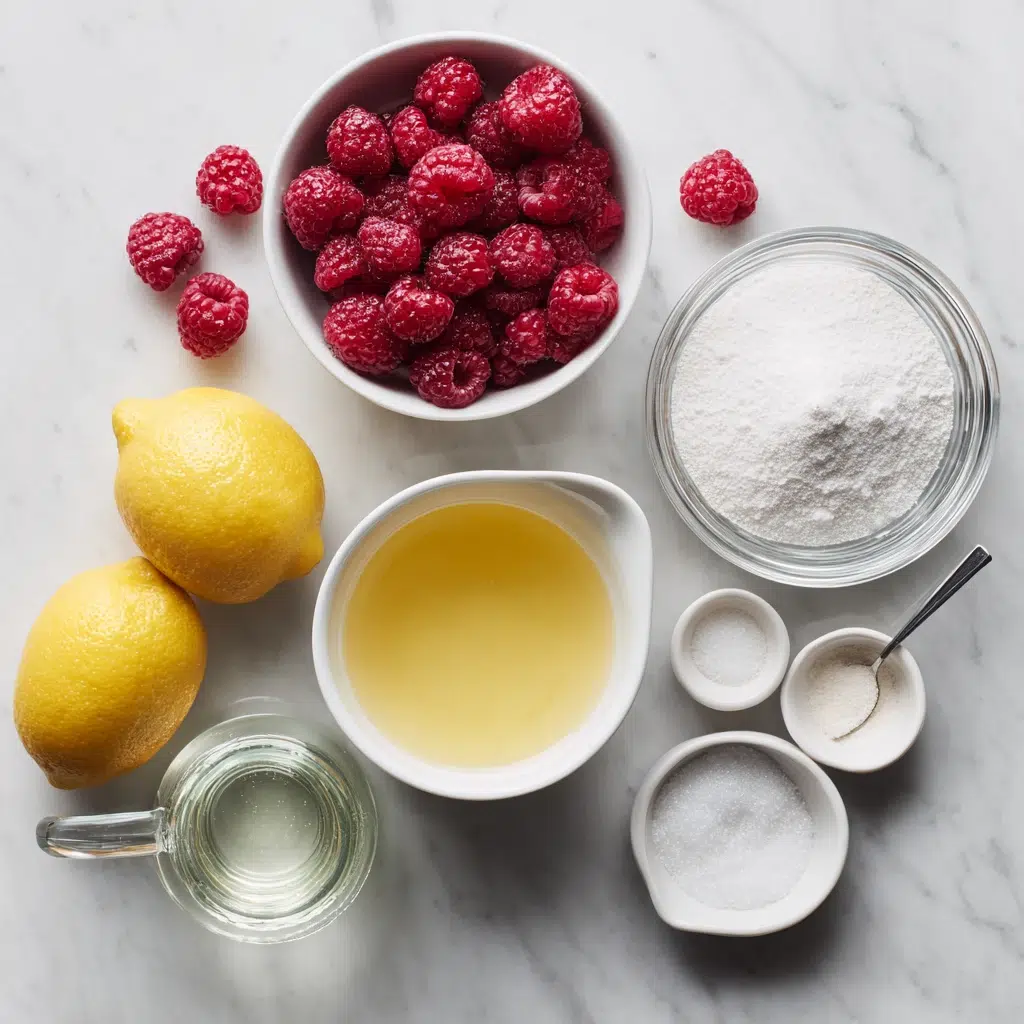
You only need five basic ingredients for this Homemade Raspberry Cake Filling, plus a couple optional add-ins if you want to play with the flavor. I love recipes like this because if you have a bag of berries tucked in the freezer, you’re already halfway there.
- 2 cups raspberries (fresh or frozen), the main flavor and that gorgeous ruby color.
- 1/2 cup granulated sugar, sweetens and helps the berries release their juices.
- 1 tablespoon lemon juice, brightens and balances the sweetness.
- 1 tablespoon cornstarch, thickens the filling so it holds up in cakes.
- 2 tablespoons water, mixes with cornstarch to make a smooth slurry.
Optional variations
- 1–2 teaspoons vanilla extract, stir in at the end for a soft bakery vibe.
- Pinch fine salt, makes the berry flavor pop.
- 1–2 tablespoons extra sugar, if your berries are extra tart.
Fresh vs. Frozen Raspberries (What Changes)
You can absolutely use fresh or frozen raspberries here, and both make a beautiful DIY raspberry sauce for cakes. The main difference is how much liquid shows up in the pot and how long you’ll need to simmer.
- Fresh: Cooks down a little quicker, often tastes slightly brighter, especially in peak summer. You may reach your thickening point faster.
- Frozen: Releases more water as it thaws, so you’ll usually need a few extra minutes of simmering before you add the slurry. The color is still jewel-bright, which is honestly such a mood-lifter in the middle of winter.
If you’re using frozen berries, don’t thaw first. Just add them straight to the pan and let the heat do the work.
How To Make Raspberry Cake Filling (Step-by-Step)
This Raspberry Cake Filling Recipe is simple, but the timing matters. Keep a small spoon nearby so you can test the texture as you go, it’s my favorite low-stress way to know you’re on track.
- Start the berries. Add the raspberries, sugar, and lemon juice to a small saucepan over medium heat. Stir gently as the berries warm up and start to release their juices, about 3 to 5 minutes.
- Simmer and break down. Once it’s bubbling, reduce to a gentle simmer. Use a spoon to lightly mash some of the berries against the side of the pan. Simmer 5 to 8 minutes, until the mixture looks a bit darker and slightly reduced.
- Mix the slurry. In a small bowl, whisk the cornstarch and water until completely smooth. No dry pockets. This is what keeps your filling glossy instead of lumpy.
- Thicken. While whisking the pan, slowly pour in the slurry. Keep stirring and bring it back to a gentle bubble. Simmer 30 to 60 seconds, until it turns shiny and thickens into a spoonable sauce.
- Finish and cool. Remove from heat. If using, stir in vanilla and a pinch of salt. Pour into a heat-safe bowl and cool completely before using in cakes or cupcakes.
Eva’s Note: Please don’t rush the cooling. Warm filling can melt frosting and make cake layers slide around like they’re on a little berry slip-and-slide. Once it’s cool, it sits neatly and slices clean.
Want a frosting that plays perfectly with this? Try it with my raspberry buttercream frosting.
Cornstarch Slurry Timing (For Glossy, Lump-Free Thickening)
I learned the slurry lesson the hard way. I once sprinkled cornstarch straight into the pan, and I spent the next five minutes chasing little jelly lumps around with a whisk. A slurry fixes all of that, and it takes about 20 seconds.
- Whisk the slurry smooth: cornstarch + water should look like thin milk, not paste.
- Pour slowly while whisking: this spreads the starch evenly so it thickens without clumping.
- Simmer briefly to activate: you need a short bubble for the starch to thicken fully.
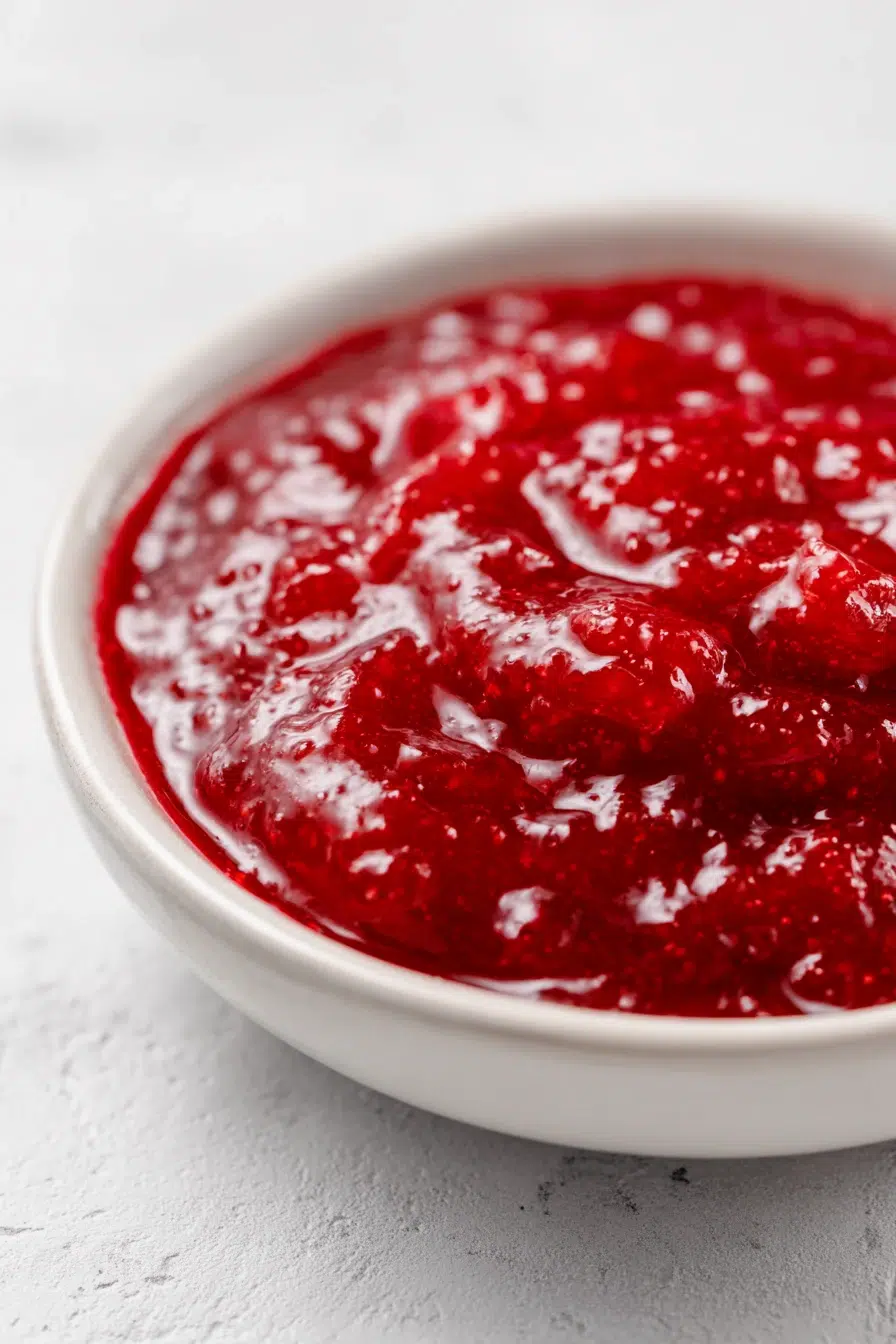
Use the “spoon trail” test: drag a spoon through the filling. If the line lingers for a moment before slowly closing, you’ve got the thick raspberry filling you want. And remember, it thickens even more as it cools.
Make It Smooth: Seedless Raspberry Cake Filling (Optional)
If you love the flavor but not the seeds, you’re not alone. One of my kids will happily eat a whole cupcake, but the second a raspberry seed gets stuck in a tooth, it’s a full stop. Seedless raspberry filling is a tiny extra step that makes the texture feel extra “bakery,” silky, smooth, and so pretty between cake layers.
- Strain while warm. Set a fine-mesh strainer over a bowl. Pour the warm filling in.
- Press it through. Use a spatula to press and scrape the pulp through the strainer. Keep going until you’re mostly left with seeds.
- Check thickness. If the strained filling seems thinner, return it to the saucepan and simmer 1 to 3 minutes to thicken back up.
That first satin-smooth spoonful in the bowl is deeply satisfying, like you just pulled off a quiet little bakery trick at home.
Flavor Tweaks (Sweet, Tart, or Extra-Berry)
This homemade raspberry cake filling is easy to adjust depending on what you’re pairing it with. In my house, one kid wants it sweeter, another wants it tangy, and I’m usually trying to keep the peace while frosting a cake.
- Sweeter: Add 1 to 2 tablespoons extra sugar. Start small, stir, taste, then decide.
- Tarter and brighter: Add an extra teaspoon of lemon juice at the end.
- More “berry” flavor: Add a pinch of salt. It makes the raspberries taste louder in the best way.
- Cozy bakery note: Stir in 1 to 2 teaspoons vanilla extract after you take it off the heat.
If you’re making something like white chocolate raspberry cake, I like leaning a little more tart so the sweetness stays balanced.
How to Use Raspberry Cake Filling (Cakes, Cupcakes, Frosting Swirls)
This is where the fun really starts. A simple vanilla cake can feel like a birthday cake just by adding a bright stripe of raspberry filling. I’ve done this for last-minute celebrations more times than I can count, and nobody ever needs to know it was a “Tuesday night miracle.”
- Raspberry filling for layer cake: Use about 1/3 to 1/2 cup filling per 8-inch layer, depending on how thick you spread it. Always leave a border so it doesn’t squeeze out.
- Raspberry cupcake filling: Core the center (a small knife works), spoon in 1 to 2 teaspoons filling, then frost. It’s the easiest “surprise center.”
- Frosting swirls and ripples: Cool the filling completely, then gently swirl it into buttercream for a marbled look. It’s especially good with raspberry buttercream frosting.
- Raspberry sauce for cake filling or drizzle: Warm it slightly to loosen, then drizzle over slices, cheesecakes, or a simple pound cake.
If you love a richer cake moment, this filling is dreamy tucked into a raspberry chocolate layer cake.
Keep It From Soaking Into Cake Layers
My no-stress layer cake rule is simple: cool everything, then build with a barrier. This keeps Raspberry Cake Filling from soaking into cake layers and helps you get those clean, confident slices with a neat bright stripe in the middle.
- Cool completely: the filling and the cake layers should both be fully cooled.
- Pipe a frosting dam: pipe a ring of frosting around the edge of the layer (I use raspberry buttercream frosting or vanilla). Think of it like a little wall.
- Add a thin frosting layer (optional): spread a very thin layer of frosting on the cake surface before the filling if your cake is extra soft.
- Don’t overfill: spread the filling in a thin, even layer. Too much is what makes it squish out the sides.
Make-Ahead, Storage, Freezing, and Reheating
I’m a big fan of making this on Sunday and sticking it in the fridge, because midweek baking is usually happening in the cracks between homework help and finding matching socks. Having a jar of filling ready feels like future-me did me a favor.
Storage at a glance
- Cool first: cool completely before sealing, so condensation doesn’t thin it out.
- Fridge life: store in a clean, airtight container for 5 to 7 days.
- Freeze raspberry filling: freeze up to 3 months in a freezer bag or container with a little headspace.
- Freeze flat for fast thawing: pour into a zip-top freezer bag, press out air, and freeze it flat like a little raspberry sheet. It stacks neatly and thaws quickly.
To thaw: thaw overnight in the fridge, then stir well until glossy again.
To reheat raspberry filling: warm gently on the stove over low heat or in short microwave bursts, stirring often. Warm it just enough to loosen. If it looks thinner, don’t panic, it thickens again as it cools.
Frequently Asked Questions about Raspberry Cake Filling
Q: How do you make Raspberry Cake Filling thicker?
✅ Answer: Simmer it a little longer to reduce excess moisture, then add a cornstarch slurry and simmer briefly until glossy and spoonable. If it still feels loose, let it cool, raspberry filling thickens noticeably as it chills. I always watch the bubbles go from fast and watery to slow and jammy, and that’s when I know I’m close.
Q: Can I use frozen raspberries for Raspberry Cake Filling?
✅ Answer: Yes. Frozen raspberries work beautifully; they may release more liquid, so expect a slightly longer simmer before thickening. Keep the heat at a gentle simmer so the flavor stays bright and the filling doesn’t scorch. The deep ruby color you get, even in the middle of winter, is honestly part of the joy.
Q: How do I make Raspberry Cake Filling without cornstarch?
✅ Answer: You can thicken by simmering longer to reduce the mixture until it coats a spoon and holds its shape as it cools. Straining (if you go seedless) can make it seem thinner at first, so plan on a little extra reduction time. It’s a slow, cozy simmer while you prep cake layers on the counter.
Q: How long does Raspberry Cake Filling last in the fridge?
✅ Answer: Stored in a clean, airtight container, it typically keeps well for up to 5–7 days in the fridge. For best results, cool it completely before sealing to prevent condensation that can thin the texture. I label the container so it doesn’t mysteriously disappear after snack time.
Q: Can you freeze Raspberry Cake Filling?
✅ Answer: Yes. Freeze it in an airtight container or freezer bag with a little headspace for expansion. Thaw overnight in the fridge, then stir well to bring back a smooth, glossy texture. It’s so satisfying to pull out a ready-to-go filling when you need quick cupcakes.
Q: How do you strain Raspberry Cake Filling to remove seeds?
✅ Answer: Pour the warm filling into a fine-mesh strainer set over a bowl and press with a spatula until only seeds remain. If the strained filling seems thinner, return it to the pan and simmer briefly to reach your preferred thickness. The moment it hits the bowl looking satin-smooth is the best kind of quiet kitchen victory.
Q: How do I keep Raspberry Cake Filling from soaking into cake layers?
✅ Answer: Make sure the filling is fully cooled and the cake layers are completely cooled as well. Pipe a frosting dam around the edge, spread a thin layer of frosting on the cake surface if needed, and don’t overfill, thin, even layers hold best. When you slice and see that neat bright stripe, you’ll feel like you nailed it.
Q: What’s the best way to reheat Raspberry Cake Filling?
✅ Answer: Reheat gently in short bursts in the microwave or over low heat on the stove, stirring often. Warm it just enough to loosen, overheating can make it look thinner until it cools again. The aroma pops up the moment it warms, like someone turned on a little berry candle in the kitchen.
Q: Can I make Raspberry Cake Filling in a slow cooker, and how long would it take?
✅ Answer: Yes. Cook on low for about 1½–2½ hours, stirring occasionally, until the berries break down and the mixture reduces. Finish by whisking in the slurry and cooking a little longer until thick and glossy. It’s so hands-off, you can tidy the kitchen or help with homework while it does its thing.
If you make this Raspberry Cake Filling, I hope it brings a little calm to your kitchen and a little sparkle to whatever you’re baking. It’s simple, dependable, and one of those small homemade touches that makes cakes and cupcakes feel truly loved.
Thank you for cooking with me, it means so much to have you here in my kitchen.
For more cozy baking ideas, come follow me on Pinterest.
Print
Raspberry Cake Filling (Easy Homemade, Thick & Glossy)
- Total Time: 15
- Yield: 1 batch 1x
Description
Make Raspberry Cake Filling with fresh or frozen berries in minutes. This easy homemade raspberry sauce is thick, smooth, and perfect for cakes & cupcakes.
Ingredients
2 cups raspberries (fresh or frozen)
1/2 cup granulated sugar
1 tablespoon lemon juice
1 tablespoon cornstarch
2 tablespoons water
Instructions
1. Add the raspberries, sugar, and lemon juice to a small saucepan over medium heat. Stir gently as the berries warm up and start to release their juices, about 3 to 5 minutes.
2. Once it’s bubbling, reduce to a gentle simmer. Use a spoon to lightly mash some of the berries against the side of the pan. Simmer 5 to 8 minutes, until the mixture looks a bit darker and slightly reduced.
3. In a small bowl, whisk the cornstarch and water until completely smooth. No dry pockets.
4. While whisking the pan, slowly pour in the slurry. Keep stirring and bring it back to a gentle bubble. Simmer 30 to 60 seconds, until it turns shiny and thickens into a spoonable sauce.
5. Remove from heat. If using, stir in vanilla and a pinch of salt. Pour into a heat-safe bowl and cool completely before using in cakes or cupcakes.
Notes
Please don’t rush the cooling. Warm filling can melt frosting and make cake layers slide around. Once it’s cool, it sits neatly and slices clean.
You can use fresh or frozen raspberries. If using frozen, don’t thaw first.
- Prep Time: 5
- Cook Time: 10
- Category: Dessert
- Method: Stovetop
- Cuisine: American
Nutrition
- Serving Size: 1 batch
- Calories: 200
- Sugar: 50
- Sodium: 1
- Fat: 0
- Saturated Fat: 0
- Unsaturated Fat: 0
- Trans Fat: 0
- Carbohydrates: 52
- Fiber: 8
- Protein: 1
- Cholesterol: 0