
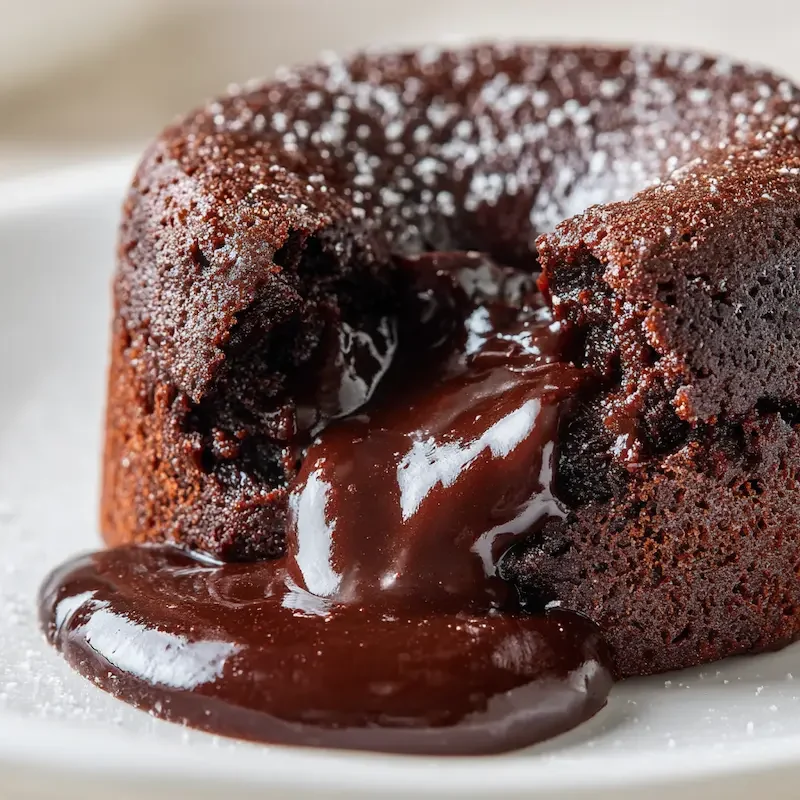
These easy molten chocolate lava cakes have a rich, gooey center and bake in just 14 minutes! A perfect romantic dessert or indulgent chocolate treat.
Molten Chocolate Lava Cakes – A Chocolate Lover’s Dream
You know those desserts that feel like they should be saved for a white-tablecloth restaurant, the kind where someone sets it down in front of you and you pause—just for a moment—because it looks too perfect to eat? That was my first experience with molten chocolate lava cakes.
It was my birthday. We were living in a tiny apartment just outside Florence, Italy. My husband had planned a surprise dinner at this cozy little trattoria. After the meal, the waiter brought out two individual chocolate cakes—still warm—with a single candle flickering on top. I remember cracking into it with my spoon and watching that deep, velvety chocolate ooze from the center. It was magic. And I knew, right then, I had to learn how to make that kind of magic at home.
Fast forward a few years, and these molten chocolate lava cakes have become a staple in our home. They’re shockingly easy, bake in just 14 minutes, and feel every bit as indulgent as that night in Florence. Whether it’s a last-minute Valentine’s Day treat or a weeknight chocolate fix, this recipe never lets me down.
They’re rich. They’re gooey. They’re simple. And they just might be your new favorite romantic Valentine’s Day dessert.
Ingredients You’ll Need
What I love most about these molten chocolate lava cakes is that they use pantry staples — no fussy ingredients or specialty equipment. If you’ve got a few ramekins and a bag of chocolate chips, you’re already halfway there. And because this is a ramekin dessert, it’s perfect for portion control… unless you eat two. (No judgment. I’ve done it.)
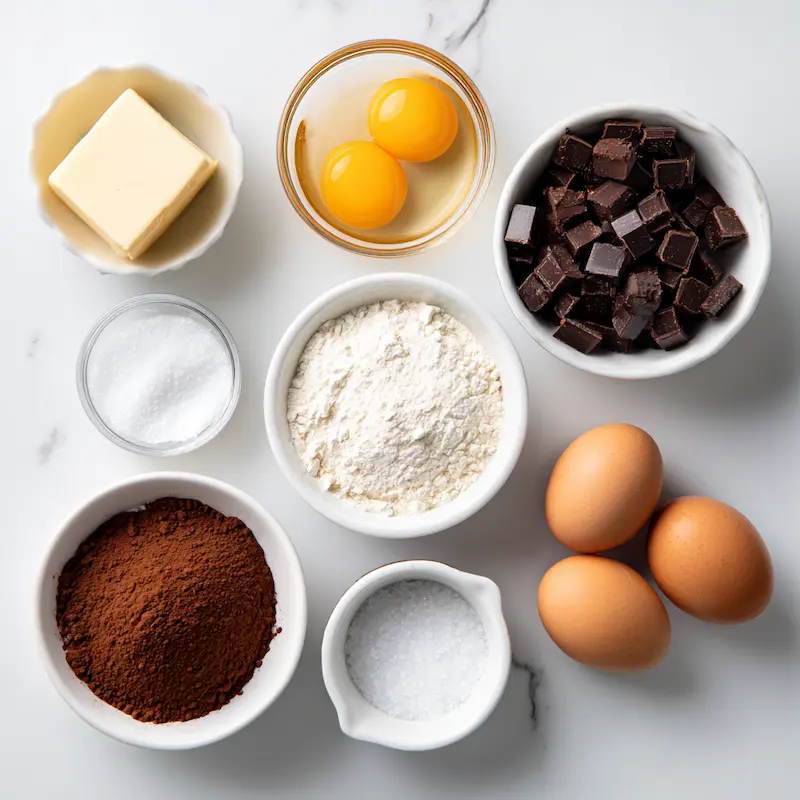
Here’s what you’ll need:
• ½ cup butter – Use unsalted so you can better control the salt level in the batter.
• 1 cup chocolate chips – I recommend bittersweet or dark chocolate chips for that deep, rich flavor. Milk chocolate will make them too sweet. I usually go with 60% Ghirardelli or Trader Joe’s dark chips.
• 2 eggs + 2 egg yolks – The extra yolks add richness and help create that dreamy gooey center.
• ½ cup sugar – Just enough to sweeten without overpowering the chocolate.
• ¼ cup all-purpose flour – A small amount keeps the texture soft and fudgy.
• Pinch of salt – Always important to bring out the chocolate’s depth.
Eva’s Note:
Don’t skip the cocoa powder for dusting your ramekins (you’ll do that in the next step). It’s one of those little things that makes a big difference—like remembering to warm the dinner rolls.
How to Make Molten Chocolate Lava Cakes
Okay, apron on? Let’s walk through this together. You won’t need any fancy skills — just a whisk, a few ramekins, and maybe a kid or two to crack the eggs (though fair warning: they might fight over licking the spoon).
1. Prep the ramekins (this part really matters)
Grease four 6-ounce ramekins generously with butter. Then dust them with cocoa powder, tapping out the excess.
Eva’s Tip: Don’t skip this! I’ve cried over broken lava cakes stuck to the ramekin. Cocoa powder keeps the cakes from sticking and blends right into the chocolate — unlike flour, which can leave a white residue.
Place the ramekins on a baking sheet for easier transfer later.
2. Melt the butter and chocolate
In a heatproof bowl, combine:
• ½ cup butter
• 1 cup chocolate chips (dark or bittersweet, not milk chocolate)
Melt together using a double boiler or in the microwave in 20-second bursts, stirring in between. Once smooth, set aside to cool slightly.
3. Whisk the eggs and sugar
In a separate bowl, whisk:
• 2 eggs
• 2 egg yolks
• ½ cup sugar
Whisk until pale and thick — about 2 minutes by hand or 1 minute with a mixer. My kids love helping with this part. Emma, my youngest, calls it “sugar eggs” and insists on taste-testing before it’s baked. (No, I don’t let her — but she tries every time.)
4. Combine the mixtures
Slowly pour the warm (not hot!) chocolate mixture into the egg mixture while whisking. This keeps the eggs from scrambling.
Then gently fold in:
• ¼ cup all-purpose flour
• Pinch of salt
Mix just until no streaks remain.
5. Fill the ramekins
Evenly divide the batter between your prepared ramekins. They should be about ¾ full.
If you’re prepping ahead, this is where you stop and pop them in the fridge. (More on that in the make-ahead section.)
6. Bake
Preheat your oven to 425°F (218°C). Bake the ramekins on the center rack for 12–14 minutes.
You’re looking for set edges and a slightly jiggly center — like a barely set pudding.
Eva’s Tip: To check for doneness, give one ramekin a gentle shake. If the sides don’t move but the center jiggles, they’re ready. A toothpick inserted in the center should come out wet, but not runny.
7. Let them rest and invert
Let the cakes sit for 1 minute out of the oven. Run a small knife around the edges, then carefully invert onto a small dessert plate. Tap the ramekin gently to release.
Now take a breath, grab a spoon, and crack into that gooey center.
And if you’re in the mood for another classic chocolate-based treat, try this classic red velvet cake next.
Serving Suggestions & Flavor Variations
There’s something about molten chocolate lava cakes that just begs for a little flair. Maybe it’s the gooey center, or maybe it’s the way they sit so perfectly on a small plate like they’re waiting for applause. Either way, they’re one of those desserts that feel extra special — and they’re so easy to dress up for anything from a romantic dinner to a “just because” Tuesday night.
I’ve made these for anniversaries, birthdays, even a Valentine’s double-date night when we hosted friends for dinner. The trick? Serve them warm, with something cold and creamy on the side. That contrast? It’s dreamy.
Here are some favorite ways to serve them:
• A scoop of vanilla bean ice cream – It melts into the warm chocolate like a sauce. Classic, and always a hit.
• Fresh whipped cream – Just lightly sweetened, with a touch of vanilla.
• Raspberry coulis or fresh berries – Adds a beautiful pop of color and tartness.
• Powdered sugar dusting – For a simple, elegant finish.
• Crushed pistachios or hazelnuts – A little crunch goes a long way.
• Espresso drizzle – For the grown-ups. Coffee and chocolate are meant to be together.
Eva’s Note:
For a cozy dinner that’s equal parts comforting and elegant, serve these cakes with garlic butter green beans and a simple roast chicken. That light veggie side balances this rich dessert perfectly.
Feeling playful? You can also mix things up inside the batter before baking:
• Add ½ tsp orange zest for a citrusy twist
• Tuck a spoonful of peanut butter into the center for a surprise filling
• Sprinkle a pinch of sea salt flakes on top just before baking
There’s no wrong way to enjoy these individual chocolate cakes. Just promise me one thing: you’ll serve them warm.
Make Ahead & Storage Tips
One of the questions I get most often about these molten chocolate lava cakes is: “Can I make them ahead of time?” And the answer is a warm, melty yes — with just a little planning.
Honestly, that’s one of the reasons this recipe is always in my back pocket for holidays and dinner parties. You can prep everything in advance, tuck the ramekins into the fridge, and then just pop them into the oven when you’re ready. No mixers. No mess. Just 14 minutes to chocolate heaven.
To Prep Ahead:
After filling your cocoa-dusted ramekins with the cake batter, cover them loosely with plastic wrap and refrigerate for up to 24 hours.
Before baking, let them sit at room temperature for about 30 minutes. This helps them bake evenly — straight-from-the-fridge batter can lead to overbaked edges and underdone centers.
Eva’s Note:
I’ve prepped these during Emma’s nap time and baked them after dinner more times than I can count. There’s nothing better than having dessert ready to go when the day’s been long and your feet are tired.
Reheating:
If you’ve already baked the cakes and have leftovers (which, honestly, is rare around here), you can store them in the fridge for 1–2 days.
To reheat:
• Place the cake (still in its ramekin, if possible) in the microwave for 15–20 seconds.
• The center may not be quite as molten, but it’ll still be soft and rich.
Tip: Add a little scoop of ice cream on top before reheating to protect the top from drying out — and to create that creamy-saucy combo everyone loves.
Frequently Asked Questions About Molten Chocolate Lava Cakes
How do I know when molten chocolate lava cakes are done?
Great question — and honestly, it’s the trickiest part for most people.
You’ll know your molten chocolate lava cakes are ready when the edges are set but the center still jiggles slightly. Think of it like a just-set pudding. If you gently tap the side of the ramekin and the middle wobbles a bit, you’re in good shape.
You can also try the toothpick test — just insert it near the edge. It should come out clean there, but if you stick it in the center, it should come out with thick, gooey batter (not raw and runny, but definitely not clean).
Eva’s Note:
I do a little “jiggle check” every time — give the baking sheet a nudge and look for that gentle wobble. If it looks like a trampoline, it’s not done yet.
Can I make molten chocolate lava cakes ahead of time?
Absolutely — and it’s one of the best things about this recipe.
Just prep the batter, spoon it into your buttered and cocoa-dusted ramekins, cover with plastic wrap, and refrigerate up to 24 hours in advance. Let them come to room temperature before baking.
I’ve done this so many times — I’ll prep them in the afternoon while the kids are doing homework, and then bake them after dinner while we’re cleaning up. It feels like no work but gets all the praise.
What can I use if I don’t have ramekins?
No ramekins? No problem. You can absolutely make these in a muffin tin or silicone baking cups — just be aware that they may be harder to invert and serve nicely. (Still delicious though!)
If you use a muffin tin, grease the cups really well and dust with cocoa powder. Then reduce the bake time slightly — around 10–12 minutes usually does the trick.
Eva’s Tip:
One time I made these in a cupcake tin during a power outage dinner party (don’t ask). They weren’t the prettiest, but we still scraped the plates clean.
Final Thoughts – Your Next Go-To Dessert
If you’ve made it this far, I hope you feel like molten chocolate lava cakes are not only doable—they’re totally calling your name.
This is the dessert that makes people pause mid-bite. The one that makes guests say, “Wait, you made this?” The one my son Noah once declared “tastes like restaurant dessert, but better because it’s still warm.”
And he’s right. These little cakes might look fancy on the outside, but inside they’re full of warmth, ease, and comfort — just like the best recipes always are.
So whether you’re planning a romantic Valentine’s dinner, celebrating something big (or just getting through a long Monday), give this recipe a try. You’ll get a rich, gooey center in every bite, and a lot of love at the table.
Thanks for spending time in the kitchen with me. And if you try these molten chocolate lava cakes, I’d love to hear how it goes — tag me or drop a comment so we can keep passing the chocolate joy along.
With cinnamon-sugar hands and a happy heart,
Eva
Molten Chocolate Lava Cakes Recipe
- Total Time: 24 minutes
- Yield: 4 cakes 1x
Description
These easy molten chocolate lava cakes have a rich, gooey center and bake in just 14 minutes! A perfect romantic dessert or indulgent chocolate treat.
Ingredients
½ cup butter
1 cup chocolate chips (bittersweet or dark)
2 eggs
2 egg yolks
½ cup sugar
¼ cup all-purpose flour
Pinch of salt
Butter and cocoa powder for dusting ramekins
Instructions
1. Grease four 6-ounce ramekins with butter, then dust with cocoa powder. Set on a baking sheet.
2. Melt butter and chocolate chips together in a bowl using a microwave or double boiler. Let cool slightly.
3. Whisk eggs, egg yolks, and sugar in a separate bowl until pale and thick.
4. Slowly pour the chocolate mixture into the egg mixture while whisking constantly.
5. Gently fold in flour and salt just until combined.
6. Divide the batter evenly among the ramekins (about ¾ full).
7. Bake at 425°F for 12–14 minutes until edges are set and center jiggles slightly.
8. Let rest for 1 minute, run a knife around edges, and invert onto plates.
9. Serve warm with ice cream, whipped cream, or berries.
Notes
Use high-quality bittersweet chocolate chips for best flavor.
Don’t skip cocoa dusting — it prevents sticking and blends into the cake.
Refrigerate filled ramekins up to 24 hours ahead; bring to room temperature before baking.
For reheating, microwave baked cakes for 15–20 seconds.
Try flavor twists like orange zest, peanut butter centers, or sea salt flakes.
- Prep Time: 10 minutes
- Cook Time: 14 minutes
- Category: Dessert
- Method: Baking
- Cuisine: American
Nutrition
- Serving Size: 1 cake
- Calories: 410
- Sugar: 28g
- Sodium: 65mg
- Fat: 29g
- Saturated Fat: 17g
- Unsaturated Fat: 10g
- Trans Fat: 0g
- Carbohydrates: 32g
- Fiber: 2g
- Protein: 6g
- Cholesterol: 160mg