
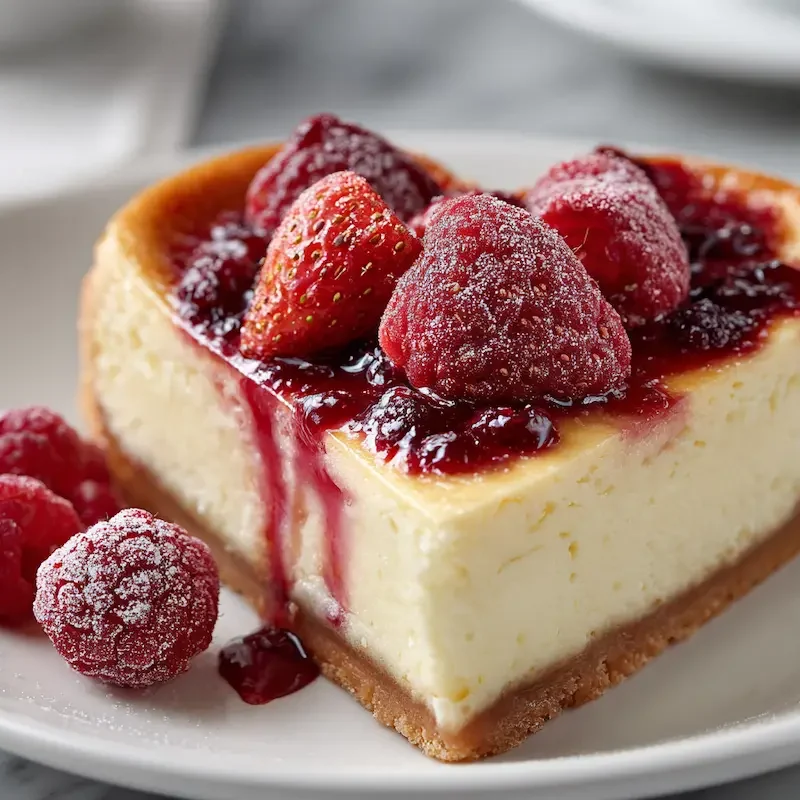
Celebrate love with this rich, creamy Heart-Shaped Cheesecake topped with fresh berries. A perfect make-ahead Valentine’s Day dessert for someone special.
A Cheesecake Worth Falling For
There’s something so sweet about making a dessert just because you love someone—and this Heart-Shaped Cheesecake is that kind of dessert. Rich, creamy, and kissed with berries, it’s everything you want in a Valentine’s Day dessert: thoughtful, a little indulgent, and just the right amount of romantic.
In our house, Valentine’s Day isn’t about grand gestures. It’s about those little, quiet moments we carve out of busy weeks. Years ago, when Lily was just a toddler and Noah barely walking, I decided to start a tradition: we’d make one heart-shaped treat every February 14th. The first year it was pink pancakes. Then came sugar cookies, strawberry muffins, and eventually—this cheesecake.
I still remember the first time we made it. Emma was about three, wearing her little apron covered in chocolate stains and flour smudges. She pressed graham cracker crumbs into the pan with her tiny fingers like it was serious business. That year, we served it after a cozy dinner of slow-cooked chicken and green beans, candles lit, paper hearts taped to the wall behind us.
Now, even with the kids older, we still make this heart-shaped cheesecake together. It’s become our edible love letter, topped with sugared berries and shared with smiles.
And if you’re looking for other Valentine’s Day cake ideas, I’ve rounded up my favorites right here. But today? It’s all about the cheesecake.
Eva’s Note
If you’ve got little hands in the kitchen, let them press the crust or wash the berries. They’ll feel part of the love, and honestly, those imperfect edges and extra crumb sprinkles? That’s what makes it special.
Ingredients for Love (and Cheesecake)
The beauty of this heart-shaped cheesecake is in its simplicity. You don’t need anything fancy—just a few good ingredients and a bit of patience (okay, and maybe a heart cake pan, but we’ll get to that in the next section).
Let’s start with the most important one: cream cheese. I’ve tested this recipe with several brands over the years, and trust me, the quality makes a difference. You want full-fat, block-style cream cheese—not the whipped kind in tubs. That rich, smooth texture? It starts here. I usually pull mine out an hour before baking so it softens evenly.
Next up, sugar, eggs, vanilla, and sour cream come together to create that creamy cheesecake base. The sour cream might seem like a small touch, but it’s what gives the filling its slight tang and luxurious feel. It also keeps the texture moist, not dry or overly dense.
For the crust, we go classic: graham cracker crumbs, a touch of sugar, and melted butter. It’s buttery, slightly sweet, and the perfect contrast to the creamy filling.
Now, the topping. I love topping this cheesecake with fresh strawberries or raspberries, especially when they’re lightly tossed with a spoonful of sugar. It’s simple and lets the fruit shine. You can use whatever berries your loved one prefers—blueberries, blackberries, or even a mix.
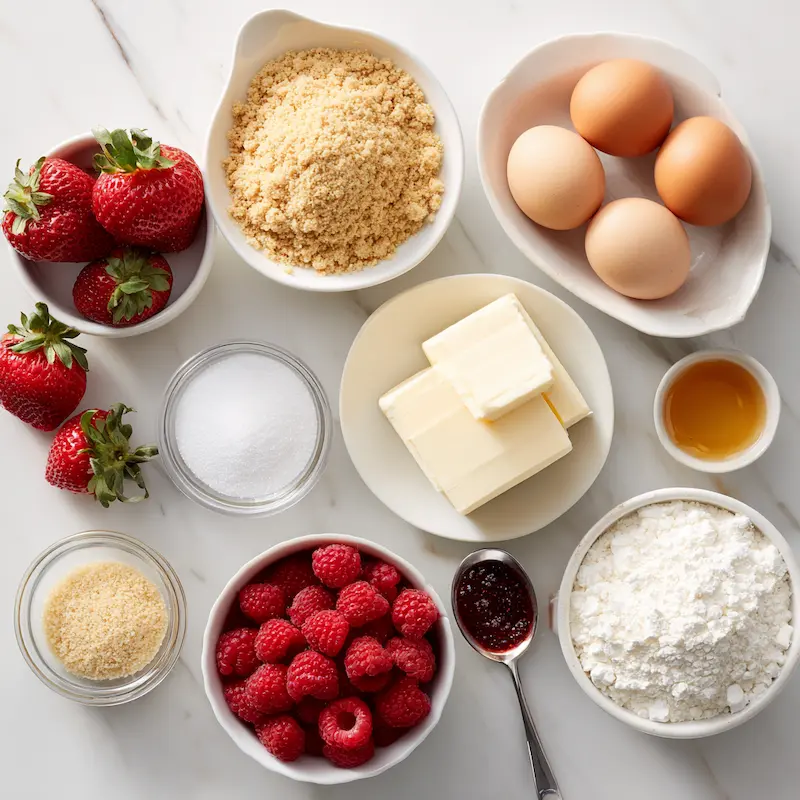
I often serve this cheesecake after a cozy dinner like these garlic butter green beans alongside a creamy chicken dish. It all feels like a hug on a plate.
Crust:
• 1 ½ cups graham cracker crumbs
• ¼ cup sugar
• 5 tbsp melted butter
Filling:
• 24 oz cream cheese (softened)
• 1 cup sugar
• 3 large eggs
• 1 tsp vanilla extract
• ½ cup sour cream
Topping:
• Fresh strawberries or raspberries
• 1–2 tbsp sugar (optional, for macerating berries)
How to Make Heart-Shaped Cheesecake
Making a Heart-Shaped Cheesecake might sound a little intimidating at first, but I promise—it’s much easier than it looks. Once you’ve got your ingredients ready and your pan prepped, it’s really just about layering love into every step.
And yes, we are using a heart cake pan for this—mine is a springform pan I found at a thrift shop years ago, and it’s still my favorite. But don’t worry if you don’t have one! I’ll show you a little hack that works in a pinch.
Step 1: Prep the Heart Cake Pan
Lightly grease your heart-shaped springform pan and wrap the outside with foil if you plan to use a water bath (more on that below). If you don’t have a heart pan, just take a regular round springform pan and tuck a ball of foil into the top edge to shape it like a heart. It’s not perfect, but it’s heartfelt.
Eva’s Tip:
No heart pan? Place a foil ball in the top curve of a round pan to create the illusion of a heart. It’s DIY love—and it totally works.
Step 2: Make the Crust
In a medium bowl, mix 1 ½ cups graham cracker crumbs, ¼ cup sugar, and 5 tbsp melted butter until it looks like wet sand. Press this mixture into the bottom of your prepared pan. I like to use the bottom of a measuring cup to get it even.
Bake at 325°F (160°C) for 8 minutes, then set aside to cool.
Step 3: Make the Filling
While the crust is baking, beat 24 oz softened cream cheese in a large bowl until smooth and creamy—about 2 to 3 minutes. Add 1 cup sugar and mix again until combined.
Now add 3 eggs, one at a time, mixing gently after each. Overmixing can lead to cracks, so take it easy here. Stir in 1 tsp vanilla and ½ cup sour cream until just combined.
Eva’s Tip:
Room temperature ingredients are your best friend. Cold cream cheese or eggs can make the filling lumpy, and no one wants that on Valentine’s.
Step 4: Assemble and Bake
Pour the filling over your cooled crust, smoothing the top with a spatula. Now, here’s that water bath trick I promised.
Baking Tip:
You can skip the traditional water bath by placing a tray of hot water on the rack below your cheesecake. It adds just enough moisture to prevent cracks—without the stress of leaks.
Bake your cheesecake at 325°F for 50 to 60 minutes, or until the edges are set and the center still has a slight wobble.
Step 5: Cool Slowly
Once it’s done, turn off the oven, crack the door, and let the cheesecake rest inside for 30 minutes. Then move it to the counter to cool for another hour before chilling in the fridge.
Patience is key here, but I know from experience—it’s worth it.
If you’re planning a full Valentine’s dinner, this pairs beautifully with a romantic dinner like this Crock Pot Marry Me Chicken. It’s the kind of meal that feels special without being fussy.
Cool, Chill, and Top with Love
Alright, you’ve baked your heart-shaped cheesecake and it’s looking dreamy—but we’re not quite ready to slice into it just yet. Cheesecake is a dessert that loves a good nap. Cooling and chilling are where that creamy texture really comes alive.
Once your cheesecake has cooled on the counter for about an hour, transfer it to the fridge. Cover it lightly with foil or plastic wrap (I use beeswax wrap sometimes, just for fun) and chill for at least 6 hours, though overnight is best.
Eva’s Tip: Chill Time Is Love Time
“Overnight is best—it lets the flavors deepen and the texture set perfectly. Plus, it’s one less thing to do the day-of!”
Now, the fun part: topping. I usually go with cheesecake with berries because it feels classic and looks gorgeous, especially for a Valentine’s Day dessert. Here’s how we do it:
Berry Topping Options
Pick one—or mix a few! These are all lovely on top of a creamy cheesecake:
• Sliced strawberries + 1 tbsp sugar (macerate for 30–60 mins)
• Fresh raspberries, tossed gently with 1 tsp sugar
• Blueberries and blackberries, mixed with a splash of lemon juice
• Mixed berries, chilled until juicy and glossy
Sugared Berry Garnish Shortcut:
Just toss sliced berries with a little sugar an hour before serving—juices form naturally, no need to cook anything.
When you’re ready to serve, remove the cheesecake from the pan carefully. I always feel like I’m unwrapping a present when I unlock the springform and lift it away.
Serving Tips for a Valentine’s Wow
When it comes to presenting your Heart-Shaped Cheesecake, you don’t need to go over the top. It already says, “I love you enough to bake something creamy and wonderful in the shape of a heart.” That’s romance on a plate right there.
But if you want to make it even more special—especially for a quiet dinner at home or a surprise date night—here are a few sweet ideas I’ve tried (and loved):
Romantic Presentation Ideas
• Dust the edges with powdered sugar using a mesh sieve. It gives that soft, snow-kissed look without extra sweetness.
• Place the cheesecake on a white cake stand, and add a small ring of fresh berries around the base.
• Drizzle a little melted chocolate (just a touch!) over the top in a zigzag, then top with your sugared berries.
• For couples: plate two slices together, tip to tip, so the heart shape shows from both angles. It’s adorable.
And let me just say—don’t be afraid to serve cheesecake for breakfast the next day. I’ve done it. With coffee. On the couch. Wrapped in a blanket while watching cartoons with the kids. That’s real-life romance.
Eva’s Note: Morning-After Magic
If you happen to have a slice or two left, serve it chilled with hot coffee the next morning. It’s a quiet, sweet way to stretch the love just a little longer.
And if your Valentine is more into cocoa than cheesecake, or if you’re baking for a group, you might want to check out my classic red velvet cake—it’s another sweetheart of a dessert.
Heart-Shaped Cheesecake Variations
Once you’ve mastered the classic Heart-Shaped Cheesecake, it’s fun to get a little creative. Whether you want to surprise your partner with a new flavor or adapt it for a kid-friendly celebration, here are a few of my favorite twists on the original creamy cheesecake recipe:
Lemon-Lovers Version
Add 1 tbsp of lemon zest and 1 tbsp of lemon juice to the filling for a bright, citrusy flavor. Pair with blueberries or raspberries on top for a zingy contrast. Lily loves this version—it’s her go-to when we make cheesecake just because.
Chocolate-Swirl
Melt ¼ cup of chocolate chips, swirl into the top of the filling before baking using a butter knife, and bake as usual. It gives a marbled effect that’s part cheesecake, part truffle.
Raspberry Swirl
Blend ¼ cup of raspberries with 1 tbsp sugar, strain out the seeds, and swirl it into the batter. It adds a pop of color and a tart surprise with every bite.
Mini Cheesecakes for the Littles
No heart pan? No problem. Pour the filling into ramekins or lined muffin tins and bake for 18–20 minutes. Perfect for classrooms, little hands, or just portion-controlled sweetness.
Emma likes to decorate hers with one single raspberry on top—tiny, proud, and perfectly hers.
Frequently Asked Questions About Heart-Shaped Cheesecake
Every time I share this Heart-Shaped Cheesecake recipe, a few thoughtful (and totally relatable) questions pop up. So here’s a little FAQ section to help you bake with confidence—and a full heart.
Can you bake cheesecake in a heart-shaped pan?
Yes! As long as your heart-shaped pan is oven-safe and ideally springform-style, it works just like a round pan. The key is making sure you can easily release the cheesecake once it’s chilled and set.
Eva’s Tip:
I always feel a little thrill when I unclip the springform and gently lift it away. It’s like unwrapping a present you made yourself.
If you don’t have a heart pan, remember—you can DIY the shape using a round springform pan and a tightly balled piece of foil placed in the top curve before baking.
How do I keep cheesecake from cracking?
Great question. To prevent cracks:
• Don’t overmix your filling (especially after adding the eggs)
• Bake at a low, steady temperature
• Let it cool gradually—no fridge right away
• Use a tray of water on the rack below your cheesecake while baking
Eva’s Story:
My first cheesecake cracked like dry earth in a summer drought. I panicked—then I covered it in berries and no one even noticed. Now I say, if it cracks, just call it rustic and pass the forks.
How far ahead can I make this?
Up to 2 days in advance! Just keep it well-covered in the fridge and wait to top it with berries until just before serving so the juices stay fresh and pretty.
Eva’s Note:
I usually make this on a quiet Thursday night, then bring it out Friday after dinner like a little surprise. It feels like a secret gift I planned all week—even if I totally didn’t.
Final Thoughts on Making Your Own Heart-Shaped Cheesecake
There’s something deeply comforting—and honestly, kind of magical—about making a Heart-Shaped Cheesecake from scratch. Whether you’re baking it for a partner, a best friend, your kids, or yourself (yes, self-love counts too!), it’s more than just a Valentine’s Day dessert. It’s a quiet act of love. A creamy, berry-topped reminder that sometimes the sweetest things are homemade.
And just like love, this dessert isn’t about perfection. Maybe your heart shape is a little uneven. Maybe you let the cheesecake chill an hour less than ideal because your kid really wanted dessert now. Maybe the top cracked a little. That’s okay. Because when you set it down on the table and see someone smile—that’s when it becomes perfect.
One More Time: Why You’ll Love This Heart-Shaped Cheesecake
• Creamy, dreamy filling with just the right amount of tang
• Classic graham cracker crust for buttery crunch
• Simple berry topping (no cooking required)
• Can be made ahead for low-stress Valentine’s prep
• Sweet enough for date night, cozy enough for family dinner
Thanks for baking with me today, friend. I hope this recipe becomes part of your own Valentine’s tradition—like it has in my home.
If you’re new here, feel free to poke around the blog for more cozy, heartfelt recipes. From other Valentine’s Day cake ideas to everyday comfort foods, there’s always something warm waiting for you here at Noted Recipes.
And if you do make this cheesecake, I’d love to hear how it turned out. Tag me or send a note—your stories always make my day.
With love (and cheesecake crumbs),
Eva
Heart-Shaped Cheesecake (Perfect for Valentine’s Day)
- Total Time: 8 hours
- Yield: 1 heart-shaped cheesecake 1x
Description
Celebrate love with this rich, creamy Heart-Shaped Cheesecake topped with fresh berries. A perfect make-ahead Valentine’s Day dessert for someone special.
Ingredients
1 ½ cups graham cracker crumbs
¼ cup sugar
5 tbsp melted butter
24 oz cream cheese (softened)
1 cup sugar
3 large eggs
1 tsp vanilla extract
½ cup sour cream
Fresh strawberries or raspberries
1–2 tbsp sugar (optional, for macerating berries)
Instructions
1. Preheat oven to 325°F (160°C) and grease a heart-shaped springform pan. If using a round pan, shape a foil ball to form a heart curve.
2. In a bowl, mix graham cracker crumbs, sugar, and melted butter until it resembles wet sand. Press into the bottom of the pan. Bake for 8 minutes and let cool.
3. Beat softened cream cheese until smooth, add sugar, and mix. Add eggs one at a time, mixing gently. Stir in vanilla and sour cream until just combined.
4. Pour filling over cooled crust. Place a tray of hot water on the rack below to help prevent cracks. Bake for 50–60 minutes until edges are set and center slightly jiggles.
5. Turn off oven and cool cheesecake inside with door ajar for 30 minutes. Then cool on counter for 1 hour before refrigerating at least 6 hours or overnight.
6. Macerate berries with sugar if desired. Remove cheesecake from pan and top with sugared or fresh berries before serving.
Notes
Use full-fat block-style cream cheese for best texture.
Let cream cheese and eggs come to room temp to prevent lumps.
Place a tray of water on the rack below cheesecake to help avoid cracks.
Overnight chilling allows the flavor and texture to set perfectly.
Add lemon zest, chocolate, or raspberry swirl for variations.
- Prep Time: 20 minutes
- Cook Time: 60 minutes
- Category: Dessert
- Method: Baking
- Cuisine: American
Nutrition
- Serving Size: 1 slice
- Calories: 420
- Sugar: 29g
- Sodium: 260mg
- Fat: 31g
- Saturated Fat: 18g
- Unsaturated Fat: 11g
- Trans Fat: 0g
- Carbohydrates: 32g
- Fiber: 1g
- Protein: 6g
- Cholesterol: 105mg