
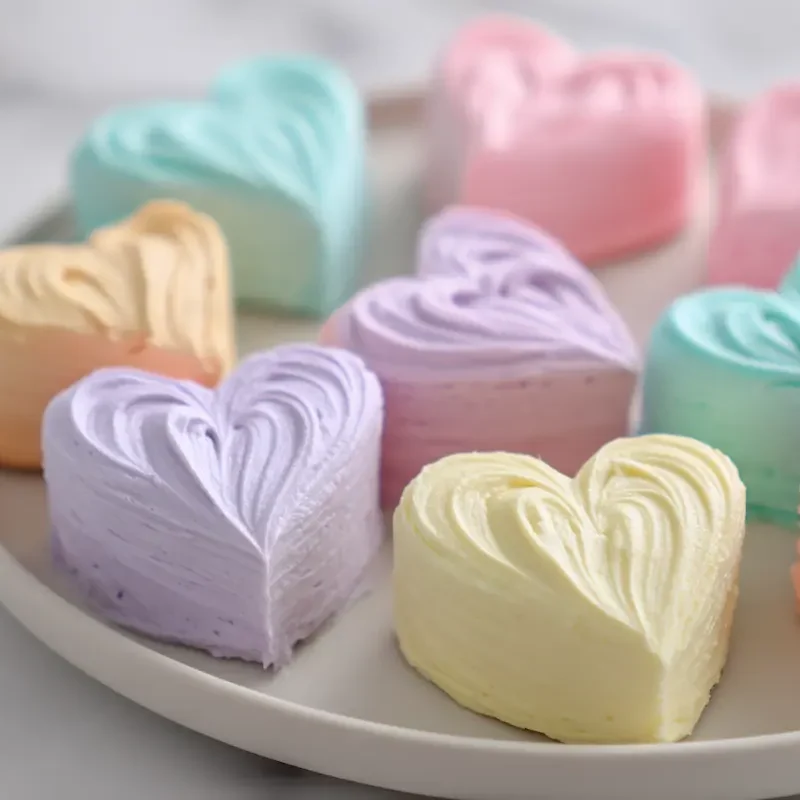
These adorable Conversation Heart Cakes are a perfect homemade Valentine’s Day treat! Heart-shaped, frosted in pastels, and decorated with sweet messages — fun to make and share with loved ones.
These Mini Heart Cakes Speak the Language of Love
When I think about Valentine’s Day, I always go back to those little folded paper cards we passed around in grade school. You know the kind — bright, pun-filled, and full of stickers. I remember sitting at the kitchen table with my mom, carefully writing each classmate’s name, taping a lollipop to the back, and hoping I wouldn’t forget anyone (especially the cute boy who always sat two desks over). It was simple and sweet — just like these Conversation Heart Cakes.
These mini heart cakes feel like the grown-up, homemade version of those childhood valentines. They’re soft, pastel-colored, and full of personality — each one decorated with a tiny message, just like the classic candies. But instead of chalky sugar, you get moist cake, smooth pastel buttercream frosting, and a chance to write something meaningful, funny, or just plain silly.
What I love most is how much fun these are to make with the kids. We usually turn it into a little assembly line: one of them cuts the hearts, one frosts, and one writes the messages (Emma, our youngest, usually ends up just eating the frosting — quality control, I guess).
And every year, we set up a “decorate your own heart” table after dinner. I lay out bowls of frosting in soft colors, a tray of sprinkles, and edible markers for cakes. It’s messy, heartfelt, and full of laughter — just how Valentine’s Day should be.
Whether you’re baking for your kids, your partner, or your best friend, these Valentine’s Day treats are little edible love notes. And if you’re looking for even more festive inspiration, you’ll find more fun Valentine’s Day cakes over on the blog.
Want to make some? Let’s do it together.
Ingredients You’ll Need
These Conversation Heart Cakes start with a soft, simple vanilla cake and end with sweet pastel frosting and a personal touch. Nothing fancy — just pantry basics, a few fun extras, and lots of love.
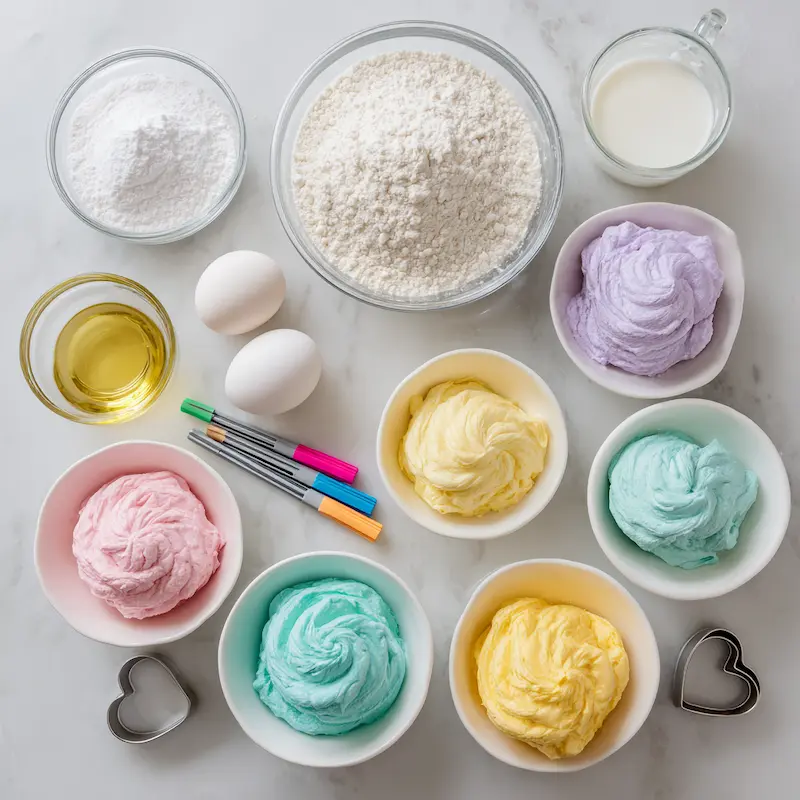
Here’s what you’ll need to make these adorable mini heart cakes:
For the Cake Batter:
• 2 cups all-purpose flour
• 1 cup granulated sugar
• 2 teaspoons baking powder
• ½ teaspoon salt
• 1 cup milk (I usually use whole milk, but any kind works!)
• 1 egg
• ⅓ cup neutral oil (like canola or vegetable)
Eva’s Note: We’ve also made this recipe using almond milk and a flax egg for our dairy-free friends — it still bakes up beautifully!
For the Pastel Buttercream Frosting:
• Buttercream in soft pastel shades — think pink, lavender, mint, yellow, or blue (You can tint your own using gel food coloring — more on that soon!)
• Optional: Strawberry, lemon, or almond extract to flavor the frosting (My kids love the lemon!)
For Decorating:
• Heart-shaped cookie cutters (medium size works best) or a paring knife
• Edible markers for cakes
• Optional: Piping gel for writing messages if you prefer it to markers
Optional Variations:
• Swap in a red velvet cake base — I love using our classic red velvet cake for a deeper flavor and color.
• Add natural fruit extracts to the frosting for a little surprise in every bite.
• Use a 1:1 gluten-free flour blend to make this recipe gluten-friendly.
Simple, colorful, and open to customization — just how we like our heart-shaped desserts.
Ready to bake? Let’s make that vanilla cake base next.
How to Make Conversation Heart Cakes
These Conversation Heart Cakes may look fancy, but I promise they’re totally doable — even on a weeknight. The key is to break it into steps, and if you’ve got little helpers, even better. This is the kind of recipe that’s just as much about the memories as it is about the final bite.
Let’s walk through it together, step by step.
1. Bake a Soft Vanilla Cake Base
You’ll want to start with a nice, fluffy sheet of vanilla cake — something sturdy enough to cut into shapes but soft enough to melt in your mouth.
Here’s how to make it:
Preheat your oven to 350°F (175°C). Grease a 9×13 inch pan and line the bottom with parchment paper for easy removal.
In a large bowl, whisk together the flour, sugar, baking powder, and salt.
Add the milk, egg, and oil. Mix until smooth — no need for a mixer, just a good whisk or wooden spoon.
Pour into your prepared pan and smooth out the top.
Bake for 25–30 minutes, or until a toothpick comes out clean.
Cool completely before cutting.
Eva’s Note: It always smells like my grandma’s kitchen when this cake is in the oven. That cozy vanilla aroma makes our whole apartment feel like a hug.
Optional: Want something richer? Try our red velvet cake base for a bold, cocoa-kissed twist.
2. Cut Out Those Sweet Hearts
Once your cake is baked and cooled, it’s time for the fun part: cutting out the heart shapes! You can use cookie cutters, or trace a heart shape on parchment and cut around it with a sharp knife.
Instructions:
Chill the cake in the fridge for 30 minutes.
Cool cake is easier to cut — warm cake crumbles!
Use your heart-shaped cutter to stamp out as many mini cakes as you can. (I usually get 8–10 from one pan, depending on size.)
If you don’t have a cutter, use a paper stencil and a small knife.
I’ve even folded a playing card into a heart shape before — desperate times, creative measures.
Eva’s Note: Don’t toss the cake scraps! We save them in a container in the fridge for trifle cups or cake pops later in the week.
3. Frost with Love (and Pastels!)
Here’s where the personality really starts to shine. These mini Valentine cakes with messages are all about the soft, dreamy pastel tones — and the flavor fun you can sneak into the frosting.
Before you begin:
Make sure your cakes are cool and crumbs are brushed off. It helps to do a thin “crumb coat” layer first, then chill for 10 minutes before finishing with the final layer of frosting.
Color-Tinting Hack:
A little goes a long way. I dip a toothpick into the gel food coloring and swirl it into the buttercream. You can always add more — but you can’t take it out!
Suggested Pastel Combos:
Pink: Strawberry extract + a dot of red gel
Peach: Pink + orange gel
Lavender: Purple gel + touch of blue
Mint Green: Green gel + drop of vanilla extract
Lemon Yellow: Yellow gel + lemon extract
Frosting Tips:
Spread evenly with a small offset spatula or butter knife.
Smooth the sides for that cute little heart cake look — or leave a rustic finish, it’s all love.
Let the cakes chill again briefly if frosting starts to get too soft.
Eva’s Note: My kids love mixing colors — Noah always goes rogue and makes a “mystery frosting” swirl. It’s never pretty, but it always gets eaten first.
4. Add Personalized Messages
Now for the best part: writing those sweet nothings!
Whether you’re going classic (Be Mine) or personal (You Got This), this step turns your Conversation Heart Cakes into tiny love letters.
You can use edible markers for cakes (so fun for kids), or piping gel with a fine tip for a more polished look.
Message Writing Tips:
Write before adding sprinkles or any extras
Practice on parchment paper first if using piping gel
It’s like signing a tiny edible Valentine — no pressure, just fun.
Cute Phrase Ideas:
Be Mine
Love Ya
Cutie Pie
You Rock
Call Me
BFF 4Ever
XOXO
Eva’s Note: My husband once wrote “Nap Now?” on mine. Romantic and practical — I married well.
Let your messages reflect you. Whether you’re making these as easy Valentine’s Day desserts for kids, sweet notes for friends, or silly love tokens, this part is all heart.
How to Store and Gift Them
One of the reasons I adore these Conversation Heart Cakes is how well they hold up — both for storing and gifting. Whether you’re prepping ahead for a party, making a batch for your kiddo’s classroom, or surprising your favorite neighbor with something sweet, these little cakes are as practical as they are precious.
Let’s talk about keeping them fresh and giving them away with flair.
How to Store
Room Temperature: Keep the cakes in an airtight container at room temp for up to 2 days. Just make sure they’re not stacked or touching — the frosting is delicate!
Refrigerator: For longer storage (up to 5 days), pop them in the fridge. Let them come to room temperature before serving for the softest texture.
Freezer: You can freeze unfrosted heart-shaped cakes for up to a month. Wrap tightly in plastic wrap and then foil. Frost fresh when you’re ready to decorate.
Eva’s Note: These rarely make it to day two in our house. Someone (usually me) always sneaks one with tea after dinner.
How to Gift
Mini heart cakes make the sweetest homemade Valentine’s Day treats. We’ve gifted these to teachers, neighbors, and even the mail carrier — they’re always a hit.
Here are a few of my favorite ways to package them:
• Clear cellophane bags tied with red or pink ribbon (Add a little handwritten tag for that extra love note touch)
• Mini treat boxes (you can find heart-print ones around Valentine’s) with a doily lining
• Cupcake clamshells or meal prep containers with a square of parchment — great for classroom gifting
• Mason jars if you’re making tiny stacked versions (think cake parfaits!)
Need another edible gift idea? You’ll love our peppermint bark cookies — they’re especially cute in a tin with a bow.
Eva’s Note: Emma once handed hers out to every neighbor on our floor. I opened the door that afternoon and found a sticky note: “Your daughter is a Valentine angel.” Best. Compliment. Ever.
Print
Conversation Heart Cakes: Sweet Mini Treats with a Valentine’s Message
- Total Time: 1 hour
- Yield: 8–10 mini cakes 1x
- Diet: Vegetarian
Description
Sweet and simple mini heart cakes frosted in pastel buttercream and topped with personalized Valentine’s Day messages.
Ingredients
2 cups all-purpose flour
1 cup granulated sugar
2 teaspoons baking powder
½ teaspoon salt
1 cup milk
1 egg
⅓ cup neutral oil
Buttercream in pastel shades (pink, lavender, mint, yellow, blue)
Optional: strawberry, lemon, or almond extract
Heart-shaped cookie cutters or knife
Edible markers or piping gel
Instructions
1. Preheat oven to 350°F and prepare a 9×13 inch pan with parchment.
2. Mix flour, sugar, baking powder, and salt in a bowl.
3. Add milk, egg, and oil, and whisk until smooth.
4. Pour batter into the pan and bake for 25–30 minutes.
5. Cool the cake completely, then chill for 30 minutes.
6. Use heart-shaped cookie cutters or a knife to cut shapes.
7. Prepare pastel buttercream and frost each cake.
8. Use edible markers or piping gel to write sweet messages.
9. Let the cakes chill slightly before packaging or serving.
Notes
Chill your cake before cutting to prevent crumbling.
Do a crumb coat before the final frosting layer.
Use a toothpick for gel coloring — a little goes a long way.
Store cakes in an airtight container or refrigerate up to 5 days.
Try red velvet or gluten-free variations if desired.
- Prep Time: 15 minutes
- Cook Time: 30 minutes
- Category: Dessert
- Method: Baking
- Cuisine: American
Nutrition
- Serving Size: 1 mini cake
- Calories: 280
- Sugar: 24g
- Sodium: 160mg
- Fat: 12g
- Saturated Fat: 5g
- Unsaturated Fat: 6g
- Trans Fat: 0g
- Carbohydrates: 38g
- Fiber: 1g
- Protein: 3g
- Cholesterol: 30mg