
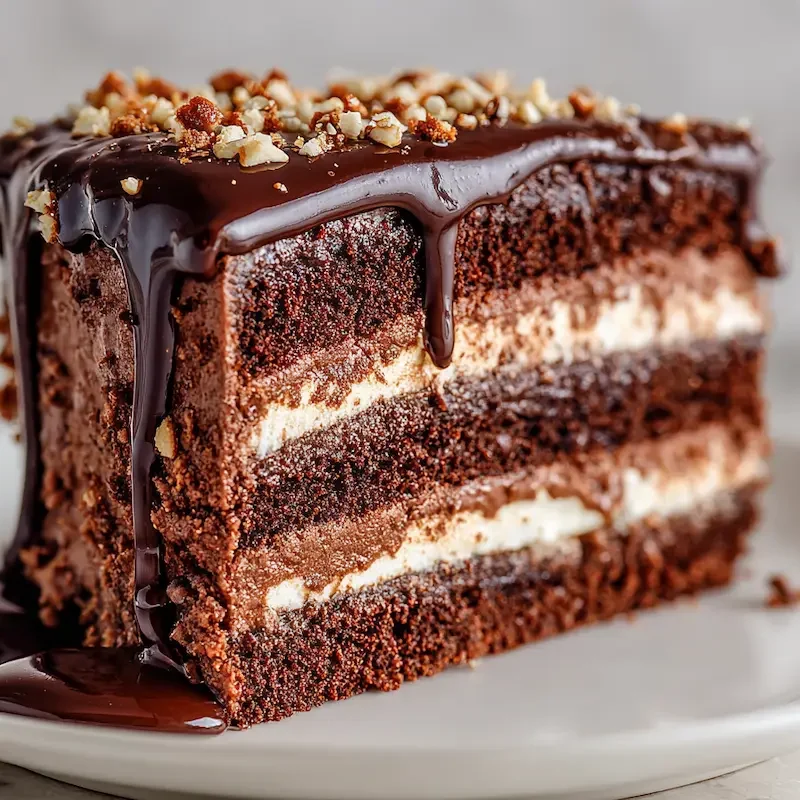
This layered chocolate delight cake is a dreamy, decadent treat made with soft chocolate cake, rich ganache, and creamy chocolate filling. Perfect for birthdays or holiday gatherings!
A Chocolate Lover’s Dream: Layered Chocolate Delight Cake
There’s something timeless about a good chocolate cake. It doesn’t need a special occasion — it is the occasion. But when you layer it up with a melt-in-your-mouth filling and drizzle it with silky chocolate ganache? Now you’ve got a Layered Chocolate Delight Cake — the kind of rich chocolate dessert that people remember, request, and sneak second slices of when they think no one’s looking.
In our house, this cake shows up on birthdays, Valentine’s Day, and, honestly, anytime someone has a hard week and needs a little joy. It’s one of those “bring out the cake stand” desserts — tall, proud, and unapologetically chocolatey.
I still remember the first time I tried something similar — it was at a neighborhood potluck back when we lived in Italy. One of the moms had brought a chocolate cake with filling so smooth it felt like pudding and ganache so glossy it caught the light. I had to recreate it. Years (and many chocolate-smeared mixing bowls) later, this version is my family’s favorite.
If you’ve ever made my butterscotch lush cake, you know I’m a fan of layering flavor and texture. This one takes it to the next level — rich, creamy, and deeply chocolate.
Ingredients You’ll Need
Making this Layered Chocolate Delight Cake doesn’t require anything too fancy — just a few pantry staples and a couple of quality ingredients that really make the flavor sing. This recipe leans into the richness of dark chocolate because it gives the cake and ganache a deep, luxurious flavor. Trust me, it’s what sets this apart from an everyday chocolate layer cake.
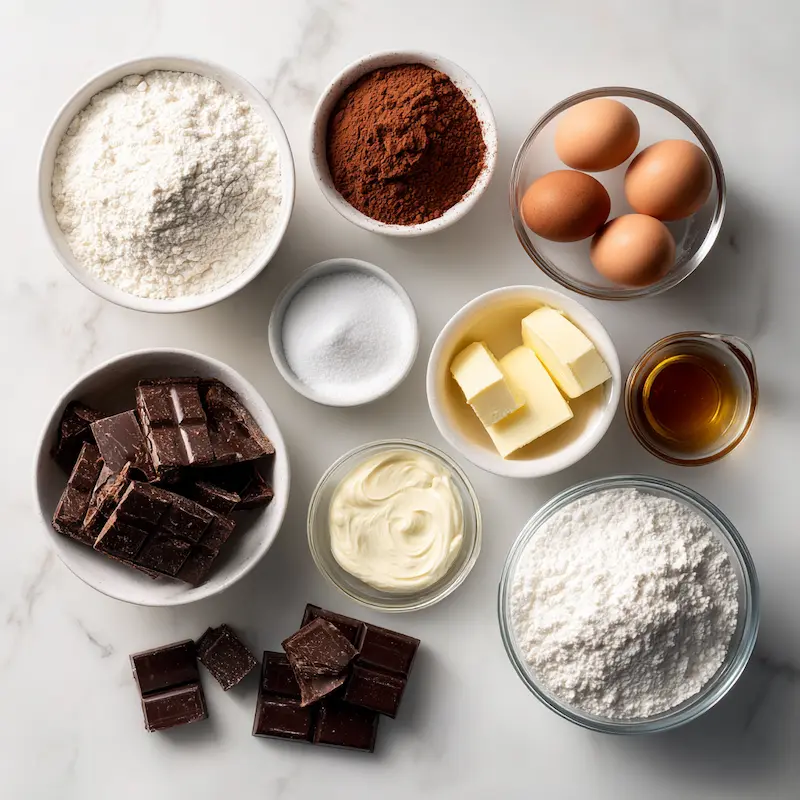
And let’s talk cream — it’s the magic that softens the boldness of the chocolate and gives both the chocolate ganache and filling their dreamy, smooth texture.
Here’s what you’ll need:
• 2 cups all-purpose flour
• ¾ cup unsweetened cocoa powder
• 2 cups granulated sugar
• 1 cup unsalted butter, softened (set it out with your morning coffee!)
• 3 large eggs
• 1½ cups heavy cream (divided — for both filling and ganache)
• 8 ounces dark chocolate (for filling)
• 8 ounces dark chocolate (for ganache)
• 1 teaspoon baking soda
• 1 teaspoon baking powder
• 2 teaspoons vanilla extract
Optional Variations:
• Swap half the dark chocolate with milk chocolate if you like a slightly sweeter ganache
• Add ½ teaspoon espresso powder to deepen the cocoa flavor (this one’s for grown-up birthdays!)
Making the Layers: Cake Base from Scratch
When you’re making a Layered Chocolate Delight Cake, the base matters just as much as the frosting. You want layers that are soft but sturdy, rich but not too heavy — something that stands up to creamy filling and thick chocolate ganache, without collapsing into a gooey mess.
Now, I’ll be honest: I learned the hard way how important this part is. Years ago, I rushed a birthday cake for Noah and didn’t let the layers cool properly. I ended up with a leaning chocolate tower and a kid who still talks about “the cake that slid.” Lesson learned.
This version? It holds strong and slices like a dream.
Here’s how to build the perfect chocolate layer cake:
1. Preheat & Prep
Preheat your oven to 350°F (175°C).
Grease and line two 9-inch round cake pans with parchment paper.
Pro Tip: Use cake strips around the outside of the pans if you want extra-flat layers — they help keep the edges from doming too much.
2. Mix the Dry Ingredients
In a large bowl, whisk together:
• 2 cups flour
• ¾ cup cocoa powder
• 1 teaspoon baking soda
• 1 teaspoon baking powder
• A pinch of salt
Set aside.
3. Cream the Butter & Sugar
In a separate mixing bowl, cream 1 cup softened butter with 2 cups sugar until light and fluffy (about 3 to 5 minutes).
Don’t skip this part — cold butter won’t cream properly. I always set mine out first thing in the morning. The texture difference is huge.
4. Add Eggs & Vanilla
Beat in 3 large eggs, one at a time. Add 2 teaspoons vanilla extract. Scrape the sides of the bowl to make sure it’s all mixed in well.
5. Alternate Dry Ingredients & Cream
Add the dry ingredients in thirds, alternating with 1 cup heavy cream. Start and end with the dry mix. Stir gently until just combined.
Don’t overmix! You want a tender crumb, not a chewy one.
6. Divide & Bake
Pour batter evenly into your prepared pans. Tap them gently on the counter to release air bubbles.
Bake for 30 to 35 minutes, or until a toothpick comes out clean. Let them cool in the pans for 10 minutes, then turn out onto wire racks to cool completely.
While your beautiful dark chocolate cake layers are cooling, it’s time to work on the next star of the show — the silky chocolate filling.
Oh — and if you’re into layered baking, I think you’ll love my pecan upside-down cake. Different vibe, but same “wow” factor.
The Creamy Chocolate Filling
This, my friend, is the part that takes your Layered Chocolate Delight Cake from “yum” to “who made this and can I get the recipe?” The filling is smooth, velvety, and just rich enough to hold its own between those soft cake layers without stealing the spotlight.
I like my filling silky and thick — the kind that spreads like a dream and doesn’t ooze when you slice the cake. It’s basically a chocolate truffle, but softer and spreadable.
And yes, I always sneak a spoonful before it goes between the layers. For “quality control,” of course.
Ingredients for the Filling:
• 8 ounces dark chocolate, finely chopped
• ½ cup heavy cream
Directions:
- Heat the Cream
In a small saucepan, heat the heavy cream over medium heat until it just begins to simmer — don’t let it boil. - Pour Over Chocolate
Place the chopped dark chocolate in a heatproof bowl. Pour the hot cream over the top and let it sit for 1 minute. - Stir Slowly
Gently stir until the mixture is smooth and glossy. - Cool to Thicken
Let the filling cool for about 30 minutes at room temperature or pop it in the fridge for 10 minutes if you’re in a rush. You want it spreadable, not runny.
Pro Tip:
If your filling looks grainy or split, add a tablespoon of warm cream and whisk gently — it usually comes right back together.
Chocolate Ganache Topping (the Magic Finish)
Oh, the chocolate ganache. It’s not just a topping — it’s the ta-da! of the entire Layered Chocolate Delight Cake. This glossy, smooth pour of rich chocolate dessert magic is what makes your cake look straight out of a bakery window. It’s simple to make, but the payoff is huge — a silky layer that firms just enough to slice cleanly, but still melts on your tongue.
I remember the first time I tried to make ganache. I overheated the cream, poured it too fast, and ended up with what I now call a “chocolate seize emergency.” Noah, who was about seven at the time, patted my arm and said, “It’s okay, Mom. You’re still good at pancakes.”
But once you know the trick, it’s a breeze.
Here’s my go-to chocolate cake ganache recipe:
Ingredients:
• 8 ounces dark chocolate, finely chopped
• ½ cup heavy cream
• Optional for gloss boost: 1 teaspoon corn syrup and 1 tablespoon extra cream
Steps:
- Warm the Cream Gently
Heat the cream in a small saucepan until it’s just about to simmer — not boiling. Tiny bubbles around the edge are your cue to pull it off the heat. - Pour Over Chocolate
Place your chopped dark chocolate in a heatproof bowl. Pour the warm cream over the top and let it sit for a full minute. Don’t stir right away — let the heat work. - Stir Smoothly
Use a whisk or spatula to gently stir until you get a smooth, shiny ganache. - Gloss It Up (Optional)
For an extra-slick finish (great for photos or party cakes), stir in a teaspoon of corn syrup and a bit more cream. - Cool Slightly Before Pouring
Let the ganache cool for about 10 to 15 minutes. It should be pourable but not runny. You want it to hug the top and drip just slightly over the edges.
Note: If you want a super dramatic drip effect, use the back of a spoon to nudge the ganache toward the edges after pouring.
In our house, the ganache step is group participation. Emma usually grabs a tiny spoon to help “test,” while Lily checks the shine. It’s a whole family affair, with a lot of chocolate smudges and laughter.
Oh — and if you’re into rich chocolate desserts like this pie, you’ll probably love my chocolate pecan pie. It’s got a ganache-adjacent vibe and the same cozy chocolate kick.
How to Assemble & Serve This Showstopper
Now that your layers are baked, your filling is creamy, and your ganache is glossy and ready — it’s time to bring your Layered Chocolate Delight Cake to life. This part always feels like magic to me. It’s when all the separate pieces come together into one jaw-dropping, slice-worthy masterpiece of a chocolate layer cake.
And yes, this is also when I pull out my favorite cake stand — a sturdy white one with tiny chips along the base that I’ve had since our first apartment in Queens. It’s been through birthday parties, bake sales, and quiet Sundays when we just needed something sweet on the table.
Step-by-Step Assembly:
- Level Your Layers
Once your cake layers are completely cool, use a serrated knife to trim the tops if they’ve domed. Flat layers = no sliding surprises.
Eva’s Tip: Use a lazy Susan or turntable if you have one. A level cake is half the battle won.
- Add the Creamy Filling
Place the first layer on your cake stand or plate. Spread the chocolate filling evenly across the top — go all the way to the edges. Add the second cake layer on top, pressing down gently. - Chill Before Ganache
Pop the whole cake in the fridge for 15 to 20 minutes. This helps the filling set so your ganache won’t slide off. - Pour the Ganache
Once chilled, pour your ganache over the top. Start in the center and let it drift naturally. Use the back of a spoon to coax it toward the edges if you want that beautiful drip look. - Let It Set
You can serve it as soon as the ganache firms up slightly (about 30 minutes), or chill longer if you’re planning ahead.
Styling Tips for Serving:
• Warm Knife = Clean Slices
Dip a sharp knife in warm water, wipe it clean, and slice. Repeat between each cut for those perfect, bakery-style slices.
• Add a Garnish (Optional)
Shaved dark chocolate, a few fresh berries, or a light dusting of cocoa powder on top can make it feel even more special.
• Use a White or Slate Cake Plate
Dark chocolate pops beautifully on light backgrounds — it’s small, but it makes a big difference on the dessert table.
Make-Ahead Magic:
This cake actually gets better after a night in the fridge. The flavors blend, the filling firms up, and the ganache sets to a perfect silky shell. I often make it a day early, wrap it gently, and let it rest overnight.
And for ganache lovers looking to step up their game, you might want to try my sponge buttercream ganache cake next. It’s a bit more advanced, but wow — that one’s a crowd favorite too.
Eva’s Note
There’s something deeply comforting about making a cake from scratch. The process, the smells, the anticipation of that first slice — it all brings me back to the kitchen I grew up in, wherever that happened to be at the time. Whether it was Morocco or Michigan, the scent of dark chocolate cake baking was one of the few constants in my childhood.
This Layered Chocolate Delight Cake is more than just a dessert in our home — it’s a way of saying “I love you” in layers. I’ve made it for birthdays when the guest list included noisy cousins and paper hats, and I’ve made it quietly at midnight, just for myself, after a long day.
If you’re nervous to try this, don’t be. You don’t need to be a professional baker — just someone with a spoon, a bowl, and a little patience. And maybe a child nearby to lick the spatula (Emma highly recommends this job).
The best part? When someone takes that first bite, pauses, and says, “Wait — did you make this?” Yes. Yes, you did.
So here’s to chocolate smudges on aprons, late-night baking sessions, and the joy of sharing something homemade. I hope this cake brings as much love to your table as it has to mine.
With flour-dusted hands and a full heart,
Eva
Frequently Asked Questions about Layered Chocolate Delight Cake
Q: Can I make this cake a day in advance?
✅ Answer: Absolutely — in fact, I recommend it.
This Layered Chocolate Delight Cake is often even better the next day. The chocolate ganache firms up just enough, the filling settles beautifully between the layers, and the flavors really deepen. It becomes the kind of cake that tastes like it’s been waiting just for you.
Personal Moment: I’ve quietly sliced into it at midnight with a glass of milk after the kids went to bed — it’s one of my favorite little “mom moments.” No plates, no rules. Just me and the cake.
Q: What’s the best way to keep the ganache from splitting?
✅ Answer: The key is gentleness.
Warm your cream just to a simmer — not boiling — and pour it over finely chopped chocolate. Let it sit for about a minute before stirring. That short rest gives the heat time to melt the chocolate evenly.
Stir gently with a spatula, not a whisk, until smooth. If it starts to look grainy or oily, don’t panic — you can usually bring it back together by adding a splash of warm cream and stirring slowly.
Personal Memory: I once got distracted helping Lily with her science project and let the cream boil… Let’s just say we had a “chocolate seize emergency.” Lesson learned.
Q: Can I use semi-sweet or milk chocolate instead of dark?
✅ Answer: Yes, definitely.
If you prefer a sweeter profile, you can swap out some or all of the dark chocolate for semi-sweet or milk chocolate — just note that it will make the cake richer in sweetness but lighter in cocoa intensity. This works especially well for birthday cakes when you’ve got little ones who love that classic milk chocolate flavor.
Personal Note: When I make the milk chocolate version for Emma’s birthday, she always asks for extra ganache on the side — like a little cup of warm frosting. It’s messy, but joyful.
Print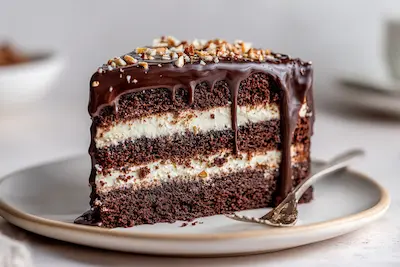
Layered Chocolate Delight Cake (with Rich Ganache & Creamy Filling)
- Total Time: 1 hour 5 minutes
- Yield: 1 9-inch double-layer cake 1x
Description
A rich, decadent layered chocolate delight cake made with moist chocolate layers, creamy chocolate filling, and glossy ganache topping. Perfect for celebrations or make-ahead desserts.
Ingredients
2 cups all-purpose flour
¾ cup unsweetened cocoa powder
2 cups granulated sugar
1 cup unsalted butter, softened
3 large eggs
1½ cups heavy cream (divided)
8 ounces dark chocolate (for filling)
8 ounces dark chocolate (for ganache)
1 teaspoon baking soda
1 teaspoon baking powder
2 teaspoons vanilla extract
Optional: ½ tsp espresso powder
Optional: 1 tsp corn syrup (for ganache gloss)
Instructions
1. Preheat oven to 350°F (175°C). Grease and line two 9-inch cake pans with parchment paper.
2. Whisk together flour, cocoa powder, baking soda, baking powder, and salt in a large bowl.
3. In another bowl, cream softened butter and sugar until light and fluffy.
4. Beat in eggs one at a time, then add vanilla extract.
5. Alternate adding dry ingredients and 1 cup heavy cream to the butter mixture. Do not overmix.
6. Divide batter evenly into pans. Bake for 30–35 minutes. Let cool completely.
7. Heat ½ cup cream and pour over 8 oz chopped dark chocolate for filling. Let sit, then stir until smooth. Cool until spreadable.
8. Place one cake layer on stand. Spread filling on top. Add second layer. Chill cake for 20 minutes.
9. Heat remaining ½ cup cream and pour over 8 oz chopped dark chocolate for ganache. Stir until smooth.
10. Let ganache cool slightly, then pour over chilled cake. Use spoon to guide drips if desired.
11. Chill until ganache sets. Slice with warm knife for clean cuts.
Notes
For best results, make this cake a day in advance — the flavors deepen and the texture improves.
Use a serrated knife and turntable to level cake layers evenly.
For a glossier ganache, add 1 tsp corn syrup and 1 tbsp extra cream after stirring.
Use a warm knife (dip in hot water and wipe) for neat, bakery-style slices.
This cake pairs beautifully with fresh berries or a dusting of cocoa powder on top.
- Prep Time: 30 minutes
- Cook Time: 35 minutes
- Category: Dessert
- Method: Baking
- Cuisine: American
Nutrition
- Serving Size: 1 slice
- Calories: 560
- Sugar: 38g
- Sodium: 220mg
- Fat: 36g
- Saturated Fat: 20g
- Unsaturated Fat: 13g
- Trans Fat: 0g
- Carbohydrates: 60g
- Fiber: 4g
- Protein: 6g
- Cholesterol: 95mg