
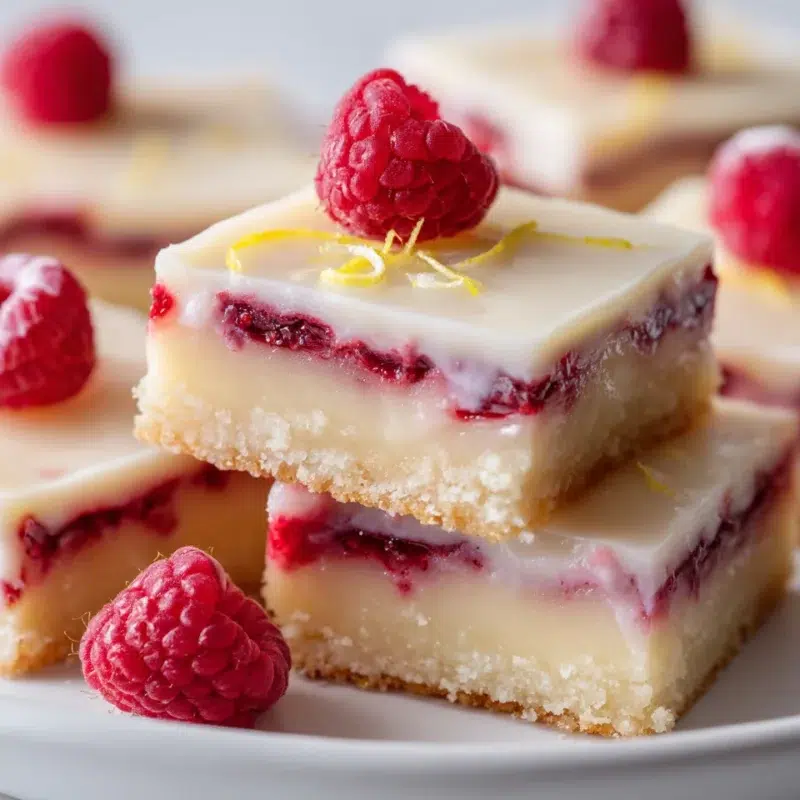
Every time I make Raspberry Lemonade Bars, I swear my kitchen turns into a little lemonade stand for the afternoon, bright, sweet, and just tart enough to make you smile. These are the kind of glazed dessert bars that feel made for warm weather days, when you want something cheerful but still easy to slice and share.
Growing up, summer treats were rarely fancy. They were the “grab a napkin and run back outside” kind of desserts. Now, in our NYC life, summer looks like park picnics, sticky kid hands, and me trying to pack something that won’t melt into a sad puddle by the time we get there. Lemon and raspberries always feel celebratory to me, like sunshine you can actually eat, and this is one of my favorite summer raspberry desserts to bring along.
Bright, buttery, and sliceable, the whole pan disappears fast.
What You’ll Love About These Bars
If you love lemon raspberry dessert bars that feel bakery-pretty but don’t require bakery-level patience, this Raspberry Lemonade Bar Recipe is for you. I call it my “bring-to-the-potluck pan” because it travels well, slices clean after chilling, and that pink raspberry layer gets compliments before anyone even takes a bite.
- Bright lemonade flavor from lots of zest and real lemon juice
- Buttery, soft base that eats like Raspberry Lemon Blondies (tender and rich, not dry)
- A defined raspberry ribbon that stays neat when you cut
- Easy lemon-vanilla glaze that makes them look like a bakery case treat
- Make-ahead friendly because chilling is actually the secret to neat squares
- Party flexible, cut them into 16 big squares or 24 smaller bites
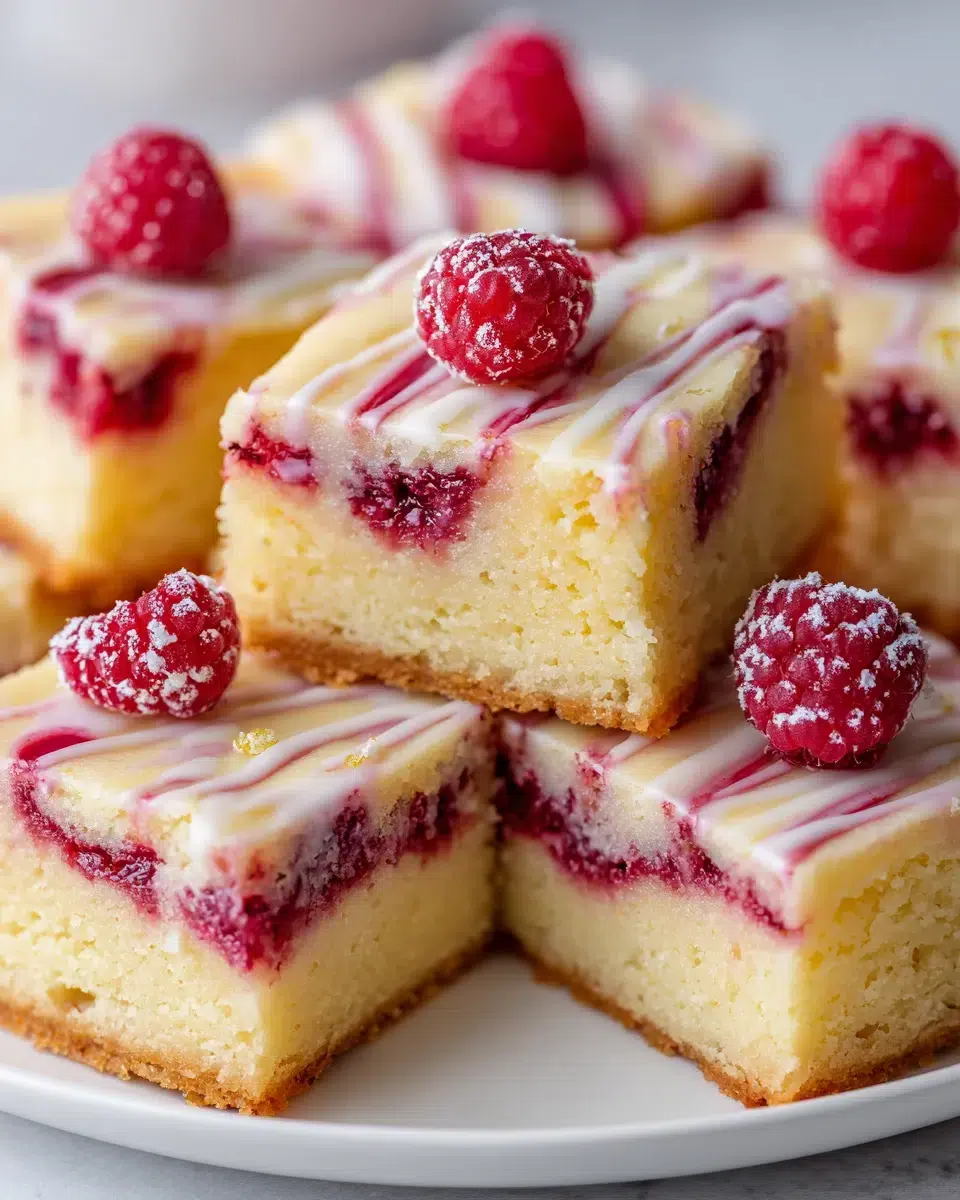
Ingredients You’ll Need (And Why They Matter)
This is a fresh raspberry dessert recipe at heart, but it’s built to be practical. Nothing weird, nothing fussy, just smart ingredients doing their jobs so you get clean layers and big flavor.
For the lemon bar base
- 1 cup unsalted butter, softened (richness and that buttery “blondie” texture)
- 1¾ cups granulated sugar (sweetness, plus it helps create a tender crumb)
- 4 large eggs, room temperature (structure and a smooth, even bake)
- 2 tbsp fresh lemon zest (this is where the “lemonade” flavor really lives)
- ¼ cup fresh lemon juice (brightness and tang)
- 1 tsp vanilla extract (rounds out the citrus so it tastes like dessert, not just lemon)
- 2½ cups all-purpose flour (the bar structure)
- 1 tsp baking powder (lift, so the bars aren’t heavy)
- ½ tsp salt (keeps everything from tasting flat)
- ½ cup whole milk or buttermilk (tender crumb and a little extra richness)
For the raspberry layer
- 3 cups fresh raspberries (the star, juicy and bright)
- ½ cup granulated sugar (pulls out juices and sweetens the berries)
- 2 tbsp lemon juice (keeps the berry flavor lively)
- 1 tbsp cornstarch (helps set the layer for clean slices)
- 2 tbsp water (to make a quick slurry)
For the lemon-vanilla glaze
- 1 cup powdered sugar (the base of a simple lemon glaze for dessert bars)
- 2–3 tbsp lemon juice (adjust for drizzle or a smooth layer)
- ½ tsp vanilla extract (softens the sharp lemon edge in the best way)
Optional variations (options)
- Add ½ tsp lemon extract for extra “lemonade” pop
- Swap in mixed berries for part of the raspberries (keep total at 3 cups)
Zest Tip: Rub the lemon zest into the sugar first. The sugar turns fragrant and slightly damp, like you just opened a lemonade stand on a hot day.
Berry Tip: Choose ripe berries that smell like berries. If they look tired in the container, your layer will taste a little tired too.
Glaze Tip: Start with less lemon juice, then add more. It’s easier to thin than to fix a glaze that’s gone watery.
If you want a deeper dive on berry filling texture, my guide to thick, glossy raspberry filling is a helpful reference for getting that spoonable, slice-friendly consistency.
Tools + Pan Prep for Neat, Bakery-Style Squares
These bars are simple, but the pan prep is what makes them look like you bought them. I learned the hard way that skipping parchment means messy edges and a lot of “why won’t you come out of the pan” drama.
- 9×13-inch baking pan (metal works great for even baking)
- Parchment paper to make a sling (leave overhang on two sides)
- Nonstick spray for the corners and sides under the parchment
- Mixing bowls + whisk
- Hand mixer or stand mixer (helpful, but not required)
- Small saucepan for the raspberry layer
- Fine zester (your lemon flavor secret weapon)
Plan a little cooling time, too. If you want those neat “raspberry lemon bars on plate” bakery squares, you need the bars fully cooled and chilled before slicing. It’s not extra work, it’s just letting the fridge do you a favor.
How to Make Raspberry Lemonade Bars (Step-by-Step)
We’re going to make a lemon batter, cook a quick raspberry layer on the stove so it slices clean, then bake everything together and finish with a lemon-vanilla glaze. The smell when lemon hits warm butter is honestly the best part, until you taste the first chilled square.
Make the Lemon Batter (Zest-First for Maximum “Lemonade” Flavor)
- Preheat your oven to 350°F. Line a 9×13-inch pan with parchment, leaving an overhang on two sides. Lightly spray the pan first so the parchment sticks in place.
- In a large bowl, add the 1¾ cups sugar and 2 tbsp lemon zest. Use your fingertips to rub the zest into the sugar for about 30 seconds, until the sugar feels slightly damp and smells intensely lemony.
- Add the softened 1 cup butter and beat until light and fluffy, about 2 minutes.
- Beat in the 4 eggs, one at a time, mixing just until smooth after each. (Room-temp eggs matter here, they blend in without making the batter look curdled.)
- Mix in the ¼ cup lemon juice, 1 tsp vanilla, and optional lemon extract if using.
- In a separate bowl, whisk together the 2½ cups flour, 1 tsp baking powder, and ½ tsp salt.
- Add the dry ingredients to the wet ingredients and mix on low just until you don’t see dry flour.
- Pour in the ½ cup milk or buttermilk and mix gently until the batter is smooth.
- Texture cue: The batter should be thick, like a soft cake batter that slowly falls off a spatula.
- Look cue: Pale yellow and glossy, with no dry streaks.
- Mixing cue: Once the flour goes in, keep it gentle so the bars stay tender.
Cook the Raspberry Layer for Clean Slices
- In a small saucepan, add the 3 cups raspberries, ½ cup sugar, and 2 tbsp lemon juice.
- Cook over medium heat, stirring often, until the berries break down and the mixture starts bubbling, about 5 to 7 minutes. You can mash the berries a bit with a spoon if you want a smoother layer.
- In a small bowl, stir together the 1 tbsp cornstarch and 2 tbsp water to make a slurry.
- Stir the slurry into the bubbling raspberry mixture. Cook 30 to 60 seconds more, until it turns glossy and thickened.
- Pour the raspberry layer into a bowl and let it cool for 10 to 15 minutes, stirring once or twice so it cools evenly.
Important: Cool the raspberry layer before assembling. If it’s hot, it can melt into the batter and you’ll lose that pretty, defined ribbon. We want spoonable, not watery.
If you like seeing the exact thickness you’re aiming for, my post on thick, glossy raspberry filling explains the visual cues in a really straightforward way.
Assemble, Bake, Cool, Then Glaze
- Spoon about two-thirds of the lemon batter into the prepared pan and spread it into an even layer.
- Dollop the cooled raspberry mixture over the batter. Use a spoon to spread it gently, leaving a small border near the edges if you can.
- Dollop the remaining lemon batter over the raspberry layer. Gently spread it, or leave it in soft patches for a marbled look. (Either way tastes great.)
- Bake for 28 to 34 minutes, until the edges look set and lightly golden and the center no longer looks wet.
- Cool completely in the pan on a rack. Then refrigerate for at least 2 hours before glazing and slicing.
Timing Plan: Cool in pan, chill in fridge, glaze, then slice.
Troubleshooting nudge: If the top starts browning too quickly, loosely tent with foil for the last few minutes. And remember, these are meant to be soft. Overbaking is the fastest way to lose that Raspberry Lemon Blondies tenderness.
Eva’s Note: The first time I made these, Noah hovered like a tiny food critic and asked, “Is the pink part jam?” When I said yes, he tried to negotiate for “just the corner pieces” because they have the most glaze. Now I bake with a little extra parchment overhang because I know I’m going to be lifting the whole slab out like a bakery tray, guarding the corners with my life.
If you love the lemonade vibe but want something layer-cake festive, I also make a lemonade-style cake for summer celebrations when we’re doing birthdays or backyard parties.
Glaze Options (Drizzle or Smooth Layer)
This lemon glaze for dessert bars is simple, but it’s the finishing touch that makes the whole pan look bright and polished. The only rule is this: glaze only when fully cool. If the bars are even a little warm, the glaze melts and disappears like it never existed.
- Drizzle (casual and quick): Mix 1 cup powdered sugar with 2 tbsp lemon juice and ½ tsp vanilla. Drizzle with a spoon for that relaxed, bakery-drip look.
- Smooth layer (party-pretty): Use closer to 2½–3 tbsp lemon juice so it spreads easily. Pour it on and gently smooth with the back of a spoon.
If you want to dress them up, a little extra lemon zest on top is pretty, or you can press a few crushed raspberries into the glaze while it’s still wet.
For another berry topping idea on other bakes, my thick, glossy raspberry filling page is already linked above for texture, but if you’re ever in frosting mode, that buttercream post is a fun one to keep around too.
Make-Ahead + Serving Ideas for Summer Tables
These are made for summer tables, especially when you want something bright that can sit in a cooler bag for a bit and still look cute. I usually make them the night before, chill them while I’m setting out plates, and by the time guests arrive, the bars practically slice themselves.
- Make-ahead: Bake, cool, and chill overnight. Glaze the next day for the freshest look.
- Cut sizes: Cut into 16 squares for generous portions, or 24 squares for a dessert tray.
- Garnish ideas: lemon zest curls, a few fresh raspberries, or a light dusting of powdered sugar (skip if you already glazed).
- Transport tip: Keep them chilled, and bring a sharp knife plus a few napkins. Someone always wants “just one more piece.”
For a dessert spread, I like pairing these with another easy dessert bar for a party tray so you’ve got two totally different flavors but the same easy, slice-and-serve vibe.
Common Mistakes (And How to Avoid Them)
I’ve rushed these before, I’ve overmixed, I’ve tried to cut them warm, and I can confirm that the bars will still get eaten. This Raspberry Lemonade Bar Recipe is forgiving, and a good glaze covers a multitude of little sins.
- Runny raspberry layer: Simmer a little longer and let it cool before layering.
- Bars look dry: They likely baked too long. Pull them when the center looks set, not jiggly.
- Glaze melts into the top: The bars were still warm. Cool completely, then chill.
- Messy slices: Chill longer, wipe your knife between cuts, and use the parchment sling to lift.
- Top cracks or sinks: Avoid overbaking and don’t overmix once the flour goes in.
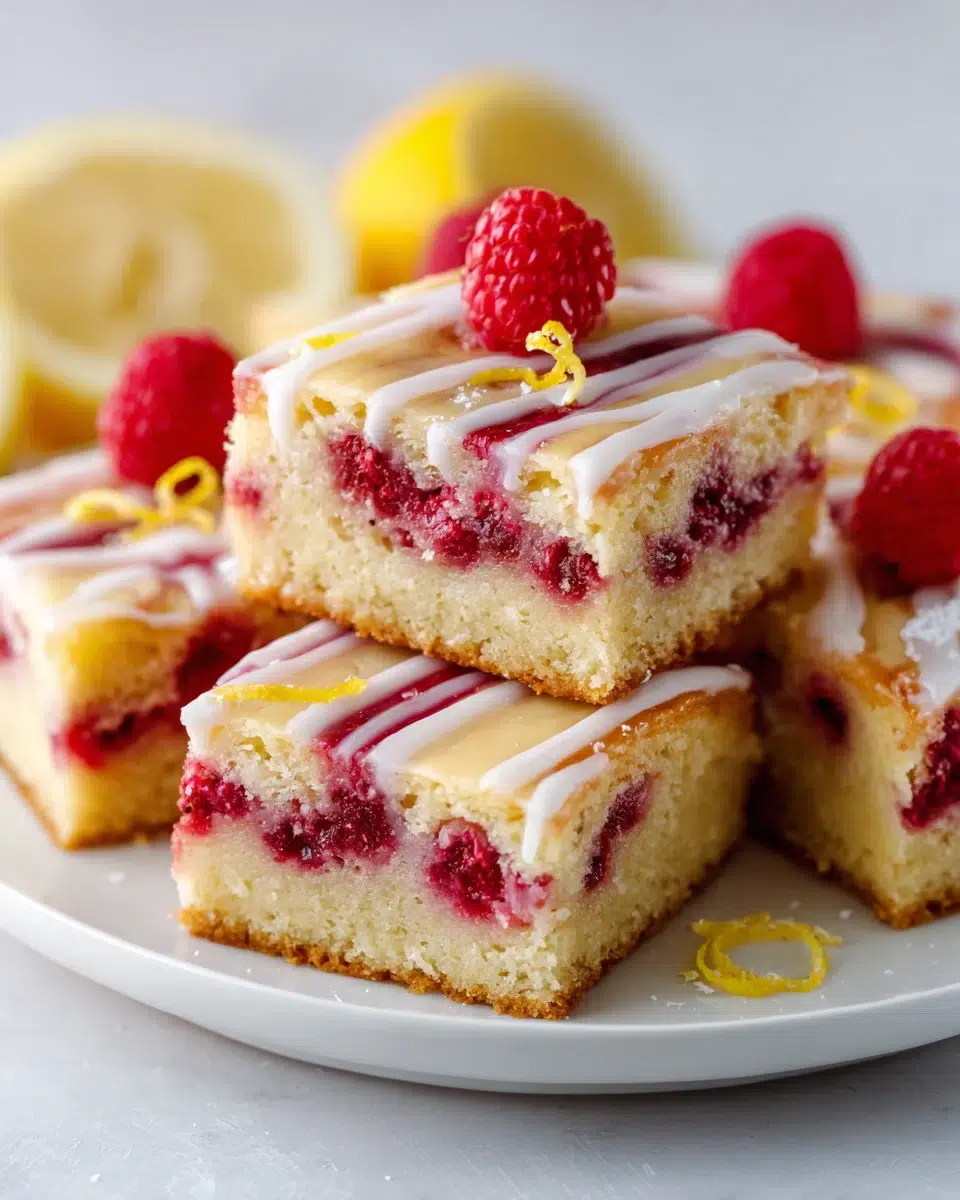
Frequently Asked Questions about Raspberry Lemonade Bars
Q: How do you store Raspberry Lemonade Bars and how long do they last?
✅ Answer: Store the bars in an airtight container in the refrigerator so the lemon layer stays firm and the raspberry layer stays neat. They’re best within 3–4 days for the brightest flavor and cleanest texture. If stacking, place parchment between layers to keep the glaze tidy.
💡 Personal Detail: I swear the lemon scent gets even more “lemonade-like” after a night in the fridge.
Q: Can Raspberry Lemonade Bars be frozen with the glaze?
✅ Answer: Yes—freeze them in a single layer until firm, then wrap well and store in a freezer-safe container. For the prettiest top, freeze with parchment between layers so the glaze doesn’t stick. Thaw overnight in the refrigerator for the cleanest slices.
💡 Personal Detail: I’ve pulled these out for a last-minute get-together, and they taste extra refreshing served cold.
Q: Can I use frozen raspberries instead of fresh raspberries?
✅ Answer: Yes. Thaw first, then drain off excess liquid before cooking the raspberry layer. Frozen berries can be juicier, so you may need an extra minute or two of simmering to reach a thick, spoonable consistency.
💡 Personal Detail: That jammy smell when the berries start to bubble and deepen in color is the best clue you’re on the right track.
Q: What can I use instead of buttermilk in Raspberry Lemonade Bars?
✅ Answer: Whole milk works well and keeps the crumb tender. If you want a similar tang, stir 1 tablespoon lemon juice into ½ cup milk, let it sit 5 minutes, then use it in the batter.
💡 Personal Detail: That tiny bit of tang makes the bars taste like a tall glass of lemonade.
Q: How do I thicken the raspberry layer if it seems runny?
✅ Answer: Keep simmering to evaporate extra moisture, stirring often. If it still looks loose, mix 1 teaspoon cornstarch with 1 teaspoon water and stir it in while the berries are bubbling; cook 30–60 seconds more until glossy and thick. Let it cool—it will set more as it cools.
💡 Personal Detail: When it coats the back of a spoon, you’re there.
Q: How do I know when Raspberry Lemonade Bars are done baking?
✅ Answer: The edges should look set and lightly golden, and the center should no longer look wet or jiggly—just a gentle, set bounce. A toothpick inserted into the lemon portion should come out mostly clean (a few moist crumbs are fine). Avoid overbaking, which can dry the bars.
💡 Personal Detail: I watch for that tiny shimmer to disappear from the center.
Q: Can I make Raspberry Lemonade Bars in a slow cooker, and how long would they take?
✅ Answer: You can, but the texture will be softer and more cake-like than oven-baked bars. Line the cooker with parchment, cover with a clean towel under the lid to catch condensation, and cook on low until the center is set—typically 2 to 3 hours depending on your model. Chill well before slicing.
💡 Personal Detail: It’s a cozy, hands-off feeling when the kitchen is busy and the slow cooker quietly does the work.
Q: How do you reheat Raspberry Lemonade Bars (or should they be served chilled)?
✅ Answer: These are best served chilled or at cool room temperature for the cleanest layers and brightest flavor. If you prefer them slightly warm, let a square sit out for 10–15 minutes; avoid microwaving long, which can soften the glaze and make the layers slide.
💡 Personal Detail: A cold bar tastes extra bright on a hot afternoon.
Q: Why did my lemon layer crack or sink after baking?
✅ Answer: Cracking can happen from overbaking or cooling too quickly; sinking can happen if the center wasn’t fully set or if the batter was overmixed. Bake just until set, cool in the pan, and avoid vigorous mixing once the flour goes in. Chilling also helps the bars firm up and look smooth.
💡 Personal Detail: Even imperfect tops disappear under a pretty lemon glaze.
Closing Thoughts
If you need a little burst of sunshine in dessert form, Raspberry Lemonade Bars are it. They’re bright without being fussy, buttery without being heavy, and the glaze makes them feel special even on an ordinary Tuesday. Pop them in the fridge, slice them cold, and enjoy that sweet-tart “lemonade stand” feeling right from your own kitchen.
Thank you for cooking with me, it means more than you know.
Come hang out with me over on Pinterest for more cozy, family-friendly recipes.
Print
Raspberry Lemonade Bars (Glazed, Bright & Buttery)
- Total Time: 54 minutes
- Yield: 16 servings 1x
- Diet: Vegetarian
Description
Raspberry Lemonade Bars are soft, buttery dessert bars with a tangy lemon base, a fresh raspberry layer, and an easy lemon-vanilla glaze. They are perfect for warm weather days, cheerful and easy to slice and share.
Ingredients
1 cup unsalted butter, softened
1¾ cups granulated sugar
4 large eggs, room temperature
2 tbsp fresh lemon zest
¼ cup fresh lemon juice
1 tsp vanilla extract
2½ cups all-purpose flour
1 tsp baking powder
½ tsp salt
½ cup whole milk or buttermilk
3 cups fresh raspberries
½ cup granulated sugar
2 tbsp lemon juice
1 tbsp cornstarch
2 tbsp water
1 cup powdered sugar
2–3 tbsp lemon juice
½ tsp vanilla extract
Instructions
1. Preheat your oven to 350°F. Line a 9×13-inch pan with parchment, leaving an overhang on two sides. Lightly spray the pan first so the parchment sticks in place.
2. In a large bowl, add the 1¾ cups sugar and 2 tbsp lemon zest. Use your fingertips to rub the zest into the sugar for about 30 seconds, until the sugar feels slightly damp and smells intensely lemony.
3. Add the softened 1 cup butter and beat until light and fluffy, about 2 minutes.
4. Beat in the 4 eggs, one at a time, mixing just until smooth after each.
5. Mix in the ¼ cup lemon juice, 1 tsp vanilla, and optional lemon extract if using.
6. In a separate bowl, whisk together the 2½ cups flour, 1 tsp baking powder, and ½ tsp salt.
7. Add the dry ingredients to the wet ingredients and mix on low just until you don’t see dry flour.
8. Pour in the ½ cup milk or buttermilk and mix gently until the batter is smooth.
9. In a small saucepan, add the 3 cups raspberries, ½ cup sugar, and 2 tbsp lemon juice.
10. Cook over medium heat, stirring often, until the berries break down and the mixture starts bubbling, about 5 to 7 minutes.
11. In a small bowl, stir together the 1 tbsp cornstarch and 2 tbsp water to make a slurry.
12. Stir the slurry into the bubbling raspberry mixture. Cook 30 to 60 seconds more, until it turns glossy and thickened.
13. Pour the raspberry layer into a bowl and let it cool for 10 to 15 minutes, stirring once or twice so it cools evenly.
14. Spoon about two-thirds of the lemon batter into the prepared pan and spread it into an even layer.
15. Dollop the cooled raspberry mixture over the batter. Use a spoon to spread it gently, leaving a small border near the edges if you can.
16. Dollop the remaining lemon batter over the raspberry layer. Gently spread it, or leave it in soft patches for a marbled look.
17. Bake for 28 to 34 minutes, until the edges look set and lightly golden and the center no longer looks wet.
18. Cool completely in the pan on a rack. Then refrigerate for at least 2 hours before glazing and slicing.
Notes
Store the bars in an airtight container in the refrigerator for up to 3–4 days. If stacking, place parchment between layers to keep the glaze tidy. For freezing, freeze them in a single layer until firm, then wrap well and store in a freezer-safe container.
- Prep Time: 20 minutes
- Cook Time: 34 minutes
- Category: Dessert
- Method: Baked
- Cuisine: American
Nutrition
- Serving Size: 1 bar
- Calories: 220
- Sugar: 28
- Sodium: 120
- Fat: 10
- Saturated Fat: 6
- Unsaturated Fat: 3
- Trans Fat: 0
- Carbohydrates: 30
- Fiber: 2
- Protein: 3
- Cholesterol: 55