
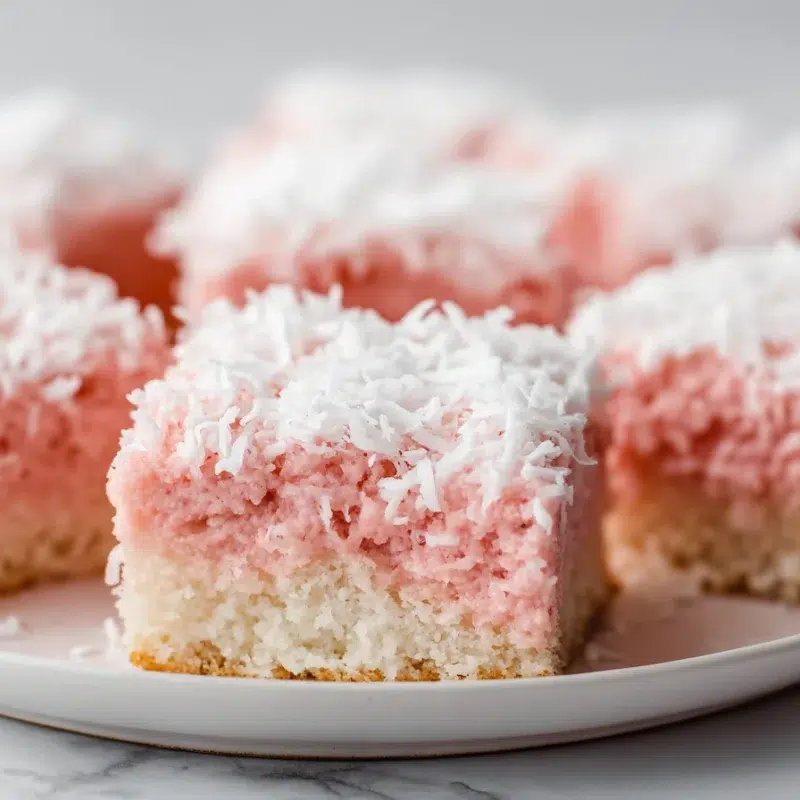
If you need a dessert that disappears fast, these Pink Coconut Snowball Cake Bars are it. They’re soft and chocolatey underneath, topped with a cool, creamy coconut topping, then finished with a snowy blanket of coconut. The whole thing feels like a little spring party dessert miracle that you can slice, stack, and serve without juggling a layer cake.
I first made a version of these for an Easter brunch table when my kids were little and everything felt like it needed to be pastel and “cute.” I was also tired, because that is basically the Easter season for moms. Bars saved me. No fancy decorating, no leaning cake layers, no stress. Just a pan of fluffy desserts that look party-ready the minute you add that coconut “snow.”
Pull-quote: This is the pink snowball dessert that eats like a pillow and travels like a champion.
- Soft, tender base with a cocoa-kissed flavor
- Creamy condensed milk coconut bars style topping
- Easy to slice and serve for showers, potlucks, and school events
- The coconut finish gives that classic coconut snowball cake vibe
What “Snowball” Texture Means (And How to Get It Every Time)
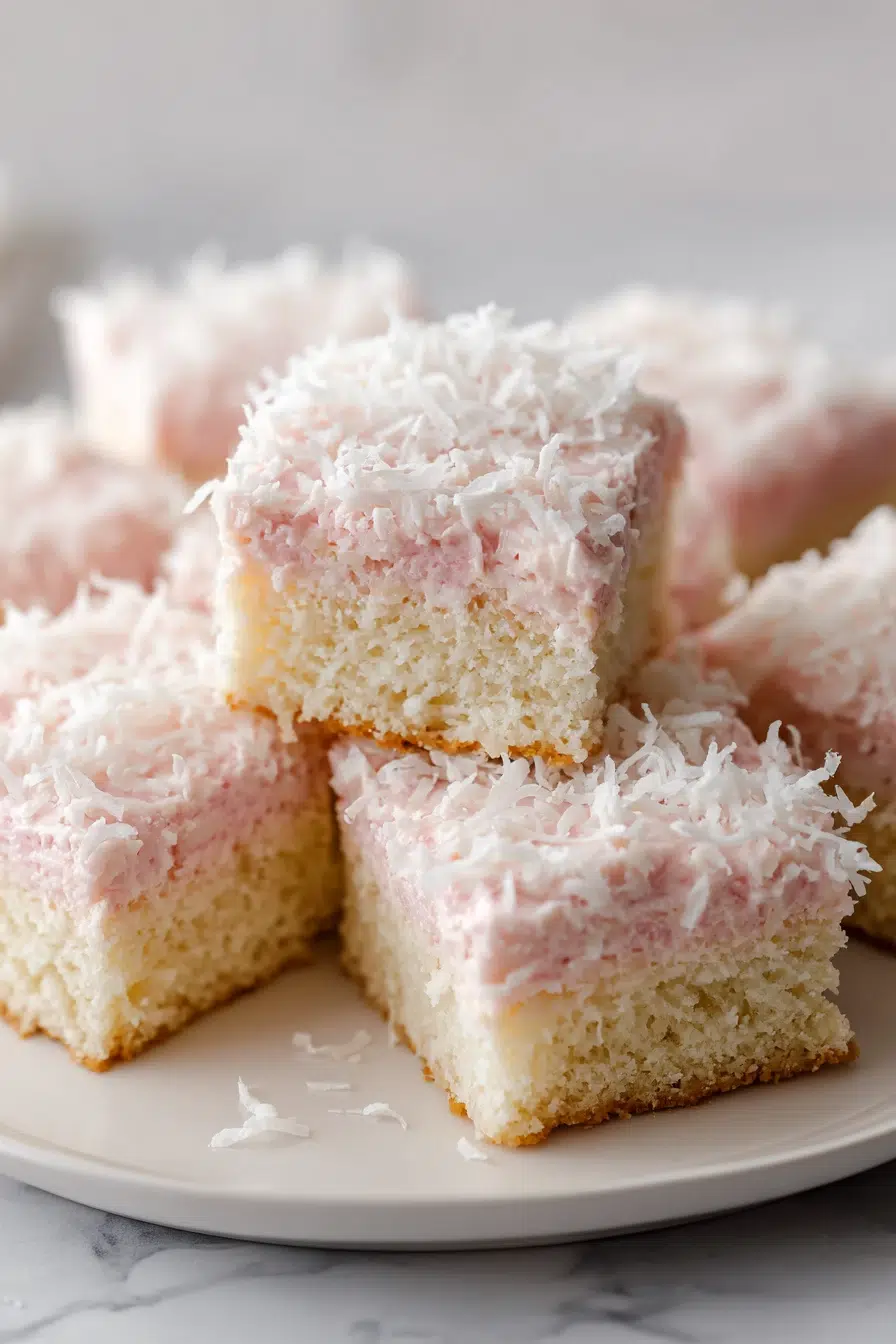
When I say “snowball,” I mean three layers of texture working together. First, a fluffy cake base that’s tender, not dense. Then a cool, creamy coconut topping that spreads like a cloud. And finally, that coconut finish on top that makes it look like a little snow drift, which is exactly why these pink coconut dessert bars get grabbed first on a dessert table.
The magic is the contrast. The cake is soft and springy, and the topping is creamy and chilled. That chill time is not just for temperature, it’s for structure. Once the topping sets, you get clean slices that don’t slump or smear, which matters when kids are hovering and guests are waiting with plates in hand.
- Snowball Checklist
- Soft base (tender crumb, not overbaked)
- Stable topping (whipped to soft peaks, then chilled)
- Coconut finish (even layer, gently pressed)
Ingredients You’ll Need (Plus Smart Coconut & Color Choices)
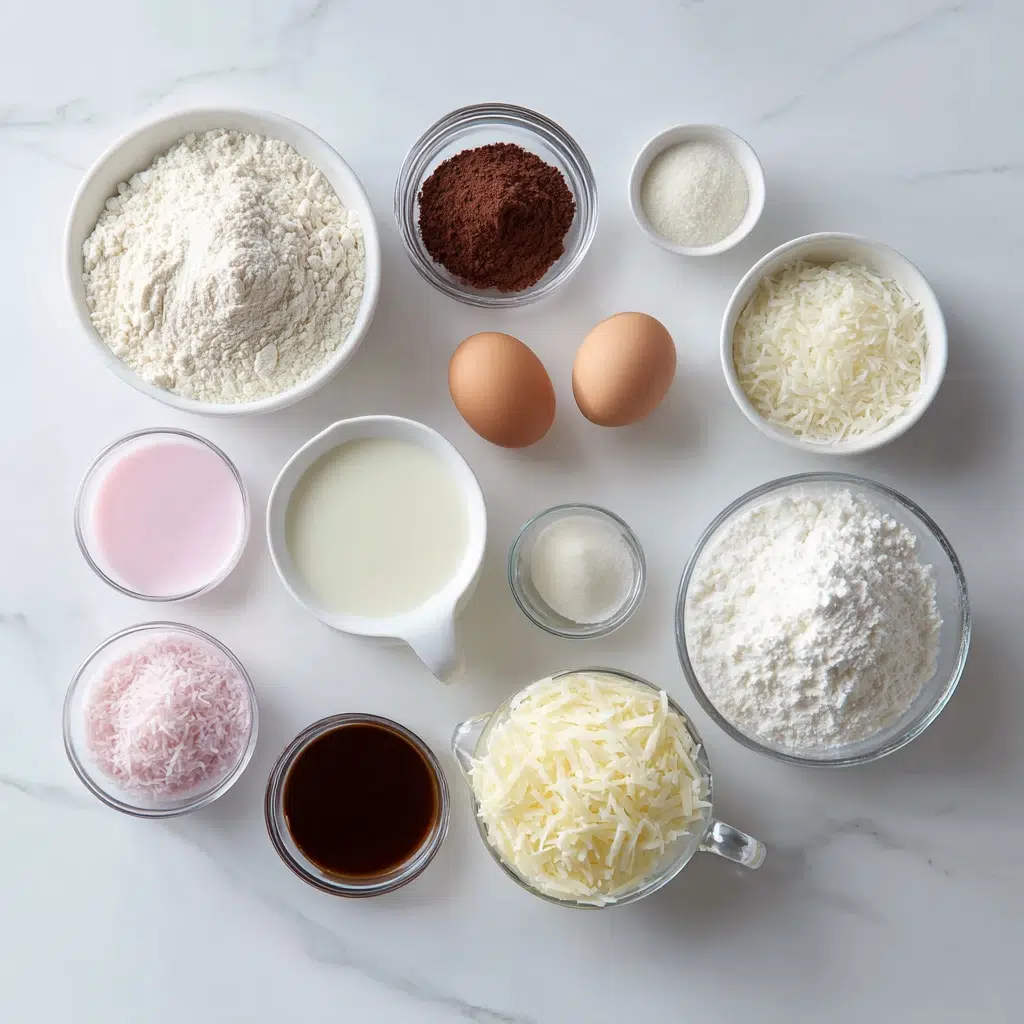
This is a pantry-friendly recipe, which is my favorite kind when life is busy. Most of these ingredients are things you might already have, and the rest are easy to grab on a quick grocery run. The key is using them in a way that keeps the bars light, creamy, and party-pretty.
- 1 cup all-purpose flour, spoon and level for the fluffiest coconut cake bars
- 1 cup granulated sugar, sweetens the base without making it heavy
- ⅓ cup cocoa powder, gives a gentle chocolate flavor that plays so well with coconut
- 1 teaspoon baking powder, helps the base rise and stay tender
- ¼ teaspoon salt, balances sweetness
- 2 large eggs, for structure and that soft cake bite
- ½ cup milk, keeps the crumb moist
- ½ cup vegetable oil or melted butter, oil stays extra moist, butter adds richer flavor
- 1 teaspoon vanilla extract, warms everything up
- 1 cup sweetened condensed milk, the heart of that creamy coconut topping
- 2 cups shredded coconut, for mixing and finishing (this is where the “snow balls recipe” look really happens)
- 1 cup heavy whipping cream, whipped into soft peaks for a cloudlike layer
- ½ cup powdered sugar, stabilizes and sweetens the topping
- 3–4 drops pink food coloring, optional but fun for a spring party dessert vibe
- Pastel vs Bright Pink
- Pastel: start with 1 drop, mix, then decide
- Party-bright: build slowly, drop by drop, so you don’t overmix
- If you want a no food coloring snowball look, skip it and lean into the white-on-white coconut finish
Sweetened vs Unsweetened Coconut (And Toasted or Not?)
I usually reach for sweetened shredded coconut for these Pink Coconut Snowball Bars because it gives that classic party-dessert feel. Kids especially love it, and it plays nicely with the creamy condensed milk coconut bars topping. That said, you’ve got options depending on who you’re feeding and how sweet you like your desserts.
- Sweetened coconut: softer texture, sweeter finish, very “snowball” classic
- Unsweetened coconut: a little more coconut-forward and less sweet overall
- Toasted coconut (optional): adds a cozy, nutty aroma and a bit more texture, great if you want a slightly more grown-up twist
If you toast it, let it cool completely before topping the bars. Warm coconut can soften the creamy coconut topping and make it harder to get that clean snowball finish.
How to Make Pink Coconut Snowball Cake Bars (Step-by-Step)
These bake up in one pan, then you build the topping while the base cools. It’s very “don’t stress” baking, which is exactly what I need when I’m making an easy party dessert between school pickup and whatever is happening at 7 p.m. that I forgot to write down.
- Prep your pan and oven. Heat the oven to 350°F. Line a 9×13-inch pan with parchment paper, leaving overhang on the sides for a parchment sling. Lightly grease the parchment.
- Mix the dry ingredients. In a medium bowl, whisk together the flour, sugar, cocoa powder, baking powder, and salt. Break up any cocoa lumps so the base bakes evenly.
- Mix the wet ingredients. In a large bowl, whisk the eggs, milk, vegetable oil (or melted butter), and vanilla extract until smooth.
- Combine gently. Add the dry ingredients to the wet ingredients and stir just until you don’t see dry streaks. The batter should look smooth and pourable. Visual cue: If you keep mixing after it looks combined, the bars can lose that fluffy desserts texture.
- Bake the cake base. Pour the batter into the prepared pan and spread evenly. Bake for 18–24 minutes, or until a toothpick comes out with a few moist crumbs (not wet batter). Visual cue: The top should look set and spring back lightly when touched.
- Cool completely. Let the cake base cool in the pan. Then lift it out using the parchment sling and let it cool fully on a rack if you can. Visual cue: The base should feel room temperature all the way through before topping.
- Whip the cream to soft peaks. In a cold bowl, whip the heavy whipping cream and powdered sugar until soft peaks form. Visual cue: When you lift the whisk, the peak should droop gently. This is the sweet spot for spreading.
- Make the coconut topping. In another bowl, stir together the sweetened condensed milk and 1 cup of the shredded coconut. Fold in the whipped cream gently until you have a fluffy, creamy coconut topping. Save the remaining 1 cup coconut for the top.
- Add pink color (optional). If you want the pink snowball dessert look, add the pink food coloring to the topping and fold gently until even. Keep it light-handed so you don’t deflate the fluff.
- Spread gently. Spoon the topping over the cooled cake base and spread in an even layer. Visual cue: Use a light touch, like you’re frosting a pillow, not pressing down on it.
- Finish with coconut “snow.” Sprinkle the remaining shredded coconut evenly over the top. Press very gently with clean hands or the back of a spoon so it sticks.
- Chill for structure. Cover and refrigerate for at least 2 hours, or until the topping feels set. This is what turns coconut cake bars into neat, party-perfect squares.
If you love the whole pink-and-pretty dessert table vibe, you might also want my pink velvet cake for another soft, spring-ready option.
- Troubleshooting while you go
- If the base seems dry, it likely baked a bit long. Pull it when you see moist crumbs.
- If the topping feels loose, chill it 10 minutes, then whip or fold again.
- If the coconut won’t stick, your topping may be too cold. Let it sit 5 minutes, then sprinkle and press gently.
Eva’s Note: The first time I made these for a school spring event, my son Noah tried to “taste test” the topping with a spoon and called it “coconut frosting clouds.” I did not correct him, because honestly, he nailed it.
Important tip: Cool the cake base completely before topping. If the base is even a little warm, the topping can loosen and slide. Cooling is the quiet step that makes everything look bakery-neat.
Pink Color Control (Pastel to Party-Bright)
Color is one of those things that can get away from you fast. I start with the tiniest drop and build slowly, especially when I’m aiming for that soft spring pink that fits right in with Easter cakes ideas and baby shower tables.
- Add 1 drop of pink food coloring to the topping, then fold gently.
- Check the color in good light, then add another drop only if needed.
- Stop as soon as it looks a shade lighter than you want, it deepens slightly as it sits.
Make-Ahead & Party Prep Timeline (Chill Time, Pan Size, Transport)
These are made for real life hosting, the kind where you’re also making coffee, finding matching socks, and wiping little fingerprints off the serving platter. Chilling is your best friend here. It helps the topping set, makes clean slices, and keeps the bars sturdy for transport.
- T-24 hours: Bake the base, cool completely, add topping and coconut finish, then chill covered overnight.
- T-6 hours: If you’re short on time, chill at least 2–4 hours so the topping firms up.
- T-1 hour: Slice, then re-chill in a single layer if you want the neatest edges for a dessert tray.
For pan size, a 9×13 is the easiest party format. If you want thicker bars, you can use a smaller pan, just expect a longer bake time. For transport, I keep the bars in the pan, cover tightly, and slice on site if I can.
If you’re building a whole make-ahead spread, my no-bake strawberry cheesecake lasagna is another great option that plays nicely with spring flavors.
Clean Slices Every Time (No Smeared Topping)
This is the trick I use when I want bakery-style squares, especially for pink coconut dessert bars that have a soft topping. The goal is to cut through the chilled topping without dragging it across the surface. It’s not hard, it just takes a couple small steps that save you a lot of frustration.
- Chill thoroughly. Cold bars slice cleaner, period.
- Lift with a parchment sling. Pull the whole slab out and set it on a cutting board so you’re not chasing corners around the pan.
- Use a long sharp knife. Wipe it clean between cuts.
- For extra-clean edges: Warm the knife under hot water, dry it, then slice.
- Tools I reach for
- Parchment paper
- Large cutting board
- Long chef’s knife
- Clean kitchen towel for wiping the knife
Easy Variations (Chocolatey, Vanilla-Forward, or Coconut Crunch)
These bars are flexible, which is helpful when your family has opinions. In my house, Lily wants things “pretty and classic,” Noah wants more chocolate, and Emma wants whatever has the most sprinkles, which we are not doing today. Here are a few variations that still keep that coconut snowball cake feel.
- Vanilla-Forward: Add ½–1 teaspoon extra vanilla extract to the cake batter for a warmer, bakery-style flavor.
- More Chocolatey Bite: Fold ¼–½ cup mini chocolate chips into the batter right before baking.
- Toasted Coconut Finish: Swap ½ cup of the topping coconut for toasted shredded coconut (cool it first) for a slightly nutty, cozy twist.
- Coconut Crunch: Add a thin layer of extra shredded coconut on top and press gently, then chill longer so it sets into a slightly firmer bite.
- Extra “Coconut Cream Dream Bars” Energy: Use coconut cream in place of some of the whipped cream (see FAQ for tips), it boosts coconut flavor in a big way.
Serving Ideas for Spring & Easter (Garnishes + Dessert Tray Pairing)
These are best served chilled or just slightly cool. I like to pull them from the fridge about 10 minutes before serving so the cake softens a touch, but the topping still holds its shape. That’s when the coconut aroma pops and the texture feels the most “snowball.”
- Easy garnish ideas
- A light extra sprinkle of coconut right before serving
- A few pastel candies on the platter (not on the bars, unless you love chaos)
- A dusting of powdered sugar for an extra snowy look
- Simple dessert tray plan
- Pink Coconut Snowball Cake Bars
- Fresh berries or sliced strawberries
- A cake centerpiece like strawberry shortcake cake
Frequently Asked Questions about Pink Coconut Snowball Cake Bars
Q: How do you keep Pink Coconut Snowball Cake Bars fluffy and not dry?
Answer: Measure flour with a light hand (spoon and level), avoid overmixing once the dry ingredients go in, and pull the cake base as soon as a toothpick comes out with a few moist crumbs. Let the base cool fully before adding the topping so it stays tender and doesn’t steam. I love the springy feel when you press the cooled cake lightly with a fingertip.
Q: Can I make Pink Coconut Snowball Cake Bars ahead of time for a party?
Answer: Yes, these are ideal for making ahead because chilling helps the topping set and makes cleaner slices. Make them the day before, chill covered, then cut right before serving (or cut, then re-chill in a single layer). I’ve definitely prepped these the night before a brunch, right after I set the coffee mugs out, because morning Eva is not to be trusted with frosting.
Q: How do I thicken the coconut topping if it seems too runny?
Answer: Chill the topping mixture for 10–15 minutes, then whip again to build structure. If it’s still loose, add a little more powdered sugar (a few tablespoons at a time) and whip until it holds soft peaks. Also make sure the heavy whipping cream is very cold before whipping. You’ll see the moment it changes from glossy and loose to pillowy.
Q: Can I substitute the heavy whipping cream with whipped topping or coconut cream?
Answer: You can use whipped topping for a quicker, very stable finish, or coconut cream for a stronger coconut flavor. If using coconut cream, chill it well and whip only the thick portion for the best texture. Coconut cream also makes the kitchen smell extra coconutty the second you open the can.
Q: How long do Pink Coconut Snowball Cake Bars last in the fridge, and can you freeze them?
Answer: They keep well in the fridge for about 4–5 days, tightly covered. For freezing, freeze bars in a single layer until firm, then wrap and store airtight for up to 2 months. Thaw overnight in the fridge for the neatest texture. I like stashing a few squares for late-night tea later in the week.
Q: What’s the best way to cut cake bars cleanly without smearing the topping?
Answer: Chill the bars thoroughly, lift them out using a parchment sling, and use a long sharp knife wiped clean between cuts. For extra-clean edges, warm the knife under hot water, dry it, then slice. There is nothing more satisfying than that first perfect square coming off the knife.
Q: Can I make these cake bars in a slow cooker, and how long would it take?
Answer: Yes, line the slow cooker with parchment (or use a liner), then cook the cake base on low until set in the center (often 2–3 hours, depending on model). Let it cool completely before adding the topping, then chill to firm up for slicing. This is a lifesaver when the oven is already busy with holiday cooking.
Q: How do I reheat or serve these bars if they’ve been refrigerated?
Answer: These are best served chilled or just slightly cool. Let them sit at room temperature for 10–15 minutes before serving for the softest cake texture, but keep them out longer only if your room is cool and you’re serving soon. I swear the coconut aroma pops more after a few minutes on the counter.
Q: Can I make them without food coloring and still get a “snowball” look?
Answer: Absolutely, the snowball look comes from the creamy topping and coconut finish. Keep the topping bright and smooth, then add an even, generous coconut layer on top for that snowy effect. I’ve made a white-on-white version for a simple, classic dessert tray, and it still looks special.
If you’re looking for a sweet little spring win, Pink Coconut Snowball Cake Bars are the kind of dessert that makes you feel like you pulled off something special, without making you work like it. Soft base, creamy coconut topping, snowy finish, and a pan full of smiles waiting in the fridge.
Thank you for cooking with me today, it means the world to have you here in my little NYC kitchen.
Come hang out with me on Pinterest for more cozy, party-friendly recipes you can save and make on your busiest days.
Print
Pink Coconut Snowball Cake Bars (Fluffy & Creamy)
- Total Time: 39 minutes
- Yield: 12 servings 1x
- Diet: Vegetarian
Description
Pink Coconut Snowball Cake Bars are fluffy cake bars topped with a creamy coconut layer, an easy party dessert perfect for spring and Easter. They’re soft and chocolatey underneath, topped with a cool, creamy coconut topping, then finished with a snowy blanket of coconut.
Ingredients
1 cup all-purpose flour
1 cup granulated sugar
⅓ cup cocoa powder
1 teaspoon baking powder
¼ teaspoon salt
2 large eggs
½ cup milk
½ cup vegetable oil or melted butter
1 teaspoon vanilla extract
1 cup sweetened condensed milk
2 cups shredded coconut
1 cup heavy whipping cream
½ cup powdered sugar
3–4 drops pink food coloring
Instructions
1. Prep your pan and oven. Heat the oven to 350°F. Line a 9×13-inch pan with parchment paper, leaving overhang on the sides for a parchment sling. Lightly grease the parchment.
2. Mix the dry ingredients. In a medium bowl, whisk together the flour, sugar, cocoa powder, baking powder, and salt. Break up any cocoa lumps so the base bakes evenly.
3. Mix the wet ingredients. In a large bowl, whisk the eggs, milk, vegetable oil (or melted butter), and vanilla extract until smooth.
4. Combine gently. Add the dry ingredients to the wet ingredients and stir just until you don’t see dry streaks. The batter should look smooth and pourable.
5. Bake the cake base. Pour the batter into the prepared pan and spread evenly. Bake for 18–24 minutes, or until a toothpick comes out with a few moist crumbs (not wet batter).
6. Cool completely. Let the cake base cool in the pan. Then lift it out using the parchment sling and let it cool fully on a rack if you can.
7. Whip the cream to soft peaks. In a cold bowl, whip the heavy whipping cream and powdered sugar until soft peaks form.
8. Make the coconut topping. In another bowl, stir together the sweetened condensed milk and 1 cup of the shredded coconut. Fold in the whipped cream gently until you have a fluffy, creamy coconut topping. Save the remaining 1 cup coconut for the top.
9. Add pink color (optional). If you want the pink snowball dessert look, add the pink food coloring to the topping and fold gently until even.
10. Spread gently. Spoon the topping over the cooled cake base and spread in an even layer.
11. Finish with coconut “snow.” Sprinkle the remaining shredded coconut evenly over the top. Press very gently with clean hands or the back of a spoon so it sticks.
12. Chill for structure. Cover and refrigerate for at least 2 hours, or until the topping feels set.
Notes
Cool the cake base completely before topping. If the base is even a little warm, the topping can loosen and slide. Chilling helps the topping set, makes clean slices, and keeps the bars sturdy for transport.
- Prep Time: 15 minutes
- Cook Time: 24 minutes
- Category: Dessert
- Method: Baked
- Cuisine: American
Nutrition
- Serving Size: 1 bar
- Calories: 320
- Sugar: 28
- Sodium: 120
- Fat: 18
- Saturated Fat: 12
- Unsaturated Fat: 5
- Trans Fat: 0
- Carbohydrates: 36
- Fiber: 2
- Protein: 4
- Cholesterol: 45