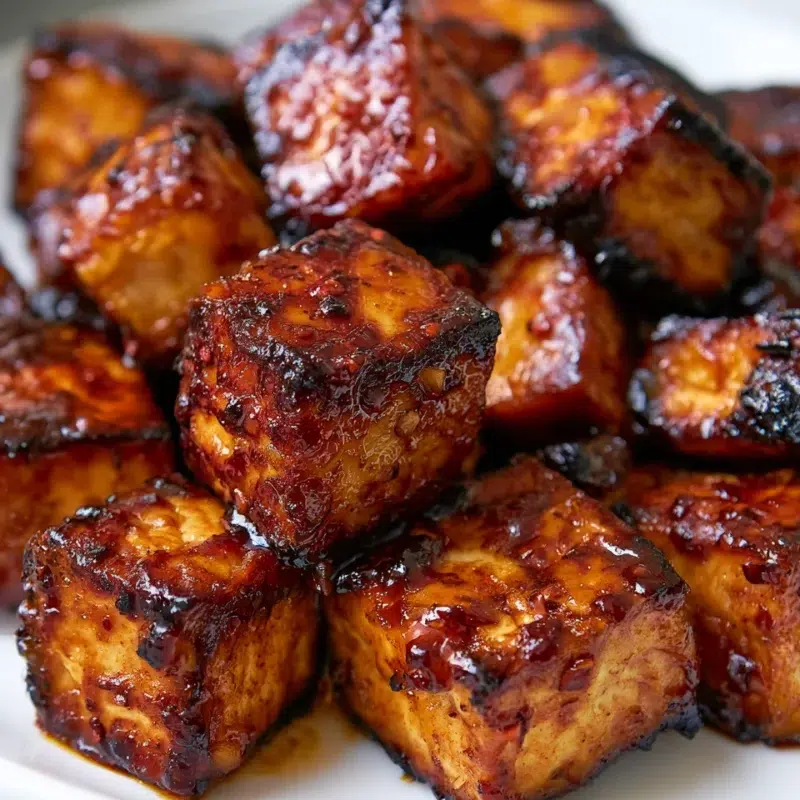
There are nights when I walk in the door, drop my bag, and the whole house feels like it’s asking the same question at once, “What’s for dinner?” This Skillet BBQ Tofu is the one I reach for when everyone’s hungry now, and I need something fast, satisfying, and not followed by a mountain of dishes. It’s crispy tofu in a skillet, then a quick toss in a sweet-smoky BBQ sauce that turns glossy and clingy in minutes.
I love that it fits right into our rotation of one pan vegan meals. Noah “taste tests” straight from the skillet, Emma asks for “just one more cube,” and Lily quietly builds herself a perfect little bowl like she’s running a tiny restaurant.
“When the sauce turns glossy, dinner’s basically done.”
Why This Skillet BBQ Tofu Works (Even If You’ve Had Soggy Tofu Before)
I used to think tofu was just… destined to be soft. Then I learned the hard way that I was sabotaging myself by adding sauce too early. The second a wet sauce hits tofu that hasn’t browned yet, the pan turns into a steamy situation, and that’s how you get the soggy bite that makes people swear off tofu forever.
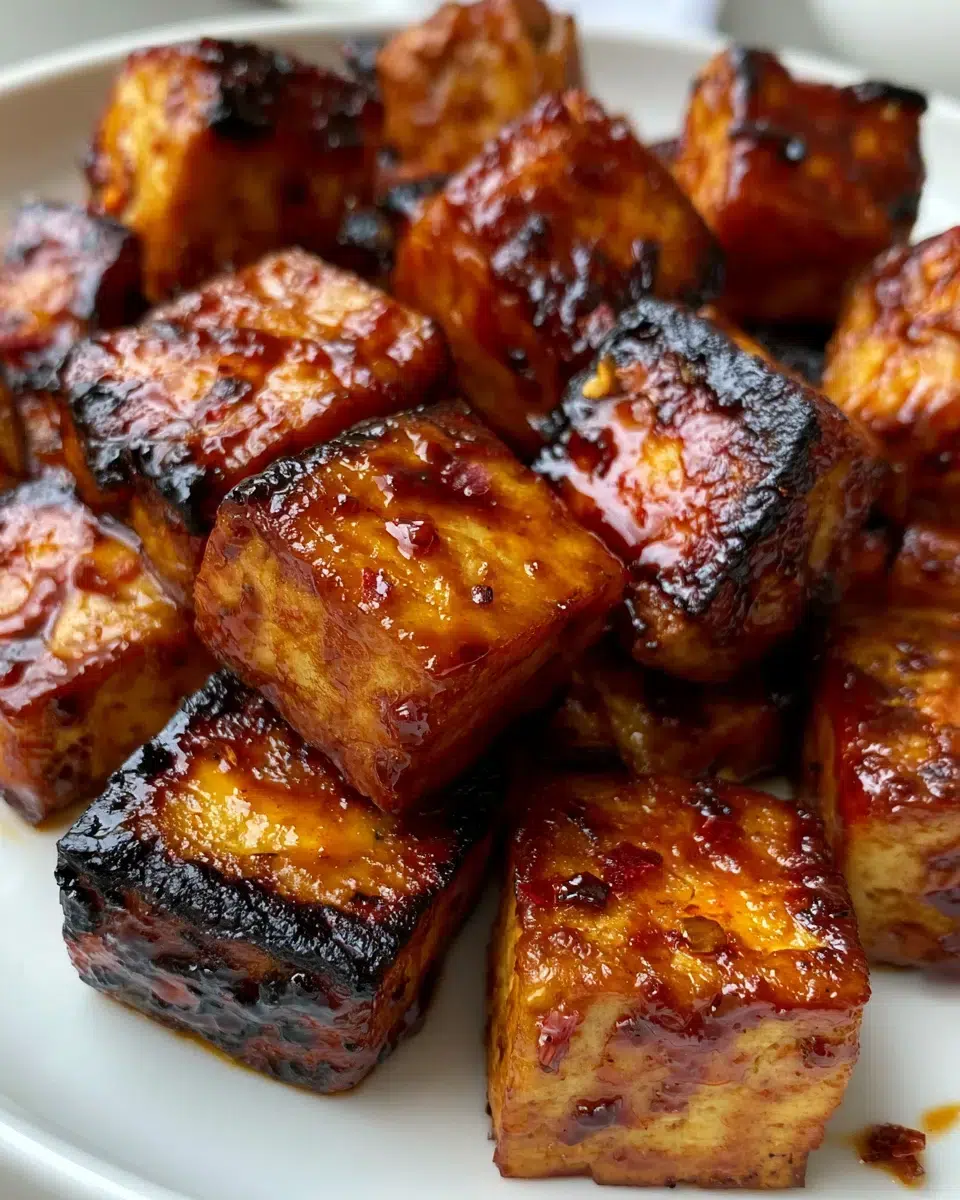
This BBQ tofu recipe is all about timing. You dry the tofu well, let it sear in a hot skillet, and only then do you add the sauce. When those edges brown, you’ll hear that steady sizzle and smell something almost nutty and toasty. That’s your sign you’re building flavor and texture that can actually stand up to sauce.
If you like having a second tofu option in your back pocket, I also share my other crispy tofu method, and the same “don’t rush the sear” rule applies there too.
- Dry surface first, less moisture means better browning.
- Hot pan, single layer, so you get a real crust (not steamed tofu).
- Sauce goes in last, so it turns sticky and shiny instead of watery.
Ingredients You’ll Need
This is an easy tofu dinner kind of ingredient list. Nothing fussy, mostly pantry staples, and you can adjust the heat depending on who’s eating. I usually grab a BBQ sauce that’s more smoky-sweet than spicy, then let the chili flakes wake everything up at the end. It’s one of my favorite quick dinner ideas vegetarian because it tastes like you tried harder than you did.
- 14 oz extra-firm tofu, drained
- 1 tbsp extra-virgin olive oil
- 1 tbsp sesame oil
- ¾ cup BBQ sauce
- 1 tbsp light soy sauce
- 1 tbsp chili flakes (or to taste)
- Sea salt, to taste (if needed)
Shopping tip: choose extra-firm tofu for best browning.
Optional add-ons:
- 1–2 cups quick-cooking vegetables (bell peppers, snap peas, zucchini), sautéed after tofu browns
- 1–2 tsp toasted seeds for crunch (sprinkle at the end)
Equipment (Keep It Simple)
You don’t need anything fancy here, just a skillet that holds heat well so you can get that crispy tofu in skillet texture. In my NYC kitchen, I reach for my everyday 12-inch skillet because it’s roomy enough to keep the tofu in a single layer, and it’s still easy to wash while the kids are doing their end-of-day swirl around the apartment.
- 12-inch skillet (nonstick or well-seasoned)
- Spatula or tongs
- Paper towels (or a clean kitchen towel)
How to Make Skillet BBQ Tofu (Step-by-Step)
Dry and cut the tofu. Drain the tofu, then pat it very dry with paper towels. I mean really dry, this is the quiet little step that pays off. Cut into bite-size cubes or rectangles (either works). If your BBQ sauce is already salty, hold off on adding salt until the end.
Eva’s tiny tip: If the tofu still feels damp after blotting, give it one more quick pat right before it hits the pan.
Heat the oils. Set a large skillet over medium-high heat. Add the olive oil and sesame oil. Once the oil shimmers, you’re ready.
Eva’s tiny tip: If the oil looks like it’s just sitting there dull and heavy, give it another 30 seconds. A hot pan matters.
Add tofu in a single layer. Place the tofu in the skillet, keeping pieces spaced out so they sear instead of steam. You should hear that immediate sizzle, that’s the sound of crispiness happening.
Don’t rush the first sear. Let the tofu cook undisturbed for 3 to 5 minutes, until the bottoms are deeply golden and the pieces release easily when nudged. This is the moment that makes the sauce taste even better later, because that browned edge is pure flavor.
Eva’s tiny tip: If you try to flip too soon and it sticks, it’s not ready. Give it another minute and it will let go.
Flip and brown the other sides. Turn the tofu and continue cooking for 5 to 7 minutes, flipping occasionally, until you’ve got browning on multiple sides. It doesn’t have to be perfect, just enough to build a crust.
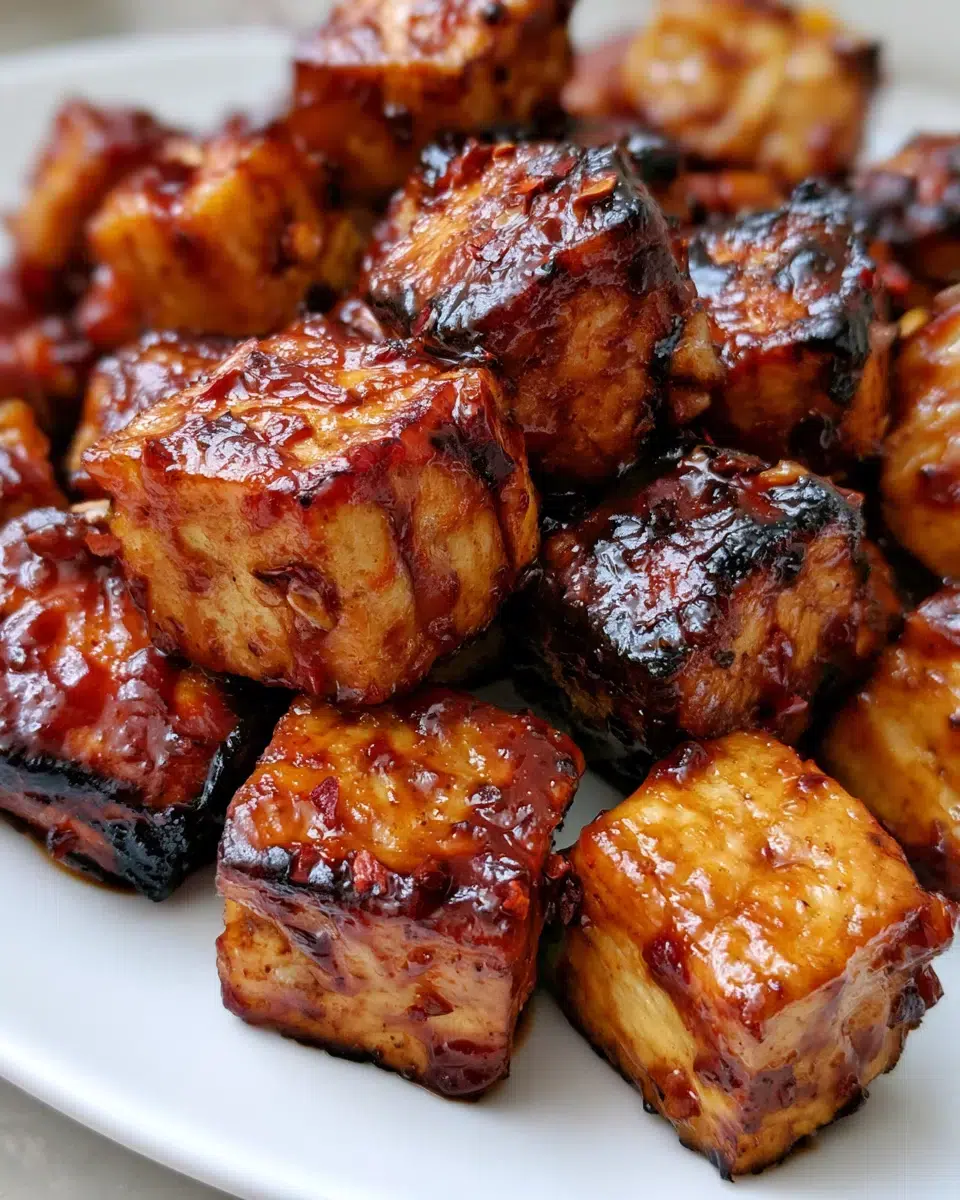
Add the sauce mixture. Lower the heat to medium. Pour in the BBQ sauce and soy sauce, then sprinkle in the chili flakes. Toss gently to coat every piece.
Eva’s tiny tip: Add sauce after the crust forms. If you sauce too early, you’ll steam away the crisp edges you worked for.
Simmer until glossy and clinging. Let everything simmer for 2 to 4 minutes, stirring and tossing gently, until the sauce thickens and hugs the tofu. If you’re adding quick-cooking veggies, this is a good time to stir them in so they stay crisp-tender.
Taste and adjust, then serve. Taste a piece. Add more chili flakes for heat, or a pinch of sea salt if it needs it (BBQ sauces vary a lot). Serve right away while the tofu is at its crispiest.
The “Glossy Coating” Moment (What You’re Watching For)
This is my favorite part, because it’s the exact second you know dinner is about to be great. The sauce starts out loose and a little puddly, then it reduces and turns shiny. The pan smells sweet-smoky, and you’ll see the tofu go from “sauced” to “sticky-glazed.” If your sauce won’t cling, don’t panic, it usually just needs a little more simmer time.
- The sauce looks shiny, not watery.
- When you drag a spatula through the pan, it leaves a quick trail that fills in slowly.
- The tofu looks lacquered, like each piece has a thin glaze.
Eva’s Note: The first time I nailed this, I was standing at the stove with one hand on the spatula and the other helping Emma with a school form she “forgot” to mention. The sauce turned glossy right as she said, “Mom, this smells like takeout.” I’ll take that compliment any day.
Serving Ideas (Make It a Full Meal)
This is where Skillet BBQ Tofu becomes one of those vegetarian one pan dinner heroes. You can keep it simple, or turn it into one of those lots of veggies meals that makes you feel like you really did something good for yourself today. In our house, bowls are the easiest, everyone builds their own, and nobody argues about toppings.
- Rice bowls: serve over jasmine rice or brown rice with cucumbers and shredded carrots.
- Big salad situation: pile onto crunchy greens with tomatoes and a handful of toasted seeds.
- Veggie-packed bowl: pair with Mediterranean roasted vegetables bowl for a colorful, filling dinner.
- Greens on the side: add a quick garlicky green side when you want something fresh and punchy.
- Taco night: tuck into tortillas with slaw and a squeeze of lime.
- Lettuce wraps: great for hot evenings when you want dinner to feel light.
If you want a simple sauce moment for drizzling, this pairs beautifully with Maple tahini salad dressing on the side, especially in bowls with lots of crunchy veggies.
Meal Prep & Storage Notes (So It Still Tastes Great Tomorrow)
This is one of my favorite vegan meal prep ideas because it holds up well and makes lunch feel like something you’d actually pay for. The key is packing it like a restaurant bowl, keep the warm stuff separate from the crunchy stuff. I’ve learned that if you toss everything together too soon, your greens get sad, and nobody needs that at 1 p.m.
For meal prep tofu recipes, I like shallow containers so the tofu cools faster and doesn’t steam itself into softness. Then I add fresh toppings right before eating.
- Cool completely before putting the lid on.
- Store tofu separately from fresh greens and crunchy toppings.
- Pack extra sauce on the side if you like it saucier.
- Add a quick drizzle of a creamy dressing for meal-prep bowls to make it feel extra filling.
Fridge: Store in an airtight container for 3 to 4 days.
Variations (Heat, Sweetness, and Hands-Off Options)
This Skillet BBQ Tofu is flexible, which is exactly what busy weeknights need. I make it milder when the kids are extra tired and picky, then I add more chili flakes at the table for the adults. Keep it reliable by sticking to the same method: crisp first, sauce second.
- Make it mild: start with a pinch of chili flakes, then add more later.
- Make it smoky: choose a smoky BBQ sauce and keep the soy sauce measured so it doesn’t overpower.
- Make it sweeter: use a sweeter BBQ sauce and add extra chili flakes to balance.
- Add quick veggies: toss in bell peppers, snap peas, or zucchini after tofu browns.
- Add crunch: finish with toasted seeds right before serving.
If you’re wondering about hands-off options like a sheet pan BBQ tofu dinner or slow cooker BBQ tofu, I’ve got you covered in the FAQ below.
Frequently Asked Questions about Skillet BBQ Tofu
Q: How do you make Skillet BBQ Tofu crispy?
Answer: Pat the tofu very dry, cut into even pieces, and cook in a hot skillet with enough oil to lightly coat the pan. Let the tofu sit undisturbed until it browns and releases easily, then flip to brown other sides. Add the sauce only after you’ve built that golden crust so the coating clings without steaming the tofu.
Personal Detail: Mention the “sizzle” when the tofu first hits the pan and the moment you see browned corners.
Q: Do you need to press tofu for Skillet BBQ Tofu?
Answer: Pressing helps if your tofu feels very wet or you want maximum browning, but you can still get great results by thoroughly blotting with paper towels and giving it a few extra minutes in the skillet to evaporate surface moisture. The key is a dry exterior and enough time to brown before saucing.
Personal Detail: Share your weeknight shortcut: blot well, then let the pan do the rest while you start a side dish.
Q: Can I use a different BBQ sauce (spicy, smoky, sugar-free)?
Answer: Yes, use any BBQ sauce you enjoy. Thicker sauces cling faster; thinner sauces may need a longer simmer to become glossy. If your sauce is very sweet, balance with a little extra chili flakes; if it’s very smoky, keep the soy sauce measured so it doesn’t overpower.
Personal Detail: Add a note about how your household likes it, mild for kids, extra heat for adults at the table.
Q: How do I thicken BBQ sauce for tofu if it’s too runny?
Answer: Let the sauce simmer in the skillet for a few minutes after adding it, stirring and tossing until it reduces into a shiny coating. Keep the heat at medium to avoid scorching, and spread tofu into a single layer so steam can escape. If it still looks thin, simmer a bit longer before serving.
Personal Detail: Describe the visual change from “saucy” to “sticky-glazed.”
Q: What can I substitute for sesame oil in Skillet BBQ Tofu?
Answer: You can use more olive oil, or another neutral high-heat cooking oil. You’ll still get crisp edges; the main difference is the flavor note, so consider finishing with toasted seeds or sliced scallions to add a little extra aroma.
Personal Detail: Mention a favorite finishing touch you keep on hand for busy nights.
Q: Can I bake this as a sheet pan BBQ tofu dinner instead of using a skillet?
Answer: Yes. Toss dried tofu pieces with oil, spread on a lined sheet pan, and bake until browned, flipping once for even crisping. Warm the BBQ sauce mixture separately or toss the tofu with sauce near the end, then return briefly to the oven so the coating sets without making the tofu soft.
Personal Detail: Share when you choose this method, when you want hands-off cooking while helping with homework.
Q: Can you make Skillet BBQ Tofu in a slow cooker, and how long would it take?
Answer: You can, but for best texture, brown the tofu first in a skillet, then add it to the slow cooker with the sauce mixture. Cook on low until heated through and the flavors meld, stirring gently once or twice. This method is more about convenience and flavor than crispiness.
Personal Detail: Mention using it for a potluck-style meal where the tofu stays warm for serving.
Q: How do you store leftover Skillet BBQ Tofu, and how long does it last?
Answer: Cool completely, then store in an airtight container in the refrigerator. It keeps well for about 3 to 4 days. For meal prep, store tofu separately from fresh greens or crunchy toppings so everything stays at its best.
Personal Detail: Add a lunchbox memory, opening the container and smelling that sweet-smoky BBQ aroma.
Q: What’s the best way to reheat BBQ tofu without it getting soggy?
Answer: Reheat in a hot skillet in a single layer so moisture can evaporate and the edges can re-crisp. A toaster oven also works well for bringing back texture. If using a microwave, heat in short bursts and vent the container to reduce steaming, then finish in a skillet if you have time.
Personal Detail: Mention your “two-minute skillet revive” habit before serving leftovers.
Whenever I need a dinner that feels cozy but doesn’t steal my whole evening, this Skillet BBQ Tofu is the answer. It’s fast, it’s flavorful, and it’s one of those one-pan wins that makes tomorrow’s lunch look just as good as tonight’s dinner. If you try it, I hope it brings a little calm to your busy night, and maybe a few sneaky bites straight from the skillet too.
Thank you for cooking with me, it means the world to have you here in my kitchen.
Come hang out with me on Pinterest for more cozy, weeknight-friendly ideas.
Print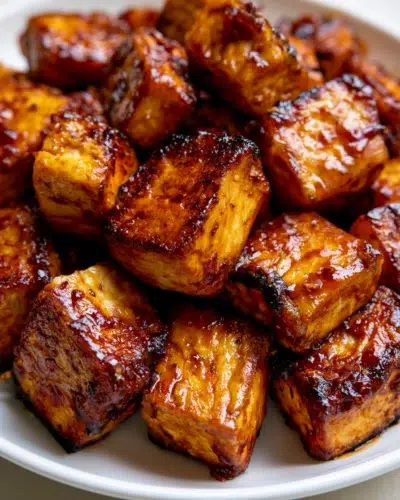
Skillet BBQ Tofu (Easy One-Pan Vegan Dinner)
- Total Time: 25 minutes
- Yield: 4 servings 1x
- Diet: Vegan
Description
Skillet BBQ Tofu is an easy one-pan vegan dinner with crispy tofu tossed in BBQ sauce, soy sauce, and chili flakes, great for quick weeknights and meal prep.
Ingredients
14 oz extra-firm tofu, drained
1 tbsp extra-virgin olive oil
1 tbsp sesame oil
¾ cup BBQ sauce
1 tbsp light soy sauce
1 tbsp chili flakes (or to taste)
Sea salt, to taste (if needed)
1–2 cups quick-cooking vegetables (optional)
1–2 tsp toasted seeds for crunch (optional)
Instructions
1. Dry and cut the tofu. Drain the tofu, then pat it very dry with paper towels. Cut into bite-size cubes or rectangles.
2. Heat the oils. Set a large skillet over medium-high heat. Add the olive oil and sesame oil. Once the oil shimmers, you’re ready.
3. Add tofu in a single layer. Place the tofu in the skillet, keeping pieces spaced out so they sear instead of steam.
4. Don’t rush the first sear. Let the tofu cook undisturbed for 3 to 5 minutes, until the bottoms are deeply golden.
5. Flip and brown the other sides. Turn the tofu and continue cooking for 5 to 7 minutes, flipping occasionally.
6. Add the sauce mixture. Lower the heat to medium. Pour in the BBQ sauce and soy sauce, then sprinkle in the chili flakes.
7. Simmer until glossy and clinging. Let everything simmer for 2 to 4 minutes, stirring and tossing gently.
8. Taste and adjust, then serve. Taste a piece. Add more chili flakes for heat, or a pinch of sea salt if needed.
Notes
Cool completely before putting the lid on.
Store tofu separately from fresh greens and crunchy toppings.
Pack extra sauce on the side if you like it saucier.
Store in an airtight container for 3 to 4 days.
- Prep Time: 10 minutes
- Cook Time: 15 minutes
- Category: Dinner
- Method: Skillet
- Cuisine: American
Nutrition
- Serving Size: 1 bowl
- Calories: 250
- Sugar: 12
- Sodium: 600
- Fat: 14
- Saturated Fat: 2
- Unsaturated Fat: 10
- Trans Fat: 0
- Carbohydrates: 20
- Fiber: 3
- Protein: 12
- Cholesterol: 0