
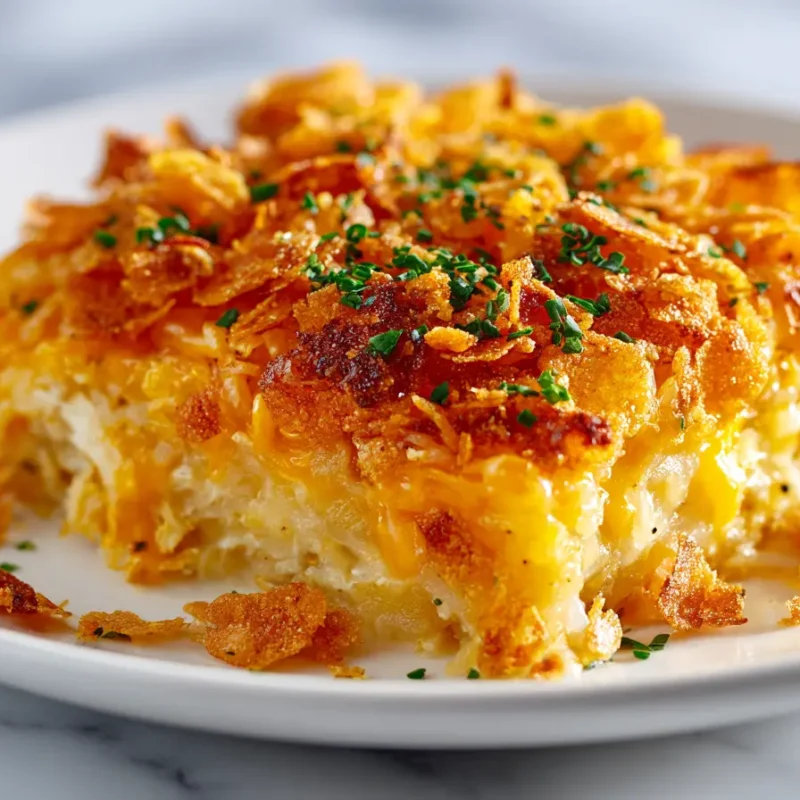
If you need dinner to feel like a warm blanket, this Rotisserie Chicken Hash Brown Casserole is it. It’s the kind of easy casserole that shows up for you on the busiest weeknights, when the sink is full of cups and everyone is asking what’s for dinner at the exact same time. You get that creamy chicken casserole center, a cheesy hash brown casserole vibe, and the best part, a crunchy cornflake topping casserole finish.
Why This Rotisserie Chicken Hash Brown Casserole Belongs in Your Dinner Rotation
This is my “help from the grocery store” dinner, and I mean that in the most grateful way. Rotisserie chicken has saved my skin more times than I can count, especially on those New York City evenings when homework is happening at the counter, someone can’t find a missing sneaker, and I’m trying to answer one last email with a wooden spoon in my hand.
When I make this chicken hashbrown casserole, I know I’m getting something cozy, filling, and kid-friendly without a lot of fuss. It’s a creamy chicken casserole that still feels like comfort food, not a science project. And because it’s a hash browns casserole bake, it’s hearty enough to stand alone, even if all you can manage on the side is a bagged salad.
Also, in my house, the corner pieces with extra crispy topping mysteriously disappear first. Noah will swear he only took one serving, but the math never checks out.
Ingredients You’ll Need
This hash brown casserole is made from simple, familiar ingredients, the kind that make you feel taken care of because you probably already have half of them. It’s also the casserole I make when I want dinner to feel steady and comforting, even if the day was anything but.
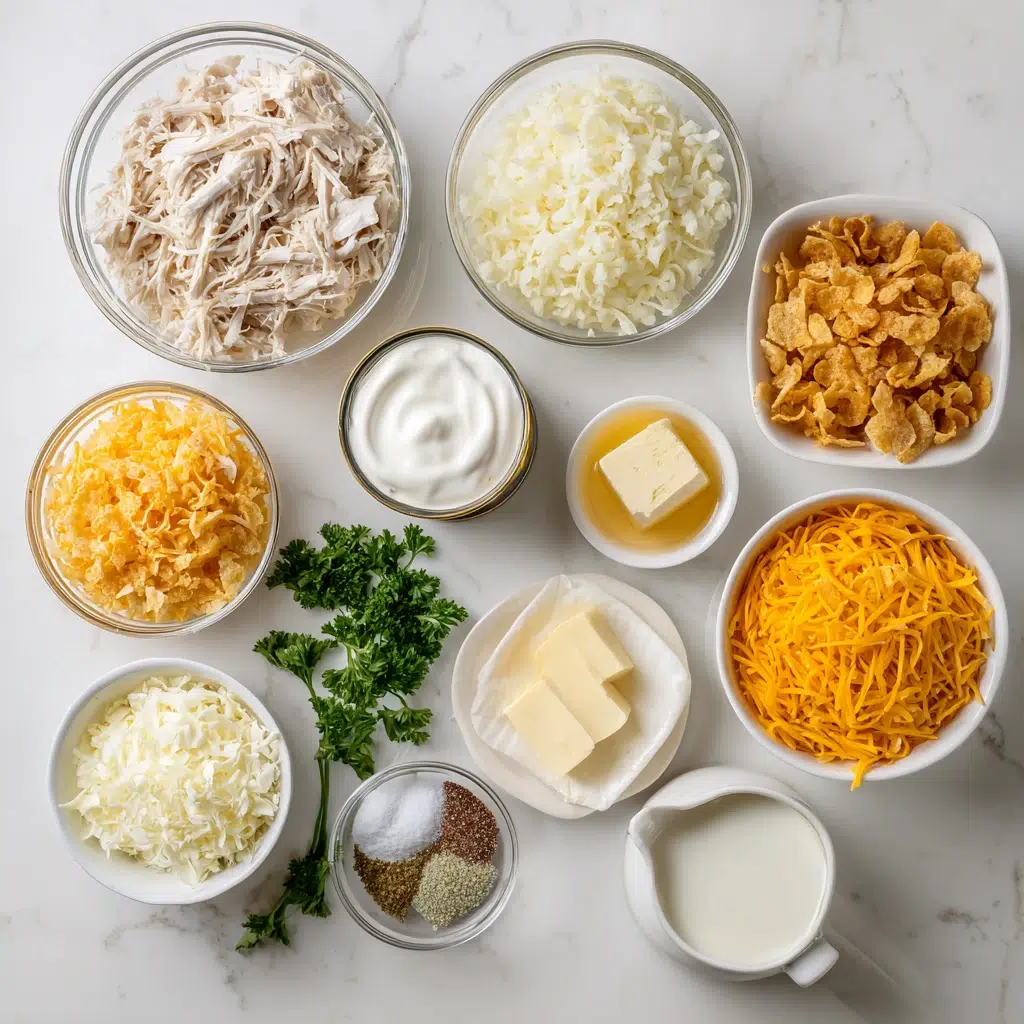
Key players (and why they matter):
- Hash browns for that cozy, filling base
- Rotisserie chicken for quick protein and big flavor
- Cheddar for a classic cheesy hash brown casserole pull
- Cornflakes + butter for a crunchy top that makes everyone happy
Here’s what you’ll need:
- 3 cups shredded rotisserie chicken
- 1 (30-ounce) bag frozen shredded hash browns, thawed
- 1 cup sour cream
- 1 (10.5-ounce) can cream of chicken soup
- 2 cups shredded cheddar cheese, divided
- 1 small onion, finely chopped
- 6 tablespoons unsalted butter, melted and divided
- 2 cups crushed cornflakes
- 1 teaspoon salt
- ½ teaspoon black pepper
- 2 tablespoons chopped fresh parsley (optional)
Optional add-ins (choose what your people will actually eat):
- ½ cup diced bell pepper
- ¾ cup peas
- 1 cup small broccoli florets (lightly steamed)
- 1 cup sliced mushrooms (sautéed until dry)
How to Prep Hash Browns So the Casserole Stays Thick and Creamy
If you want your chicken casserole to be creamy and sliceable instead of soft and soupy, this is the part that matters most. I learned the hard way, because I once rushed a hashbrown casserole recipe and ended up with a pan that looked perfect on top, then turned into a steamy puddle when I tried to serve it. The flavor was great, but it was definitely not “potluck pretty.”
Squeeze the Hash Browns Dry (Yes, Really). Thaw the hash browns completely, then drain off any liquid in the bag. After that, spread them on a clean kitchen towel or layers of paper towels and pat them dry. If they still feel wet, give them a gentle squeeze. That extra minute is the difference between thick and creamy, and watery.
What you’re aiming for: When you mix everything together, the filling should look thick and scoopable, not pourable. Think “fluffy potato salad,” not “cream soup.” That’s how you get that classic hash browns casserole bake texture that holds its shape.
Mini checklist:
- Thaw
- Drain
- Pat dry
- Mix
How to Make Rotisserie Chicken Hash Brown Casserole (Step-by-Step)
This is one of those easy casserole dinners where the oven does the heavy lifting. While it bakes, you can reset the kitchen, help with homework, or just stand there for a second and enjoy the smell of onions and butter doing their thing.
Quick reminder before you start: squeeze the hash browns dry. I know I sound like a broken record, but this is the make-or-break move for a creamy chicken casserole that sets up right.
- Preheat the oven to 350°F. Grease a deep 9×13-inch baking dish (or a similar deep casserole dish). Tip: Use a deeper dish to prevent spillover. I once had a bubbly cheese situation drip onto the oven floor, and let’s just say it did not improve my mood.
- Shred your rotisserie chicken. I like to pull it apart with clean hands while it’s still slightly warm, it goes faster. Measure out 3 cups and set aside.
- In a large bowl, combine the filling ingredients: the thawed and dried hash browns, shredded chicken, 1 cup sour cream, the can of cream of chicken soup, 1 cup of the shredded cheddar (save the rest), chopped onion, 3 tablespoons melted butter, salt, pepper, and parsley if you’re using it. Stir until everything is evenly coated.
- Let the mixed filling rest for 5 minutes in the bowl. This gives the hash browns time to absorb moisture so the casserole bakes up thick, not watery.
- Spoon the mixture into your prepared baking dish and spread it out evenly, getting into the corners. Press it down lightly so it bakes up cohesive.
- Sprinkle the remaining 1 cup cheddar cheese over the top. Tip: Save some cheese for the top layer, it helps the crust cling and gives you those browned, irresistible edges.
- Make the cornflake topping. In a bowl, toss the crushed cornflakes with the remaining 3 tablespoons melted butter until the flakes look evenly coated.
- Sprinkle the buttered cornflakes evenly over the casserole.
- Bake at 350°F for 45–60 minutes, until the edges are bubbling and the center is hot and set. The topping should look golden and crisp. If the top is browning too fast, loosely cover with foil near the end.
- Rest the casserole for 10–15 minutes before slicing. Tip: Rest after baking for cleaner slices, especially if you’re serving this at a potluck or trying to get neat squares onto plates.
Eva’s Note: If you want maximum crunch, keep the cornflake topping in a separate bag on the counter while you mix the filling, then toss it with butter right before it goes on. That way it stays crisp and doesn’t soak up any stray moisture while you’re stirring.
If you’re in a chicken casserole season (honestly, aren’t we all sometimes), you might also love Dolly’s chicken stuffing casserole for another cozy, family-style bake.
Mixing the Filling (What It Should Look Like)
This is where you can prevent a runny center before it ever hits the oven. When you stir the filling together, it should be thick and cling to the spoon. If it looks like soup now, it’ll bake like soup later, and you deserve better than that.
Look-for cue: The mixture should mound slightly when you scoop it, not level out like batter.
Quick fixes to thicken runny filling:
- Drain any liquid pooling at the bottom of the bowl, it usually means the hash browns were still holding water.
- Stir in a little more shredded cheese to help bind and thicken.
- Let the mixture rest 5 minutes before baking so the hash browns can absorb moisture (this helps more than you’d think).
Cornflake Topping That Stays Crispy
This crispy cornflake topping is the whole reason my kids suddenly appear in the kitchen “just to check on dinner.” There’s something so satisfying about the spoon cracking through the top, then hitting that creamy layer underneath. Lily always goes for a neat square from the center, but Emma is a corner-piece hunter. Respect.
Crush cornflakes in the bag for even crumbs. Put the cornflakes in a zip-top bag and gently crush with a rolling pin or the bottom of a mug. It’s tidy, fast, and tiny hands love helping with this part.
Do:
- Toss flakes with melted butter until they look evenly coated.
- Sprinkle in an even layer so you get crunch in every bite.
Don’t:
- Add the topping too early if you’re making it ahead, it can soften in the fridge.
- Use giant uncrushed flakes, they brown unevenly and can feel sharp on top.
Easy Add-Ins and Cheese Options
This chicken hashbrown casserole is wonderfully flexible, which is helpful when you’re cooking for picky eaters, hungry teens, or that one person who “doesn’t like onions” (but somehow never notices them in casseroles). If I want it more colorful, I add a veggie or two. If I want it a little more grown-up, I lean into pepper and herbs.
Add-ins that work:
- ½ cup diced bell pepper for sweetness and color
- ¾ cup peas for a classic cozy feel
- 1 cup lightly steamed broccoli florets (keep them dry so the casserole stays not watery)
- 1 cup mushrooms sautéed until dry (this keeps the filling from getting loose)
Cheese swaps (still very kid-friendly):
- Sharp cheddar for more flavor
- Colby jack for extra meltiness
- A cheddar blend if you want that classic cheesy hash brown casserole vibe with a little stretch
If you’re craving a different flavor direction, this keto garlic mushroom chicken casserole is a cozy option with a more savory, earthy feel.
Make-Ahead, Storage, and Freezer Tips
This is where this easy casserole really shines. It’s the kind of dinner you can prep during a quiet pocket of the day, then thank yourself later when evening hits. I call it cooking for “future me,” and future me is always tired and always grateful.
Make Ahead: Assemble the casserole filling and spread it into the dish. For maximum crunch, hold the cornflake topping and keep it in a separate bag or container. Cover the dish tightly and refrigerate up to 24 hours. When you’re ready, let it sit at room temperature for 20–30 minutes while the oven preheats, add the topping, then bake.
Fridge: Leftovers last in the fridge for about 3–4 days in an airtight container. Cool completely before refrigerating. I love packing a square for lunch because it feels like a real meal in the middle of a busy day, not just a sad desk snack.
Freezer (Unbaked): You can freeze before baking. Assemble the filling in a freezer-safe dish, wrap tightly, and freeze. Thaw overnight in the fridge, add topping, then bake at 350°F. You may need a few extra minutes if it’s still cold in the center.
Freezer (Baked): Freeze after baking by cooling completely, portioning, and wrapping well. Label with the date (my small habit that saves busy evenings). Thaw in the fridge before reheating. For the crunchiest top, re-crisp uncovered at the end.
If you’re building a little casserole plan for the week, my chicken and rice casserole is another cozy, family-friendly option to add to the lineup.
What to Serve With It
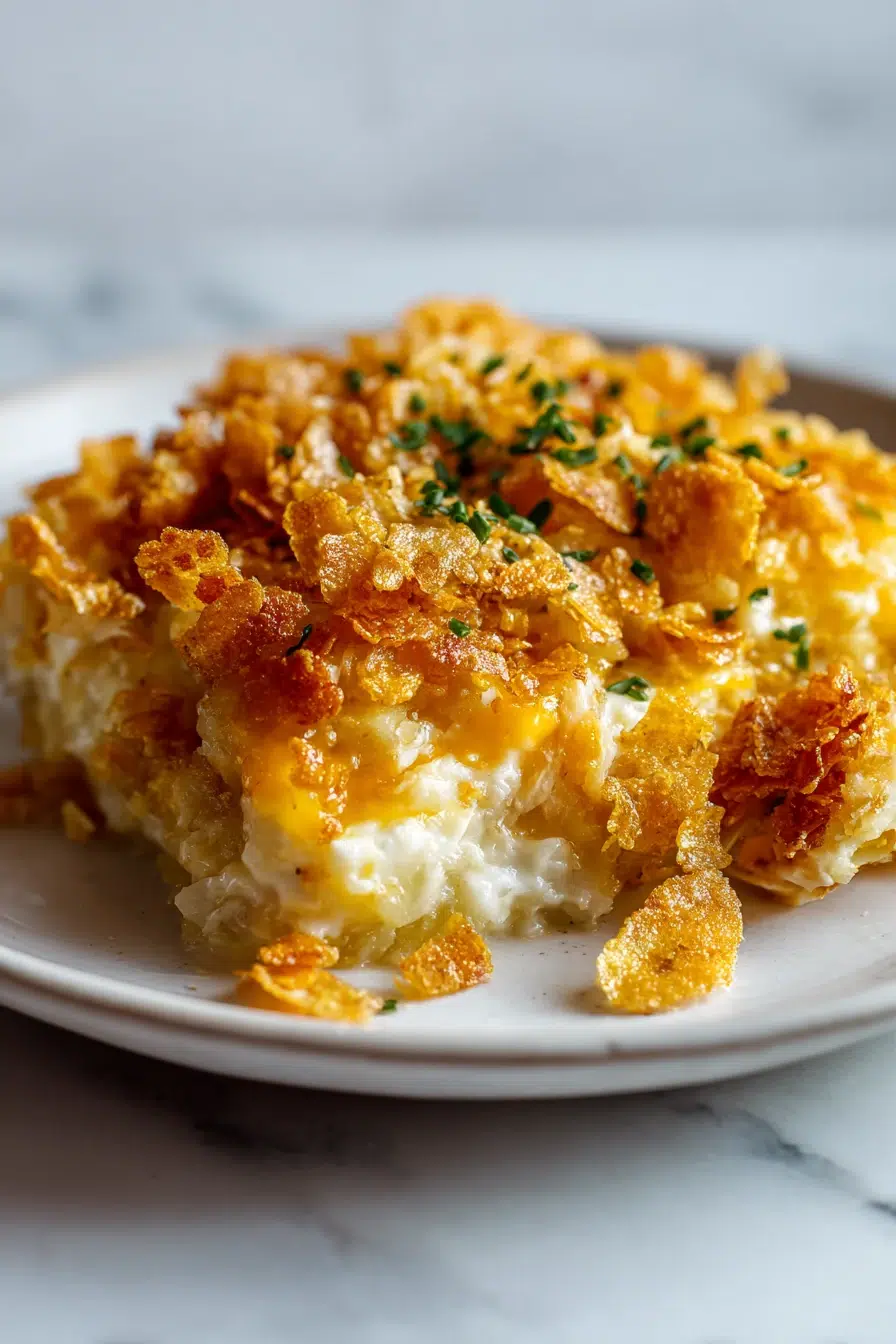
This hash brown casserole is rich and comforting, so I like to pair it with something fresh and simple. On weeknights, it’s usually whatever I can toss together in five minutes while the casserole rests. That little pause after baking is your window to make the whole meal feel complete.
Easy sides:
- A crisp green salad with a tangy dressing
- Steamed green beans or broccoli
- Sliced fruit (especially for kids who want “something sweet”)
- A simple tomato and cucumber salad
Potluck note: If you’re taking this to share, bring a big spoon and let it rest before serving so it slices neatly and stays creamy on the plate.
If you want a lighter alternative for another night, this low carb chicken casserole is a great one to keep in your back pocket.
Frequently Asked Questions about Rotisserie Chicken Hash Brown Casserole
Q: How do you make Rotisserie Chicken Hash Brown Casserole not watery?
✅ Answer: Thaw the hash browns completely, then drain and pat them very dry before mixing. Also avoid adding extra liquid ingredients, and bake until the center is hot and set (not jiggly). Let the casserole rest 10–15 minutes after baking so it can thicken as it cools slightly.
💡 Personal Detail: The first time I waited that full rest, I realized the steam needs time to settle before slicing, and the difference was night and day.
Q: Can I use fresh shredded potatoes instead of frozen hash browns?
✅ Answer: Yes. Shred the potatoes, then rinse briefly to remove excess starch, and squeeze them very dry. Because fresh potatoes can release more moisture, you may need a few extra minutes of bake time, and it’s especially important to rest the casserole before serving.
💡 Personal Detail: There’s something so comforting about the smell of onions and potatoes mixing together while the oven preheats, it feels like dinner is already on your side.
Q: What can I substitute for sour cream in Rotisserie Chicken Hash Brown Casserole?
✅ Answer: Plain Greek yogurt is the closest swap for tang and creaminess. You can also use more cream of chicken soup for a milder flavor, or a thick dairy dip-style spread that’s not too runny. Choose something thick so the filling stays creamy instead of loose.
💡 Personal Detail: I really love that little tang in the creamy layer, it keeps the whole casserole from tasting flat.
Q: How long does Rotisserie Chicken Hash Brown Casserole bake at 350°F?
✅ Answer: Most pans bake in about 45–60 minutes at 350°F, depending on pan depth and how cold the mixture is going into the oven. It’s done when the edges are bubbling and the center is hot and set. If the top browns too quickly, loosely cover with foil near the end.
💡 Personal Detail: I always listen for that gentle bubble around the edges, it’s like the casserole telling you it’s almost ready.
Q: Can you make Rotisserie Chicken Hash Brown Casserole ahead of time?
✅ Answer: Yes. Assemble the casserole (hold the topping if you want maximum crunch), cover tightly, and refrigerate up to 24 hours. When ready to bake, let it sit at room temperature for 20–30 minutes while the oven heats, then bake as directed, adding a few extra minutes if needed.
💡 Personal Detail: That “tomorrow will be easier” feeling when a casserole is ready to slide in is one of my favorite little gifts to myself.
Q: How do you thicken a hash brown casserole filling if it seems runny?
✅ Answer: First, make sure the hash browns are well-drained and dry. If the mixture is already combined, stir in a little more shredded cheese and let it rest 5 minutes so the hash browns can absorb moisture. Baking fully and resting after baking also helps the filling set up.
💡 Personal Detail: The visual cue I look for is thick and scoopable, not pourable.
Q: How do you reheat Rotisserie Chicken Hash Brown Casserole without drying it out?
✅ Answer: Reheat covered so it warms through gently, then uncover briefly at the end to re-crisp the top. For individual portions, a smaller dish covered with foil helps keep the inside creamy. Avoid overheating, warm just until hot in the center.
💡 Personal Detail: When the topping crisps back up, you can actually hear it when your fork taps the top, and it’s so satisfying.
Q: How long does Rotisserie Chicken Hash Brown Casserole last in the fridge?
✅ Answer: Stored in an airtight container, it keeps well for about 3–4 days. Cool completely before refrigerating, and reheat only the portion you plan to eat for best texture.
💡 Personal Detail: A square of this in a lunchbox feels like a real midday meal, the kind that makes you feel human again.
Q: Can you freeze Rotisserie Chicken Hash Brown Casserole before or after baking?
✅ Answer: Yes, both work. For best texture, freeze the casserole tightly wrapped. If freezing unbaked, thaw overnight in the fridge before baking. If freezing baked leftovers, cool completely, portion, wrap well, and thaw before reheating. For the crunchiest top, add topping right before baking or re-crisp during reheating.
💡 Personal Detail: I label the foil with the date every time, and it saves me on those evenings when I cannot think straight.
Q: Can I make this hash brown casserole in a slow cooker, and how long should it cook?
✅ Answer: Yes. Lightly grease the slow cooker, add the filling, and cook on LOW for about 4–6 hours (or HIGH for about 2–3 hours) until hot throughout and set. For a crisp topping, finish portions under a broiler briefly or crisp the topping separately and sprinkle on at serving.
💡 Personal Detail: I love the cozy “it’s cooking while we live our day” feeling, especially on weekends when the kids are in and out of the kitchen.
This Rotisserie Chicken Hash Brown Casserole is comfort food that doesn’t ask a lot of you. It’s creamy, cheesy, and topped with that crispy cornflake layer that makes the whole pan feel special. If tonight is one of those nights where you just need something reliable and warm, this one’s got you.
Thank you for cooking with me today, it means a lot to have you here at my table.
Come hang out with me on Pinterest for more cozy, family-friendly dinners.
Print
Rotisserie Chicken Hash Brown Casserole
- Total Time: 75 minutes
- Yield: 8 servings 1x
Description
Rotisserie Chicken Hash Brown Casserole with creamy sauce, cheddar, and a crispy cornflake topping. An easy, family-friendly dinner bake.
Ingredients
3 cups shredded rotisserie chicken
1 (30-ounce) bag frozen shredded hash browns, thawed
1 cup sour cream
1 (10.5-ounce) can cream of chicken soup
2 cups shredded cheddar cheese, divided
1 small onion, finely chopped
6 tablespoons unsalted butter, melted and divided
2 cups crushed cornflakes
1 teaspoon salt
½ teaspoon black pepper
2 tablespoons chopped fresh parsley (optional)
½ cup diced bell pepper
¾ cup peas
1 cup small broccoli florets (lightly steamed)
1 cup sliced mushrooms (sautéed until dry)
Instructions
1. Preheat the oven to 350°F. Grease a deep 9×13-inch baking dish.
2. Shred your rotisserie chicken. Measure out 3 cups and set aside.
3. In a large bowl, combine the thawed and dried hash browns, shredded chicken, 1 cup sour cream, cream of chicken soup, 1 cup of the shredded cheddar, chopped onion, 3 tablespoons melted butter, salt, pepper, and parsley. Stir until evenly coated.
4. Let the mixed filling rest for 5 minutes in the bowl.
5. Spoon the mixture into the prepared baking dish and spread it out evenly. Press it down lightly.
6. Sprinkle the remaining 1 cup cheddar cheese over the top.
7. Make the cornflake topping by tossing the crushed cornflakes with the remaining 3 tablespoons melted butter.
8. Sprinkle the buttered cornflakes evenly over the casserole.
9. Bake at 350°F for 45–60 minutes, until the edges are bubbling and the center is hot and set.
10. Rest the casserole for 10–15 minutes before slicing.
Notes
If you want maximum crunch, keep the cornflake topping in a separate bag on the counter while you mix the filling, then toss it with butter right before it goes on. That way it stays crisp and doesn’t soak up any stray moisture while you’re stirring.
- Prep Time: 15 minutes
- Cook Time: 60 minutes
- Category: Dinner
- Method: Baked
- Cuisine: American
Nutrition
- Serving Size: 1 slice
- Calories: 450
- Sugar: 3
- Sodium: 800
- Fat: 28
- Saturated Fat: 15
- Unsaturated Fat: 10
- Trans Fat: 0
- Carbohydrates: 30
- Fiber: 3
- Protein: 25
- Cholesterol: 90