
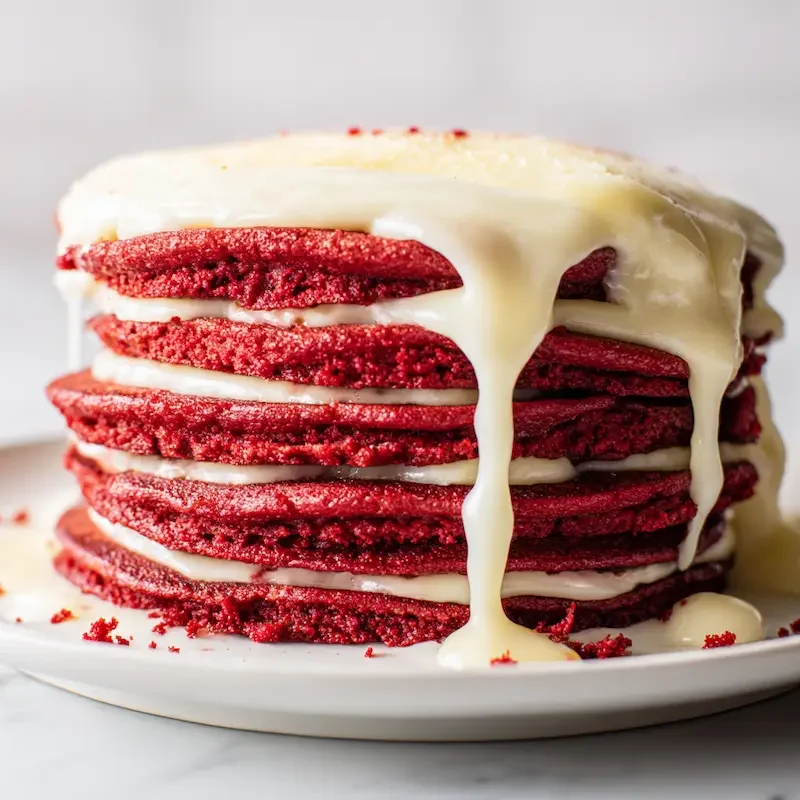
Make mornings magical with these fluffy Red Velvet Pancakes topped with a dreamy cream cheese glaze. Perfect for Valentine’s Day or a cozy weekend brunch.
Why We Love Red Velvet Pancakes
If I’m being honest, red velvet pancakes weren’t part of my childhood—but they’ve definitely become part of my kids’ memories. The first time I made them, it was a cold February morning, and I wanted to surprise the kids with something fun before school. I didn’t have heart-shaped cookie cutters, so I just poured the batter in squiggly blobs and called them “love puddles.” They didn’t care. There were giggles, sticky fingers, and not a crumb left on anyone’s plate.
Now, they’ve become a little tradition around here—especially for birthdays, sleepovers, and any “just because” morning that needs a splash of color and joy. These red velvet pancakes are rich with cocoa, tinted just enough with red food coloring (or beet powder if you like the natural route), and stacked high with a creamy swirl of glaze.
And you know what? They’re not just for Valentine’s Day breakfast. They’re breakfast for special occasions, big and small.
Eva’s Note
“One of my favorite Valentine’s mornings was when Noah made me a tiny pancake tower all by himself—with glaze pooled in the middle like syrupy lava. He called it a ‘pancake volcano of love.’ I still smile thinking about it.”
If you love heart-shaped chocolate treats like we do, don’t miss our heart-shaped chocolate fudge cake too—perfect for dessert after a red velvet morning.
Ingredients You’ll Need
These red velvet pancakes come together with everyday pantry staples, plus a couple of festive extras. Here’s what you’ll need to make them fluffy, flavorful, and totally irresistible—plus that silky cream cheese glaze that makes everyone swoon.
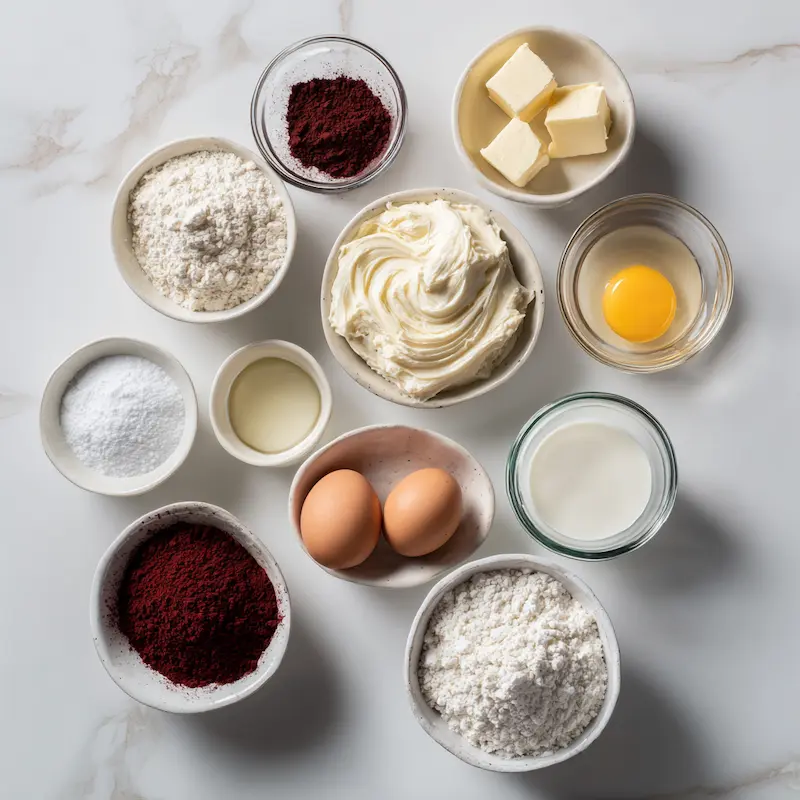
For the Pancakes:
• 1 ½ cups all-purpose flour – The sturdy base that holds all the magic together
• 2 tablespoons unsweetened natural cocoa powder – Gives that signature red velvet depth. I always use natural over Dutch-processed here for a bit more tang
• 2 tablespoons granulated sugar – Just enough sweetness to balance the cocoa
• 2 teaspoons baking powder – Helps create those fluffy buttermilk pancakes we all love
• ½ teaspoon baking soda – Reacts with the buttermilk for extra rise
• ¼ teaspoon salt – Don’t skip it—this small pinch makes everything pop
• 1 ¼ cups buttermilk – For that tender texture and slight tang. If you’ve got time, warm it slightly before mixing
• 2 large eggs – They add richness and structure
• 2 tablespoons unsalted butter, melted – Adds buttery flavor and keeps the pancakes moist
• 1 teaspoon vanilla extract – Because vanilla makes everything feel homemade
• 1 tablespoon red food coloring or beet powder – Either works. I use beet powder often—it’s earthy and gorgeous. (My favorite brand is from Thrive Market; it gives a natural but still vibrant hue)
For the Cream Cheese Glaze:
• 4 ounces cream cheese, softened – The creamy star of the show
• ½ cup powdered sugar – Smooth and sweet, just like glaze should be
• 2–3 tablespoons milk or cream – Use more or less depending on how pourable you want it
If you’re a cream cheese fan like me, you might also love our cream cheese favorites for snacking and party trays.
How to Make Red Velvet Pancakes
Making red velvet pancakes from scratch is easier than it sounds—especially once you get the hang of mixing the batter gently and flipping with confidence. The first time I made these, I was nervous I’d overmix, but the moment the vanilla hit the warm skillet, I knew they were going to be good.
Here’s how I make them in our cozy New York kitchen (usually with one kid helping and another sneaking batter).
1. Mix the dry ingredients
In a large bowl, whisk together:
• 1 ½ cups flour
• 2 tablespoons cocoa powder
• 2 tablespoons sugar
• 2 teaspoons baking powder
• ½ teaspoon baking soda
• ¼ teaspoon salt
Make sure everything is evenly combined before you add anything wet.
2. Whisk the wet ingredients
In a separate bowl or large measuring cup, combine:
• 1 ¼ cups slightly warmed buttermilk (this really helps everything blend)
• 2 large eggs
• 2 tablespoons melted butter
• 1 teaspoon vanilla extract
• 1 tablespoon red food coloring or beet powder
I like to whisk the eggs first, then add the rest. If you’re using beet powder, stir well—it tends to clump if you don’t.
3. Combine wet and dry—gently
Pour the wet ingredients into the dry. Gently stir just until combined. Don’t worry if the batter looks a little lumpy—that’s the secret to fluffy buttermilk pancakes. Overmixing makes them tough, and nobody wants tough pancakes.
4. Let the batter rest (if you can wait)
This isn’t a must, but I like to let the batter sit for 5–10 minutes while I heat the griddle. It lets the baking powder start doing its thing and gives even fluffier results.
5. Cook on a greased griddle or skillet
Heat your pan over medium heat. Lightly grease it with butter or spray. Pour about ¼ cup of batter for each pancake. Cook until bubbles form on top and the edges look set, about 2–3 minutes. Flip and cook the other side until it’s cooked through—another 1–2 minutes.
Sometimes I make a test pancake first. Emma always volunteers to eat that one (with glaze “for quality control,” of course).
For more cozy weekend baking ideas, check out our other brunch recipes like these sweet-tart berry muffins—they pair beautifully with pancakes too.
Making the Cream Cheese Glaze
Ah, the cream cheese glaze. Honestly, this might be my favorite part. It’s what transforms red velvet pancakes from just “yum” to “whoa—are we at a brunch café?”
This glaze is silky, sweet, and tangy, with just enough body to drizzle beautifully without disappearing. I’ve tested thicker and thinner versions, and this one hits the sweet spot.
Here’s how to make it:
In a medium bowl, beat together:
• 4 ounces softened cream cheese
• ½ cup powdered sugar
Once smooth, add 2 tablespoons of milk or cream, and beat again. If it’s too thick for drizzling, just add another ½ tablespoon of milk until it’s pourable but still rich.
Sometimes I warm it slightly in the microwave (just 10–15 seconds) to get that perfect drizzle texture, especially in colder months when cream cheese is a bit stiff.
Eva’s Glaze Tips
• Use room-temperature cream cheese for smooth blending
• Add milk slowly—you can always add more, but you can’t take it out
• For fun on Valentine’s Day, I pour it into a squeeze bottle and let the kids draw hearts on their pancakes. Messy? Yes. Adorable? Always
This cream cheese glaze also makes a great dip for fruit or even graham crackers, but I digress…
Serving Suggestions
Once your red velvet pancakes are stacked tall and glazed with that dreamy swirl of cream cheese, it’s time for the best part—serving them up.
Here’s how we like to make them feel extra special, whether it’s Valentine’s Day breakfast or just a Saturday that needs a little sparkle.
Try with:
• Fresh berries – Strawberries or raspberries add bright flavor and color. Bonus points if you slice them into little hearts
• Whipped cream – A dollop on top turns it into a mini pancake sundae
• Chopped walnuts or pecans – For a little crunch (Noah’s favorite touch)
• Mini chocolate chips – Sprinkle on top for extra decadence
• Powdered sugar dusting – Simple, pretty, and always classic
Sometimes, I even layer the pancakes with glaze between each one—like a breakfast cake. Lily calls it “stacked love.”
And if you’re planning a whole Valentine’s Day breakfast spread, these red velvet pancakes pair perfectly with fruit salad, scrambled eggs, or even heart-shaped toast.
Storage and Reheating Tips
If you’ve got leftovers (lucky you), these red velvet pancakes store and reheat beautifully. I often make a double batch just so I can freeze a few for busy school mornings. There’s nothing like surprising the kids with a warm, festive pancake on a regular Tuesday.
To Store:
• Refrigerator: Place cooled pancakes in an airtight container. They’ll keep for up to 3 days
• Freezer: Lay them flat on a baking sheet to freeze, then transfer to a freezer-safe bag or container. Freeze for up to 2 months
To Reheat:
• Microwave: Wrap in a damp paper towel and heat for 20–30 seconds
• Toaster: Pop frozen pancakes in for a slightly crispy edge—my personal favorite
• Skillet: Reheat on low with a pat of butter for a few minutes per side
Eva’s Tip
I freeze them individually so I can toast one or two at a time. It’s like a homemade breakfast shortcut, especially handy when we’re scrambling out the door but still want something cozy
The glaze can be stored too. Just keep it in the fridge in a small jar or container, and give it a quick stir before using again.
Variations & Flavor Twists
One of my favorite things about red velvet pancakes is how easy they are to tweak. Whether you’re looking for a more natural coloring, fun shapes, or something extra sweet, here are a few ways to make this recipe your own.
Try these fun twists:
• Use beet powder for red velvet color – A natural alternative to food coloring with a soft earthy sweetness. I usually buy mine from Thrive Market or my local co-op. The color isn’t as bold as dye, but it holds well and feels wholesome
• Make mini pancakes – Perfect for little hands or stacking into pancake towers with glaze in between. My kids love making these during sleepovers
• Add mini chocolate chips – For that double chocolate red velvet effect. They melt into tiny pockets of joy
• Try a pink twist – Use less cocoa and swap in extra beet powder for a lighter pink hue. It’s a lovely option for Easter or little kid tea parties. If you love colorful bakes, check out our pink velvet cake too
• Let the kids decorate – Pour the glaze into a squeeze bottle and let them draw hearts, faces, or zig-zags across their stack. It’s messy, but it turns breakfast into an art project
When I let Emma make her own mini stack with chocolate chips and heart sprinkles, she called it her “Valentine’s Pancake Parade.” Honestly? It was adorable, and it tasted even better because she made it herself.
Frequently Asked Questions about Red Velvet Pancakes
Q: How do you make red velvet pancakes from scratch?
A: Start by mixing your dry ingredients—flour, cocoa powder, baking powder, and soda—with a pinch of salt and sugar. In a separate bowl, whisk your eggs, buttermilk (warm it slightly), melted butter, vanilla, and red food coloring or beet powder. Gently stir the wet into the dry just until combined (lumps are good). Cook the batter on a hot greased griddle until bubbles form and the edges look set, then flip.
Eva’s note: The first time that vanilla hit the hot skillet? The smell made me fall in love with these pancakes.
Q: Can I use beet powder instead of red food coloring?
A: Yes. Beet powder is a beautiful, natural way to get that signature red hue without artificial dyes. It adds a gentle sweetness, and while the color may be a bit more muted, it’s still festive.
I’ve used beet powder for years. Honestly, my family barely noticed the difference—except Emma, who said, “They smell a little garden-y, but in a good way.”
Q: What glaze goes best with red velvet pancakes?
A: A classic cream cheese glaze is hands-down the best match. Its tanginess balances the rich cocoa flavor in the pancakes. You can make it pourable by adding milk or cream until it’s just right for drizzling.
On Valentine’s Day, I like to drizzle it in heart shapes—messy ones, but they still make the kids smile.
Print
Red Velvet Pancakes with Cream Cheese Glaze (Fluffy & Festive!)
- Total Time: 25 minutes
- Yield: 4 servings 1x
- Diet: Vegetarian
Description
Fluffy red velvet pancakes made with cocoa and buttermilk, topped with a sweet and tangy cream cheese glaze—perfect for Valentine’s Day or weekend brunch.
Ingredients
1 ½ cups all-purpose flour
2 tablespoons unsweetened natural cocoa powder
2 tablespoons granulated sugar
2 teaspoons baking powder
½ teaspoon baking soda
¼ teaspoon salt
1 ¼ cups buttermilk
2 large eggs
2 tablespoons unsalted butter, melted
1 teaspoon vanilla extract
1 tablespoon red food coloring or beet powder
Cream Cheese Glaze:
4 ounces cream cheese, softened
½ cup powdered sugar
2–3 tablespoons milk or cream
Instructions
1. In a large bowl, whisk together flour, cocoa powder, sugar, baking powder, baking soda, and salt.
2. In a separate bowl, whisk the buttermilk, eggs, melted butter, vanilla, and red food coloring or beet powder.
3. Gently mix the wet ingredients into the dry ingredients until just combined. Do not overmix.
4. Let the batter rest for 5–10 minutes while preheating a skillet or griddle over medium heat.
5. Grease the skillet and pour about ¼ cup of batter per pancake. Cook until bubbles form on top and edges set.
6. Flip and cook for another 1–2 minutes until cooked through. Repeat with remaining batter.
7. For the glaze, beat the softened cream cheese and powdered sugar until smooth.
8. Add milk or cream gradually until the glaze is pourable but thick.
9. Drizzle cream cheese glaze over warm pancakes and serve with your favorite toppings.
Notes
Warm the buttermilk slightly for a smoother batter.
Don’t overmix the batter—lumps mean fluffier pancakes.
Use beet powder for a natural red hue and subtle earthy flavor.
Glaze can be stored in the fridge and rewarmed slightly for drizzling.
- Prep Time: 10 minutes
- Cook Time: 15 minutes
- Category: Breakfast
- Method: Stovetop
- Cuisine: American
Nutrition
- Serving Size: 2 pancakes
- Calories: 350
- Sugar: 16g
- Sodium: 430mg
- Fat: 14g
- Saturated Fat: 7g
- Unsaturated Fat: 5g
- Trans Fat: 0g
- Carbohydrates: 45g
- Fiber: 2g
- Protein: 8g
- Cholesterol: 80mg