
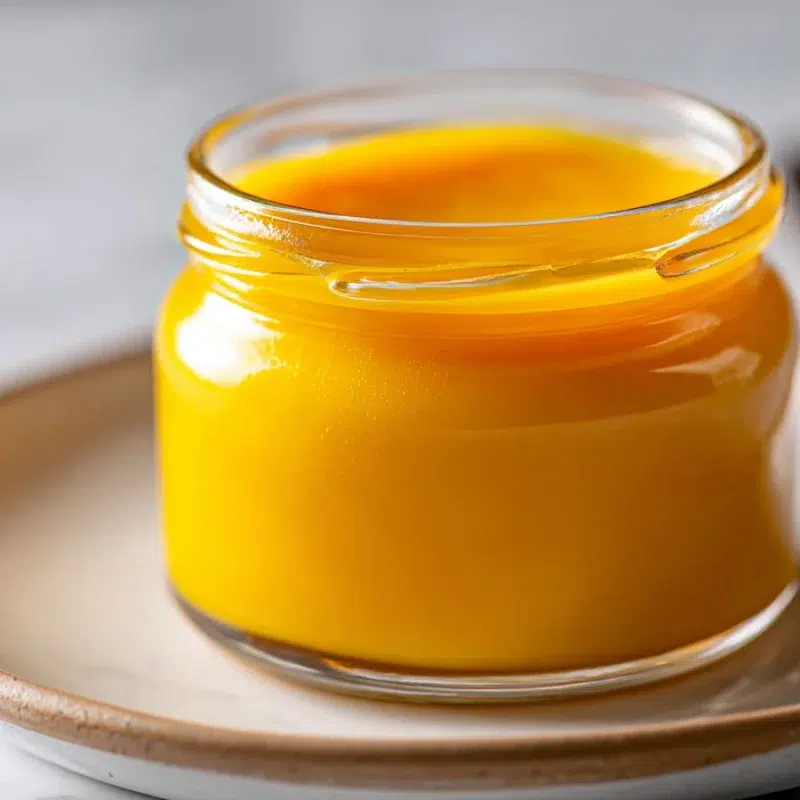
There is something about a little jar of Orange Curd in the fridge that makes an ordinary morning feel like you have your life together, even if the sink is full of cups and somebody cannot find their left shoe. This Easy Orange Curd is silky, citrusy, and honestly a tiny treat you can spoon onto toast, swirl into yogurt, or tuck into a cake when you want dessert to feel special without doing anything complicated.
I started making Homemade Orange Curd on weekends when the kids were little, back when “brunch” was just me trying to get everyone fed before the next round of chaos. Lily loves it on buttered toast, Noah wants it straight from the spoon (no shame), and Emma calls it “orange pudding,” which is not wrong. It disappears fast around here.
“If you can whisk and watch the heat, you can make this.”
What Is Orange Curd (and What Does It Taste Like)?
Orange curd is a simple citrus curd made by gently cooking citrus juice and zest with sugar and eggs until it thickens into a glossy, spoonable spread. Think pudding-smooth, bright, and buttery, with that fresh orange perfume that hits you the second you open the jar.
The first time I made an orange curd recipe, I remember standing at the stove like it was a science experiment, waiting for the moment it transformed from foamy to silky. It really does feel like kitchen magic when it starts to thicken.
- Use it for: toast, scones, pancakes
- Swirl it into: yogurt, whipped cream, oatmeal
- Spoon it into: tarts, cupcakes, layer cakes
And just to clear it up, curd is not the same thing as an orange coulis recipe. Coulis is usually a thinner fruit sauce, while curd is rich, thick, and custard-like.
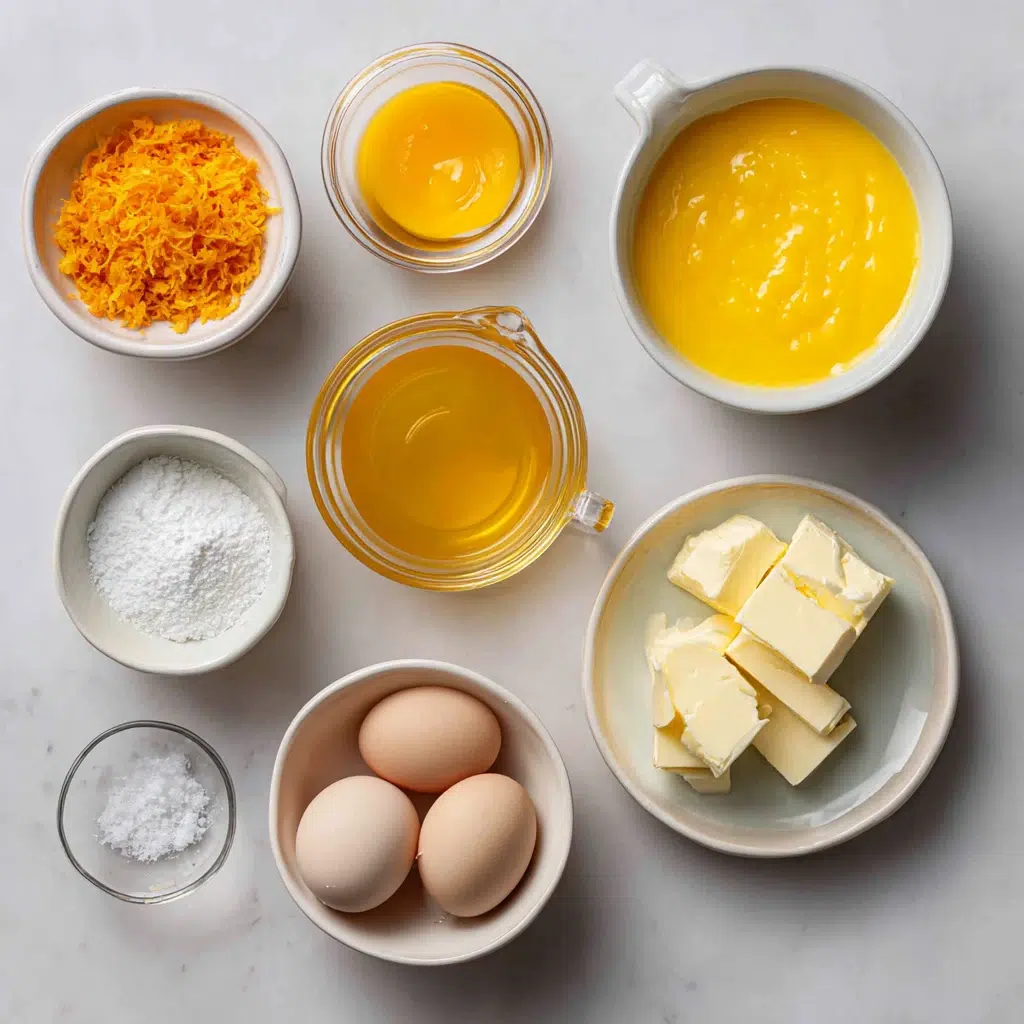
Ingredients You’ll Need (and Why Each One Matters)
This is one of those recipes that looks almost too simple, but each ingredient has a job. Also, my biggest rule before we start is this: zest first, always. Once you juice first, zesting turns into a slippery struggle, zest while the orange still has its jacket on.
- 1 tablespoon orange zest, this is where the big orange aroma lives
- ¾ cup orange juice, fresh gives you the brightest flavor (hello, recipes with fresh orange juice)
- 1 tablespoon lemon juice, a little pop of brightness that keeps it from tasting flat
- ¾ cup granulated sugar, sweetness and structure
- 4 large egg yolks, richness and thickening power
- 1 large egg, helps the curd set without feeling heavy
- ½ cup unsalted butter, makes it glossy and creamy (room temp helps it melt smoothly)
- 1 pinch salt, balances the sweetness and wakes up the citrus
If you’re planning to use this as an orange curd filling, especially for cakes or tarts, don’t skip the chill time. That’s when it becomes that dreamy, spreadable spoonful.
Best Oranges to Use (Navel vs. Mandarin) + Zest Tips
In NYC winters, I buy whatever looks heavy for its size and smells like something when you scratch the peel. If it smells like nothing, it usually tastes like nothing. When you zest a good orange, the whole kitchen smells like sunshine, and the kids always wander in “just to see what I’m making.” Sure, kids.
- Navel: bright, classic orange flavor, easy to find, great for a punchy curd
- Mandarin: sweeter, softer citrus note, this leans into that cozy mandarin oranges recipe vibe
This is an easy orange curd recipe either way, but the orange you choose changes the personality a little.
- Zesting do: use a microplane and stop when you hit the white pith
- Zesting don’t: dig deep, pith can make the curd taste bitter
- Juicing tip: roll oranges on the counter first to help them release more juice
How To Make Orange Curd (Step-by-Step)
When it comes to How To Make Orange Curd, the secret is not fancy technique. It is gentle heat and steady whisking. Curd rewards patience. Keep the heat low and whisk like you mean it, smoothness comes from steady care.
- Zest and juice the oranges, then measure everything. Add the orange zest, orange juice, and lemon juice to a measuring cup or bowl. Measure your sugar, separate your eggs, and cut the butter into pieces. Having everything ready keeps you calm once the stove is on.
- Whisk the base. In a medium saucepan (off the heat), whisk together the orange zest, orange juice, lemon juice, sugar, egg yolks, whole egg, and salt until smooth. It should look evenly mixed, with no streaks of egg.
- Cook low and slow, whisking constantly. Set the pan over low heat and whisk the whole time. Do not let it simmer. You are aiming for gentle steam, not bubbles. At first it will look foamy and thin, then it starts to change, the foam calms down and the mixture turns silky.
- Cook until it thickens and coats the spoon. Keep whisking until it thickens enough to coat the back of a spoon. This can take around 8 to 12 minutes, depending on your stove and pan. If you are nervous, watch for the moment the whisk leaves trails that linger like soft ribbons.
- Remove from heat, then whisk in the butter. Take the pan off the heat and whisk in the butter a few pieces at a time until melted and glossy. This is where it turns from “nice” to “wow.”
- Strain (optional but recommended), then chill. Pour the warm curd through a fine-mesh sieve into a clean bowl or jar, then cover and refrigerate until fully chilled and set.
Eva’s Note: Straining makes it bakery-smooth. Even on a good day, straining makes it feel special, like something you would tuck into a gift basket.
If you want another citrusy pairing idea, I love spooning this over little desserts like mini baby lemon impossible pies for a bright, tangy finish.
How to Tell When It’s Thick Enough (and Why It Thickens More in the Fridge)
Orange curd can be tricky the first time because it looks looser when it is warm. The good news is that it thickens more as it cools, and it fully sets after chilling in the fridge. So yes, the fridge is where the magic really locks in.
My favorite moment is the “first ribbon,” when the whisk trails start to linger instead of disappearing right away. That is your sign you are close.
- Coat-the-spoon test: Dip a spoon, run your finger through the curd on the back, and the line should stay clean.
- Look: glossy, thicker than heavy cream, not watery.
- Feel: it clings to the spoon like satin.
This matters a lot if you want orange curd for cake. You want it thick enough to hold its own between layers without sliding around.
Troubleshooting: Smooth, Silky Curd Every Time
Preventing Lumps and Curdling
I have absolutely had a batch go a little weird when I got distracted by a kid question and turned my back for “one second.” Curd is sweet, but it is not forgiving about heat. The good news is, most problems are fixable.
- Cause: heat too high, the eggs start to cook and you get scrambled bits
Fix: keep the heat low and never let it simmer - Cause: you stop whisking and the bottom overheats, leading to lumpy curd
Fix: whisk constantly, especially around the edges of the pan - Cause: zest clumps or tiny egg bits show up
Fix: strain the warm curd for an extra-smooth finish
There is real relief in watching it turn silky after straining, like, “Okay, we are back in business.”
How to Fix a Curd That’s Too Runny
Warm curd can look loose, and that is normal. Before you panic, give it proper chill time. If it is still loose after chilling, here is how to thicken orange curd without wrecking it.
- Pour it back into the saucepan.
- Warm over low heat and whisk constantly for 2 to 5 minutes.
- Stop when it coats the spoon, then cool and chill again.
Serving Ideas (Toast to Layer Cakes)
This is where orange curd really earns its keep. It is the kind of thing that makes a plain snack feel like a bakery moment, and it plays well with so many flavors.
- Toast or English muffins: a thick swipe of curd and a little butter is my “I have five minutes” breakfast
- Yogurt parfaits: swirl into Greek yogurt with granola for busy mornings
- Scones or biscuits: especially good with a cup of tea when the house is finally quiet
- Tarts: spoon into a baked tart shell and chill for an easy dessert
- Orange curd filling: pipe into cupcakes or sandwich cookies
- Orange curd for cake: spread a thin, even layer between cake layers, then add frosting around the edges like a little “dam” to hold it in
If you want a dessert project next, this curd is lovely with cakes like strawberry lemonade cake layers or something creamy like lemon blueberry cheesecake.
Make-Ahead, Storage, and Freezing Guide
I keep a “little jar system” in my fridge, and curd always gets the front spot because it disappears fast. Use a clean jar, label the date, and future-you will be so grateful when you find that little jar and know exactly when it was made.
- Chill time: refrigerate at least 4 hours, overnight is even better for the smoothest set
- Fridge: if you are wondering how long does orange curd last in the fridge, it is typically about 1 week in a clean, airtight container
- Freezer: yes, you can freeze orange curd. Store in a freezer-safe container with a little space at the top, for best quality use within 2 months
- Thawing: thaw overnight in the fridge, then whisk gently to smooth it out
If you love make-ahead treats with citrus, you might also like cranberry orange fudge for gifting or stashing for sweet cravings.
Flavor Variations (Mandarin, Extra-Tangy, Brunch-Style Sweet)
Think of these as choose-your-mood options. You can keep the method exactly the same and just tweak the flavor a little. This is still easy orange curd, just with different vibes.
- Mandarin version: swap in mandarin zest and juice for a sweeter, softer citrus note (very mandarin oranges recipe energy). Best for toast and yogurt.
- Extra-tangy: add a little more lemon juice for sharper brightness. Best for cutting through rich desserts.
- Brunch-style sweet: add a touch more sugar for a mellower spread. Best for kids and picky eaters.
- More zest-forward: add a little extra orange zest for stronger aroma. Best for spooning into whipped cream or frosting.
Frequently Asked Questions about Orange Curd
Q: How do you know when orange curd is thick enough?
Answer: Orange curd is thick enough when it coats the back of a spoon and you can draw a clear line through it with a fingertip. It should look glossy and slightly thickened in the pan, not watery. Keep in mind it will thicken more as it cools and fully sets after chilling in the fridge. The moment whisk trails start to linger like soft ribbons is usually when I start doing the spoon test.
Q: Why did my orange curd turn out lumpy or scrambled?
Answer: Lumps usually happen when the heat is too high or the mixture isn’t whisked constantly, causing the eggs to cook too quickly. To prevent this, use low heat and whisk the whole time. If it does get lumpy, strain the warm curd through a fine-mesh sieve for a smoother texture. The relief of watching it turn silky after straining is real, it is like saving dinner at the last second.
Q: Can I make orange curd without lemon juice?
Answer: Yes, you can make orange curd without lemon juice. Lemon juice adds extra brightness and helps sharpen the citrus flavor, but the curd will still thicken and set without it. If you skip it, the finished curd may taste a bit sweeter and softer in flavor, so consider adding a little extra zest for more aroma. That zest perfumes the kitchen the second it hits the bowl.
Q: What can I use instead of butter in orange curd?
Answer: You can use a plant-based butter alternative for a similar texture and richness. Choose one that melts smoothly and has a neutral flavor. The curd should still turn glossy and thick, though the final taste may vary slightly depending on the alternative you use. Add it off the heat and whisk until fully emulsified. You will see the shine show up as the fat melts in and the curd turns satiny.
Q: How long does orange curd last in the fridge?
Answer: Orange curd typically lasts about 1 week in the fridge when stored in a clean, airtight container. Chill it promptly, keep it covered, and use a clean spoon each time to help it stay fresh. If you notice an off smell, discoloration, or mold, discard it. I label the lid with the date because I know I will forget by day three.
Q: Can you freeze orange curd, and how do you thaw it?
Answer: Yes, orange curd can be frozen. Store it in a freezer-safe, airtight container with a little space at the top for expansion. Thaw overnight in the refrigerator, then whisk gently to restore a smooth texture. For best quality, use it within a couple of months. It is a happy surprise to find a little stash when you need a last-minute dessert upgrade.
Q: Can you make orange curd in a slow cooker, and how long does it take?
Answer: Yes, orange curd can be made in a slow cooker, though it takes longer than the stovetop. Cook on low, whisking occasionally, until it thickens enough to coat the back of a spoon. Timing varies by cooker, but plan for roughly 1 to 2 hours, and finish by whisking in the butter until glossy. It is a cozy, hands-off pace, like the kitchen quietly working for you.
Q: How do you reheat orange curd without it splitting?
Answer: Reheat orange curd gently over low heat or in short bursts, stirring frequently. Avoid high heat, which can cause the eggs and fat to separate. If it seems too thick after chilling, warm it just until loosened and smooth, then remove from heat right away. I love watching it loosen from cold pudding to spreadable silk in just a minute or two.
Q: How can I thicken orange curd if it’s too runny?
Answer: If orange curd is too runny, return it to low heat and whisk constantly for a few more minutes until it coats the back of a spoon. Also make sure you give it enough time to chill, because it thickens significantly as it cools. If it still feels loose after chilling, cook it a bit longer on low, then strain and chill again for the smoothest result.
If you make this Orange Curd, I hope it becomes one of those little kitchen staples that makes your week feel brighter. Keep a jar tucked in the fridge, and you will always be one spoon away from a sweet, sunny moment, even on the busiest days.
Thank you for cooking with me, it means the world to have you here in my little NYC kitchen.
For more cozy, family-friendly recipes, follow along on Pinterest.
Print
Orange Curd (Easy Homemade Recipe)
- Total Time: 22 minutes
- Yield: 1 jar 1x
- Diet: Vegetarian
Description
Make Orange Curd with fresh orange juice, zest, eggs, sugar, and butter. Smooth, bright, and easy, perfect for cakes, tarts, toast, and desserts.
Ingredients
1 tablespoon orange zest
¾ cup orange juice
1 tablespoon lemon juice
¾ cup granulated sugar
4 large egg yolks
1 large egg
½ cup unsalted butter
1 pinch salt
Instructions
1. Zest and juice the oranges, then measure everything. Add the orange zest, orange juice, and lemon juice to a measuring cup or bowl. Measure your sugar, separate your eggs, and cut the butter into pieces.
2. Whisk the base. In a medium saucepan (off the heat), whisk together the orange zest, orange juice, lemon juice, sugar, egg yolks, whole egg, and salt until smooth.
3. Cook low and slow, whisking constantly. Set the pan over low heat and whisk the whole time. Do not let it simmer.
4. Cook until it thickens and coats the spoon. Keep whisking until it thickens enough to coat the back of a spoon.
5. Remove from heat, then whisk in the butter. Take the pan off the heat and whisk in the butter a few pieces at a time until melted and glossy.
6. Strain (optional but recommended), then chill. Pour the warm curd through a fine-mesh sieve into a clean bowl or jar, then cover and refrigerate until fully chilled and set.
Notes
Straining makes it bakery-smooth. Chill time is important for the best texture. Store in a clean jar in the fridge for up to 1 week or freeze for up to 2 months.
- Prep Time: 10 minutes
- Cook Time: 12 minutes
- Category: Dessert
- Method: Stovetop
- Cuisine: American
Nutrition
- Serving Size: 1 tablespoon
- Calories: 70
- Sugar: 8
- Sodium: 5
- Fat: 5
- Saturated Fat: 3
- Unsaturated Fat: 2
- Trans Fat: 0
- Carbohydrates: 8
- Fiber: 0
- Protein: 1
- Cholesterol: 40