
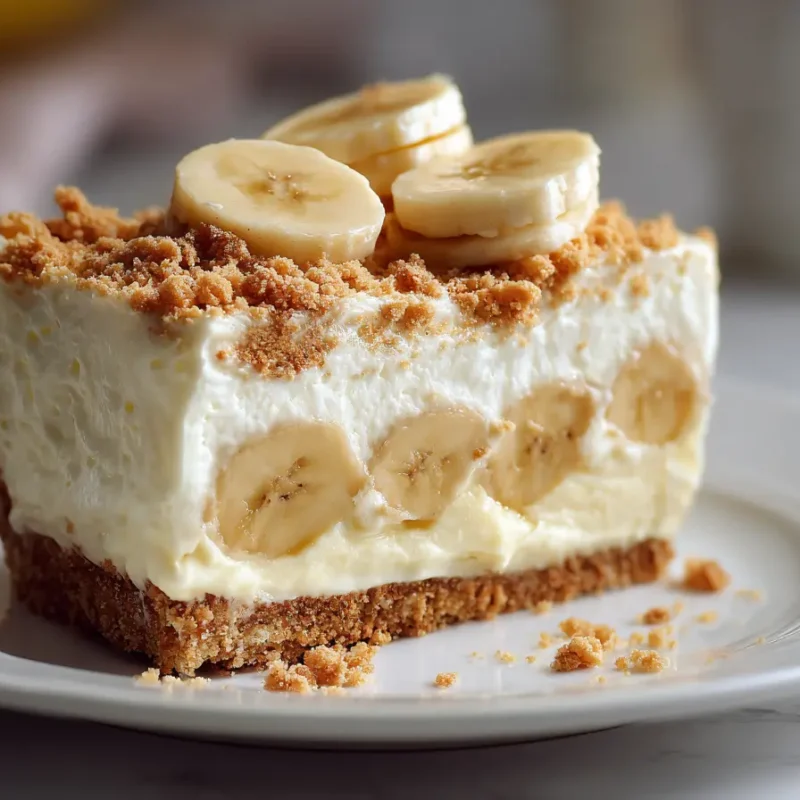
If you need a dessert that feels like a hug and looks like you really had it together this week, this No-Bake Banana Pudding Cheesecake is it. It has that cool, creamy banana pudding dessert vibe we all grew up loving, but with a cheesecake twist that makes it feel extra special. And because it’s a banana dessert for a crowd, it’s the kind of thing you bring to a gathering and quietly watch disappear.
I started making versions of this for Sunday dinners when my kids were little and everyone was hungry at the same time, which is basically always. Banana pudding was the first bowl to get scraped clean, every single time. No one even waited for plates. They just hovered with spoons like it was their job.
This is the dessert I make when I need something guaranteed to vanish.
And honestly, no-bake desserts feel like a gift on busy days. The fridge does the hard work, you get the glory, and nobody needs to know you made it in yoga pants while helping with homework.
Why Banana Pudding + No-Bake Cheesecake Works So Well
There’s a reason so many of us keep collecting recipes with banana pudding and filing them under “crowd-pleasers.” Banana pudding and cheesecake are both creamy and comforting, but together they hit that perfect balance of fluffy, rich, and light.
The first bite is my favorite part. You get cool filling, sweet banana, and that little crunch from the crust and wafers. It’s the kind of texture combo that makes people go back for “just a sliver,” then somehow their plate is full again.
- Creamy: a smooth, pudding-like no bake cheesecake with pudding
- Fruity: tender banana slices tucked into the filling
- Crunchy: a sturdy crust and that classic wafer topping
If you’re always looking for no bake cheesecake flavors ideas, this one is a sure thing because it tastes familiar, but still feels a little dressed up.
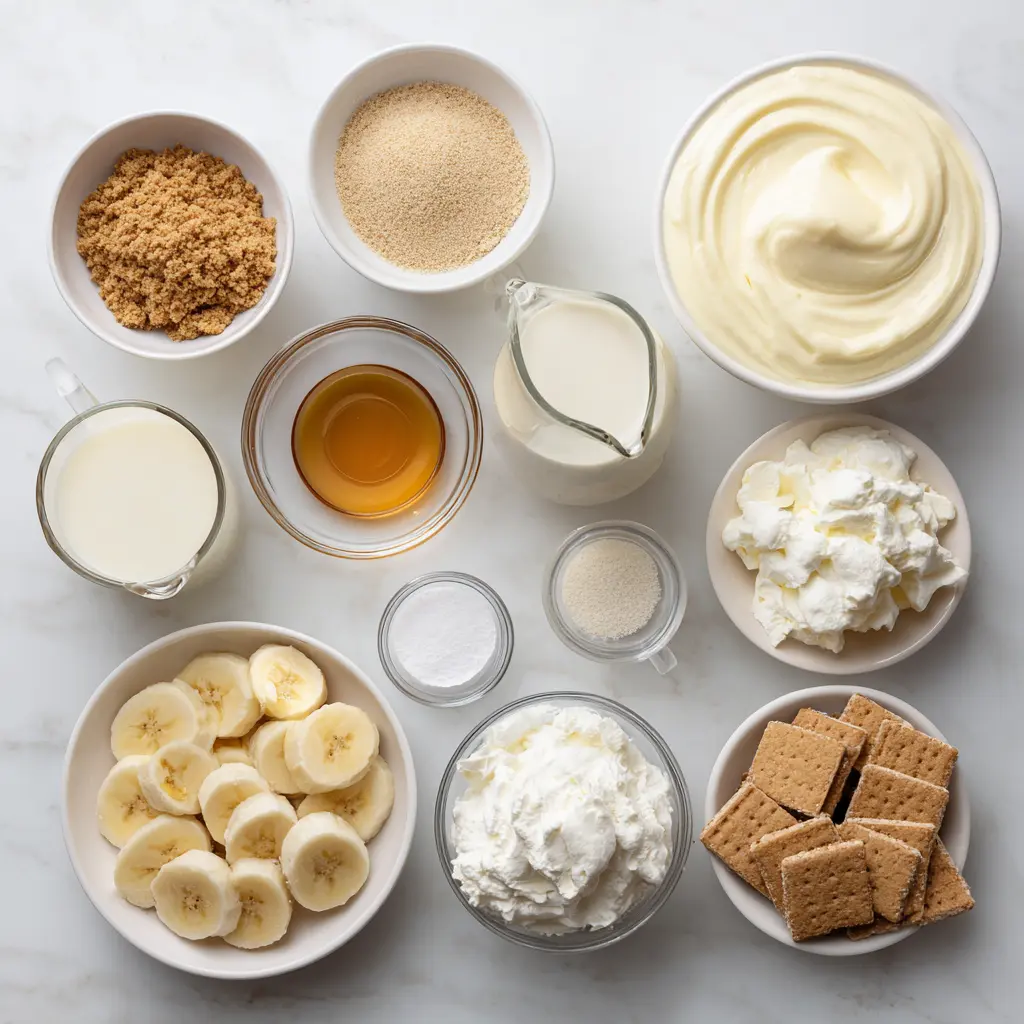
Ingredients You’ll Need (and Why Each One Matters)
This is the kind of pantry-friendly dessert I can pull off without a special trip, except the bananas. Everything else is very “grab it from the baking shelf and let’s do this.” It’s also a great example of a banana pudding mix cheesecake that sets up beautifully without turning heavy.
- 2 cups graham cracker crumbs
- 1/2 cup unsalted butter, melted
- 2 tablespoons granulated sugar
- 16 oz cream cheese, softened
- 1 cup powdered sugar
- 1 package (3.4 oz) instant banana pudding mix
- 1 1/2 cups cold milk
- 1 teaspoon vanilla extract
- 1 1/2 cups heavy whipping cream
- 2–3 bananas, sliced
- 1 cup whipped cream (for topping)
- 1/2 cup crushed vanilla wafers
Key ingredient notes (so you feel confident):
- Cream cheese: This is your base. Softened means you can press it with a finger and it gives easily, not melted, not icy. It’s the backbone of recipes with no bake cheesecake filling.
- Instant banana pudding mix: This is what makes the pudding mix no-bake cheesecake set up with that classic banana pudding flavor. Do not use cook-and-serve here.
- Cold milk: Cold helps the pudding thicken fast. Warm milk equals slow set and a looser filling.
- Whipping cream: Whipped cream adds lift and structure, so it slices clean instead of slumping.
- Crust: This no-bake cheesecake crust needs firm pressing and chill time, that’s what keeps slices neat.
How to Make No-Bake Banana Pudding Cheesecake (Step-by-Step)
This easy banana pudding cheesecake recipe is all about the order of operations. Think of it like building a comfy little dessert stack: sturdy base, smooth filling, bananas tucked in, then a crunchy finish. Don’t rush the chill, because the fridge is the final ingredient.
Step 1 — Make and Chill the Crust
In a medium bowl, mix the graham cracker crumbs, melted butter, and granulated sugar until the crumbs look like evenly damp sand. Pour the mixture into a 9-inch springform pan (or a deep pie dish) and press it firmly into the bottom.
I like using a flat-bottom measuring cup to press, and I really mean press. You want it packed tight, like a sandcastle base that can actually hold up.
- Press the crust firmly all the way to the edges.
- Go over it twice with the cup so it’s truly compact.
- Chill the crust for at least 20 to 30 minutes while you make the filling.
Eva’s little checkpoint: When you tap the crust lightly, it should feel solid, not loose and crumbly.
Step 2 — Mix the Cheesecake Base (Smooth, No Lumps)
In a large bowl, beat the softened cream cheese until it’s smooth and creamy. Add the powdered sugar and vanilla extract, then beat again until fully combined. Scrape the bowl, then scrape it again. I scrape the bowl like it’s my job, because lumps love hiding on the bottom.
This is where those Philadelphia no bake cheesecake recipe ideas really shine, the simple base is familiar, and when it’s mixed well, it tastes like classic cheesecake without the oven.
Avoiding lumps:
- Make sure the cream cheese is truly softened before you start.
- Beat the cream cheese alone first, then add sugar.
- Scrape the bottom and sides of the bowl at least twice.
Eva’s little checkpoint: Rub a tiny bit between your fingers. If it feels gritty or lumpy, keep mixing before you move on.
Step 3 — Whisk the Pudding + Milk Until Thick
In a separate bowl, whisk the instant banana pudding mix with cold milk for about 2 minutes, until it thickens. You’ll see it change from milk-thin to spoon-coating, and it will start to ribbon when you lift the whisk.
This step matters a lot for no bake cheesecake with pudding. If you pour in thin pudding, you can end up with a softer set.
- Whisk until it’s noticeably thicker, not just “mixed.”
- Let it sit 2 to 3 minutes to finish thickening before combining.
Step 4 — Whip the Cream and Fold for a Fluffy Set
In another bowl, whip the heavy whipping cream until you reach firm peaks. Soft peaks are cloud-like, but for this dessert, I prefer firmer peaks so it slices cleanly and holds up like a proper cheesecake.
Now, mix the thickened pudding into the cream cheese mixture until smooth. Then gently fold in the whipped cream in two additions. Folding keeps the filling light and airy, which is exactly what we want in recipes with no bake cheesecake filling.
- If your whipped cream looks grainy: it’s overwhipped. Stop early next time, and fold gently.
- If the filling deflates: you likely mixed too aggressively after adding whipped cream. Use a spatula and fold.
Eva’s little checkpoint: The filling should hold a soft mound on a spoon and look fluffy, not pourable.
Step 5 — Layer Bananas for the Best Texture
Slice your bananas right before layering. I like tucking most of them inside the filling so they stay protected and don’t get watery. This is where banana placement matters, and it’s the difference between “perfect slice” and “why is this a little weepy?”
Here’s my simple layering habit for the best banana pudding dessert texture:
- Slice bananas.
- Layer half the filling, then add a single layer of banana slices.
- Cover with the remaining filling and smooth the top.
If you want extra crunch, this is where you can add a thin layer of wafer crumbs between banana layers (optional).
Step 6 — Chill, Top, and Slice Cleanly
Pour the filling into the chilled crust, smooth the top, and cover tightly. Chill for at least 6 hours, but overnight is even better. This is the hardest part, walking away and letting the fridge do the work. But it’s also your “set insurance” chill, longer chill equals cleaner slices and a more pudding-like bite.
Right before serving, spread whipped cream on top and sprinkle with crushed vanilla wafers.
- Best served: after an overnight chill for the cleanest slices
- Add wafer crumbs right before serving for the best crunch
- Use a warm knife (run under hot water, wipe dry) for neat slices
This is a true make-ahead win and one of my favorite banana dessert for a crowd options because it travels well and serves a bunch.
Topping Ideas That Give Banana-Pudding Crunch
The crushed vanilla wafers on top are not optional in my house. That little crunch is the whole point, and it’s so satisfying when your fork hits the creamy layer and you hear that faint cookie crackle.
If you’re in the mood to play with no bake cheesecake flavors ideas, toppings are the easiest way to do it without changing the base recipe.
- Classic: crushed vanilla wafers + a thick swoosh of whipped cream
- Extra crunch option: add a handful of mini wafer pieces (not just crumbs)
- Bakery-style: pipe whipped cream swirls around the edge (optional variation)
- Deeper cookie flavor: use a mixed crumb crust (graham + vanilla wafer) (optional variation)
Party platter idea: Slice the cheesecake, then sprinkle a little extra wafer crumb on each slice right before serving, like you meant to do it that way all along.
Make-Ahead Timeline (Party-Friendly Plan)
If I’m hosting, I want dessert handled before the day gets loud. Making this the night before is one of those small choices that makes the next day feel calmer. You open the fridge and there it is, already done, already chilling, already making you feel like you deserve a gold star.
- Day before: Make the crust, mix the filling, assemble, cover, and chill overnight (this is your “set insurance” chill).
- Morning of: Check that it feels firm, then keep it covered and cold.
- Right before serving: Add whipped topping and crushed wafers. Add any decorative banana slices at the last minute.
If you love make-ahead desserts like this, you’ll also love my cozy weeknight casseroles roundup for the days when you need dinner to be just as low-stress.
Troubleshooting (Quick Fixes for Common No-Bake Issues)
I’ve had no-bake desserts go a little sideways too, and it’s usually fixable. Most issues come down to chill time, mixing order, or not pressing the crust firmly enough. Take a breath, your dessert is probably still going to taste amazing.
- Problem: Filling is runny
Cause: pudding wasn’t thickened first, whipped cream wasn’t whipped enough, or the filling got overmixed and deflated
Fix: Chill longer first. If still loose, gently fold in a bit more freshly whipped cream whipped to firmer peaks, then chill again until set. - Problem: Lumpy filling
Cause: cream cheese was too cold or the bowl wasn’t scraped
Fix: Beat the cream cheese smooth before adding anything else, and scrape the bowl aggressively next time. - Problem: Crust falls apart when slicing
Cause: not enough compression or not enough chill time
Fix: Press the no-bake cheesecake crust firmly with a flat-bottom cup and chill it well. If it’s already made, cut with a sharp knife and lift slices with a wide spatula. - Problem: Banana layer feels watery after a day or two
Cause: bananas sat too long or were placed too close to the surface
Fix: Tuck bananas inside the filling and save any top banana decoration for right before serving.
Eva’s Note (Little Details That Make It Feel Homemade)
Eva’s Note: If you’re making this with kids around, let them handle the crust pressing and wafer sprinkling. My youngest always wants the “crunch job,” and honestly, it’s the easiest way to make them feel like they helped without turning your kitchen into a full-blown flour storm.
This banana cheesecake recipe easy enough for a weeknight, but it still feels special when you pull it out cold and creamy, like you planned dessert all along.
Frequently Asked Questions about No-Bake Banana Pudding Cheesecake
Q: How long does No-Bake Banana Pudding Cheesecake need to chill before serving?
Answer: For best slices, chill it at least 6 hours, and overnight is even better. The filling continues to firm up as the pudding sets and the whipped cream structure stabilizes. If you slice too early, it may look soft even if it tastes great.
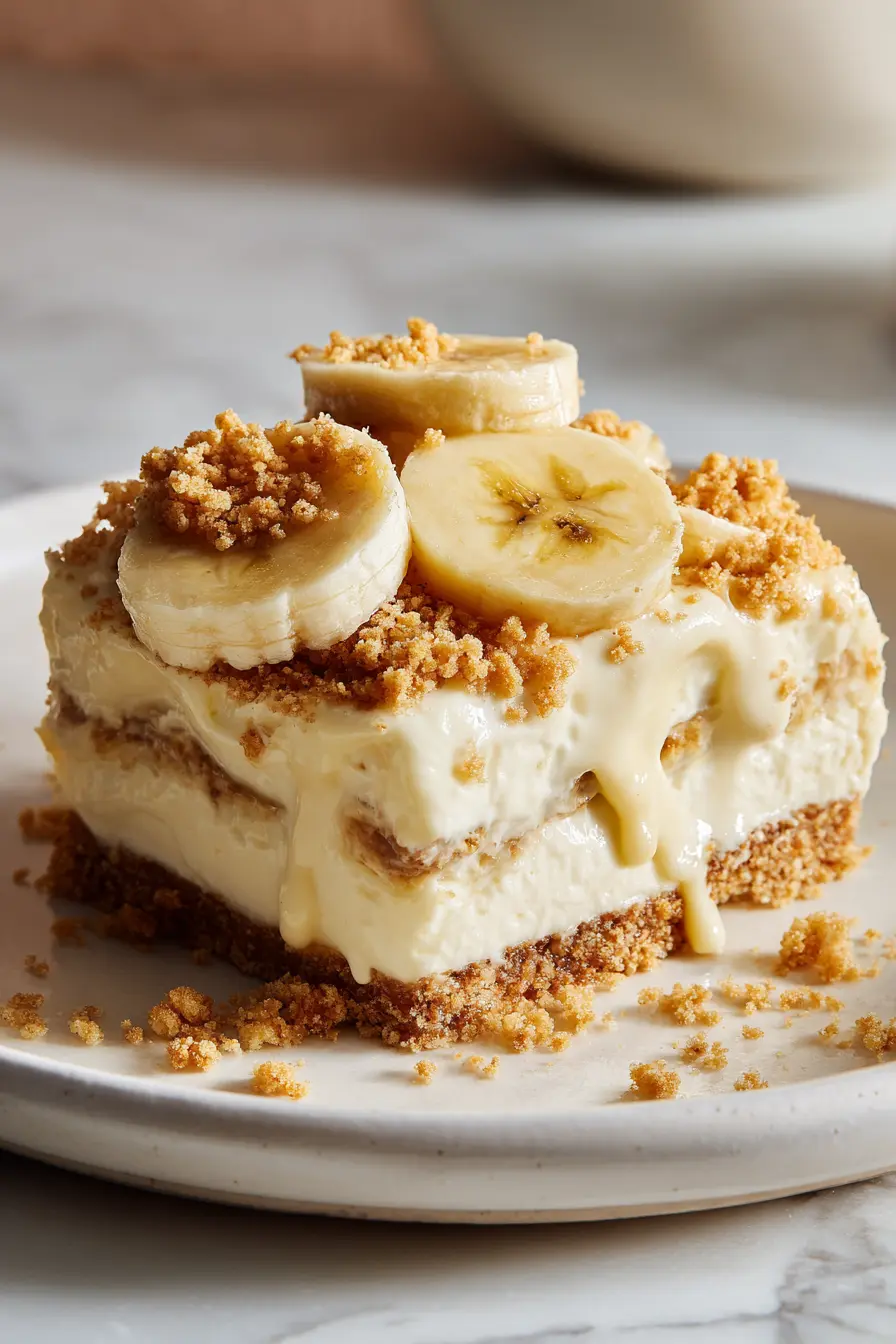
The first clean slice is the moment you’ll feel it, the knife meets a sturdy crust, the filling holds its shape, and you get that pretty layered look.
Q: How do you keep bananas from turning brown in banana pudding cheesecake?
Answer: Slice bananas right before layering, and keep them protected inside the filling rather than exposed on top for long periods. If you want banana slices visible on top, add them close to serving time and keep the dessert tightly covered while it chills.
That fresh banana aroma when you slice them at the last minute is so worth it, it smells like the dessert is about to taste.
Q: Can I use instant banana pudding mix in No-Bake Banana Pudding Cheesecake?
Answer: Yes, instant banana pudding mix is ideal here because it thickens quickly and helps the filling set without baking. Whisk it with cold milk until it noticeably thickens before combining with the cream cheese mixture for the smoothest texture.
Watch for the visual cue: it goes from milk-thin to spoon-coating in a couple minutes, then it starts to ribbon off the whisk.
Q: How do I thicken a no-bake cheesecake filling that’s too runny?
Answer: First, chill it, many fillings firm up significantly after several hours. If it’s still loose, check common causes: cream wasn’t whipped enough, the pudding wasn’t thickened before mixing, or the mixture was overmixed and deflated. You can often fix it by gently folding in a bit more freshly whipped cream (whipped to firmer peaks) and chilling again until set.
I’ve saved one by tucking it back in the fridge and letting time do its thing. By dessert time, it sliced like a dream.
Q: Can I make No-Bake Banana Pudding Cheesecake ahead of time (and how far ahead)?
Answer: Yes. It’s a great make-ahead dessert. Assemble it 1 day in advance for the best set and easiest slicing. For the freshest look, add whipped topping and wafer crumbs shortly before serving, and add any decorative banana slices close to serving time.
Making it the night before a party is one of my favorite little sanity-savers.
Q: How do you store No-Bake Banana Pudding Cheesecake in the fridge?
Answer: Store it tightly covered in the refrigerator. A cake carrier works well, or wrap the pan securely to prevent the dessert from picking up fridge odors and to keep the top from drying out. For best texture, enjoy within 2–3 days.
The wafer topping stays crunchiest the first day, so if you can, sprinkle extra crumbs on each slice as you serve.
Q: Can you freeze No-Bake Banana Pudding Cheesecake (and what changes after thawing)?
Answer: You can freeze it, but expect a slight texture change after thawing, especially around the banana layers. For best results, freeze the cheesecake well-wrapped, then thaw overnight in the refrigerator. Add whipped topping and wafer crumbs after thawing for the nicest finish.
A chilled, thawed slice feels extra cold and creamy on a warm day, like the dessert version of air conditioning.
Q: What can I substitute for graham cracker crumbs in the crust?
Answer: Crushed vanilla wafers make an excellent crust, and so do other crisp cookie crumbs. Use a similar crumb-to-butter ratio and press firmly, then chill well so the crust holds together when sliced.
My favorite is a cookie-crumb crust that matches the topping for double crunch.
Q: How do you reheat or soften no-bake cheesecake slices for serving?
Answer: You don’t reheat no-bake cheesecake, but you can soften slices slightly for the creamiest texture. Let a slice sit at room temperature for 10 to 15 minutes before eating. It takes the chill off, the banana aroma comes through more, and the filling feels extra smooth.
- If your kitchen is warm, start with 8 to 10 minutes.
- If it’s very cold, closer to 15 minutes is perfect.
When you need something sweet that feels familiar and a little celebratory, this No-Bake Banana Pudding Cheesecake really delivers. It’s creamy, it’s nostalgic, and it’s one of those make-ahead desserts that makes life easier while still feeling homemade.
Thank you for cooking with me in my little NYC kitchen, it means so much to have you here.
For more cozy, family-friendly ideas, come follow along on Pinterest.
Print
No-Bake Banana Pudding Cheesecake
- Total Time: 6 hours 30 minutes
- Yield: 8 servings 1x
Description
Make No-Bake Banana Pudding Cheesecake with a graham crust, fluffy pudding-cheesecake filling, fresh bananas, and a wafer topping, perfect make-ahead dessert.
Ingredients
2 cups graham cracker crumbs
1/2 cup unsalted butter, melted
2 tablespoons granulated sugar
16 oz cream cheese, softened
1 cup powdered sugar
1 package (3.4 oz) instant banana pudding mix
1 1/2 cups cold milk
1 teaspoon vanilla extract
1 1/2 cups heavy whipping cream
2–3 bananas, sliced
1 cup whipped cream (for topping)
1/2 cup crushed vanilla wafers
Instructions
1. In a medium bowl, mix the graham cracker crumbs, melted butter, and granulated sugar until the crumbs look like evenly damp sand. Pour the mixture into a 9-inch springform pan and press it firmly into the bottom. Chill the crust for at least 20 to 30 minutes while you make the filling.
2. In a large bowl, beat the softened cream cheese until it’s smooth and creamy. Add the powdered sugar and vanilla extract, then beat again until fully combined.
3. In a separate bowl, whisk the instant banana pudding mix with cold milk for about 2 minutes, until it thickens.
4. In another bowl, whip the heavy whipping cream until you reach firm peaks. Mix the thickened pudding into the cream cheese mixture until smooth. Then gently fold in the whipped cream in two additions.
5. Slice your bananas right before layering. Layer half the filling, then add a single layer of banana slices. Cover with the remaining filling and smooth the top.
6. Pour the filling into the chilled crust, smooth the top, and cover tightly. Chill for at least 6 hours, but overnight is even better. Right before serving, spread whipped cream on top and sprinkle with crushed vanilla wafers.
Notes
Chill the cheesecake for at least 6 hours for best results. Use a warm knife for clean slices. Add wafer crumbs right before serving for the best crunch.
- Prep Time: 30 minutes
- Cook Time: 0 minutes
- Category: Dessert
- Method: No Cook
- Cuisine: American
Nutrition
- Serving Size: 1 slice
- Calories: 450
- Sugar: 30
- Sodium: 300
- Fat: 30
- Saturated Fat: 18
- Unsaturated Fat: 10
- Trans Fat: 0
- Carbohydrates: 45
- Fiber: 2
- Protein: 6
- Cholesterol: 90