
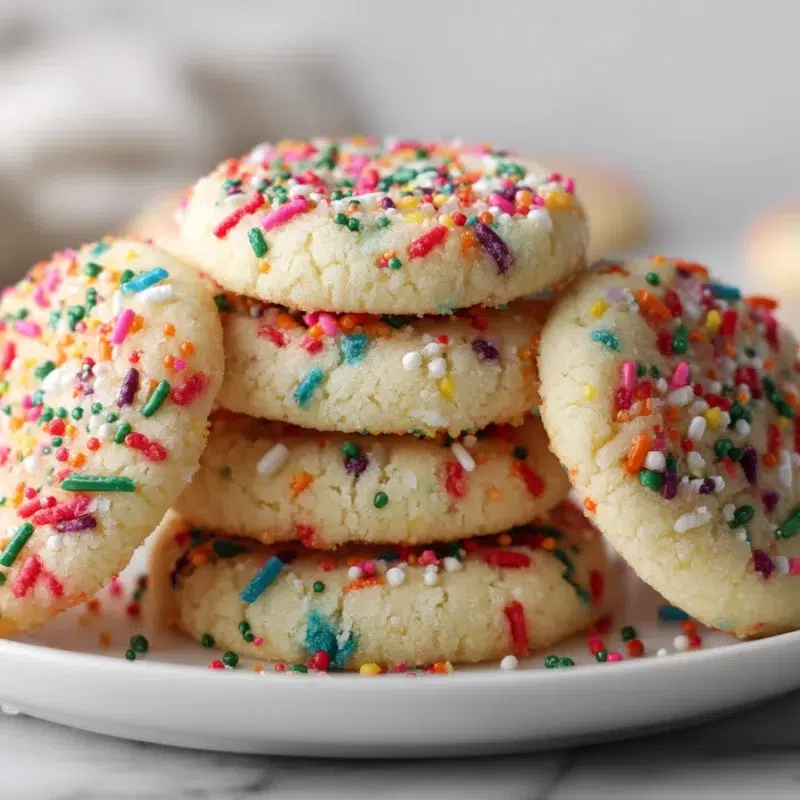
If you need a cookie that looks like you tried harder than you did, Melt-in-Your-Mouth Sprinkle Cookies are it. They’re buttery and tender with that sweet little crunch from sprinkles on cookies, and they feel right at home on a holiday tray, a class party table, or next to a mug of something warm after a long day.
In my kitchen, these usually start with a cookie tin sitting open on the counter like an invitation. Lily lines up sprinkle choices like she’s running a tiny bakery, Noah “taste tests” the sprinkles (very important work), and Emma somehow ends up wearing half of them. The first warm cookie almost always disappears before it cools, which is how I know they’re a keeper.
Pull quote: Soft, buttery, and so tender they almost dissolve, with sprinkles that make every bite feel like a celebration.
These are the kind of holiday sprinkle cookies that make people smile before they even take a bite. And yes, they are absolutely cookies with sprinkles that you can make ahead when life is busy.
Why These Cookies Melt (The Simple Texture Science)
Let’s talk about that “melt-in-your-mouth” thing, because it’s not just a cute phrase. These sprinkle butter cookies have a fine, tender crumb that feels soft as a whisper when you bite in, then you get that tiny pop of crunch from the sprinkle coating. The buttery finish is the kind that makes you reach for “just one more,” even if you promised yourself you wouldn’t.
The secret is a simple pantry combo: powdered sugar plus cornstarch. Powdered sugar blends in super smoothly, so the cookie stays delicate instead of gritty. Cornstarch softens the structure just enough to keep the bite tender, not tough. Add real butter, and you’ve got butter cookies with sprinkles that taste like they came from a fancy bakery case, minus the fancy effort.
- Powdered sugar: dissolves easily for a soft, fine crumb
- Cornstarch: makes the cookie extra tender and light
- Butter: brings richness and that classic buttery flavor
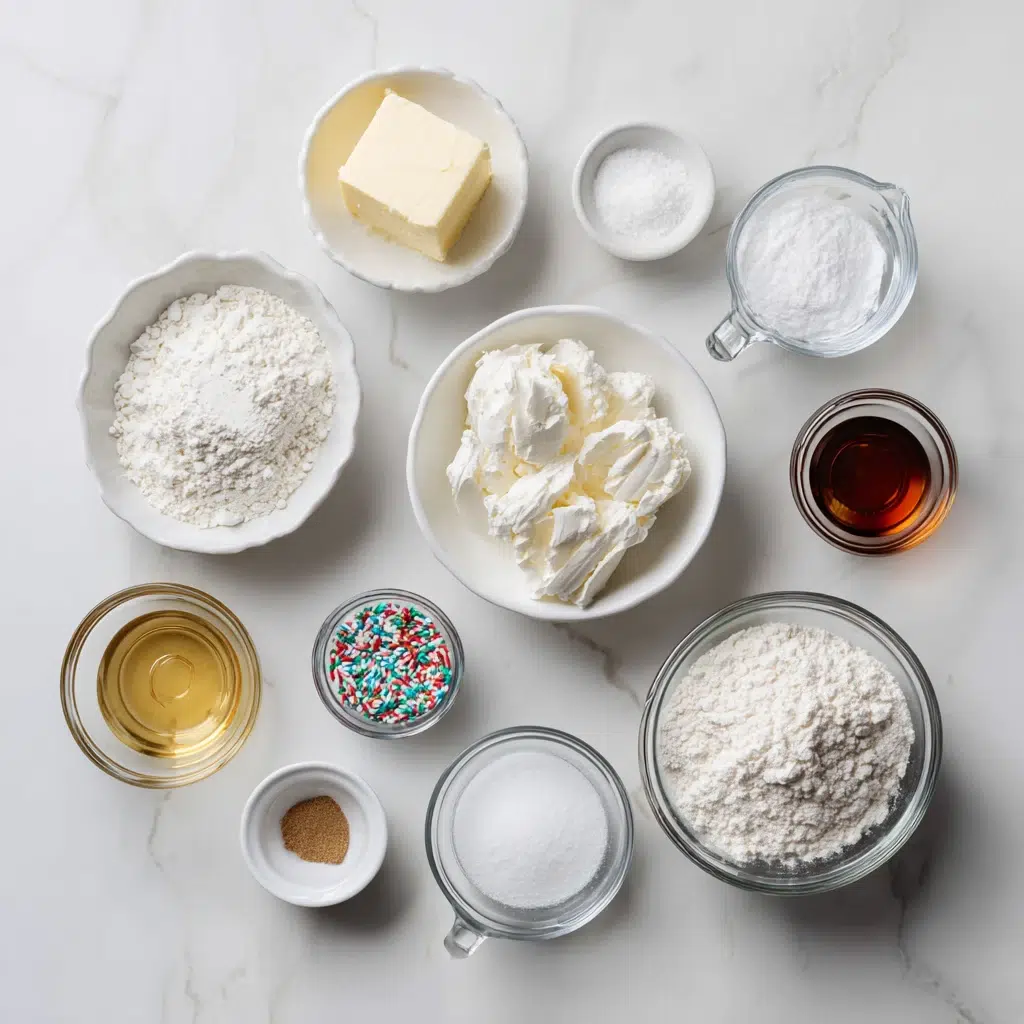
Ingredients You’ll Need (And What Each One Does)
Before you start, do yourself a favor and do a quick pantry check. I can’t tell you how many times I’ve had the butter out, the mixer ready, and then realized we’re down to two tablespoons of powdered sugar. Busy-life baking is real.
- 1 cup unsalted butter, softened: the base flavor, it should be soft enough to press but not shiny or melty
- ¾ cup powdered sugar: for that tender, melt-away texture
- ½ cup granulated sugar: adds structure and a little crisp at the edges
- 2 teaspoons vanilla extract: warm, classic flavor for sprinkle sugar cookies
- ¼ teaspoon almond extract (optional): a bakery-style hint, totally optional
- 2 cups all-purpose flour: the body of the dough
- ½ teaspoon baking powder: gentle lift, not a puffy cookie, just enough
- ¼ teaspoon salt: balances sweetness
- ¼ cup cornstarch: the tenderness trick
- Holiday-themed sprinkles (for rolling/coating): for sprinkle covered cookies that look festive
- Coarse sanding sugar (optional): extra sparkle and crunch if you want it
When I’m making these for school parties, I usually grab jimmies because they’re easy, bright, and they don’t bleed as much. For holiday trays, I like a mix that looks like sugar cookie sprinkles, a little shiny, a little classic.
Best sprinkles for rolling (quick note)
Best sprinkles for rolling: jimmies or a sprinkle mix that’s mostly jimmies. Nonpareils are pretty, but they can bleed color and feel extra crunchy.
Sprinkle Strategy (Color, Crunch, and No-Mess Coating)
Best Sprinkles for Rolling: Jimmies vs. Nonpareils
If you’ve ever rolled dough in sprinkles and thought, “Why does this feel like I’m coating it in tiny rocks,” you’re not alone. I learned the hard way with nonpareils one December. The cookies were cute, but the crunch was intense, and the colors tinted the dough where they sat too long. Not tragic, just not my favorite.
For sprinkle rolled sugar cookies and rolled sprinkle cookies, here’s what I recommend:
- Jimmies: softer crunch, easy to press on, great for Christmas sprinkle cookies and big holiday batches
- Nonpareils: very crunchy, can bleed color, best for a light coating or for decorating after baking
- Sprinkle mixes: choose ones that are mostly jimmies for the easiest rolling and prettiest finish
Color-wise, you can match the moment. Red and green for December, pastel for spring, team colors for game day. Same dough, different vibe.
How to Get Sprinkles to Stick (Without Smashing the Dough)
This is where a little technique saves your sanity. You want sprinkles on cookies, not sprinkles all over your floor.
- Pour sprinkles into a shallow bowl (this is my sprinkle bowl trick for less mess and more coverage).
- Roll the dough gently, then lightly press to help the sprinkles grab.
- If the dough feels dry, warm it for a few seconds between your palms, then roll again.
- Set finished pieces on a plate or tray, so you’re not re-handling them.
When the kids help, I set up a “sprinkle station,” one bowl for sprinkles, one plate for finished sprinkle cookie rounds. It keeps the kitchen calmer, and I get fewer “Oops!” moments.
How to Make Melt-in-Your-Mouth Sprinkle Cookies (Step-by-Step)
These are slice-and-bake style cookies, which means you can make the dough, chill it, and bake when you’re ready. Perfect for the kind of week where you’re juggling everything and still want something homemade.
- Cream the butter and sugars: In a large bowl, beat the softened butter, powdered sugar, and granulated sugar until light and fluffy, about 2 to 3 minutes. You’re looking for a pale, airy mixture, not greasy or separated.
- Add flavor: Beat in the vanilla extract and almond extract (if using). This is where the dough starts smelling like a bakery, and everyone suddenly “needs to check” what you’re making.
- Whisk the dry ingredients: In a separate bowl, whisk together the flour, baking powder, salt, and cornstarch.
- Combine: Add the dry ingredients to the butter mixture and mix on low just until the dough comes together. It should look soft and cohesive and hold together when you pinch it. Don’t overmix.
- Shape and chill: Divide the dough in half and shape each half into a log (about 2 inches thick). Wrap tightly and chill for at least 2 hours, or until firm.
- Prep for baking: Heat the oven to 350°F. Line baking sheets with parchment paper.
- Slice and roll: Slice the chilled logs into 1/4-inch rounds. Roll each round in sprinkles (and sanding sugar if you want extra sparkle). Gently press so the sprinkles stick without flattening the cookie too much.
- Bake: Place cookies 2 inches apart and bake 9 to 11 minutes, depending on thickness and your oven.
- Use the key bake cue: They’re done when the edges are just set and the centers still look a little soft. Let them rest on the pan for 5 minutes, then move to a rack to cool.
Eva’s Note: These holiday sprinkle cookies can go from “perfectly tender” to “too crisp” fast if you overbake. If you’re unsure, pull them when the edges are set and trust the carryover heat on the pan.
If you’re building a cookie tray, these pair so nicely with something spiced and cozy like my gingerbread cookies.
Dough Handling Tips (So They Don’t Crack, Stick, or Spread)
Chilling, Slicing, and Rolling Without Stress
Chilling is your best friend here. It gives you clean slices, thicker cookies, and helps keep cookies from spreading. My favorite routine is making the dough after dinner, wrapping the logs, and letting them chill while I clean up. Then the next afternoon, I can bake a fresh batch without starting from scratch.
- If the dough is too sticky: chill longer, or dust your hands lightly with flour while shaping.
- If the dough is too crumbly: it may need a minute of mixing to come together, or your flour may have been packed. Let it sit for 5 minutes, then mix briefly again.
- If the log cracks when slicing: let it sit at room temperature for 10 to 15 minutes, then slice with a sharp knife.
Getting Even Baking (Pan Choice + Spacing + Bake Time Cues)
Even baking is what keeps these sprinkle covered cookies tender instead of browned and dry. I always bake one test cookie first. It saves the whole batch because you’ll see exactly how much they spread and how long your oven really needs.
- Use: parchment paper and a light-colored baking sheet
- Space: 2 inches apart
- Rotate: the pan halfway through if your oven has hot spots
- Watch for: edges just set, not golden all over
Holiday Variations (Same Dough, New Vibes)
This dough is my little holiday helper because you can dress it up a dozen ways without changing the method. If you’re making Christmas sprinkle cookies, go classic red and green. If it’s a winter birthday, do icy blues and silvers. If it’s a cookie swap, make a few color-theme batches so your tray looks like you planned it that way.
- Citrus version: add 1 to 2 teaspoons orange or lemon zest for a bright twist.
- Extra-vanilla: add 1/2 teaspoon vanilla bean paste for deeper flavor.
- Color-theme batches: divide dough and tint lightly with gel food coloring, then roll in matching sugar cookie sprinkles.
- Sanding sugar finish: roll in sanding sugar plus sprinkles for extra sparkle.
- Shape options: keep them as slice-and-bake rounds, or roll into balls and gently flatten. If you make them thicker, add 1 to 2 minutes of bake time.
If you’re putting together a full cookie platter, something crunchy and sweet alongside these is lovely, like my salted caramel crunch cookies.
Make-Ahead, Freezing, and Storing
Make Ahead (Chill Overnight + Bake When You Need Them)
Yes, you can chill the dough overnight, and it’s honestly a lifesaver during the holidays. Future-you will be grateful when you can slice and bake holiday sprinkle cookies without hauling out every ingredient again.
- Day 1: make the dough, shape into logs, wrap tightly, and refrigerate.
- Day 2: slice, roll in sprinkles, bake, and cool.
Freezer Guide (Dough and Baked Cookies)
I keep a “cookie emergency stash” in the freezer for snow days, last-minute school events, or the nights when everyone’s had a day and a warm cookie fixes the mood.
- To freeze cookie dough: wrap logs tightly in plastic wrap, then place in a freezer bag. Label with the date. Freeze up to 2 months. Thaw in the fridge overnight, then slice and bake.
- To freeze portioned dough: slice into rounds, freeze on a lined sheet pan until firm, then transfer to a freezer bag. Bake from frozen, adding 1 to 2 minutes.
- To freeze baked cookies: cool completely, then freeze in layers with parchment. Thaw covered at room temperature so they stay soft.
Storage + How to Refresh for Softness
To store sprinkle cookies, keep them in an airtight container at room temperature. They’re best in the first 3 to 4 days, but they’ll still be tasty after that.
- Do: place parchment between layers to protect the sprinkles.
- Do: keep the container sealed tight to prevent drying out.
- Don’t: store them in the fridge, it can make them taste dry faster.
If you want to reheat or refresh sprinkle cookies to soften them, warm one cookie for about 5 to 8 seconds in the microwave. It brings back that just-baked tenderness, like a tiny kitchen miracle.
Troubleshooting Melt-in-Your-Mouth Sprinkle Cookies
If a batch goes a little sideways, you’re in good company. I’ve had cookies spread too much on a warm day, and I’ve had sprinkles fall off because I rushed the rolling step. The good news is, most fixes are easy and you don’t have to start over.
- Problem: Cookies spread too much
Likely cause: butter too warm, dough not chilled, hot baking sheet
Quick fix: chill dough longer, use a cool sheet, and chill shaped cookies 10 to 15 minutes before baking to keep from spreading. - Problem: Dough is dry or crumbly
Likely cause: flour over-measured or dough overmixed
Quick fix: let dough sit 5 minutes, then mix briefly. Next time, spoon and level flour. - Problem: Cookies are too crisp
Likely cause: overbaked
Quick fix: pull them when edges are just set, even if centers look soft. They finish on the pan. - Problem: Sprinkles won’t stick
Likely cause: dough surface too cold or dry
Quick fix: warm dough slightly in your hands, then gently press sprinkles on. - Problem: Uneven browning
Likely cause: dark pan or oven hot spots
Quick fix: use parchment, rotate pan halfway, and bake one test cookie to dial in timing.
If you love cookie troubleshooting and want another reliable classic, my chocolate chip and peanut butter chip cookies are a great one to keep in your back pocket.
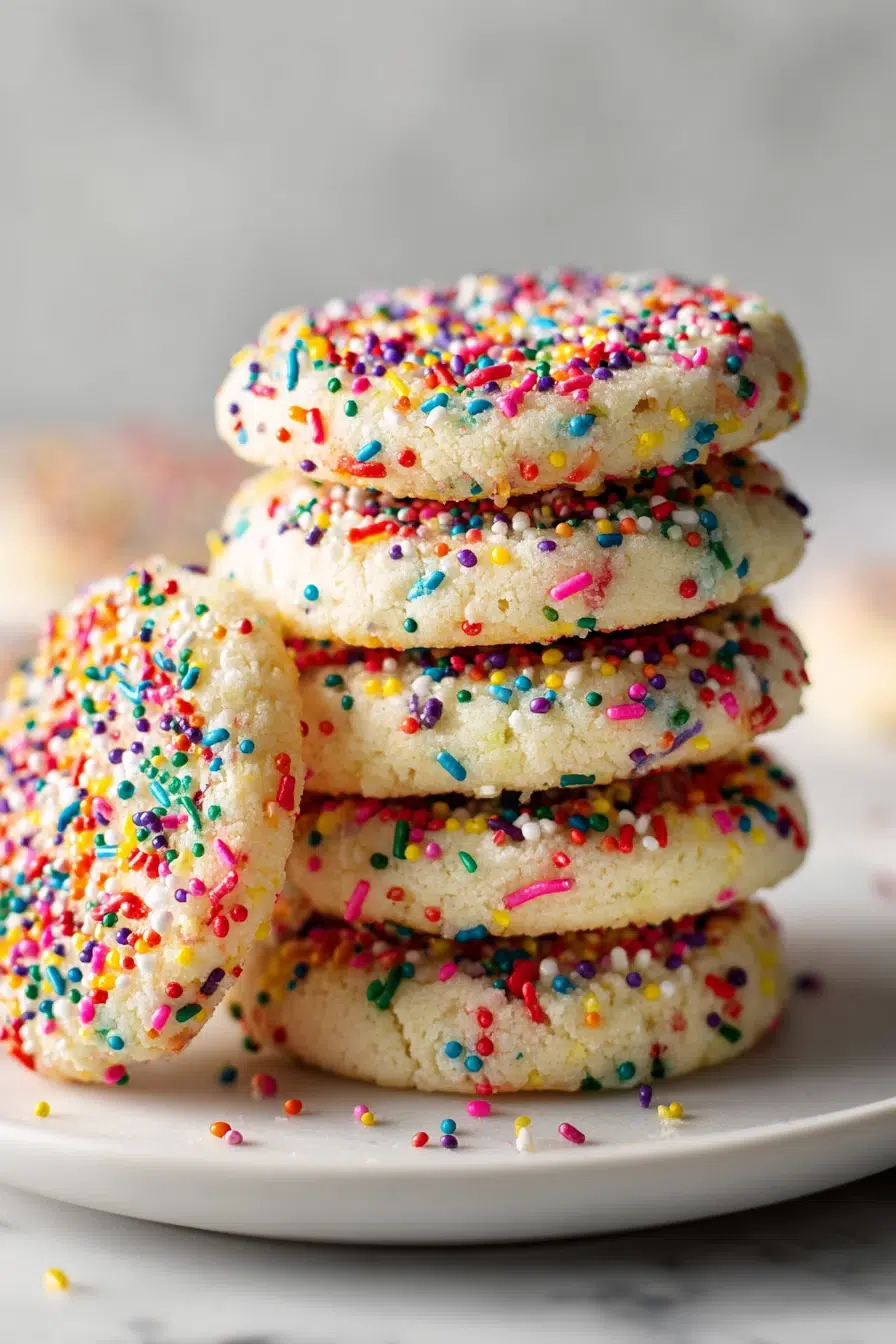
Frequently Asked Questions about Melt-in-Your-Mouth Sprinkle Cookies
Q: How do you keep Melt-in-Your-Mouth Sprinkle Cookies from spreading too much?
Answer: Start with properly softened (not melty) butter, measure flour accurately, and chill the dough before baking. Use parchment paper and a cool baking sheet, and avoid over-creaming to the point the dough gets overly airy. If your kitchen is warm, chill the shaped cookies for 10 to 15 minutes right before they go in the oven. On warm kitchen days, I slide the whole tray into the fridge while the oven preheats.
Q: Can I chill the dough for Melt-in-Your-Mouth Sprinkle Cookies overnight?
Answer: Yes, overnight chilling is great for easier slicing and a thicker, more tender cookie. Wrap the dough tightly so it doesn’t dry out. If the dough feels too firm to slice, let it sit at room temperature for 10 to 20 minutes until it yields cleanly. I usually make the dough after dinner, then bake fresh sprinkle sugar cookies the next afternoon.
Q: What can I use instead of almond extract in sprinkle cookies?
Answer: You can simply use more vanilla extract, or try a small amount of lemon or orange zest for a bright flavor. Another option is a tiny pinch of ground cardamom for a cozy bakery-style warmth. Keep any strong flavor additions subtle so the buttery base still shines. On a cookie tray, my family usually reaches for the pure vanilla version first, it tastes like classic butter cookies with sprinkles.
Q: How do I get sprinkles to stick to cookies before baking?
Answer: Roll the dough while it’s slightly cool but still pliable, and gently press the sprinkles on rather than smashing the cookie. If the dough surface feels dry, warm it briefly between your palms before rolling. Coating works best when sprinkles are in a shallow bowl so you can rotate the dough evenly. I set up a little sprinkle station, one bowl for sprinkles, one plate for finished cookies.
Q: Can I freeze Melt-in-Your-Mouth Sprinkle Cookies dough or baked cookies?
Answer: Yes. Freeze dough as a wrapped log or as pre-portioned rounds on a sheet pan, then transfer to a freezer bag. Bake from chilled (or partially thawed) and add a minute or two if needed. Baked cookies also freeze well, cool completely, freeze in layers with parchment, and thaw covered to keep them soft. I love having a small stash ready for last-minute guests or school events.
Q: How long do sprinkle cookies stay fresh and how should I store them?
Answer: They’re best within the first 3 to 4 days, stored in an airtight container at room temperature. Place parchment between layers to protect the sprinkles. If you want them softer on day three, warm one for 5 to 8 seconds. If you need a dairy-free holiday option for sharing, you might also like my dairy-free Christmas cookies.
Q: Can I bake these cookies in a slow cooker, and what timing would I use?
Answer: I don’t recommend a slow cooker for these, because you won’t get the same set edges and tender center. Slow cookers heat gently and trap moisture, which can make the cookies too soft and a little uneven. If you must try it, line the insert with parchment, keep cookies spaced, and check around 60 to 90 minutes on high, but results vary a lot. For the true melt-in-your-mouth texture, the oven is your best bet.
A Sweet Little Send-Off (And How to Share Them)
If you make these, I hope they bring a little extra joy to your day. These holiday sprinkle cookies are made for sharing, gifting, and sneaking one off the cooling rack when nobody’s looking (I won’t tell).
- Serve: with coffee, tea, or tucked into lunchboxes as a surprise treat
- Gift: stack in a cookie tin with parchment between layers for a pretty, no-fuss present
- Share: bring them to cookie swaps and tell me your sprinkle color theme
If you try them, leave a comment and let me know what sprinkles you used. I love seeing how everyone makes the same cookie feel totally their own.
Thank you for cooking with me, it means more than you know.
Come hang out with me on Pinterest for more cozy, family-friendly recipes.