
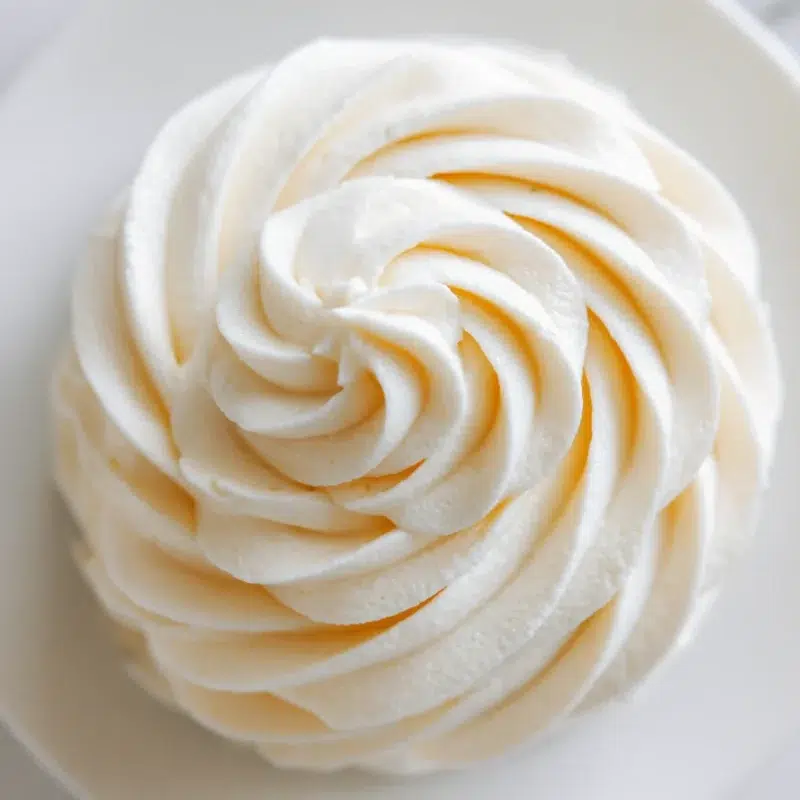
The first time I made Italian Meringue Buttercream, it was because I wanted a “grown-up” frosting for a birthday cake. You know that feeling when you want something that tastes special and bakery-pretty, but you do not want a sugar bomb that makes everyone scrape the frosting off? That was me, standing in my NYC kitchen with three kids circling like tiny frosting sharks.
This is the light buttercream I reach for when I want a not sweet buttercream frosting that still feels luxurious. It’s silky, smooth, and it holds up like a champ, which means it’s also a stable buttercream frosting for parties, piping, and those “please don’t melt in the subway” cake trips.
Why you’ll love it:
- • Light, silky texture, not heavy or gritty
- • Not overly sweet, so the cake flavor still shines
- • Smooth buttercream for piping, rosettes and borders come out clean
- • Stable buttercream frosting, great for layered cakes
- • Make-ahead friendly, you can store, freeze, and re-whip
What Is Italian Meringue Buttercream (And Why It Pipes So Smoothly)?
An Italian buttercream recipe is basically a little kitchen magic trick. You cook sugar with water into a hot syrup, then stream it into whipped egg whites. That heat “sets” the meringue, making it sturdy and glossy. After the meringue cools, you add butter slowly until it turns into a silky, fluffy frosting.
The best part is that marshmallowy stage. The egg whites go from foamy to cloud-like, then suddenly glossy and thick. The first time you see it, you’ll want to stop and stare for a second. (Do it. You earned it.) This method is why an Italian frosting recipe gives you that smooth buttercream for piping that looks clean on cakes and holds shape without feeling stiff.
Best uses:
- • Filling: light layers that do not ooze out
- • Frosting: smooth sides and easy spreading
- • Piping: stable swirls, borders, and details
Ingredients You’ll Need (And What Each One Does)
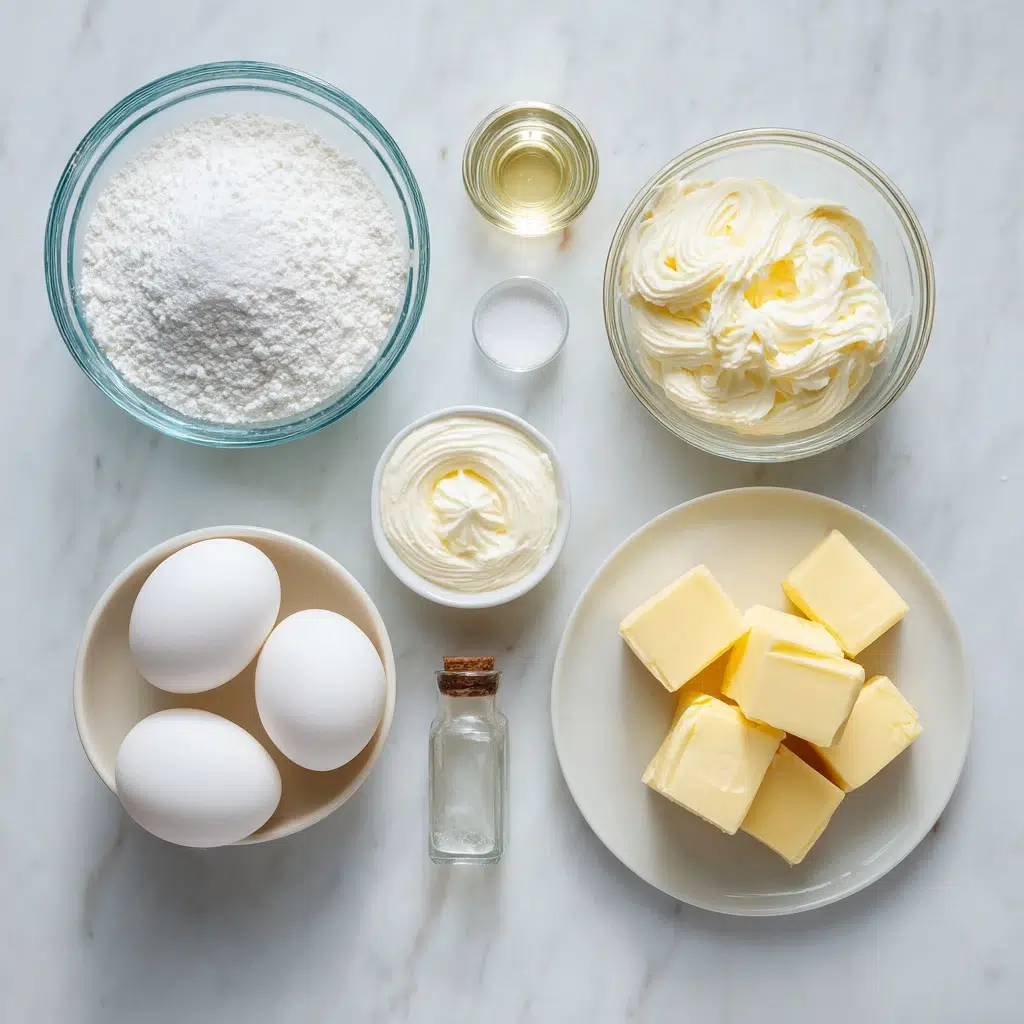
This Italian meringue buttercream frosting is made from simple ingredients, but each one has a job. My “always” rules are: room-temp butter, a clean bowl, and one deep breath before you start the syrup step. You’ve got this.
- • 1 1/4 cups (250g) granulated sugar, builds structure and stability
- • 1/3 cup (80g) water, dissolves sugar for the syrup
- • 5 large egg whites (about 150g), creates lift and that airy meringue base
- • 1/4 teaspoon cream of tartar, helps stabilize the egg whites (optional but helpful)
- • 1/2 teaspoon fine salt, balances sweetness and boosts flavor
- • 2 cups (454g) unsalted butter, room temperature, gives richness and that silky finish
- • 2 teaspoons vanilla extract, classic flavor (see FAQ for alternatives)
This is an easy Italian buttercream frosting once you understand the flow. It’s not hard, it’s just a “do this, then this” recipe.
Equipment Checklist (So the Process Feels Calm, Not Stressful)
Before you turn on the stove, set yourself up. I like to clear a little counter space, cube the butter, and pretend I’m on a calm cooking show, even if my real life is a backpack explosion behind me.
- • Stand mixer with whisk attachment (best) or a hand mixer
- • Medium saucepan for the syrup
- • Heat-safe measuring cup (optional, for pouring control)
- • Rubber spatula for scraping the bowl
- • Candy thermometer (helpful, but optional)
- • Piping bags and tips if you’re decorating
If you only have a hand mixer, you can still do this. You’ll just want to move a little quicker and keep everything organized, since you won’t have both hands free while the mixer runs.
How to Make Italian Meringue Buttercream (Step-by-Step)
This Italian buttercream frosting recipe is all about timing and temperature. If it looks weird halfway through, that is normal. I’ve had it look wrong at least once on a busy baking day, and it still turned into the prettiest frosting after a few more minutes of whipping.
Step 1: Prep Your Butter + Separate Egg Whites
Do the prep first, then you can focus during the syrup moment.
- • Cube the butter into tablespoon-sized pieces and leave it at room temperature. It should be pliable, not greasy.
- • Separate the eggs while they’re cold (it’s easier), then let the whites sit at room temp for 15 to 20 minutes if you can.
- • Use a clean, dry bowl. Any grease can keep the whites from whipping properly.
- • Eva tip: I crack each egg into a small bowl first, then add the white to the mixer bowl. That way, one broken yolk does not ruin the whole batch.
Step 2: Cook the Sugar Syrup
Add the sugar and water to a saucepan. Stir gently just to moisten the sugar, then stop stirring. Stirring later can encourage crystals.
- • Start: Medium heat until it comes to a steady boil.
- • Middle: Bubbles get louder and more active as water cooks off.
- • Finish: You’re aiming for the firm-ball range (see cues below). The syrup should look thicker and stream smoothly.
Eva’s Note (syrup timing): Stay nearby. This is not the step to answer a text, unload the dishwasher, and check on the kids’ missing shoe. The syrup moves fast at the end.
Step 3: Whip Egg Whites to Soft Peaks
While the syrup cooks, start whipping the egg whites in your mixer on medium speed. Add the cream of tartar if using.
- • Foamy: big bubbles, looks like a bubble bath
- • Soft peaks: when you lift the whisk, the tip droops over like a soft curl
You want soft peaks right around the time your syrup is ready. If the whites reach soft peaks too early, lower the speed to keep them moving without over-whipping.
Step 4: Stream in Syrup + Build the Meringue
With the mixer running on medium-high, carefully pour the hot syrup in a thin, steady stream down the side of the bowl. Avoid pouring directly onto the whisk, or it can fling syrup and create hard sugar threads.
Safety note: Hot syrup burns. Keep your face back, go slow, and don’t let kids “help” with this step.
This is the moment it turns glossy. The meringue will get thick, bright white, and marshmallowy. Keep whipping until the bowl feels closer to room temperature, usually 8 to 12 minutes depending on your kitchen.
Step 5: Cool, Then Add Butter Slowly
Once the meringue is no longer warm, start adding butter one piece at a time on medium speed. Let each piece mostly incorporate before adding the next.
What you should see:
- • It may look curdled halfway through. Keep going.
- • It may look soft for a minute, then tighten up as more butter emulsifies.
- • It will turn smooth and glossy when it comes together.
Eva’s Note (the curdled phase): This is where people panic and quit. Don’t. Keep the mixer running for a few minutes. There is often a “snap” moment where it turns into silk, and you can actually hear the mixer sound change from sloshy to fluffy.
Step 6: Flavor + Finish the Texture
Add the salt and vanilla extract, then whip on medium-high for 1 to 2 minutes to get it ultra smooth. This is where it becomes that not sweet buttercream frosting that tastes balanced and clean.
Final texture checklist:
- • Silky, not grainy
- • Fluffy, not dense
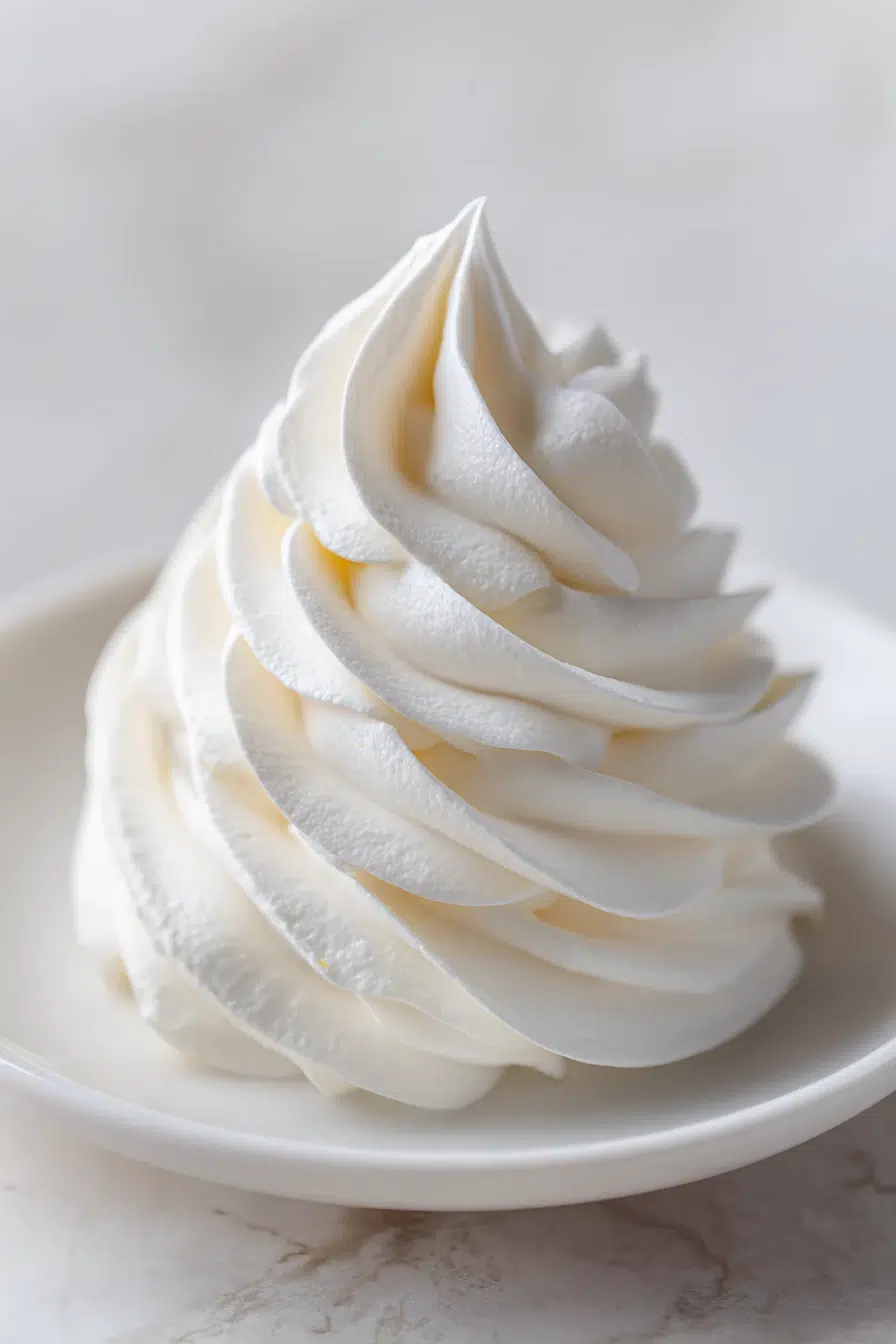
- • Holds peaks for piping, but spreads easily
If you’re using it on cake, it’s dreamy on marble cake, especially if you want that classic bakery look with a lighter bite.
Sugar Syrup Cues (With or Without a Thermometer)
I learned this the old-school way, watching the syrup and taking notes. Over time you start to recognize the bubble pattern, and it gives you this quiet confidence. If you have a thermometer, great. If you don’t, you can still make an easy Italian buttercream frosting by using visual cues.
- • Thermometer cue: Firm-ball range (about 245°F to 250°F)
- • Visual cue: Bubbles look tighter and more uniform, and the syrup streams in a continuous ribbon from a spoon
- • Thermometer cue: Syrup is thick but still pours smoothly
- • Visual cue: The boil looks more “dense” and less watery
If you see crystals: Don’t scrape the sides of the pan into the syrup. If you notice sugar stuck on the sides early on, you can brush the sides lightly with a clean pastry brush dipped in water. Then let it boil without stirring.
Troubleshooting: Curdled, Soupy, Grainy, or Greasy Buttercream
Most Italian meringue buttercream frosting problems come down to temperature. The good news is that it’s usually fixable. I’ve had a batch look like cottage cheese and still end up as a smooth buttercream for piping after a small adjustment and a little patience.
- • Looks like: Curdled, chunky
Cause: Too cool, butter not blending
Quick move: Warm the outside of the bowl briefly, then keep whipping - • Looks like: Soupy, loose
Cause: Too warm, butter melting
Quick move: Chill the bowl 10 minutes, then whip again - • Looks like: Grainy
Cause: Sugar crystals or syrup issues
Quick move: Make sure syrup was fully dissolved and avoid stirring while boiling - • Looks like: Greasy, heavy
Cause: Butter too warm or over-soft
Quick move: Chill briefly, then whip to re-aerate
If you’re chasing a stable buttercream frosting for a party cake, remember this: steady temperature beats rushing. Short chill, short warm, then whip. That’s the rhythm.
Consistency + Piping Tips (Borders, Rosettes, Smooth Sides)
This frosting is one of my favorites for decorating because it behaves. The swirls look clean, the edges stay sharp, and it doesn’t crust like some American-style frostings. On family birthdays, I always do a “two-minute final whip” right before piping, and it makes the rosettes look like they came from a bakery box.
- • For filling: Slightly softer, spreadable, but not runny
- • For smooth sides: Medium texture, holds shape on a spatula
- • For piping: A touch firmer, holds peaks and sharp ridges
If it’s too soft, chill briefly; if too firm, warm slightly.
If you want a light buttercream on a springy, fruity cake, it’s lovely on strawberry shortcake cake, especially for clean borders and big birthday swirls.
Flavor Variations (Peanut Butter, Chocolate, Citrus, Berry)
Once you’ve mastered the base, flavoring this Italian buttercream frosting recipe is honestly fun. My family requests chocolate the most, and I lean citrus in the warmer months because it makes the whole cake taste brighter. The key is to add flavors gradually, whip well, and avoid dumping in a lot of liquid at once.
- • Peanut Butter Italian Meringue Buttercream: Add 1/2 to 3/4 cup (125g to 190g) creamy peanut butter at the end. Start with 1/2 cup, taste, then adjust. If it softens too much, chill briefly and re-whip.
- • Chocolate: Add 6 to 8 oz (170g to 225g) melted and cooled chocolate or 1/2 cup (50g) cocoa powder sifted in. For extra chocolate direction, I sometimes pull inspiration from my homemade chocolate syrup notes, especially for pairing ideas.
- • Citrus: Add 1 to 2 teaspoons citrus zest plus 1 to 2 tablespoons juice (go slow with juice). Lemon with berry cake is one of my favorite “family gathering” flavors.
- • Berry: Add 3 to 6 tablespoons thick berry reduction or a spoonful at a time until it tastes right. If you want a berry direction that stays fluffy, my raspberry buttercream frosting is a great inspiration for flavor balancing.
Start small, taste, then adjust. This is a not sweet buttercream frosting by nature, so you don’t need to overdo flavorings to make it pop.
How Much Frosting This Makes (Filling vs Frosting) + Best Pairings
This batch makes about 5 to 6 cups of Italian meringue buttercream frosting, depending on how long you whip and how much air you build in. My “safe batch” rule for party cakes is to make the full amount, because you’ll want enough for filling, a crumb coat, and a final coat without scraping the bowl like a raccoon at midnight.
Covers:
- • 12 cupcakes: generous swirls
- • 24 cupcakes: simple frosting, light swirl
- • 8-inch 2-layer cake: filling + frosting (moderate thickness)
- • 8-inch 3-layer cake: you may want 1.5 batches for thick frosting and piping
Pair it with marble cake for a classic crowd-pleaser, or go fresh and bright with strawberry shortcake cake. Either way, this Italian buttercream frosting recipe lets the cake shine.
Make-Ahead, Storage, Freezing, and Bringing It Back to Life
If you’ve ever frosted a cake at midnight for a school event (hi, it’s me), you will love how make-ahead friendly this is. Italian meringue buttercream frosting stores well, and it re-whips beautifully once it’s back at the right temperature.
- • Day 0: Use right away, or store airtight at cool room temperature briefly for same-day use.
- • Day 1 to 3 (refrigerator): Store in an airtight container. Bring to room temperature, then re-whip until smooth.
- • Freezer (up to 2 months): Freeze airtight, portioned if you want. Thaw overnight in the refrigerator.
Eva’s Note (re-whip to restore texture): After chilling or freezing, it may look dense or slightly separated. Let it soften a bit, then whip for a few minutes. If it’s too firm, warm slightly. If it’s too soft, chill briefly. The goal is a stable buttercream frosting that feels cool and fluffy, not slick.
Frequently Asked Questions about Italian Meringue Buttercream
Q: How do you fix Italian meringue buttercream that looks curdled?
Answer: Keep mixing first, this frosting often passes through an “awkward” curdled stage as the butter and meringue emulsify. If it stays curdled after several minutes, the mixture is usually too cool. Warm the outside of the bowl gently (briefly) and continue whipping until it turns smooth and glossy. The moment it “snaps” into silkiness is real, and you can hear the mixer go from sloshy to fluffy.
Q: Why is my Italian meringue buttercream soupy and how do I thicken it?
Answer: Soupy buttercream usually means the mixture is too warm, so the butter can’t hold structure yet. Chill the bowl briefly, then whip again. Repeat in short rounds until it thickens and holds soft peaks suitable for frosting. I’ve saved a batch on a hot summer day with a 10-minute chill and a little patience.
Q: What temperature should the sugar syrup be for Italian meringue buttercream?
Answer: Aim for the firm-ball range so the syrup sets the meringue structure properly. At that point, the syrup streams smoothly and the bubbles look thick and active. Pour it in a thin, steady stream while whipping to build a stable, glossy meringue. I watch for the bubbles to tighten up, that’s my quiet signal to get ready.
Q: Can I make Italian meringue buttercream without a candy thermometer?
Answer: Yes. Use visual cues: the syrup will boil vigorously, then the bubbles become tighter and more uniform, and the syrup falls from a spoon in a continuous stream rather than separate drips. Consistent timing and staying attentive matter most. I learned the cues by making it a few times and writing little notes in the margin like a nerdy baking diary.
Q: How do I store Italian meringue buttercream and how long does it last?
Answer: Store it in an airtight container. It can sit at cool room temperature briefly for same-day use, or be refrigerated for several days. Before using, let it come back to a spreadable temperature and re-whip until smooth. I always label mine “tomorrow’s cake,” and it feels like leaving a gift for future me.
Q: Can you freeze Italian meringue buttercream?
Answer: Yes. Freeze in an airtight container (or portioned in bags), then thaw in the refrigerator. Once thawed, bring it to a workable temperature and whip again to restore its silky texture. I like freezing small portions so I can frost a few cupcakes without making a whole new batch.
Q: How do you reheat or bring Italian meringue buttercream back to the right texture?
Answer: If it’s too firm, let it sit at room temperature briefly, then whip. If it’s too soft, chill briefly, then whip. The goal is a smooth, airy texture that holds shape for piping without looking greasy. It should feel cool and fluffy, not slick.
Q: What substitutions can I use for vanilla extract in Italian meringue buttercream?
Answer: You can use vanilla bean paste, vanilla powder, or other extracts like almond, citrus, or coconut. Add gradually, whipping well and tasting as you go, so the flavor stays balanced and the texture remains smooth. Citrus with berry cake is one of my favorite family-party combos because it tastes bright without being loud.
Q: Can I use a slow cooker for the warming step, and how long would it take?
Answer: You can use gentle, indirect warmth to help adjust temperature, but keep it controlled and brief, this frosting changes quickly with heat. Use low heat, monitor closely, and warm in short intervals until the buttercream loosens slightly, then whip to finish. Timing varies by batch size and starting temperature, so check every few minutes rather than relying on one set time. If I do this, I set a timer and check by feel like I’m testing a baby’s bath water.
If you’ve been wanting an Italian frosting recipe that feels light, pipes beautifully, and tastes like a not sweet buttercream frosting, this is the one to keep in your back pocket. Italian Meringue Buttercream is the kind of recipe that gets easier every time you make it, and once you feel that silky finish, you’ll wonder why you ever settled for anything else.
Thank you for cooking with me, it means so much to have you here in my kitchen.
If you’d like more cozy baking ideas, come follow me on Pinterest.
Print
Italian Meringue Buttercream (Not Too Sweet Frosting)
- Total Time: 45 minutes
- Yield: 5 to 6 cups 1x
- Diet: Vegetarian
Description
Italian Meringue Buttercream is a light, silky frosting that’s not overly sweet. Step-by-step tips for smooth, stable results for cakes and piping.
Ingredients
1 1/4 cups (250g) granulated sugar
1/3 cup (80g) water
5 large egg whites (about 150g)
1/4 teaspoon cream of tartar
1/2 teaspoon fine salt
2 cups (454g) unsalted butter, room temperature
2 teaspoons vanilla extract
Instructions
1. Cube the butter into tablespoon-sized pieces and leave it at room temperature. Separate the eggs while they’re cold, then let the whites sit at room temp for 15 to 20 minutes.
2. Add the sugar and water to a saucepan. Stir gently just to moisten the sugar, then stop stirring. Start on medium heat until it comes to a steady boil. Aim for the firm-ball range.
3. While the syrup cooks, start whipping the egg whites in your mixer on medium speed. Add the cream of tartar if using.
4. With the mixer running on medium-high, carefully pour the hot syrup in a thin, steady stream down the side of the bowl.
5. Once the meringue is no longer warm, start adding butter one piece at a time on medium speed.
6. Add the salt and vanilla extract, then whip on medium-high for 1 to 2 minutes to get it ultra smooth.
Notes
This frosting is make-ahead friendly. Store in an airtight container. Re-whip after bringing to room temperature. Can be frozen for up to 2 months.
- Prep Time: 30 minutes
- Cook Time: 15 minutes
- Category: Dessert
- Method: No Cook
- Cuisine: Italian
Nutrition
- Serving Size: 1/12 of recipe
- Calories: 200
- Sugar: 20
- Sodium: 50
- Fat: 18
- Saturated Fat: 11
- Unsaturated Fat: 7
- Trans Fat: 0
- Carbohydrates: 10
- Fiber: 0
- Protein: 1
- Cholesterol: 60