
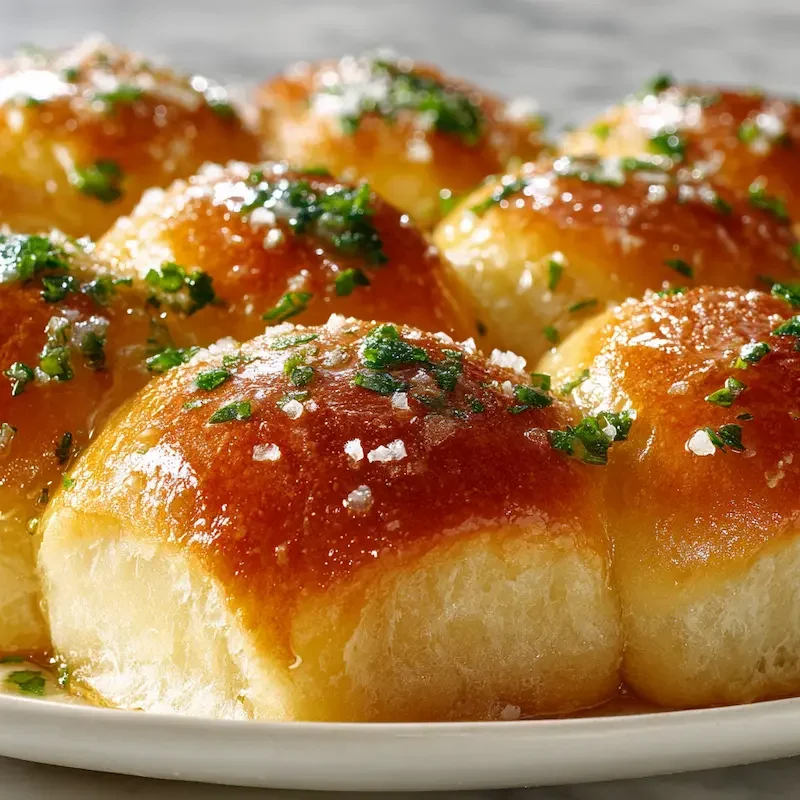
These soft, buttery garlic bread rolls are the perfect pull-apart side for any meal. Made from scratch with fresh parsley and garlic butter, they’re irresistibly fluffy and golden.
Why You’ll Love These Garlic Bread Rolls
Garlic Bread Rolls are that little bit of magic you didn’t know your dinner table needed until they’re in the oven and the smell hits you. Warm, buttery, and full of fresh garlic and herbs, these pull-apart rolls have made their way into our family’s weekly rotation, especially on soup nights or when we’re hosting.
I started making these soft garlic bread rolls for our Sunday potluck dinners, and let me tell you—there’s never a single roll left. Last Thanksgiving, I caught my son Noah sneaking a third roll before the turkey even made it to the table. That’s the kind of recipe this is.
Why They’re Special:
• Made from scratch with real ingredients you probably already have
• Incredibly soft and fluffy thanks to warm milk and a touch of egg
• Pull-apart perfection—buttery tops and tender middles in every bite
They’re cozy, garlicky, and feel like a warm hug on your plate. I usually serve them alongside cozy dishes like roasted sweet potato rounds, and they never disappoint.
Ingredients You’ll Need
One of the best parts about making homemade garlic rolls is how simple and honest the ingredients are. You don’t need anything fancy—just a few pantry staples, fresh garlic, and a little patience (the good kind, the kind that smells like bread baking).
I always pick up fresh parsley and garlic from our neighborhood market here in Queens. The guy at the produce stand knows I’m there for a bundle of parsley almost every week—it just brightens everything, especially these rolls.
And please don’t swap the milk for water. Using warm whole milk gives these yeast dinner rolls their signature softness. It’s the secret behind that cloud-like texture that keeps you reaching for “just one more.”
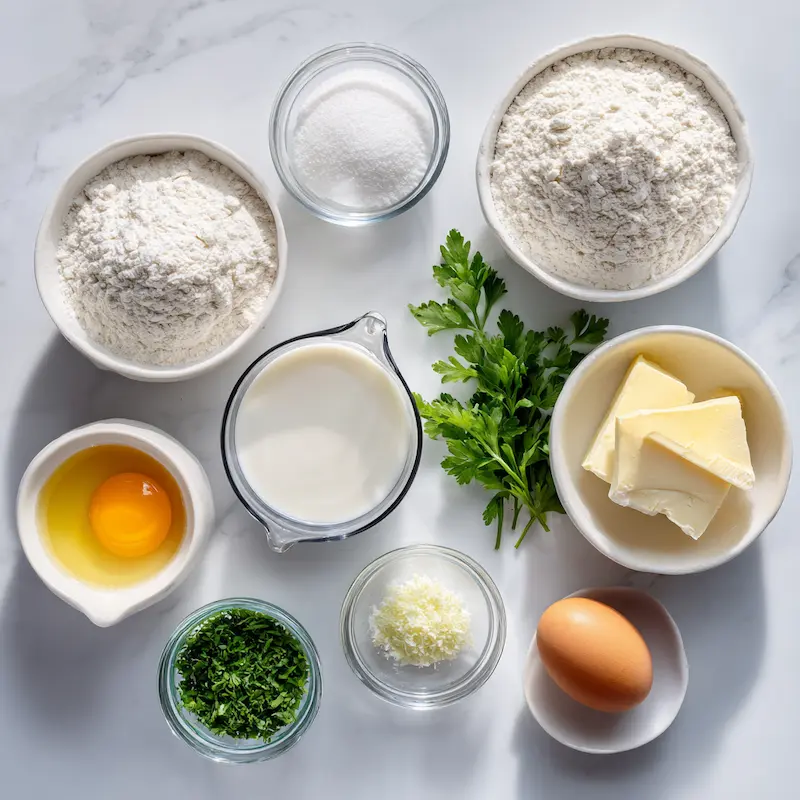
You’ll Need:
• 4½ tbsp unsalted butter
• 2 tbsp minced garlic – chop it very fine so you don’t get raw bits later
• 3½ cups all-purpose flour
• 1 tbsp all-purpose flour (extra for kneading)
• 3 tbsp chopped fresh parsley
• 1 tbsp granulated sugar
• 2¼ tsp instant yeast
• 1 tsp fine sea salt
• 1 cup whole or 2% milk, warmed to 110°F
• 1 large egg, room temperature
• 1 beaten egg, for brushing the tops
Eva’s Note:
Don’t skip the parsley. It adds a touch of green and freshness that makes these look and taste special—like something you’d get at a cozy neighborhood bakery.
How to Make Garlic Bread Rolls
Making garlic bread rolls from scratch sounds like a weekend project, but once you’ve done it once, you’ll wonder why you ever bought the frozen kind. The dough comes together in one bowl, it rises beautifully with a little warmth, and the smell—oh, the smell—is absolutely worth the effort.
The first time I tried making these, Lily (my oldest) was in 4th grade and needed something for her school’s International Night. She picked Italy, and I figured soft garlic bread was close enough. We made the dough together and watched it puff up like magic in the warm oven. She brushed on the garlic butter with such focus, and when we pulled the rolls apart, they were steaming and golden and just perfect. That memory’s baked right into this recipe.
Step-by-Step: Garlic Bread Rolls from Scratch
1. Warm the milk.
Heat your milk to about 110°F—just warm to the touch, not hot.
Eva’s Tip: I always warm mine in the microwave for 30–40 seconds and stir. If it’s too hot, let it cool a bit. Warm milk helps activate the yeast and gives the rolls their fluff.
2. Mix the dough.
In a large bowl, whisk together warm milk, sugar, and instant yeast. Let sit for 5 minutes until slightly foamy. Then add in the egg, softened butter (about 2 tablespoons), sea salt, and flour.
3. Knead until smooth.
Mix with a wooden spoon until a shaggy dough forms, then turn it onto a lightly floured surface. Knead for about 8 minutes, adding a bit of flour if it gets too sticky. The dough should be soft, stretchy, and slightly tacky.
4. First rise (1 hour).
Place the dough in a greased bowl and cover it with a clean kitchen towel or plastic wrap.
Eva’s Tip: If your kitchen is chilly, turn your oven on for just one minute, then turn it off. Place the covered bowl inside—your dough will love the cozy warmth and rise beautifully.
5. Shape the rolls.
Once doubled in size, punch down the dough and divide it into 12 equal pieces. Roll each into a smooth ball. Arrange them in a greased 9×13-inch baking dish, spaced just slightly apart.
6. Second rise (30–40 minutes).
Cover the baking dish with a towel and let the rolls rise again until puffy and nearly touching.
7. Brush with egg and bake.
Preheat the oven to 375°F. Brush the tops of the rolls with the beaten egg—this gives them that gorgeous golden glow.
Bake for 18–22 minutes, until the tops are golden and the centers are cooked through.
8. Garlic butter time!
As soon as they’re out of the oven, brush with fresh garlic butter (recipe in the next section). Sprinkle with parsley and flaky sea salt while still warm.
Eva’s Note:
These homemade garlic bread rolls are at their best warm and fresh, but they also reheat like a dream. If you love savory snacks, try these mashed potato cheese puffs next—they’re another favorite in our house.
Make-Ahead Tips
Let’s be real—sometimes dinner needs to be halfway done before the day even begins. Whether you’re prepping for a holiday, a school night, or just want that fresh-baked roll magic without starting from scratch at 4 p.m., these garlic bread rolls are wonderfully make-ahead friendly.
There are two great options, and I’ve used both depending on the kind of week we’re having:
Option 1: Make the Dough Ahead
After kneading and the first rise, cover the dough tightly and refrigerate overnight. The next day, let it sit at room temperature for about 30–45 minutes before shaping and continuing with the recipe.
Option 2: Freeze After Baking
Bake the rolls completely and let them cool. Wrap them well in foil or airtight containers and freeze for up to 2 months. Reheat in a 325°F oven wrapped in foil until warmed through—about 12–15 minutes.
Eva’s Note: My Go-To Time Saver
When I know we have guests coming or a busy week ahead, I shape the rolls the night before, cover the dish in plastic wrap, and pop it in the fridge. The next day, I let them come to room temp and rise while the oven preheats. It’s a little trick that saves me time but still feels homemade.
Garlic Butter Topping (Optional but Highly Recommended)
Let’s be honest: garlic bread rolls without garlic butter are like pancakes without syrup. Technically fine—but why would you? This buttery garlic topping takes these pull-apart rolls from “yum” to “did you seriously eat four?” (Looking at you again, Noah.)
We brush it on while the rolls are still warm from the oven, so the butter melts into the cracks and the garlic infuses every bite. That little sprinkle of flaky salt at the end? It makes them taste bakery-fancy in the best homemade way.
Simple Garlic Butter Topping
You’ll Need:
• 2 tbsp unsalted butter
• 1 tbsp finely minced garlic
• 1 tbsp chopped fresh parsley
• Flaky sea salt, for sprinkling
How to Make It:
Melt the butter in a small saucepan over low heat or in the microwave.
Add the garlic and cook gently for about 1 minute—just until fragrant.
Stir in parsley and remove from heat.
Brush generously over the warm baked rolls.
Sprinkle flaky salt while the butter’s still melty so it sticks.
Eva’s Tip:
Chop the garlic extra fine—almost paste-like. This way, it spreads evenly into the butter and doesn’t leave any sharp bites behind. I learned this after my first batch had little surprise chunks (oops!).
What to Serve with Garlic Bread Rolls
These garlic bread rolls are the kind of side that makes a meal feel complete. They’re buttery, savory, and just indulgent enough to feel like a treat—even on a weeknight.
In our house, they show up next to soups, roasts, skillet meals, and even big salads. Emma loves tearing one apart and dipping it into her bowl of tomato soup, while Lily always saves hers for the end—like a little bready dessert.
Whether you’re serving up comfort food or something fresh and quick, here are a few tried-and-true pairings:
Perfect Pairings for Garlic Dinner Rolls:
• Soup Night Favorites
Creamy tomato basil
Chicken and wild rice
Broccoli cheddar
• Main Course Ideas
Roast chicken or turkey
Baked ziti or lasagna
Slow-cooked beef stew
One-pan chicken with buttered noodles
• Other Cozy Sides
A big green salad with lemon vinaigrette
Cozy dishes like roasted sweet potato rounds
Steamed veggies with lemon and garlic butter
Eva’s Note:
They’re especially perfect when you need a cozy side that doubles as something snackable. I’ve even served leftover rolls with scrambled eggs the next morning—highly recommend.
Storage & Reheating
So—you made the garlic bread rolls, everyone loved them (of course), and now you’ve got a few left over. Lucky you. These rolls store beautifully, and with the right reheating trick, they’ll be nearly as good as fresh.
I always try to save a couple for the next day’s lunchboxes or to serve with soup leftovers. My kids actually get excited when they spot one in a foil wrap—it’s the little things.
Quick Storage Tips:
• To Store:
Keep leftover rolls in an airtight container at room temperature for up to 2 days. For longer storage, pop them in the fridge (up to 5 days) or freezer (up to 2 months).
• To Reheat:
Wrap rolls in foil and place in a 300°F oven for 8–10 minutes until warm.
Eva’s Trick: Swipe a little garlic butter on top before reheating. It brings back that fresh-baked smell and keeps the rolls soft.
Frequently Asked Questions about Garlic Bread Rolls
Q: How do you make garlic bread rolls from scratch?
✅ Answer: Start with a soft yeast dough made from flour, warm milk, egg, and butter. After kneading and the first rise, shape the dough into rolls, let them rise again, and bake until golden. Once out of the oven, brush with a garlic-parsley butter for that classic garlic bread flavor.
💡 Eva’s Tip: You’ll know they’re ready when your whole kitchen smells like a cozy Italian bakery—my kids always come running when that garlicky scent starts drifting down the hallway.
Q: Can I freeze garlic bread rolls?
✅ Answer: Absolutely. After baking, let the rolls cool completely. Wrap them tightly in foil or place in a freezer-safe bag, then freeze for up to 2 months. When you’re ready to eat, warm in a 325°F oven, wrapped in foil, until heated through.
💡 Eva’s Memory: I once froze a batch before my third baby was born—it was the best feeling to pull them out during those sleepy, chaotic first weeks and serve something warm with minimal effort.
Q: Why are my rolls dense instead of fluffy?
✅ Answer: Usually, it’s one of two things: either the dough didn’t rise enough, or the yeast wasn’t active. Always check your yeast by blooming it in warm milk with a pinch of sugar—it should get foamy within 5 minutes.
💡 Eva’s Tip: I learned the hard way during a winter cold snap—our kitchen was too chilly, and the dough just wouldn’t rise. Now I warm the oven slightly, then turn it off and let the dough rise inside. Works every time.
Q: Can I make the dough ahead of time?
✅ Answer: Yes. After kneading and the first rise, cover the dough and refrigerate it overnight. Let it come to room temperature before shaping and baking the next day.
💡 Eva’s Note: I do this every Thanksgiving Eve—makes the holiday morning so much easier, and the rolls taste just as fresh.
Q: How do I reheat leftover rolls without drying them out?
✅ Answer: Wrap each roll in foil and warm in a 300°F oven for about 10 minutes. For bonus flavor and moisture, add a dab of garlic butter before reheating.
💡 Eva’s Trick: I pop a few into the toaster oven on low with leftover soup for lunch—Noah says they taste “like they just came out of the oven.”
And there you have it. Whether you’re baking these for a holiday table or a random Tuesday dinner, garlic bread rolls bring a kind of comfort that’s hard to beat. From their soft, fluffy centers to the garlicky, buttery tops—they’re just the kind of homemade recipe that makes a meal feel complete.
If you haven’t already, go ahead and pin or print this one—it’s a keeper.
Want a perfect pairing? Don’t forget to serve them with something cozy like garlic butter green beans.
Thanks for baking with me. Let me know how your rolls turn out—I always love hearing your kitchen stories.
Print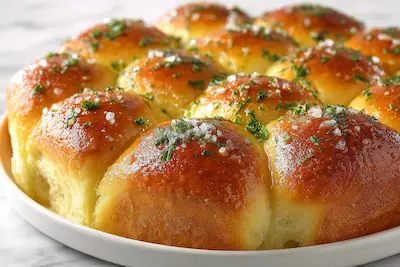
Soft and Buttery Garlic Bread Rolls (Pull-Apart Style)
- Total Time: 2 hours
- Yield: 12 rolls 1x
- Diet: Vegetarian
Description
Soft, buttery garlic bread rolls that pull apart easily and melt in your mouth. Perfect for soups, roasts, and holiday dinners.
Ingredients
4½ tbsp unsalted butter
2 tbsp minced garlic
3½ cups all-purpose flour
1 tbsp all-purpose flour (extra for kneading)
3 tbsp chopped fresh parsley
1 tbsp granulated sugar
2¼ tsp instant yeast
1 tsp fine sea salt
1 cup whole or 2% milk, warmed to 110°F
1 large egg, room temperature
1 beaten egg, for brushing tops
2 tbsp unsalted butter (for garlic topping)
1 tbsp minced garlic (for garlic topping)
1 tbsp chopped fresh parsley (for garlic topping)
Flaky sea salt, for garnish
Instructions
1. Warm the milk to about 110°F—just warm to the touch.
2. In a large bowl, whisk together the warm milk, sugar, and yeast. Let sit for 5 minutes until foamy.
3. Add egg, 2 tbsp softened butter, sea salt, and flour. Mix until a dough forms.
4. Knead on a lightly floured surface for 8 minutes until soft and smooth.
5. Place in a greased bowl, cover, and let rise in a warm spot for 1 hour or until doubled in size.
6. Punch down dough and divide into 12 equal pieces. Shape each into a smooth ball.
7. Place in a greased 9×13-inch pan. Cover and let rise again for 30–40 minutes.
8. Preheat oven to 375°F. Brush rolls with beaten egg.
9. Bake for 18–22 minutes until golden brown.
10. While baking, make the garlic butter: melt 2 tbsp butter, cook garlic for 1 minute, then stir in parsley.
11. Brush baked rolls with garlic butter and sprinkle with flaky sea salt.
12. Serve warm.
Notes
Chop garlic very fine to avoid raw bits in the butter.
Warm milk helps activate the yeast and creates softer rolls.
You can make the dough ahead and refrigerate after the first rise.
Rolls can be baked, cooled, and frozen for up to 2 months.
Reheat in a 325°F oven wrapped in foil for 10–15 minutes.
- Prep Time: 20 minutes
- Cook Time: 22 minutes
- Category: Bread
- Method: Baking
- Cuisine: American
Nutrition
- Serving Size: 1 roll
- Calories: 180
- Sugar: 2g
- Sodium: 210mg
- Fat: 7g
- Saturated Fat: 4g
- Unsaturated Fat: 2.5g
- Trans Fat: 0g
- Carbohydrates: 25g
- Fiber: 1g
- Protein: 4g
- Cholesterol: 35mg