
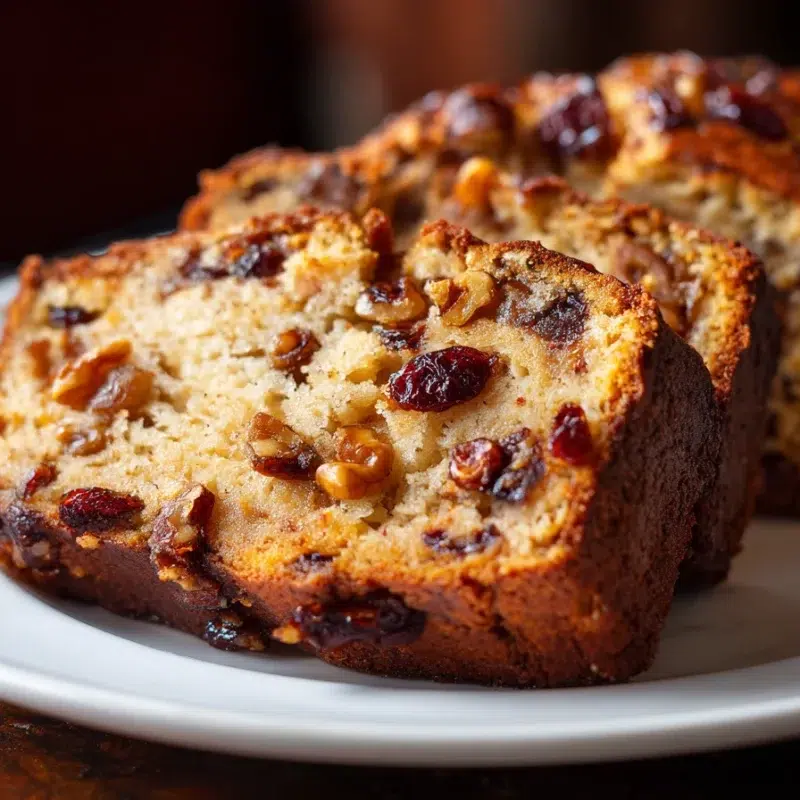
The first time I made Cranberry Raisin Walnut Cinnamon Artisan Bread, it was one of those slow New York weekend mornings where nobody wanted to put on real pants. The kids were still sleepy, the coffee was doing its job, and the whole apartment smelled like warm cinnamon before we even had breakfast figured out. That is my favorite kind of baking, special but doable, the kind of loaf that makes an ordinary morning feel like we planned it.
This is a Dutch Oven Bread situation, which means you get that crackly, bakery-style crust without any fancy equipment. And even better, it fits right into the “Homemade Bread Recipes Easy” category because most of the time is hands-off. You stir, you wait, you bake, and suddenly you have a loaf that tastes like you picked it up from a little corner bakery.
That first slice, still a little warm, with butter melting into the cinnamon crumb, it is pure comfort.
Why You’ll Love This Cranberry Raisin Walnut Cinnamon Artisan Bread
I call this my bake-once, enjoy-all-week loaf. It turns quick breakfasts into something cozy, and it makes the house smell like you have your life together (even if the laundry is absolutely not folded).
- Crackly crust + tender inside, thanks to the Dutch oven.
- Minimal hands-on time, it is an easy artisan bread recipe you can fit into a busy day.
- Sweet, spiced flavor that hits that cinnamon walnut bread craving without being dessert.
- Loaded with fruit and nuts, so every slice feels special.
- Great for toast, the raisins and cranberries get extra jammy.
- One of those “repeat bake” Artisan Bread Recipes you will come back to.
Ingredients You’ll Need (and Why They Matter)
This loaf is built from simple pantry staples, plus the cozy add-ins that make it feel like a bakery treat. It is very much a Cinnamon Raisin Bread Recipe at heart, but the cranberries and walnuts add a little extra personality. It is the kind of Raisin Bread I make when I want “homemade” to taste a little more intentional, without adding extra stress.
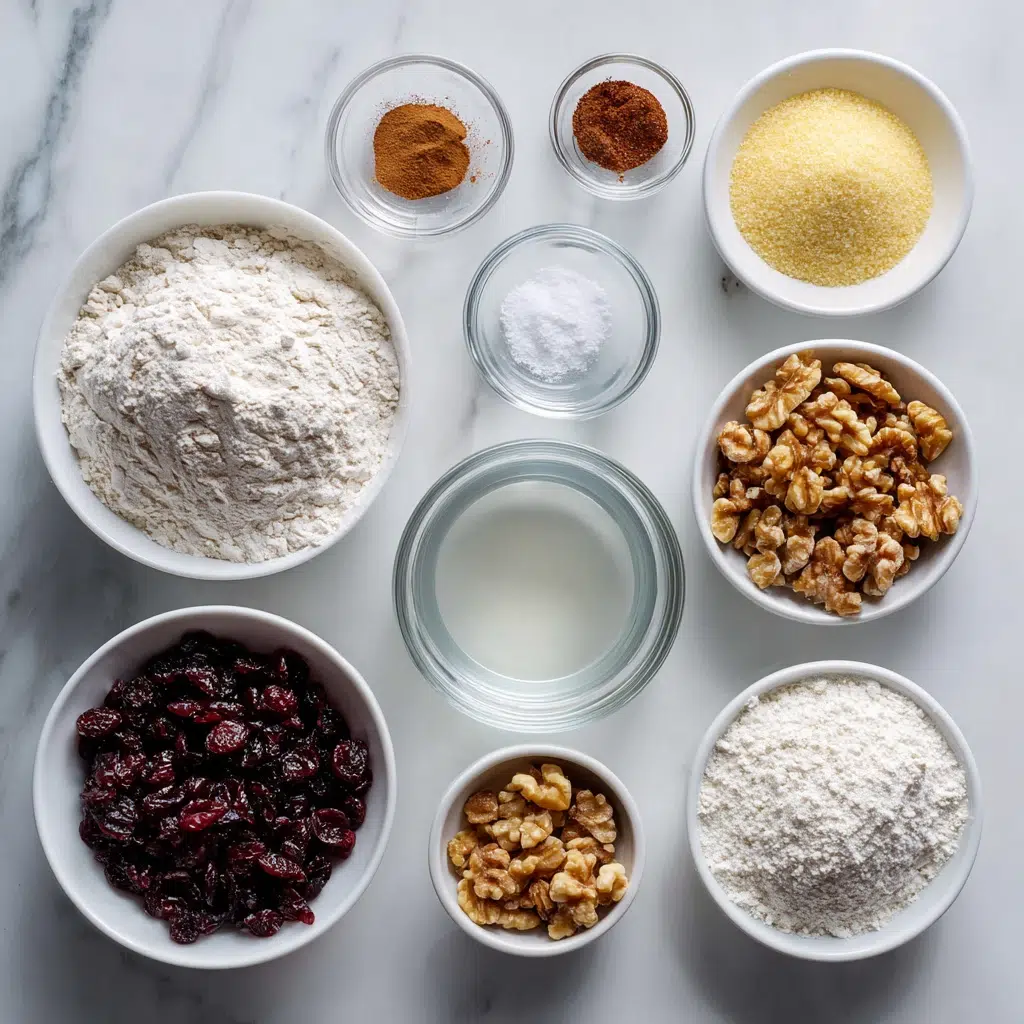
- 3 cups bread flour, gives the loaf structure, chew, and that artisan lift.
- 1 1/2 teaspoons salt, makes the flavor pop (do not skip it).
- 3/4 teaspoon ground cinnamon, warm spice in every bite for that homemade cinnamon bread feel.
- 1/2 teaspoon instant yeast, a small amount, but it does big work over time.
- 1 1/2 cups lukewarm water, hydration is what makes artisan-style crumb possible.
- 1/2 cup dried cranberries, tart little bursts that balance the cinnamon.
- 1/2 cup raisins, classic Cinnamon Raisin Bread sweetness.
- 1/2 cup walnuts, chopped, for crunch and that cozy nutty flavor (toasted is optional, but honestly worth it).
- Extra flour, for dusting so shaping is less sticky.
- Cornmeal or semolina (optional), helps prevent sticking and adds a tiny bit of crunch underneath.
Eva tip: If you have 5 extra minutes, toast the walnuts. The warm, nutty smell alone makes the loaf feel bakery-worthy, and the flavor is deeper in every slice.
Bread Flour vs All-Purpose Flour (Quick Guidance)
I am a big believer in using what you have. I have made this with bread flour and with all-purpose flour, usually depending on whether Lily “organized” the pantry and I can actually find the bread flour.
- If you use bread flour, expect a slightly chewier crumb, stronger rise, and dough that feels more elastic when you stretch it.
- If you use all-purpose flour, your loaf will still be lovely, but the crumb may be a bit softer and the dough can feel more delicate.
- If the dough feels looser with all-purpose, do an extra fold or two during the rise and use a light dusting of flour when shaping.
Either way, you are still getting a beautiful artisan-style loaf. The biggest difference I notice is in the “pull” of the dough, bread flour feels stretchy, all-purpose feels a little more gentle.
Equipment + Dutch Oven Setup (For a Crackly Crust)
If you want that thicker, crunchier crust at home, the Dutch oven is your best friend. It traps steam from the dough as it bakes, and that steam is what helps your artisan loaf rise high and form that shiny, blistered crust. The first time I baked Dutch Oven Bread, I was shocked by the sound it made cooling on the rack, like a quiet little crackle-song telling you it worked.
- Dutch oven, 5 to 7 quarts is ideal.
- Parchment paper, for easy lowering and lifting (and fewer burned knuckles).
- Good oven mitts, the lid is no joke when it is blazing hot.
- Optional thermometer, helpful for doneness, especially with fruit in the dough.
Safety note from my first attempt: Put the hot lid somewhere obvious and stable. I once set it too close to the sink and spent the rest of the bake guarding it like a dragon.
How to Make Cranberry Raisin Walnut Cinnamon Artisan Bread (Step-by-Step)
This is an easy artisan bread recipe with a simple rhythm, mix, rest, fold, rise, bake. The dough will look shaggy at first, and that is exactly right. And if it looks sticky early on, do not panic. Sticky dough is often the secret to a tender, open crumb, especially for cinnamon raisin bread.
- Mix the dry ingredients. In a large bowl, whisk together the bread flour, salt, cinnamon, and instant yeast.
- Add the water (hold back a splash). Pour in most of the lukewarm water and stir with a spoon until you have a shaggy dough. If there is still dry flour at the bottom, add the remaining water a little at a time. You want shaggy but cohesive, not soupy.
- First rest (autolyse-style). Cover the bowl and let the dough rest 15 to 20 minutes. Look for: the dough will feel less rough and more unified after this rest.
- Fold in the add-ins. Sprinkle in the dried cranberries, raisins, and chopped walnuts. Use your hand or a dough scraper to fold the dough over itself until the add-ins are mostly distributed.
- Bulk rise. Cover the bowl and let the dough rise at room temperature until puffy and noticeably larger, usually 2 to 3 hours depending on your kitchen. Look for: bubbles on the surface and a dough that jiggles slightly when you shake the bowl.
- Optional folds for strength. During the first hour, you can do 1 to 2 gentle stretch-and-folds right in the bowl, about 20 minutes apart. This helps structure, especially if you used all-purpose flour.
- Shape. Lightly flour your counter. Turn out the dough and shape it into a round by tucking the edges under. Keep the surface reasonably tight, but do not deflate it aggressively.
- Second rise. Place the dough seam-side down on a piece of parchment. Cover loosely and let it rest 30 to 60 minutes while you preheat the oven.
- Preheat the Dutch oven. Put the Dutch oven (with lid) in the oven and preheat to 450°F. Give it at least 30 minutes so the pot is fully hot.
- Score and bake covered. Carefully lift the dough on the parchment into the hot Dutch oven. If you like, sprinkle a little cornmeal or semolina under the parchment. Score the top with a sharp knife. Cover and bake 25 minutes.
- Uncover and finish. Remove the lid and bake another 10 to 20 minutes until deep golden brown. Bake to temperature, not just time: aim for about 205°F to 210°F in the center for a fully baked loaf with no gummy middle.
- Cool completely. Transfer to a rack and let it cool at least 1 hour before slicing. Look for: the crust will “sing” and crackle as steam escapes.
Add-In Success (Even Fruit + Walnut Distribution)
Fruit and nuts can be sneaky. If you dump them in and stir like you mean it, you can end up with clumps, or a bottom-heavy loaf. Here is how I keep cranberry raisin bread slices evenly loaded with walnuts, the goal is a little bit of everything in every bite of this artisan bread.
- Toss add-ins with a pinch of flour before adding, it helps them grip the dough instead of sliding.
- Fold, do not knead hard, gentle folds keep the dough airy.
- Add in stages if needed, half the fruit and nuts, fold, then the rest.
- Chop walnuts medium, too big and they create gaps, too small and they disappear.
- Toast walnuts for bigger flavor, it makes the whole loaf smell like a cozy bakery corner.
Cinnamon Swirl vs Mixed-In Cinnamon (Choose Your Style)
You have two good options here, and my family is split. Noah loves mixed-in cinnamon because every bite tastes the same. Emma votes for a swirl because she likes finding the “cinnamon ribbons.” Either way, you end up with a very lovable homemade cinnamon bread moment.
- Swirl: After the first rise, gently pat the dough into a rectangle, sprinkle a little extra cinnamon (and optional honey if you are using it), then roll and shape into a round. Result: pretty marbling, more distinct cinnamon pockets. Note: swirl loaves can sometimes separate if over-floured while shaping.
- Mixed-in: Follow the recipe as written, cinnamon is already in the dough. Result: even flavor, easier slicing, more classic artisan crumb. Note: this is my go-to for a dependable cinnamon raisin bread recipe style loaf.
Make-Ahead + Overnight Option (Deeper Flavor, Flexible Timing)
If your life is anything like mine, baking often needs to fit into the cracks of the day. The overnight option is perfect for that. I love mixing the dough after dinner when the kitchen is finally quiet, then waking up to dough that is basically ready to become bread. It is one of those artisan bread recipes tricks that makes you feel like a genius with very little effort.
- Evening: Mix the dough, fold in the fruit and nuts, cover, and let it sit at room temperature for 30 to 60 minutes. Then refrigerate overnight (8 to 12 hours).
- Morning: Let the dough sit on the counter 45 to 60 minutes to take the chill off. Shape, do a short second rise while the oven preheats, then bake.
This slower timing deepens flavor and can make the crumb a little more complex, in a good way.
Troubleshooting (Sticky Dough, Dense Loaf, Gummy Center)
My first loaf taught me something important, dough does not care about my schedule. It cares about temperature, hydration, and time. So if something feels off, do not toss it. Most issues have a simple fix, and once you learn the cues, you will trust your hands more than the clock.
- Problem: Dough is very sticky. Likely cause: high hydration or flour measured too lightly. Fix: rest 15 to 20 minutes before adding flour. Use wet hands for folds and shaping. Add flour only 1 tablespoon at a time if it is truly soupy. The “sticky hands, clean bowl” cue is often good, if the dough releases from the bowl after resting but still clings to your fingers, you are on track for a tender crumb.
- Problem: Loaf is dense. Likely cause: under-proofed dough or yeast issues. Fix: give it more rise time and look for bubbles and puffiness, not just “2 hours.” Make sure your yeast is fresh.
- Problem: Gummy center. Likely cause: underbaked or sliced too soon. Fix: bake to temperature (205°F to 210°F), especially with fruit in the dough. Cool completely before slicing.
- Problem: Pale crust. Likely cause: Dutch oven not hot enough or uncovered time too short. Fix: preheat the pot longer and extend the uncovered bake a few minutes, watching color.
If you want a confidence-builder on a hectic week, I also love this easy, no-fuss soda bread for busy days. Different vibe, same cozy payoff.
Serving Ideas (Toast, Creamy Spreads, and a Simple Breakfast Board)
This loaf is made for slicing, toasting, and sharing. It is sweet enough to feel special, but not so sweet that it cannot sit next to eggs or yogurt. In our house, it disappears fastest as toast, because the fruit gets warm and jammy and the walnuts taste extra toasty.
- Toast thick slices and spread with butter or cream cheese.
- Make a simple breakfast board with fruit, yogurt, and nut butter.
- Use it for a cozy afternoon snack with tea.
- Turn it into French toast for a weekend treat (the cinnamon does half the work).
- Serve alongside a savory breakfast for that sweet-salty balance, like a slice of Raisin Bread next to scrambled eggs.
Eva’s Note: For toast, I like slices about 3/4-inch thick. Too thin and the fruit can pull out, too thick and the center stays soft while the outside over-browns.
Storage, Freezing, and Reheating (So Every Slice Stays Lovely)
Because this loaf has fruit, it stays tender for days, but the crust will soften as it sits. That is normal. My rule is “counter for today, freezer for later,” especially when I know school mornings are coming and I will want quick, cozy breakfasts.
- Room temperature: Once fully cool, store in a breathable bag or wrapped in a clean kitchen towel. This helps store artisan bread to keep it fresh while protecting the crust.
- Airtight storage: If you want longer softness, store sliced bread in an airtight container. The crust softens, but a quick toast brings it back.
- Freezer: Freeze slices (my favorite) so you can grab what you need. Wrap well to prevent freezer dryness.
For reheating, a quick toast is usually best. If you are reheating more than a slice or two, keep it gentle so you do not dry out the fruit.
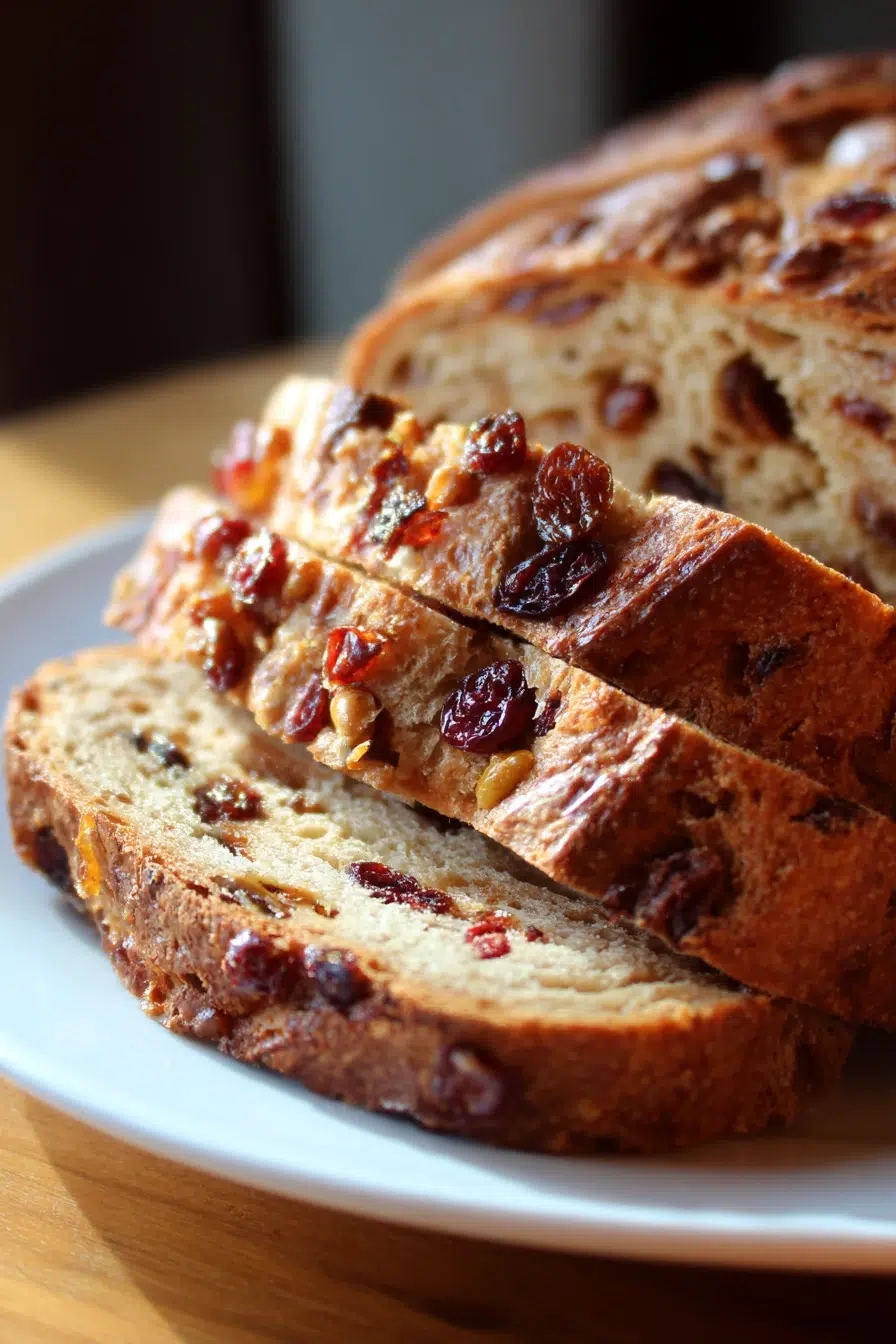
Frequently Asked Questions about Cranberry Raisin Walnut Cinnamon Artisan Bread
Q: How do I store Cranberry Raisin Walnut Cinnamon Artisan Bread to keep it fresh?
✅ Answer: Let the loaf cool completely, then store it at room temperature in a breathable bag or wrapped in a clean kitchen towel for the best crust. For longer freshness, slice and store in an airtight container; the crust will soften slightly, but the crumb stays tender. A quick toast the next day brings that crust right back, and the cinnamon smell is even cozier.
Q: Can I substitute all-purpose flour for bread flour in this artisan bread?
✅ Answer: Yes. All-purpose flour will still make a beautiful loaf, but the crumb may be a bit softer and the dough can feel slightly less elastic. If the dough seems looser, use a little extra folding during the rise and dust lightly when shaping. You will notice it when you pull the dough, bread flour stretches more, all-purpose feels a little more delicate.
Q: Can I swap dried cranberries for other dried fruit (or use all raisins)?
✅ Answer: Absolutely. You can use all raisins or swap in chopped dried apricots, cherries, or dates. Keep the total dried fruit amount about the same so the dough structure stays balanced and the loaf bakes through evenly. Around the holidays, my kids love a raisin-and-cherry combo, it smells like cinnamon toast the second it hits the toaster.
Q: How long does it take to bake artisan bread in a Dutch oven?
✅ Answer: Most artisan loaves bake in a preheated Dutch oven for about 35 to 45 minutes total, often starting covered to trap steam and finishing uncovered to deepen color and crisp the crust. Exact time depends on your pot, loaf size, and oven. My favorite moment is lifting the lid and seeing the loaf fully sprung, like it just did a little magic trick.
Q: How do I fix sticky dough without adding too much flour?
✅ Answer: First, give it time, many doughs firm up after a 15 to 20 minute rest as the flour hydrates. Then use lightly wet hands for folds and shaping, and dust the counter sparingly. If it is truly soupy, add flour one tablespoon at a time until it is manageable. You will actually see it change from shaggy to smoother after that first rest.
Q: How can I get a thicker, crunchier crust on artisan bread?
✅ Answer: Preheat the Dutch oven thoroughly, bake covered first for strong oven spring, then uncover long enough to deepen browning. Let the loaf cool on a rack so steam does not soften the crust. If you like extra crunch, extend the uncovered bake by a few minutes while watching color. When it cools, you will hear that crust crackling, like it is quietly applauding you.
Q: Can you make artisan bread in a slow cooker, and how long does it take?
✅ Answer: You can bake a rustic loaf in a slow cooker, though the crust will be softer than an oven-baked Dutch oven loaf. Timing varies by model, but it commonly takes a few hours on high. Lining with parchment helps with lifting and cleanup, and finishing briefly under high heat can improve the exterior. I have done this on a hands-off day when I needed dinner and homework help to happen at the same time.
Q: How do I reheat slices of Cranberry Raisin Walnut Cinnamon Artisan Bread without drying them out?
✅ Answer: For single slices, a quick toast is ideal. For a softer rewarm, heat slices gently and briefly, then serve right away with butter or cream cheese. Avoid long reheating times, which can dry the fruit and tighten the crumb. The best part is watching butter melt into those warm cinnamon pockets.
Q: Can I freeze cinnamon raisin artisan bread, and how should I thaw it?
✅ Answer: Yes, freeze the loaf whole or, even better, pre-sliced so you can grab what you need. Wrap well to prevent freezer dryness. Thaw slices at room temperature for a short time or toast straight from frozen for a fresh-baked feel. On weekday mornings, I pull slices straight from the freezer and toast them while everyone is hunting for backpacks.
Printable Recipe Card + Final Notes
This is the kind of artisan loaf I love gifting, too. Wrap it in parchment, tie it with string, and suddenly you are the neighbor everybody hopes moves in next door. If you bake this Cranberry Raisin Walnut Cinnamon Artisan Bread, I would love to hear how you served it, and whether your family voted for swirl or mixed-in cinnamon.
Eva’s Note: Cool completely for clean slices. I know it is hard, but slicing too early can compress the crumb and make it feel gummy. Use a serrated knife and let the crust do its crisp little crackle thing first.
Thank you for cooking with me, it means more than you know.
Come hang out with me on Pinterest for more cozy, family-friendly ideas.
Print
Cranberry Raisin Walnut Cinnamon Artisan Bread
- Total Time: 65
- Yield: 1 loaf 1x
- Diet: Vegetarian
Description
Bake Cranberry Raisin Walnut Cinnamon Artisan Bread with a crisp Dutch-oven crust and tender cinnamon crumb, an easy homemade artisan loaf for slicing.
Ingredients
3 cups bread flour
1 1/2 teaspoons salt
3/4 teaspoon ground cinnamon
1/2 teaspoon instant yeast
1 1/2 cups lukewarm water
1/2 cup dried cranberries
1/2 cup raisins
1/2 cup walnuts, chopped
Extra flour
Cornmeal or semolina (optional)
Instructions
1. Mix the dry ingredients. In a large bowl, whisk together the bread flour, salt, cinnamon, and instant yeast.
2. Add the water (hold back a splash). Pour in most of the lukewarm water and stir with a spoon until you have a shaggy dough. If there is still dry flour at the bottom, add the remaining water a little at a time. You want shaggy but cohesive, not soupy.
3. First rest (autolyse-style). Cover the bowl and let the dough rest 15 to 20 minutes. Look for: the dough will feel less rough and more unified after this rest.
4. Fold in the add-ins. Sprinkle in the dried cranberries, raisins, and chopped walnuts. Use your hand or a dough scraper to fold the dough over itself until the add-ins are mostly distributed.
5. Bulk rise. Cover the bowl and let the dough rise at room temperature until puffy and noticeably larger, usually 2 to 3 hours depending on your kitchen. Look for: bubbles on the surface and a dough that jiggles slightly when you shake the bowl.
6. Optional folds for strength. During the first hour, you can do 1 to 2 gentle stretch-and-folds right in the bowl, about 20 minutes apart. This helps structure, especially if you used all-purpose flour.
7. Shape. Lightly flour your counter. Turn out the dough and shape it into a round by tucking the edges under. Keep the surface reasonably tight, but do not deflate it aggressively.
8. Second rise. Place the dough seam-side down on a piece of parchment. Cover loosely and let it rest 30 to 60 minutes while you preheat the oven.
9. Preheat the Dutch oven. Put the Dutch oven (with lid) in the oven and preheat to 450°F. Give it at least 30 minutes so the pot is fully hot.
10. Score and bake covered. Carefully lift the dough on the parchment into the hot Dutch oven. If you like, sprinkle a little cornmeal or semolina under the parchment. Score the top with a sharp knife. Cover and bake 25 minutes.
11. Uncover and finish. Remove the lid and bake another 10 to 20 minutes until deep golden brown. Bake to temperature, not just time: aim for about 205°F to 210°F in the center for a fully baked loaf with no gummy middle.
12. Cool completely. Transfer to a rack and let it cool at least 1 hour before slicing. Look for: the crust will “sing” and crackle as steam escapes.
Notes
If you have 5 extra minutes, toast the walnuts. The warm, nutty smell alone makes the loaf feel bakery-worthy, and the flavor is deeper in every slice.
For toast, I like slices about 3/4-inch thick. Too thin and the fruit can pull out, too thick and the center stays soft while the outside over-browns.
Once fully cool, store in a breathable bag or wrapped in a clean kitchen towel.
- Prep Time: 20
- Cook Time: 45
- Category: Bread
- Method: Baked
- Cuisine: American
Nutrition
- Serving Size: 1 slice
- Calories: 210
- Sugar: 8
- Sodium: 290
- Fat: 7
- Saturated Fat: 1
- Unsaturated Fat: 5
- Trans Fat: 0
- Carbohydrates: 35
- Fiber: 3
- Protein: 5
- Cholesterol: 0