
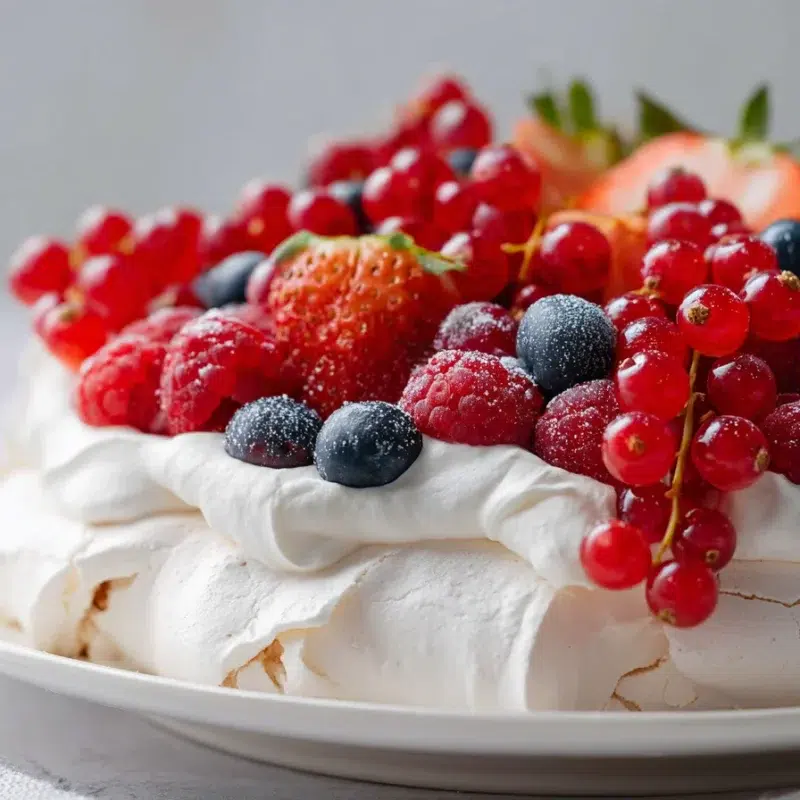
Every year, I try to put at least one “ooh” dessert on our holiday table, the kind that makes everyone pause mid-conversation and lean in a little. This Christmas Pavlova is that dessert in my house. It looks like a snowy cloud wearing a crown of berries, and somehow it feels fancy and cozy at the same time.
I love a holiday pavlova dessert because it’s mostly pantry basics and patience, not complicated techniques. You bake a big, crisp meringue nest dessert, let it cool slowly, then pile on pavlova with whipped cream and winter berries right before serving. It’s bright, light, and honestly such a relief after a heavier holiday meal.
Crisp shell, marshmallowy center, and a billowy swirl of cream, that’s the whole magic.
What Makes a Great Pavlova (Texture, Timing, and the “Why” Behind Each Step)
A great Winter Pavlova has that signature contrast, shatter-crisp on the outside, soft and marshmallowy in the middle. Getting there is less about perfection and more about understanding what the meringue needs: stable egg whites, fully dissolved sugar, gentle heat, and a slow cool-down.
I learned this the hard way one December when I got impatient and cranked the oven a little higher because I “needed the oven back.” The top browned, the shell got a little sticky, and I stood there staring at it like it had personally betrayed me. The good news is it still tasted wonderful under cream and berries. The better news is I never rushed the low-and-slow method again.
- What you’re aiming for: a dry, crisp shell that holds its shape
- That dreamy center: soft, marshmallow-like bite (not fully dry all the way through)
- Stable topping: cream that’s plush but holds swirls without sliding off
One more thing that matters more than people think: humidity is the silent texture thief. On damp winter days, the shell can soften faster, which is why make-ahead pavlova works best when you store the shell dry and assemble close to serving.
Common Pavlova Problems (And What They Usually Mean)
If pavlova makes you nervous, I get it. But here’s my pep talk: cracks are normal, and “rustic beautiful” is still beautiful. Cream and fruit cover a multitude of sins, and everyone remembers the marshmallow center, not the tiny flaws.
- If you see cracks: it’s usually from temperature changes or a quick cool-down
- If it weeps (sticky beads): sugar may not have fully dissolved, or humidity moved in
- If it collapses: egg whites may not have been whipped to glossy stiff peaks, or the oven door was opened
- If it’s hollow inside: it may have been overbaked or baked too hot
- If it browns: the oven temperature was likely too high (or runs hot)
Ingredients You’ll Need (And What Each One Does)
This Winter Pavlova Recipe is simple, but each ingredient has a job. When I’m making it for the holidays, I try to buy the freshest eggs I can and berries that look plump and bright. If the fruit is a little sad, the whole thing feels a little sad, you know?
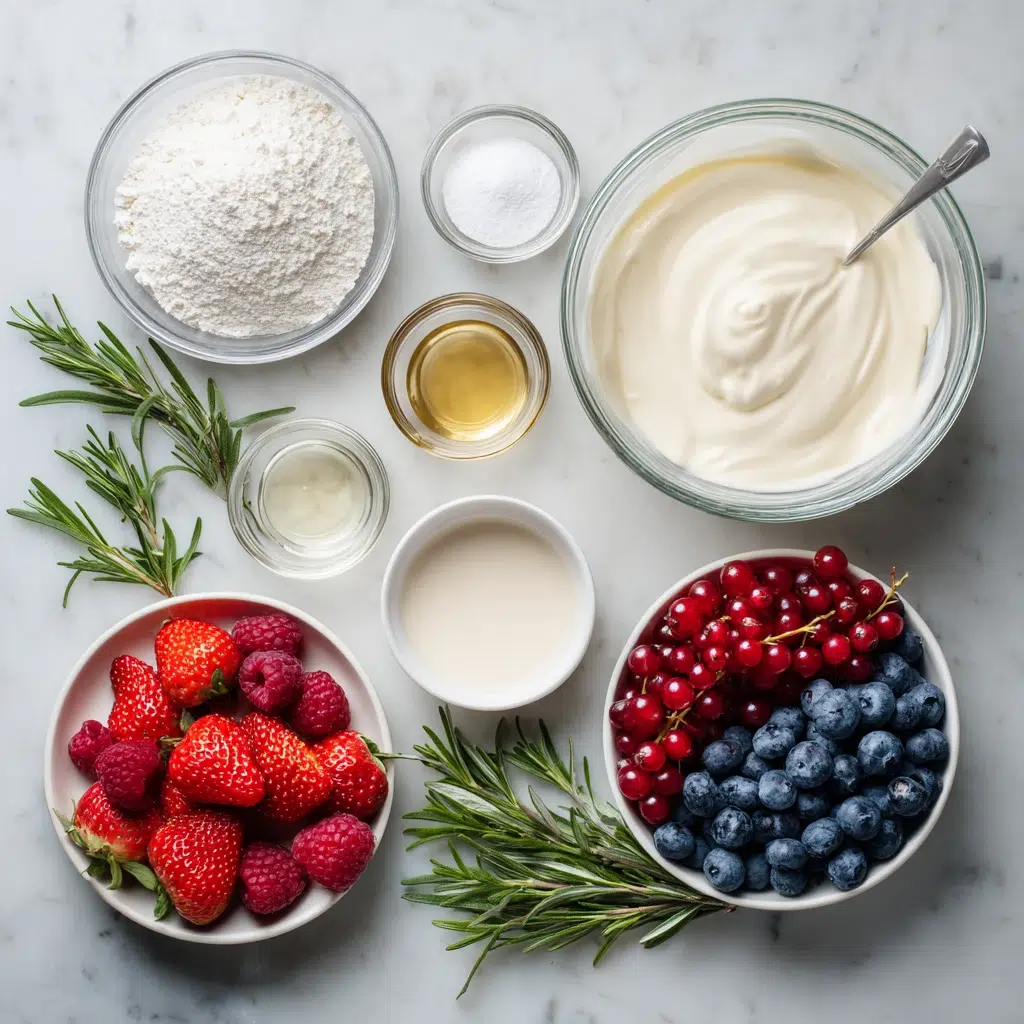
For the pavlova (meringue):
- 6 large egg whites, room temperature: room-temp whites whip up with more volume
- 300 g superfine sugar (about 1 1/2 cups): dissolves easier for a glossy, stable shell (best sugar for meringue)
- 2 tsp cornstarch: helps create that tender, marshmallow center
- 1 tsp white vinegar: adds gentle acidity for structure and stability
- 1 tsp vanilla extract: soft, cozy flavor
For the topping:
- 480 ml heavy cream (2 cups), cold: cold cream whips up thick and fluffy
- 2 tbsp powdered sugar (optional): adds sweetness and helps the cream set slightly firmer
- 1/2 tsp vanilla extract: makes the cream taste like a holiday candle, but edible
- 1/2 cup raspberries: tart and jewel-toned
- 1/2 cup blueberries: sweet, deep color contrast
- 1/2 cup red currants: the “Christmas ornament” look
- 1/4 cup sliced strawberries (optional): extra color and softness
- Fresh rosemary sprigs or mint leaves, for garnish: that wintry, wreath-like finish
How to Make Christmas Pavlova (Step-by-Step)
Think of this as a calm, cozy kitchen project. You’ll whip, shape, bake low and slow, then cool it gently. The decorating is the fun part, and it’s also where you can hide any cracks with confidence.
Prep (Pan, Paper, and a Quick Oven Check)
Before you start, take two minutes to set yourself up. It makes everything feel easier.
- Line a baking sheet with parchment paper. For a Christmas pavlova wreath, draw a circle (about 8 to 9 inches) and a smaller circle inside it (about 3 to 4 inches), then flip the parchment so the ink is underneath.
- Preheat the oven to 250°F. If your oven runs hot, consider using an oven thermometer.
- Clean your bowl and whisk well. Any grease, or even a speck of yolk, can keep the whites from whipping properly.
Whip the Meringue (Glossy, Stable, and Not Gritty)
Add the egg whites to a large mixing bowl and start whipping on medium speed until foamy. Once they look like a thick bubble bath, begin adding the sugar gradually, about a tablespoon at a time, while continuing to whip. This part takes a few minutes, and it’s worth not rushing.
Here’s the trick that prevents weeping and helps you get that crisp shell: do the “sugar dissolved” test. Rub a tiny pinch of meringue between your fingers. If it feels grainy, keep whipping. When it feels silky and smooth, you’re set.
- Foamy: looks bubbly and loose
- Soft peaks: peaks droop gently when you lift the whisk
- Glossy stiff peaks: stands tall, looks shiny, holds shape
Once you hit glossy stiff peaks, sprinkle in the cornstarch, then add the vinegar and vanilla. Whip just a few seconds more to combine. The meringue should look thick, glossy, and confident, like it knows it’s about to be the center of attention.
Shape + Bake (Nest or Wreath)
Spoon the meringue onto your parchment and shape it into your chosen style. This is where kids love to “help,” which in my house means Emma wants to hold the spoon and Noah wants to critique the swirl. I let them, because it’s supposed to be fun.
Classic Nest
Make a mound in the center of your circle, then use the back of a spoon to spread it out and build up the sides. Shape a deeper center for maximum cream and fruit. I like to create a little “snowy bowl” so the topping sits tall and looks abundant.
Wreath
For a Christmas pavlova wreath, mound the meringue around the ring. Use a spoon to create a shallow trench all the way around the center, so the cream and berries have a place to settle.
Bake at 250°F for about 1 hour and 15 minutes to 1 hour and 30 minutes, depending on thickness. You’re looking for an outside that feels dry and set. The best oven temperature and bake time for pavlova is low and gentle, so resist the urge to turn it up.
Cool Completely (The Secret to Less Cracking)
When the bake time is up, turn off the oven and let the pavlova cool inside. I like to crack the oven door slightly and just let it be. This slow cool-down is what helps reduce cracking and collapsing.
This is my patience moment. I usually reset the kitchen, wrap a few gifts, or make a cup of tea and pretend I’m the kind of person who finishes holiday tasks early.
- Don’t pull it out hot and set it on a cold counter
- Don’t open the oven door repeatedly during baking
- Don’t decorate until it’s fully cool
Whip the Cream + Decorate (Right Before Serving)
Right before serving, whip the cream. For how to thicken whipped cream for pavlova, the biggest secret is temperature and timing. Use cold cream, and if you can, chill your bowl for 10 minutes first.
Whip the heavy cream (with powdered sugar, if using) and vanilla on medium speed until medium peaks form. It should hold ridges and look pillowy, but not stiff or grainy.
- Soft peaks: good for spooning, but can slump quickly
- Medium peaks: best for pavlova with whipped cream (structured, fluffy, stable)
Spread the cream into the center of the pavlova, then pile on berries. Add red currants for that holiday sparkle, and tuck in a few rosemary sprigs or mint leaves. If your shell cracked, this is where you lean into it. Rustic beautiful, always.
Make-Ahead Plan (So It’s Stress-Free on Christmas Day)
If you’re juggling oven space, family schedules, and that one person who always shows up early, this is the part you’ll love. Make-ahead pavlova is absolutely doable, as long as you keep the shell dry and wait to assemble.
1 day before
Bake the pavlova and cool it completely (ideally in the turned-off oven with the door cracked). Once cool, store the shell at room temperature in a dry spot. If you’re wondering how to store pavlova overnight, the goal is minimal air exposure and zero humidity. An airtight container works well.
Morning of
Wash and dry your berries, and keep them chilled. Clear a little counter space so you’re not decorating next to a sink full of dishes (ask me how I know).
Right before serving
Whip the cream and decorate. That’s how you keep the shell crisp. If you’re building a bigger holiday dessert spread, I love pairing this with something easy you can cut into bars, like these eggnog cheesecake bars.
Festive Variations (Winter Fruit + Styling Ideas)
This is where you can make it feel like your holiday, your colors, your vibe. I tend to lean into bright fruit in December because everything outside is gray and I need the cheer on my plate.
- Winter Citrus Pavlova: swap some berries for citrus segments and add a little zest over the cream. A clementine pavlova is especially pretty, those little orange jewels look like ornaments.
- Persimmon pavlova: layer sliced persimmons with a handful of berries for contrast. It’s sweet, soft, and feels a little special.
- Berry pavlova (classic): go heavy on raspberries, blueberries, and currants, then add mint for brightness.
- Mini pavlovas for Christmas: pipe or spoon 8 to 10 smaller nests. They bake faster and feel extra fun for parties. (Just shorten bake time as needed and keep the same slow cool-down idea.)
- Christmas pavlova wreath styling: make a ring, then decorate with berries in clusters and tuck rosemary like greenery. It looks like a centerpiece you can eat.
If you want another festive sweet on the table, this one plays so nicely with tangy, bright flavors like cranberry orange fudge.
Pavlova Food Photography Tips (Bright Whites + Berry Contrast)
If you’re making this Christmas Pavlova, you might as well take a photo before it disappears. Pavlova food photography is all about celebrating the bright whites and the jewel-toned fruit without making the scene feel cluttered.
- Use window light if you can, side light gives the meringue texture without harsh shadows.
- Pick a simple background like a white plate, a wood board, or a linen napkin.
- Add one “holiday hint” like a rosemary sprig or a neutral ribbon, then stop there.
- Go in close to capture the crisp shell and that marshmallow center.
- Shot list: whole pavlova, a slice showing the center, close-up of berries and cream swirls.
If you love photographing creamy desserts, you’d probably also enjoy this lemon blueberry cheesecake.
Frequently Asked Questions about Christmas Pavlova
Q: How do you keep a Christmas Pavlova from cracking or collapsing?
Answer: Keep the oven temperature low and steady, avoid opening the door during baking, and cool the pavlova gradually (ideally in the turned-off oven with the door cracked). Make sure the sugar is fully dissolved and the egg whites are whipped to glossy stiff peaks for structure.
Personal Detail: I swear you can hear the quiet little “crackle” of the shell as it finishes cooling on a winter evening, and it always makes me smile.
Q: Can you make Christmas Pavlova the day before (and what should you assemble last-minute)?
Answer: Yes, bake the pavlova the day before, cool it completely, and keep the shell at room temperature in a dry spot. Whip the cream and add fruit right before serving so the shell stays crisp.
Personal Detail: I like doing the bake-ahead part after dinner, then decorating while everyone’s gathering coats and gifts and the house feels loud and happy.
Q: How do you store pavlova overnight without it getting soggy?
Answer: Store the fully cooled pavlova shell at room temperature in an airtight container (or wrapped well) with minimal air exposure, and keep it away from humidity. Avoid adding cream or fruit until serving time.
Personal Detail: I tuck the shell away like a little snowy secret on the counter, safely out of reach.
Q: What can I use instead of white vinegar in pavlova?
Answer: You can use an equal amount of lemon juice. The gentle acidity helps the meringue hold its structure and encourages that marshmallowy center.
Personal Detail: If you go the lemon route, add a tiny bit of citrus zest to the cream for a bright holiday aroma.
Q: What can I use instead of cornstarch in pavlova?
Answer: Arrowroot powder is a good swap in the same amount. It helps the center set softly while keeping the outside crisp.
Personal Detail: The center should feel like a soft cloud when you slice in.
Q: How do you thicken whipped cream for pavlova so it holds its shape?
Answer: Start with very cold cream, whip at medium speed, and stop at medium peaks (the cream holds ridges but still looks plush). A little powdered sugar can help it set slightly firmer, and chilling your bowl can also help.
Personal Detail: There’s a moment when the whisk leaves soft ribbons and I always want to swipe a taste, purely for quality control.
Q: What’s the best oven temperature and bake time for pavlova (and how long to cool it)?
Answer: A low oven works best, bake until the outside is dry and set, then turn the oven off and let it cool slowly inside to reduce cracking. Exact timing depends on size and thickness, but plan for a long, gentle bake plus a full cool-down.
Personal Detail: The kitchen smells faintly like vanilla and sugar while it bakes, which feels like the sweetest kind of holiday background music.
Q: Can you reheat pavlova if it turns sticky or soft?
Answer: You can dry it out briefly in a low oven, then let it cool completely again before topping. This won’t make it perfect in very humid conditions, but it can help restore some crispness to the shell.
Personal Detail: I’ve had a “save the day” moment with this trick right before guests arrived, and nobody ever knew.
Q: Can you make pavlova in a slow cooker, and if so, how long would it take?
Answer: Yes, it can be done using a low, steady setting with good ventilation for moisture (like propping the lid slightly with a clean towel under it). Timing varies widely by cooker size and heat level, but expect a long cook similar to a low oven approach, followed by a gentle cool-down.
Personal Detail: I tested it on a quiet weekend afternoon just for the fun of it, and it felt like a little kitchen science project.
If you want one dessert that looks like a winter centerpiece but feels totally doable, Christmas Pavlova is it. Bake the shell gently, cool it slowly, then let the cream and fruit do the sparkling. Whether you go classic berry pavlova, a Winter Citrus Pavlova twist, or a Christmas pavlova wreath, it’s the kind of holiday sweetness that makes people linger at the table just a little longer.
Thank you for cooking with me, it means the world to have you in my little NYC kitchen.
For more cozy holiday ideas, come follow me on Pinterest.
Print
Christmas Pavlova (Crisp Meringue + Whipped Cream)
- Total Time: 110 minutes
- Yield: 8 servings 1x
- Diet: Vegetarian
Description
Make Christmas Pavlova with a crisp-on-the-outside, marshmallowy center, fluffy vanilla cream, and winter berries for a showstopping holiday dessert. It looks like a snowy cloud wearing a crown of berries, and somehow it feels fancy and cozy at the same time.
Ingredients
6 large egg whites, room temperature
300 g superfine sugar (about 1 1/2 cups)
2 tsp cornstarch
1 tsp white vinegar
1 tsp vanilla extract
480 ml heavy cream (2 cups), cold
2 tbsp powdered sugar (optional)
1/2 tsp vanilla extract
1/2 cup raspberries
1/2 cup blueberries
1/2 cup red currants
1/4 cup sliced strawberries (optional)
Fresh rosemary sprigs or mint leaves, for garnish
Instructions
1. Line a baking sheet with parchment paper. Draw a circle (about 8 to 9 inches) and a smaller circle inside it (about 3 to 4 inches), then flip the parchment.
2. Preheat the oven to 250°F. Clean your bowl and whisk well.
3. Add the egg whites to a large mixing bowl and start whipping on medium speed until foamy. Gradually add the sugar, about a tablespoon at a time, while continuing to whip until glossy stiff peaks form.
4. Sprinkle in the cornstarch, then add the vinegar and vanilla. Whip just a few seconds more to combine.
5. Spoon the meringue onto your parchment and shape it into a nest or wreath.
6. Bake at 250°F for about 1 hour and 15 minutes to 1 hour and 30 minutes.
7. Turn off the oven and let the pavlova cool inside with the door slightly open.
8. Right before serving, whip the cream with powdered sugar and vanilla until medium peaks form.
9. Spread the cream into the center of the pavlova, then pile on berries. Add rosemary sprigs or mint leaves for garnish.
Notes
Store the pavlova shell at room temperature in a dry spot. Whip the cream and decorate right before serving to keep the shell crisp. If humidity is high, store the shell in an airtight container.
- Prep Time: 20 minutes
- Cook Time: 90 minutes
- Category: Dessert
- Method: Baked
- Cuisine: Australian
Nutrition
- Serving Size: 1 slice
- Calories: 350
- Sugar: 40
- Sodium: 50
- Fat: 20
- Saturated Fat: 12
- Unsaturated Fat: 6
- Trans Fat: 0
- Carbohydrates: 45
- Fiber: 2
- Protein: 4
- Cholesterol: 70