
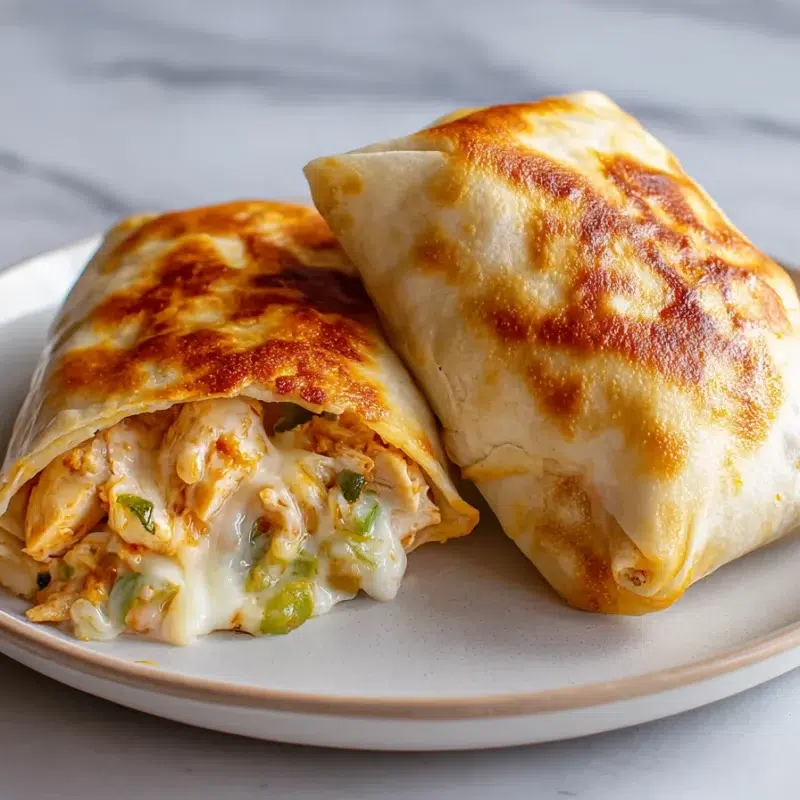
On the kind of weeknight where everyone walks in hungry and slightly dramatic, Chicken Chimichangas save my sanity. You get that creamy, cheesy center, wrapped up in Tortillas De Harina, then crisped until the outside crackles when you tap it with tongs. It’s the crunch that makes my kids come running, and it’s the “everyone can top their own” vibe that makes this an easy Mexican dinner I actually want to repeat.
In our house, chimichanga night usually looks like backpacks by the door, a quick kitchen cleanup sprint, and then the sound of the first bite, crunchy, quiet for two seconds, then “Mom, can I have another?” That’s how you know it’s a request recipe.
- Creamy filling that stays tucked in (not watery)
- Crispy chimichangas with skillet, oven, or air fryer options
- Freezer-friendly for future-you wins
Why These Chicken Chimichangas Work (Creamy Inside, Crisp Outside)
This Chimichanga Recipe works because it’s built around one simple goal, keep the filling thick and the outside dry enough to crisp. I learned this the hard way years ago when I got a little too generous with salsa and ended up with chimichangas that looked fine, but turned steamy and soft the second they hit the plate. They tasted good, but they didn’t crunch, and my son Noah called them “sad burritos.” Fair.
Now I make these like I’d make a thick dip: creamy, scoopable, and not runny. That’s the secret for Mexican food recipes easy enough for weeknights, but still satisfying like a real Mexican dinner.
- Filling texture: Drain anything watery and aim for thick and creamy, so it doesn’t seep into the tortilla.
- Tortilla prep: Warm Tortillas De Harina for flexibility, fewer cracks, and a better seal.
- Heat + airflow: Crisping needs space. Crowding causes steaming, which is how you lose that crunch.
- Seam-first cooking: Starting seam-side down “locks” the wrap so it behaves.
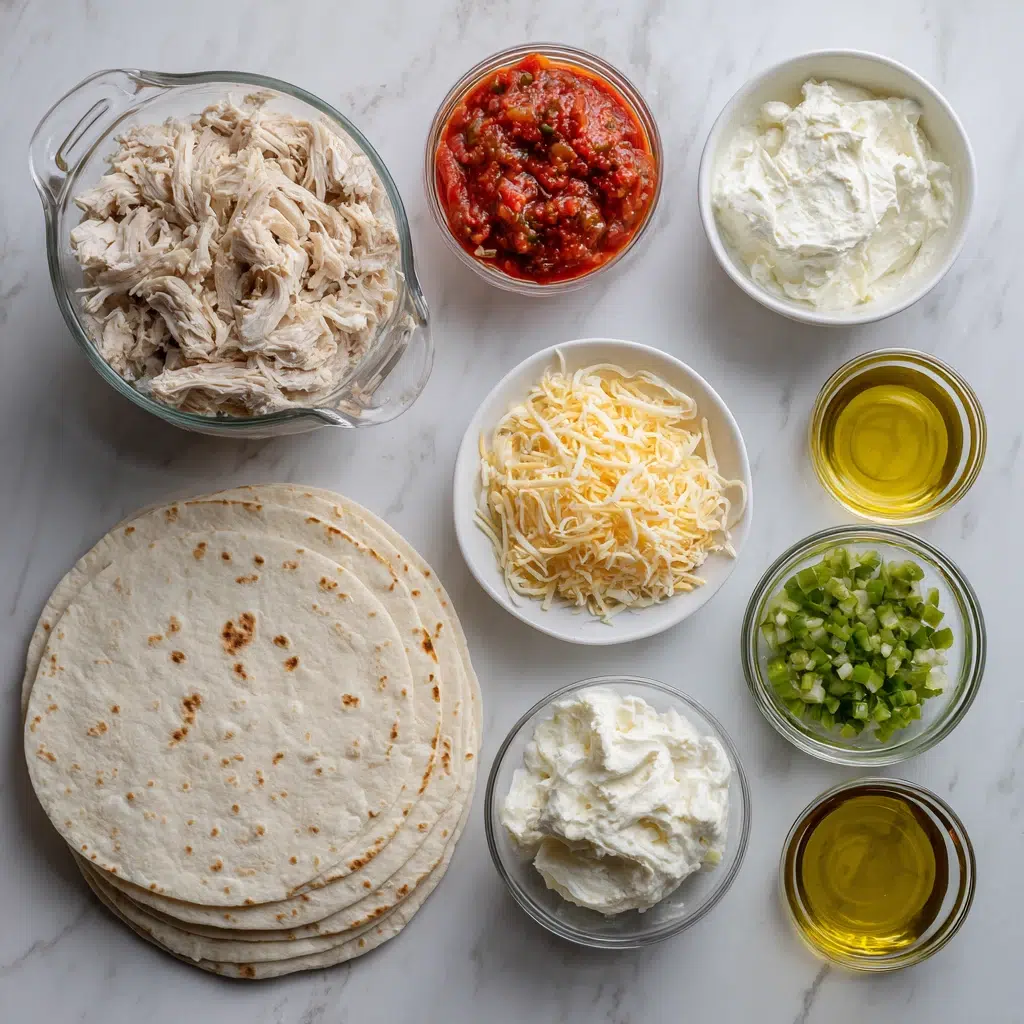
Ingredients You’ll Need
This is one of my favorite pantry-friendly Mexican Chicken Recipes because it’s flexible. If you’ve got cooked chicken and a pack of flour tortillas, you’re already halfway there. I usually keep the salsa mild for the kids, then let the adults bring the heat at the topping bar.
- 2 cups shredded cooked chicken
- 4 oz cream cheese, softened
- ½ cup salsa
- 1 cup shredded cheese (Mexican blend or cheddar)
- ¼ cup diced green chiles
- 6 large flour tortillas (burrito-sized)
- 2 tbsp olive oil or cooking spray
Optional toppings
- sour cream
- salsa
- chopped cilantro
- lime wedges
Optional variations (ideas):
- Add ½ tsp ground cumin + ½ tsp chili powder to the filling for a warmer, fajitas-style flavor.
- Stir in ½ cup drained black beans or corn for a heartier bite.
Best tortillas: Burrito-size flour tortillas (Tortillas De Harina) roll the easiest and crack the least. If your tortillas feel stiff, warm them first, it changes everything.
Best cheese melt: Mexican blend melts smoothly and evenly. Cheddar gives a sharper flavor. Either works for these Chicken Dishes Recipes, just avoid very dry, crumbly cheeses.
If you love creamy, cheesy Mexican Dishes, you’ll probably also want my creamy white chicken enchiladas on your next meal plan.
Best Shredded Chicken Options (Fast + Flavorful)
For easy chicken chimichangas, the chicken doesn’t have to be complicated. I’m a mom of three, and some nights “complicated” is just not happening. Here are the three paths I use most, depending on the day.
- Rotisserie chicken / 5 minutes / Best for the busiest nights (my go-to after soccer practice). Pull the meat, shred it, and you’re done.
- Leftover cooked chicken / 5 to 10 minutes / Best for using what you’ve got. If it tastes bland, stir in a pinch of salt and your cumin and chili powder variation to revive it.
- Quick-poached chicken / 15 to 20 minutes / Best when you have raw chicken but still need dinner fast. Simmer chicken in salted water until cooked through, then shred.
If you’re in a meal-prep season, a bowl-style dinner can also be a lifesaver. I rotate these chimichangas with a taco bowl week, and it keeps everyone happy without feeling repetitive.
How to Make Chicken Chimichangas (Step-by-Step)
The filling should feel like a thick, creamy scoop, not like a sauce. If you can pile it on a spoon and it holds its shape for a second before slowly settling, you’re in the sweet spot for crispy chimichangas.
- Make the filling. In a medium bowl, mix the shredded chicken, softened cream cheese, salsa, shredded cheese, and diced green chiles. Stir until creamy and evenly combined.
- Check the thickness. If your salsa is watery, your filling can get runny. If it looks loose, stir in a little more shredded cheese, or let the mixture sit for 5 minutes so it thickens slightly.
- Warm the tortillas. Warm each flour tortilla for about 15 to 20 seconds (microwave or dry skillet) until flexible. This helps prevent cracks and makes the chimichangas easier to seal.
- Fill (but don’t overfill). Spoon about 1/3 cup filling onto the lower third of each tortilla. The neatest chimichangas are the ones that close easily. If it won’t close, it’s too full.
- Roll and seal. Fold the sides in, roll up tightly, and place seam-side down on a plate while you finish the rest.
- Choose your cooking method. Skillet-crisp, bake, or use the air fryer. All three make delicious crispy chimichangas, it just depends on your time and how hands-on you want to be.
Eva’s Note: Warm tortillas = fewer cracks. I used to skip this step when I was rushing, then I’d end up with a tortilla splitting mid-roll and the filling sneaking out like it had somewhere better to be. Twenty seconds of warmth saves the whole batch.
If you want another chimichanga night option, my cheesy beef chimichangas are a fun switch-up.
Rolling, Tucking, and Sealing Like a Pro
Think of rolling a chimichanga like wrapping a little present. You want it snug, tidy, and sealed so it doesn’t pop open the second it hits heat. My youngest, Emma, calls this the “tuck and hug” step because you’re basically hugging the filling into place.
- Step 1: Place filling on the lower third of the tortilla, leaving space on the sides.
- Step 2: Fold the left and right sides inward, like closing doors.
- Step 3: Roll up tightly from the bottom, keeping the sides tucked as you roll.
- Step 4: Set it seam-side down so the seam stays closed.
“Wrap it like a little present, snug enough to hold, not so tight it tears.”
This is the best way to seal chimichangas so they don’t open, especially when you start cooking seam-side down to set the wrap.
Cooking Methods (Skillet-Crisped vs Baked vs Air Fryer)
You’ve got options here, which is why I love this for Mexican food recipes easy enough for real life. On a weeknight, I usually do air fryer chimichangas because they’re fast and crunchy. On weekends, skillet-crisped feels like a treat. And when I’m feeding a crowd, baked chimichangas let me do a big batch without babysitting the stove.
If tonight needs to be even simpler, I also keep an alternative in my back pocket, an easy taco rice bowl is the same cozy flavor family, just in a faster format.
Skillet-Crisped (Classic Crunch)
This is the classic crispy chimichangas method, shallow-crisped in a skillet. You’ll know it’s ready to flip when the tortilla turns deeply golden and smells toasty, like warm flour and melted cheese.
- Do: Heat a thin layer of olive oil in a skillet over medium heat.
- Do: Place chimichangas seam-side down first for 1 to 2 minutes to “lock” the seam.
- Don’t: Crowd the pan, it traps steam and softens the shells.
- Don’t: Use low heat, it absorbs oil instead of crisping.
Crisp each side for about 2 to 3 minutes, turning until golden all over. Drain briefly on a paper towel-lined plate.
Baked (Hands-Off + Great for Big Batches)
Baked chimichangas are my movie-night move. I can get a whole tray going, set the table, and actually sit down for a minute before someone asks where the sour cream is (it’s always right in front of them).
- Temp/time: Bake at 425°F for 18 to 25 minutes, flipping once halfway through.
- Oil amount: Lightly brush or spray the outside so it browns and crisps.
- Best results tip: Bake seam-side down first.
Crisp Booster: Put the chimichangas on a rack over a sheet pan. That airflow keeps the bottoms from steaming, which is how you get that crisp outside without extra grease.
Air Fryer (Fast + Extra Crunchy)
Air fryer chimichangas are fast and extra crunchy, but spacing matters. I once tried to cram in “just one more,” and they came out with soft spots where they touched. Lesson learned.
- Temp/time: Air fry at 400°F for 8 to 10 minutes, flipping at the halfway point.
- Oil amount: Spray lightly with cooking spray for better browning.
- Batch sizing: Cook in a single layer with space between each one. Work in batches if needed.
For best crunch, start seam-side down, then flip once the seam feels set.
Topping Bar + Easy Side Pairings
This is where chimichangas turn into one of my favorite Recetas Mexicanas-style family nights, not because it’s “authentic” in a strict way, but because it brings that warm, build-your-own Mexican dinner energy to the table. The kids keep it simple, and the adults go heavy on lime and cilantro. Everyone wins.
Topping bar ideas:
- sour cream
- salsa (mild and spicy if you’ve got both)
- chopped cilantro
- lime wedges
Easy side pairings:
- rice and beans
- simple green salad with lime dressing
- corn or black bean salad
- fajitas-style peppers and onions (especially if you used the cumin and chili powder variation)
If you love the build-a-bowl vibe, you can pair this night with my high-protein taco bowl another day of the week and keep your Mexican Food Recipes Authentic cravings satisfied in a very real-life way.
Make-Ahead, Storage, and Freezer Tips
These are the kind of Mexican Dishes that make future-you feel cared for. When I’m already cooking, I try to make a couple extra, wrap them up, and label them. It’s like leaving myself a little dinner note for a chaotic day.
Fridge: Store cooked chimichangas in an airtight container for up to 3 days. If you’re storing un-cooked rolled chimichangas, keep them tightly wrapped so the tortillas don’t dry out.
Freezer: To freeze chicken chimichangas, wrap each one tightly and store in a freezer bag or container for up to 2 to 3 months. I label with the date and the reheating method I plan to use, because I will forget, and so will you.
Reheat: To reheat chimichangas crispy, use the oven or air fryer. Heat until hot in the center and the outside re-crisps. The microwave will warm them, but it softens the shell. If you want crunch, go with dry heat and airflow.
If you’re in a creamy-chicken season, this is also a great week to add creamy white chicken enchiladas to your make-ahead list.
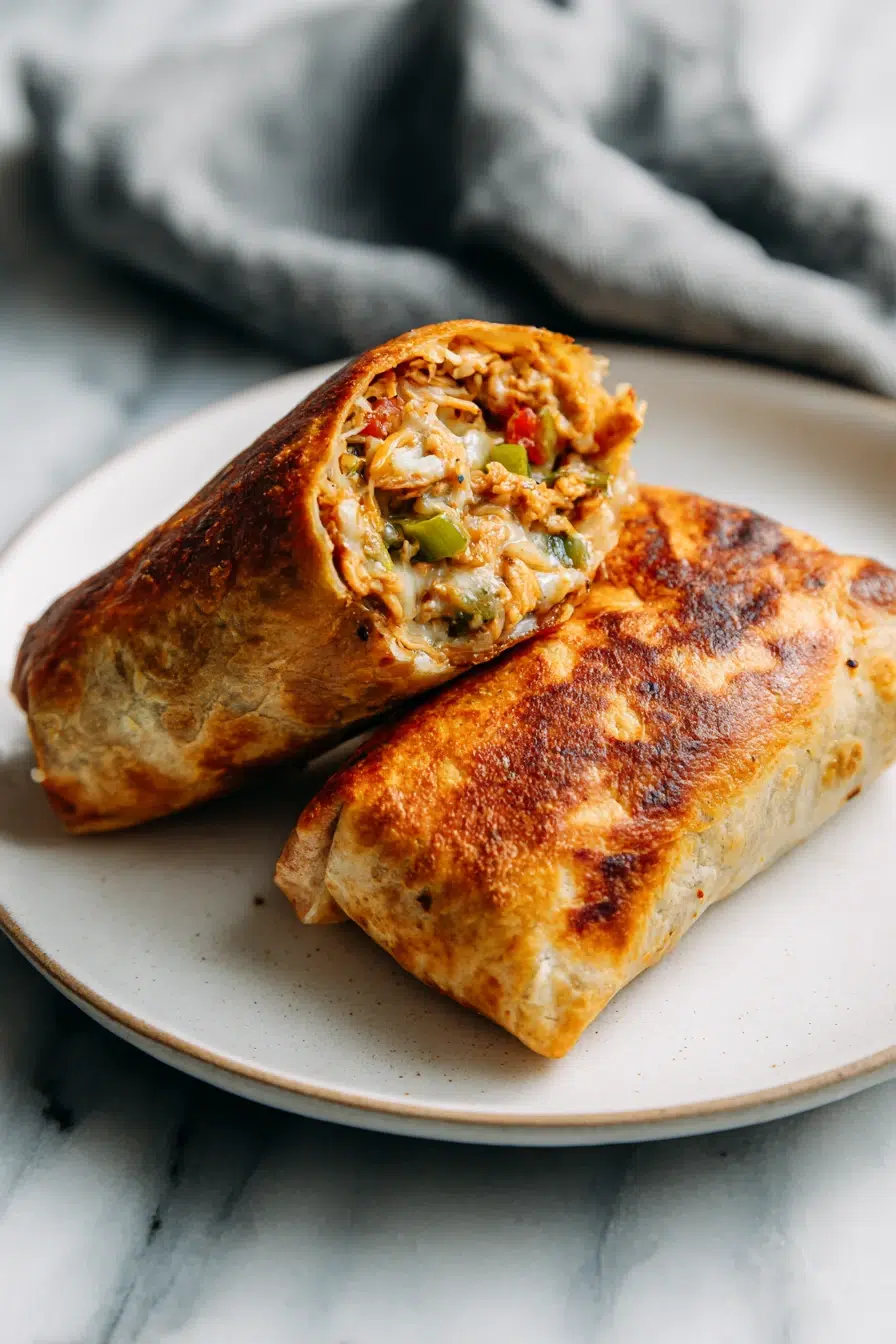
Frequently Asked Questions about Chicken Chimichangas
Q: How do you keep Chicken Chimichangas from getting soggy?
✅ Answer: Keep the filling thick (not runny), warm tortillas briefly so they wrap tightly, and cook with enough heat and airflow to crisp the outside. If baking, use a rack and leave space between each one so steam can escape. Let them rest a couple minutes before serving so the shell stays crisp.
💡 Personal Detail: I listen for that “dry crunch” when you tap the tortilla with tongs. If it sounds crisp, you’re golden.
Q: Can I bake Chicken Chimichangas instead of frying them?
✅ Answer: Yes. Brush or spray the outside lightly with oil, place seam-side down on a rack over a sheet pan, and bake until deeply golden, flipping once for even crisping. The rack and oil mist help mimic that signature crunch.
💡 Personal Detail: This is my movie night batch, one pan feeds everyone without me standing over the stove.
Q: Can I make the chicken filling in a slow cooker, and how long should it cook?
✅ Answer: Yes. Cook chicken with salsa and seasonings on LOW for 4–6 hours or HIGH for 2–3 hours, until it shreds easily. Shred, then stir in cream cheese and shredded cheese at the end so the filling turns creamy and thick.
💡 Personal Detail: Coming home to that smell is the best, and shredding with two forks feels almost too easy for how good it turns out.
Q: What’s the best way to seal chimichangas so they don’t open while cooking?
✅ Answer: Warm the tortillas so they’re flexible, roll tightly, tuck the sides in firmly, and always start cooking seam-side down to set the seam. Avoid overfilling, if it won’t close easily, it’s too full.
💡 Personal Detail: I always tell my kids, wrap it like a little present. It works every time.
Q: How can I thicken chimichanga filling if it’s too runny?
✅ Answer: Simmer the filling briefly in a skillet to evaporate extra moisture, or stir in a bit more cream cheese and shredded cheese until it becomes thick and scoopable. Also make sure any add-ins (like chiles or beans) are well-drained.
💡 Personal Detail: My cue is simple, the spoon should leave a trail that slowly fills in.
Q: What cheese works best for Chicken Chimichangas?
✅ Answer: A Mexican blend melts smoothly and gives balanced flavor, while cheddar adds a sharper bite. For extra stretch, mix in a little mozzarella. The best choice is a cheese that melts well and isn’t overly dry.
💡 Personal Detail: That first pull-apart moment when the filling is still steamy is basically the whole point.
Q: How do you reheat chimichangas and keep them crispy?
✅ Answer: Reheat in an oven or air fryer so the outside re-crisps. Place them on a rack or in a single layer, heat until hot throughout, and avoid the microwave if you want the shell to stay crunchy.
💡 Personal Detail: The air fryer brings back that fresh-made crunch in minutes, it’s my favorite trick.
Q: Can you freeze Chicken Chimichangas, and how long do they last?
✅ Answer: Yes. Freeze them tightly wrapped and stored in a freezer bag or container for up to 2–3 months. For best texture, thaw overnight in the fridge or cook from frozen using oven/air fryer until hot in the center and crisp outside.
💡 Personal Detail: I label with the date plus a quick note like “air fry 400°F,” because future me deserves clarity.
Q: What can I use instead of cream cheese in chimichanga filling?
✅ Answer: You can use sour cream for a tangier creamy texture, or a thicker plain Greek yogurt for a lighter option. Add it off the heat so it stays smooth, and adjust the shredded cheese to keep the filling thick.
💡 Personal Detail: We go sour cream when we want it extra tangy, Greek yogurt when we want it lighter, and nobody complains either way.
If you’re craving Mexican food recipes easy enough for a Tuesday but still worthy of a “wow,” this is it. Make a batch of Chicken Chimichangas, set out a few toppings, and let everyone build their perfect plate. That first crunchy bite is the kind of little win that makes a busy day feel a whole lot softer.
Thank you for cooking with me, I hope these chimichangas bring some cozy crunch to your table.
Come hang out with me on Pinterest for more weeknight favorites and comfort-food ideas.
Print
Chicken Chimichangas (Crispy, Cheesy & Easy)
- Total Time: 40 minutes
- Yield: 6 servings 1x
Description
Make Chicken Chimichangas with creamy chicken, salsa, and melty cheese wrapped in flour tortillas and crisped to perfection. Easy Mexican dinner idea.
Ingredients
2 cups shredded cooked chicken
4 oz cream cheese, softened
½ cup salsa
1 cup shredded cheese (Mexican blend or cheddar)
¼ cup diced green chiles
6 large flour tortillas (burrito-sized)
2 tbsp olive oil or cooking spray
Instructions
1. Make the filling. In a medium bowl, mix the shredded chicken, softened cream cheese, salsa, shredded cheese, and diced green chiles. Stir until creamy and evenly combined.
2. Check the thickness. If your salsa is watery, your filling can get runny. If it looks loose, stir in a little more shredded cheese, or let the mixture sit for 5 minutes so it thickens slightly.
3. Warm the tortillas. Warm each flour tortilla for about 15 to 20 seconds (microwave or dry skillet) until flexible. This helps prevent cracks and makes the chimichangas easier to seal.
4. Fill (but don’t overfill). Spoon about 1/3 cup filling onto the lower third of each tortilla. The neatest chimichangas are the ones that close easily. If it won’t close, it’s too full.
5. Roll and seal. Fold the sides in, roll up tightly, and place seam-side down on a plate while you finish the rest.
6. Choose your cooking method. Skillet-crisp, bake, or use the air fryer. All three make delicious crispy chimichangas, it just depends on your time and how hands-on you want to be.
Notes
Warm tortillas = fewer cracks. I used to skip this step when I was rushing, then I’d end up with a tortilla splitting mid-roll and the filling sneaking out like it had somewhere better to be. Twenty seconds of warmth saves the whole batch.
- Prep Time: 15 minutes
- Cook Time: 25 minutes
- Category: Dinner
- Method: Skillet
- Cuisine: Mexican
Nutrition
- Serving Size: 1 chimichanga
- Calories: 450
- Sugar: 3
- Sodium: 800
- Fat: 25
- Saturated Fat: 12
- Unsaturated Fat: 10
- Trans Fat: 0
- Carbohydrates: 30
- Fiber: 2
- Protein: 25
- Cholesterol: 85