
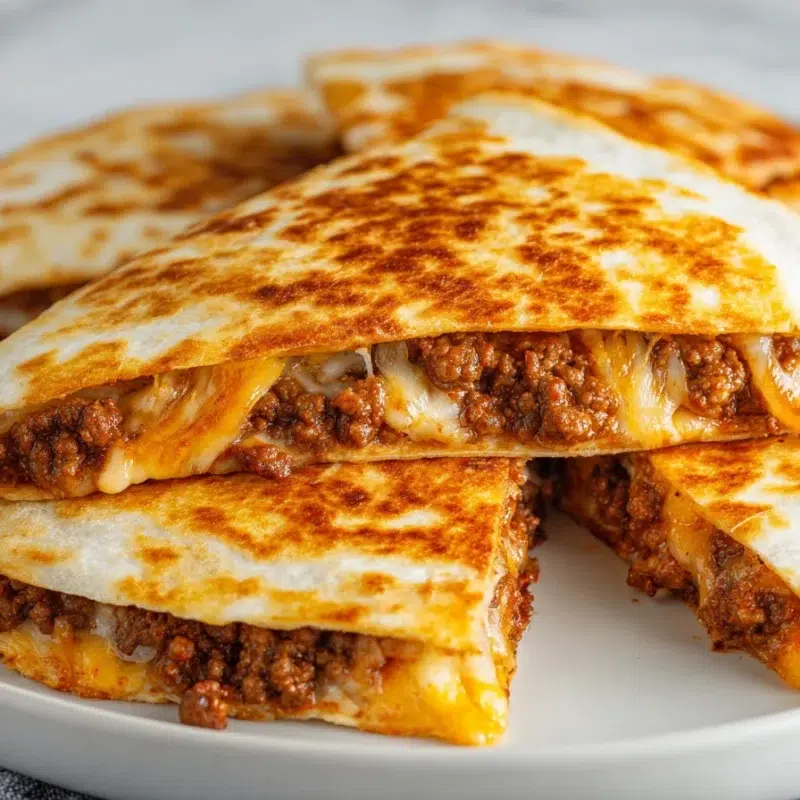
On the busiest nights at our place, dinner has to be two things, fast and comforting. These Cheesy Ground Beef Quesadillas hit both. The second the tortillas hit the hot pan, you get that steady sizzle that makes everyone magically wander into the kitchen like they were “just passing through.”
I usually set up a little topping bar while the skillet quesadillas crisp, cilantro, sour cream, guacamole, hot sauce. Lily lines things up like a tiny caterer, Noah “tests” the beef filling (his job, according to him), and Emma hovers for the first cheesy corner.
Crispy edges, melty center, and dinner that feels like a win, even when the day was a lot.
Why These Quesadillas Work on a Busy Night
If you need a quick weeknight dinner that doesn’t feel like a sad backup plan, this is it. I lean on pantry spices and a hot skillet, and suddenly it turns into that cheesy tortilla dinner everyone actually wants to eat.
- Fast, real-deal flavor: The beef cooks quickly, and the chili powder, cumin, and paprika make it taste like you tried harder than you did.
- Minimal ingredients: This is Ground Beef Quesadillas Easy in the best way. You probably have most of it already.
- Everyone can customize: One easy quesadilla recipe, endless topping choices, which means fewer complaints at the table.
If you want another taco-ish dinner that’s just as weeknight-friendly, my high-protein taco bowl is a great next one to keep in your back pocket.
Ingredients You’ll Need
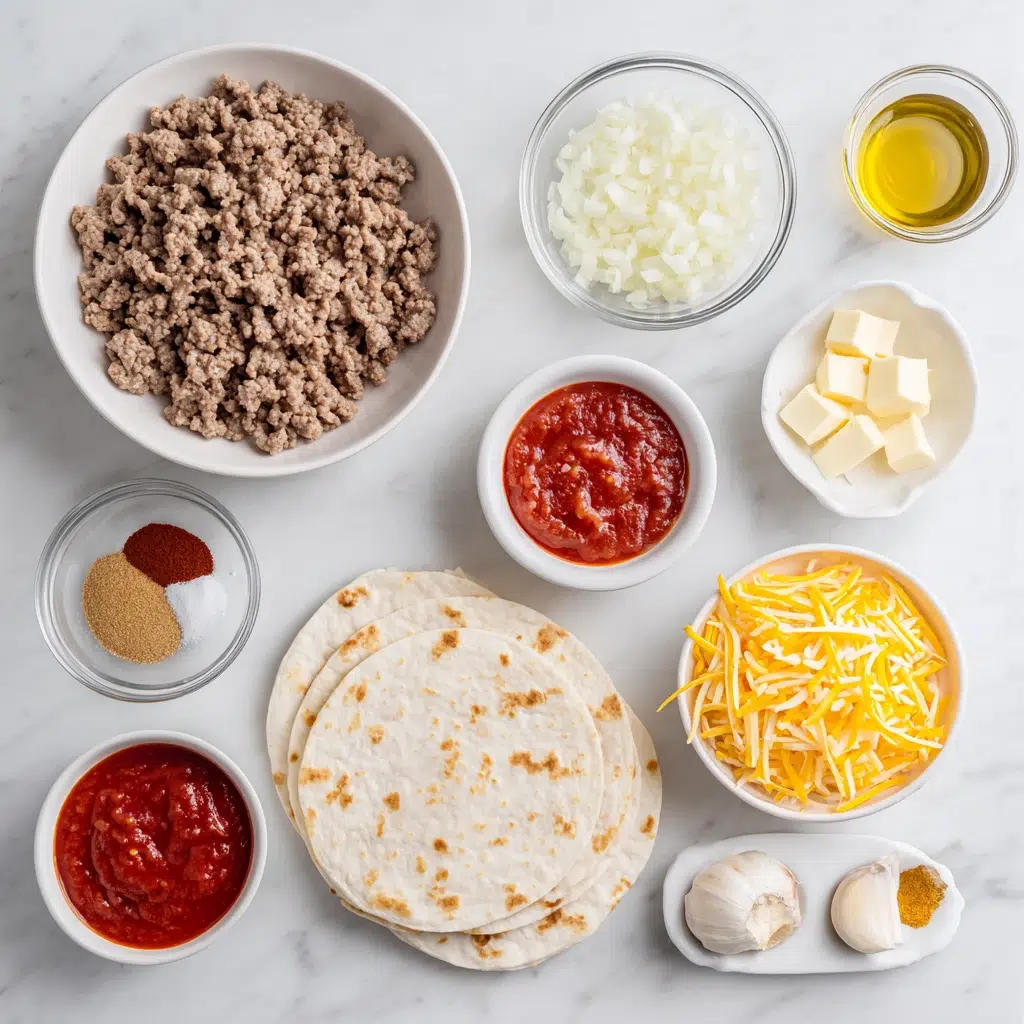
These are simple, everyday ingredients, but they come together like a proper Beef Cheese Quesadilla situation, crispy on the outside and melty in the middle. This is one of those Cheesy Beef Quesadilla nights where the pantry does the heavy lifting.
- 1 lb ground beef: The hearty, savory base.
- 1 tbsp olive oil: Helps the onion and garlic soften fast.
- 1/2 cup onion, finely chopped: Makes it smell like “real dinner” in minutes.
- 1 clove garlic, minced: Adds that cozy, savory kick.
- 1 tsp chili powder: Warm, taco-style flavor.
- 1/2 tsp ground cumin: Adds depth and that classic “taco night” vibe.
- 1/2 tsp paprika: Gentle sweetness and color.
- 1/2 tsp salt: Brings everything into focus.
- 1/4 tsp black pepper: A little bite.
- 1/4 cup tomato sauce or salsa: Adds moisture and tang, but we reduce it so it does not get soggy.
- 1 1/2 cups shredded cheddar cheese: Melty, bold, and reliable.
- 4 large flour tortillas: Soft enough to fold, sturdy enough to crisp.
- Butter or oil, for the skillet: For that golden, crisp finish.
Optional toppings: cilantro, sour cream, guacamole, hot sauce
Optional variations: Pepper jack or Monterey jack for a different melt, add diced bell pepper or corn to the filling, add sliced jalapeños for heat
If you love taco-style flavors, you might also like my easy taco rice bowl for a simple, cozy rotation meal.
Seasoning Shortcuts (Taco-Style Without Fuss)
These taste like Cheesy Beef Taco Quesadillas without needing a packet or anything fancy. I keep it family-friendly, then let the topping bar handle the “spicy vs mild” debate.
- Mild: Use the spices as written, and choose salsa that is mild. Skip jalapeños.
- Medium: Add an extra 1/2 tsp chili powder, or use a medium salsa.
- Spicy: Add sliced jalapeños, and finish with hot sauce at the table.
This is also a quick weeknight dinner trick I use all the time, make the base mild, then let adults crank up the heat on their own plates.
How to Make Cheesy Ground Beef Quesadillas (Step-by-Step)
You do not need special equipment, just a good skillet and a little patience while the tortillas crisp. This method is one of my favorite Easy Ground Beef Quesadilla Recipes because it is repeatable, even when you are tired and the kitchen is loud.
- Prep your toppings and cheese first. Shred the cheddar (or measure it out) and set up any toppings. Once the skillet is hot, things move quickly. Eva’s best tip: Keep sour cream and guacamole in the fridge until the last second so they stay cold and fresh.
- Cook the beef filling. You want it flavorful and spoonable, not saucy. Follow the detailed steps in the section below, then set the filling aside.
- Assemble the quesadillas. Layer cheese, then beef, then more cheese, and top with the second tortilla. That cheese “glue” matters.
- Preheat your skillet. Heat a skillet over medium heat. Add a thin swipe of butter or a little oil. Eva’s best tip: If you sprinkle the tiniest pinch of cheese in the pan and it sizzles right away, you are ready.
- Crisp the first side. Place one assembled quesadilla into the skillet. Cook 2 to 4 minutes, until the bottom is golden and feels firm when you nudge it with a spatula.
- Flip confidently. Slide a wide spatula underneath and flip in one smooth motion. Cook another 2 to 4 minutes until the second side is crisp and the cheese is fully melted.
- Rest before cutting. Move to a cutting board and let it rest 2 minutes. This helps the cheese set so the wedges do not slide apart.
- Slice and serve. Cut into wedges and head straight into that first crunchy bite.
If you love crispy handheld dinners, you should also try my crispy, cheesy handheld dinner for another family favorite.
Cook the Beef Filling (Flavor + Moisture Control)
This is the part that keeps your quesadilla with ground beef from turning soft. Moisture is the enemy of crisp, so we build flavor, then reduce the liquid until the filling is thick and scoopable.
- Heat the olive oil in a large skillet over medium heat.
- Add the onion and cook 2 to 3 minutes until softened.
- Add the garlic and cook 30 seconds, just until fragrant.
- Add the ground beef. Break it up and cook until browned and no longer pink.
- Carefully drain excess fat if needed, then return the beef to the skillet.
- Stir in chili powder, cumin, paprika, salt, and black pepper. Let the spices toast for about 30 seconds so they smell warm and bold.
- Add the tomato sauce or salsa. Simmer uncovered for 3 to 5 minutes, stirring, until it is reduced.
Reduce the filling until it’s “spoonable, not saucy”: I watch for the steam to calm down and the beef to look glossy but not wet. When you drag a spoon through it, it should not immediately flood back like soup. That is the moment crispy tortillas happen.
Assemble for the Best Melt (Cheese as the ‘Glue’)
I learned this the hard way, cheese on both sides makes everything hold together. It is like building a cozy blanket around the filling so every wedge stays neat when you cut.
- Bottom tortilla
- Cheese layer
- Ground beef filling
- More cheese
- Top tortilla
This little layering trick is the difference between “Cheesy Beef Quesadilla Recipes that look great” and “why is all the filling on the cutting board.”
Crisp in a Skillet (Heat, Fat, Press, Flip)
Skillet quesadillas are all about heat control. Medium heat gives the tortilla time to toast while the cheese melts, and it keeps the outside from burning before the inside is ready.
Preheat the skillet like you mean it: Let the pan warm up for a couple minutes. A properly hot skillet toasts, it does not steam.
- Crispy checklist:
- Use medium heat, not high.
- Use a light swipe of butter or oil, not a puddle.
- Do not overfill.
- Press gently, then let it be: After flipping, press lightly with your spatula for good contact, then stop fussing with it.
- Rest 2 minutes before cutting so steam does not soften the crust.
This is my favorite easy quesadilla recipe move, listen for that steady sizzle. When it sounds active and the tortilla feels firm, it is ready to flip.
Serving Ideas (Family-Style Topping Bar)
This is where dinner gets fun, and honestly, where it gets easier. When everyone can build their own plate, you are not making five different dinners. You are making one Cheesy Beef Quesadilla dinner that works for the whole table, which is exactly what a quick weeknight dinner should do.
I like to put everything out in little bowls and keep the cold toppings cold until the last minute. It takes two minutes, but it feels like a treat night.
- Mild & Kid-Friendly:
- sour cream
- guacamole
- extra cheddar
- corn (mixed into the filling or on the side)
- Bold & Spicy:
- hot sauce
- sliced jalapeños
- cilantro
- pepper jack swap
If you want a simple side that fits right in, my easy taco rice bowl flavors pair perfectly with these.
Make-Ahead, Storage, Freezing, and Reheating (Keep Them Crispy)
Future-you deserves crispy quesadillas, too. On Sundays, I will sometimes make the filling ahead, then all I have to do later is assemble and crisp. It is one of those small habits that makes the week feel less chaotic.
- Make-ahead: Cook the beef filling up to 3 days ahead. Cool completely, store airtight, and rewarm briefly before assembling so it is not ice-cold in the center.
- Fridge storage: Store cooked quesadillas in an airtight container once fully cooled. They are best within 3 to 4 days. Keep toppings separate.
- Freezing: Freeze quesadillas once cooled. Wrap each one tightly, then place in a freezer bag with air pressed out. Freeze up to 2 to 3 months for best quality.
Reheating so they stay crispy: Use a dry skillet over medium-low heat and reheat until hot and crisp, flipping once. You can also use an oven or air fryer at moderate heat until the tortilla is crisp and the center is hot. The microwave works in a pinch, but it softens the tortilla.
When I freeze them, I stack them like books in the freezer so they take up less space, and I label the bag with the date because my memory is not as strong as my love of cheese.
Variations (Same Method, New Vibes)
This is a “use what you’ve got” kind of dinner. Some nights I am cleaning out the veggie drawer, other nights I am just trying to get everyone fed before homework and showers. Same method, different vibes.
- Pepper jack or Monterey jack: A different melt and a little extra stretch.
- Add diced bell pepper: Sauté it with the onion for sweetness and crunch.
- Add corn: Stir into the filling for a little pop and kid-friendly sweetness.
- Jalapeños: Add to the filling or keep them on the side for the heat-lovers.
- Extra cheesy: Mix cheddar with Monterey jack for a gooier Cheesy Beef Quesadilla moment.
If you want a different format with similar flavors, my keto crunchwraps are a fun switch-up.
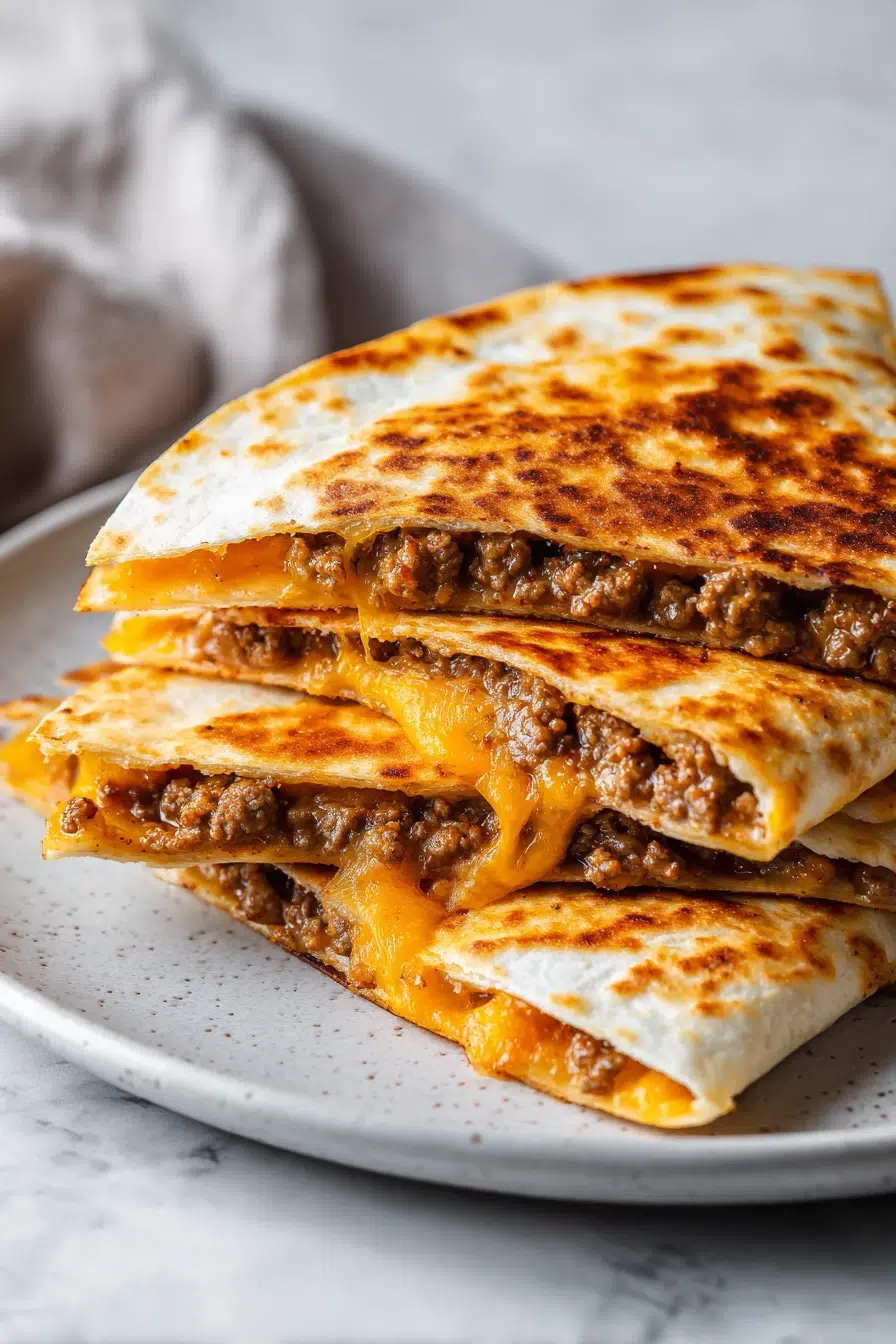
Frequently Asked Questions about Cheesy Ground Beef Quesadillas
Q: How do you keep Cheesy Ground Beef Quesadillas from getting soggy?
✅ Answer: Keep the filling fairly dry by draining excess fat and simmering off extra moisture after adding tomato sauce or salsa. Use medium heat so the tortilla toasts instead of steaming, and don’t overfill. Layer cheese on the tortilla first to create a barrier, then add the beef, then more cheese before closing. Let the cooked quesadilla rest for a minute or two before slicing so steam doesn’t soften the crust.
💡 Personal Detail: The cue Eva can add: listening for that steady skillet sizzle and waiting until the bottom feels firm before flipping.
Q: What’s the best cheese for Cheesy Ground Beef Quesadillas?
✅ Answer: Cheddar melts well and brings bold flavor, making it a reliable choice. For extra stretch, mix cheddar with a good melting cheese like Monterey jack. Shred your own if you can—fresh-shredded tends to melt smoother than pre-shredded.
💡 Personal Detail: Eva can mention her “cheese pull” test—lifting a corner with a spatula and seeing those melty strands.
Q: Can I substitute ground turkey or chicken in Cheesy Ground Beef Quesadillas?
✅ Answer: Yes. Ground turkey or chicken works well—just add a little extra seasoning and keep an eye on moisture since leaner meats can go from juicy to dry quickly. Cook until no longer pink, then add the sauce/salsa and simmer briefly so the flavors soak in without making the filling wet.
💡 Personal Detail: Eva can add how she adjusts the spices when she wants a lighter-tasting filling for kids.
Q: How can I thicken the ground beef filling if it’s too wet?
✅ Answer: Simmer it uncovered for a few minutes to evaporate liquid—this is the simplest fix. If it still needs help, stir in a small spoonful of cornstarch mixed with a little water, or add a tablespoon or two of refried beans to bind the mixture. Let it cook until thick and scoopable.
💡 Personal Detail: Eva can describe the “trail test”: dragging a spoon through the filling and checking if it leaves a clean path.
Q: Can I make the ground beef filling for Cheesy Ground Beef Quesadillas in a slow cooker, and how long does it take?
✅ Answer: Yes. Brown the beef first for best flavor and texture, then add it to the slow cooker with onion, garlic, spices, and tomato sauce or salsa. Cook on LOW for 3–4 hours or HIGH for 1½–2½ hours, then crack the lid for the last 20–30 minutes if you need to reduce moisture.
💡 Personal Detail: Eva can add the “walk-in-the-door dinner win” feeling—filling ready, all that’s left is crisping tortillas.
Q: How long do Cheesy Ground Beef Quesadillas last in the fridge?
✅ Answer: Stored in an airtight container, they’re best within 3–4 days. For best texture, cool completely before refrigerating so condensation doesn’t soften the tortillas.
💡 Personal Detail: Eva can mention packing wedges for next-day lunches and keeping toppings separate.
Q: Can you freeze Cheesy Ground Beef Quesadillas, and what’s the best way to wrap them?
✅ Answer: Yes. Cool completely, then wrap each quesadilla tightly (or wrap individual wedges) and place in a freezer bag with the air pressed out. Freeze up to 2–3 months for best quality. Label with the date and reheat straight from frozen for easiest weeknight meals.
💡 Personal Detail: Eva can add her freezer “stacking like books” trick to save space.
Q: What’s the best way to reheat Cheesy Ground Beef Quesadillas so they stay crispy?
✅ Answer: Reheat in a dry skillet over medium-low heat until warmed through and crisp again, flipping once. An oven or air fryer also works well—use moderate heat and reheat until the tortilla is crisp and the center is hot. Avoid the microwave if you want crispness; it tends to soften the tortilla.
💡 Personal Detail: Eva can describe the smell of the tortilla toasting again and that first crunchy bite.
When you need something cozy and fast, these Cheesy Ground Beef Quesadillas are the kind of dinner that makes the whole kitchen feel calmer. Put out a few toppings, let everyone build their plate, and enjoy that crispy, cheesy moment while it is hot.
Thank you for cooking with me, it means so much to have you in my kitchen.
Come hang out with me on Pinterest for more cozy weeknight ideas.
Print
Cheesy Ground Beef Quesadillas (Easy, Crispy)
- Total Time: 20 minutes
- Yield: 4 servings 1x
Description
Make Cheesy Ground Beef Quesadillas fast with seasoned beef, melty cheddar, and golden-crisp tortillas, perfect for an easy weeknight dinner.
Ingredients
1 lb ground beef
1 tbsp olive oil
1/2 cup onion, finely chopped
1 clove garlic, minced
1 tsp chili powder
1/2 tsp ground cumin
1/2 tsp paprika
1/2 tsp salt
1/4 tsp black pepper
1/4 cup tomato sauce or salsa
1 1/2 cups shredded cheddar cheese
4 large flour tortillas
Butter or oil, for the skillet
Instructions
1. Prep your toppings and cheese first. Shred the cheddar (or measure it out) and set up any toppings. Once the skillet is hot, things move quickly. Keep sour cream and guacamole in the fridge until the last second so they stay cold and fresh.
2. Cook the beef filling. You want it flavorful and spoonable, not saucy. Follow the detailed steps in the section below, then set the filling aside.
3. Assemble the quesadillas. Layer cheese, then beef, then more cheese, and top with the second tortilla. That cheese “glue” matters.
4. Preheat your skillet. Heat a skillet over medium heat. Add a thin swipe of butter or a little oil. If you sprinkle the tiniest pinch of cheese in the pan and it sizzles right away, you are ready.
5. Crisp the first side. Place one assembled quesadilla into the skillet. Cook 2 to 4 minutes, until the bottom is golden and feels firm when you nudge it with a spatula.
6. Flip confidently. Slide a wide spatula underneath and flip in one smooth motion. Cook another 2 to 4 minutes until the second side is crisp and the cheese is fully melted.
7. Rest before cutting. Move to a cutting board and let it rest 2 minutes. This helps the cheese set so the wedges do not slide apart.
8. Slice and serve. Cut into wedges and head straight into that first crunchy bite.
Notes
Optional toppings: cilantro, sour cream, guacamole, hot sauce
Optional variations: Pepper jack or Monterey jack for a different melt, add diced bell pepper or corn to the filling, add sliced jalapeños for heat
Make-ahead: Cook the beef filling up to 3 days ahead. Cool completely, store airtight, and rewarm briefly before assembling so it is not ice-cold in the center.
Fridge storage: Store cooked quesadillas in an airtight container once fully cooled. They are best within 3 to 4 days. Keep toppings separate.
Freezing: Freeze quesadillas once cooled. Wrap each one tightly, then place in a freezer bag with air pressed out. Freeze up to 2 to 3 months for best quality.
Reheating so they stay crispy: Use a dry skillet over medium-low heat and reheat until hot and crisp, flipping once. You can also use an oven or air fryer at moderate heat until the tortilla is crisp and the center is hot. The microwave works in a pinch, but it softens the tortilla.
- Prep Time: 10 minutes
- Cook Time: 10 minutes
- Category: Dinner
- Method: Skillet
- Cuisine: Mexican
Nutrition
- Serving Size: 1 quesadilla
- Calories: 450
- Sugar: 2
- Sodium: 800
- Fat: 30
- Saturated Fat: 15
- Unsaturated Fat: 10
- Trans Fat: 0
- Carbohydrates: 25
- Fiber: 2
- Protein: 25
- Cholesterol: 90