
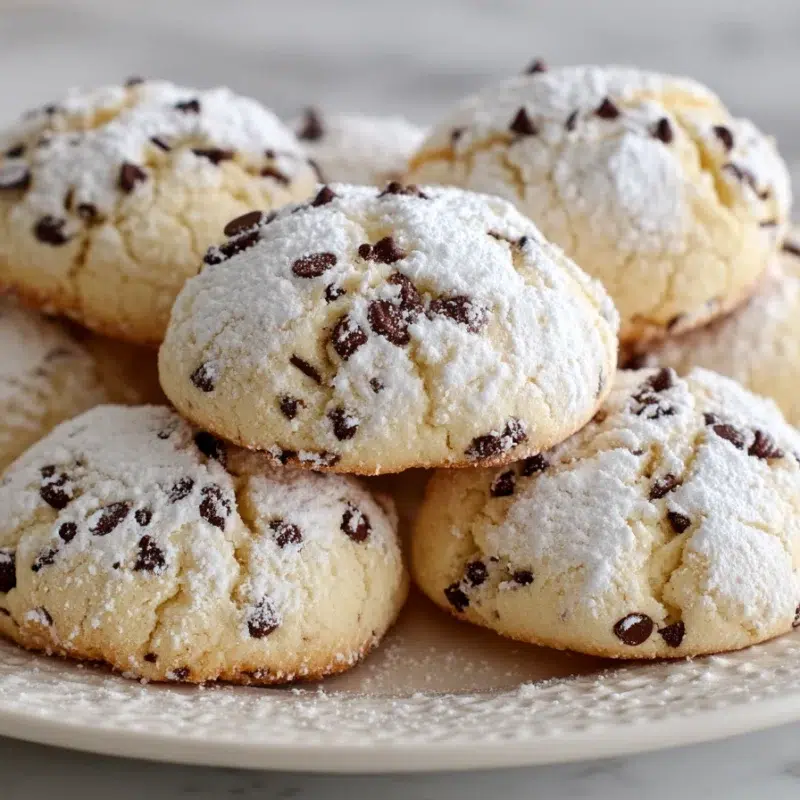
These Cannoli Cookies are my answer to the “I want something that looks fancy, but I do not have fancy time” problem. They’re light airy cookies with that soft, pillowy feel you get from ricotta cookies, plus a cozy vanilla flavor and mini chocolate chips in every bite. Then you finish them like bakery style cookies with a simple powdered sugar dusting that makes them look like they came from a pretty pastry case.
Soft, airy, vanilla-sweet, finished with a snowy dusting.
I started making these when I needed a bring-along dessert for a school gathering. You know the kind, you want to show up with something that feels special, but you are also juggling a million things and your kitchen counter is already covered in permission slips. These are the topped cookies I reach for because they feel festive and homemade at the same time. The keys are simple: drain the ricotta, cream the butter and sugar long enough for lift, and do not overmix.
What Makes Cannoli Cookies “Cannoli-Inspired”?
Let’s be honest, the name is doing some heavy lifting here. These are not filled pastries, but they are absolutely cannoli-inspired in flavor and vibe. Ricotta gives the cookies a tender, delicate crumb, vanilla brings that classic bakery sweetness (hello, dessert recipes vanilla lovers), and mini chips give you those little pops of chocolate that feel like a treat in every bite.
They’re also one of my favorite unique cookie flavor ideas when you want something a little different from the usual chocolate chip, but still totally kid-friendly. I make them a lot around the holidays because they look gorgeous on cookie trays, and they’re the kind of powdered sugar cookies that disappear fast. Lily loves arranging them in neat rows, Noah “tests” at least two, and Emma somehow ends up wearing powdered sugar like it’s face paint.
- Flavor notes: vanilla-forward, lightly sweet, creamy, with mini chocolate chip cookies energy in the best way
- Texture notes: soft centers, lightly cakey but still cookie-like, delicate crumb, not dense
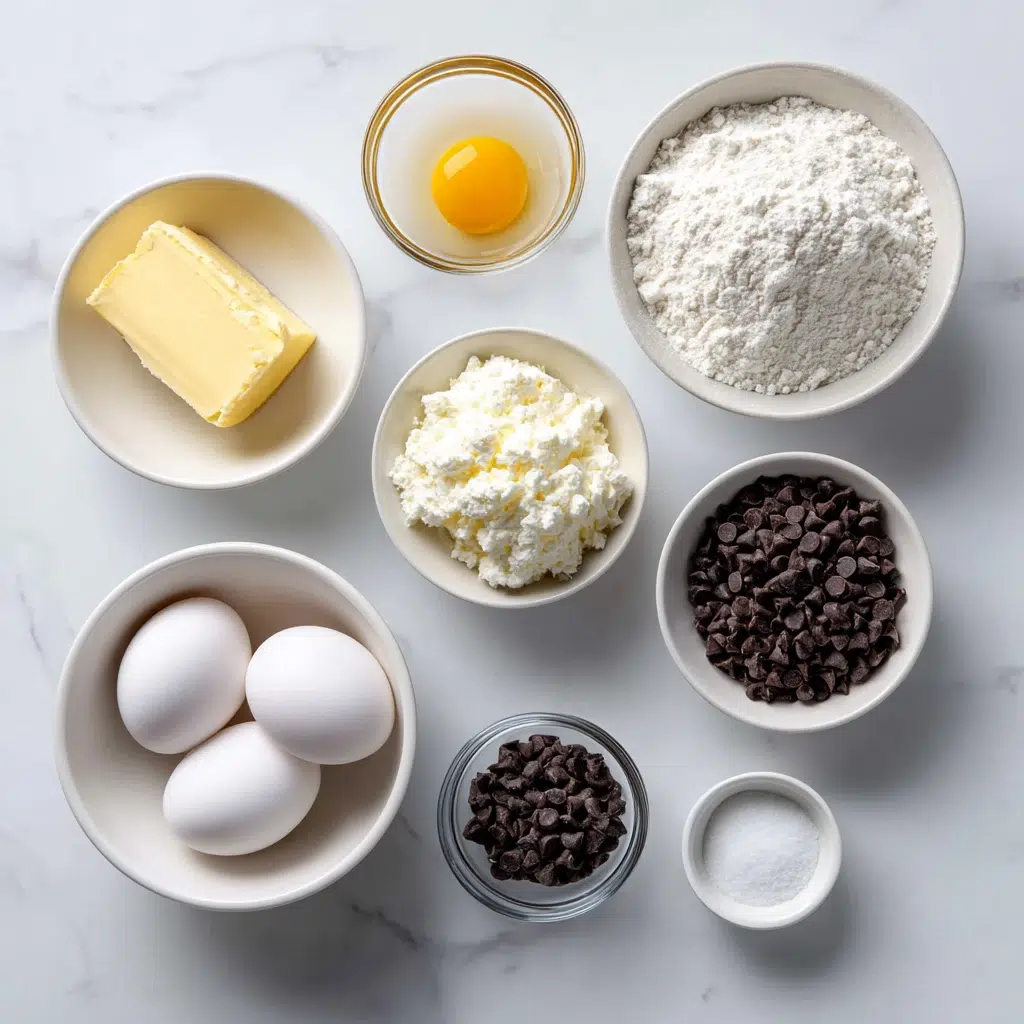
Ingredients You’ll Need
This is a short list, which is part of the charm. These are pantry-friendly, bakery sweets ideas ingredients, and each one has a job to do. My biggest grocery note is this: full-fat ricotta makes the most tender cookies, and mini chips make them feel more “bakery-style” because you get chocolate in more bites.
- 1 cup unsalted butter, softened
- 1 cup granulated sugar
- 1 cup full-fat ricotta cheese, well-drained
- 1 large egg
- 1 teaspoon vanilla extract
- 2 ¼ cups all-purpose flour
- 1 teaspoon baking powder
- ½ teaspoon salt
- ¾ cup mini chocolate chips
- Powdered sugar, for dusting
- Butter: richness and that classic cookie base, it also helps create lift when creamed with sugar
- Sugar: sweetness and structure, plus it helps trap air during creaming
- Ricotta: moisture and tenderness, but only if it’s drained well
- Egg + vanilla: binding and that warm, bakery-style flavor
- Flour + baking powder: structure and lift for light airy cookies
- Mini chips: even chocolate distribution and a bakery-style look
- Powdered sugar: the easiest “cookie topping idea” that instantly makes them look special
The Ricotta Step That Changes Everything (Drain It Well)
If you take one thing seriously in this recipe, let it be this: drain the ricotta so cookies don’t spread. Ricotta can hold a surprising amount of extra liquid, and that extra moisture is what turns your dough slack and your cookies flat. That little extra prep is what keeps the dough thick and scoopable, and helps the cookies bake up tall and tender.
I learned this the hard way. My first batch looked adorable going into the oven, then came out like soft little puddles. Still tasty, but not the bakery style cookies vibe I was going for. Now I drain ricotta every single time, even if it looks “fine” at first glance.
Eva’s Note: If your ricotta looks glossy or watery, give it time. When it stops looking shiny and starts looking fluffy, it’s ready.
How to Make Cannoli Cookies (Step-by-Step)
These are straightforward, but the texture depends on a few small choices. Think of this as a cannoli cookie copycat moment, the homemade kind that feels like a Crumbl cannoli cookie copycat in spirit, but softer and more classic. You’re aiming for dough that is thick and scoopable, and cookies that look set on the edges but still soft in the center.
- Prep the oven and pans. Preheat your oven to 350°F. Line two baking sheets with parchment paper.
- Drain the ricotta. Spoon ricotta into a fine-mesh strainer set over a bowl. Let it drain until it looks thicker and less glossy. (Even 15 to 30 minutes helps.)
- Cream butter and sugar for lift. In a large bowl, beat the softened butter and granulated sugar until light and fluffy, about 2 to 3 minutes. This step matters because you’re building air right at the start, those tiny bubbles are what give you that light, bakery-style bite.
- Add the wet ingredients. Beat in the drained ricotta, then the egg, then the vanilla extract. Scrape down the bowl so everything mixes evenly.
- Whisk dry ingredients separately. In a medium bowl, whisk together the flour, baking powder, and salt.
- Combine wet and dry gently. Add the flour mixture to the wet mixture and mix on low just until the flour disappears. Look-for cue: The moment you can’t see streaks of flour, you’re done. Overmixing is the fastest path to dense cookies.
- Fold in mini chips. Stir in the mini chocolate chips by hand so you don’t overwork the dough. The dough should feel thick, plush, and scoopable.
- Scoop the dough. Use a cookie scoop (about 1 ½ tablespoons) and place mounds on the baking sheet, leaving about 2 inches between them.
- Bake. Bake for 10 to 14 minutes, depending on your scoop size and oven. Look-for cues: edges set, tops matte (not glossy), and a gentle spring-back when lightly touched. The centers should still look soft.
- Cool, then dust. Let cookies cool on the baking sheet for 5 minutes, then transfer to a rack to cool completely. Dust with powdered sugar only after cooling so it stays pretty and snowy.
If your kitchen runs warm (mine does, especially when the kids are in and out like it’s Grand Central Station), you can scoop the dough first, then chill the scooped portions for 20 to 30 minutes before baking. It’s a small move that makes the whole process calmer and more consistent.
Bakery-Style Shaping Tips (Size, Scoop, and Finish)
If you want that thick, pretty, topped-cookie look, this is where you can make these feel like cookie recipes fancy without adding stress. I love serving them on a dessert platter because the powdered sugar makes them look “special” with almost no effort.
- Use a scoop for even baking. Even portions mean no guessing on bake time, and your cookies look uniform like bakery style cookies.
- Press a few mini chips on top. Right after scooping, press 3 to 5 mini chips into the top of each mound. It’s one of my favorite cookie topping ideas because it signals “chocolate” before you even take a bite.
- Powdered sugar timing matters. Dust only after the cookies are fully cool. If they’re warm, the sugar melts and disappears, and you lose that powdered sugar cookies finish.
Topping & Finish Ideas (Simple, Pretty, Pantry-Friendly)
The classic finish is powdered sugar, and honestly, it’s perfect. But if you’re making a party tray or you want a little topping station for kids, these topped cookies can handle a few easy upgrades. Emma loves “decorating,” which mostly means she tries to sneak extra chips, and I pretend I don’t notice.
- Snowy Dusting: Powdered sugar right before serving. It’s the simplest, prettiest finish.
- Chip-Studded Tops: Press a few mini chips on top before baking, then dust with powdered sugar after cooling.
- Simple Drizzle: Mix powdered sugar with a tiny splash of milk and a drop of vanilla, then drizzle lightly over cooled cookies. Let set before stacking.
- Bright Bakery Twist (Optional Variation): Add 1 teaspoon lemon zest to the dough for a fresher finish.
- Warm Bakery Note (Optional Variation): Add ½ teaspoon cinnamon for a cozy, bakery-sweet vibe.
- Extra Chocolate Pockets (Optional Variation): Use ½ cup mini chips plus ¼ cup chopped dark chocolate.
If you’re in a cookie mood and want another bakery-style cookie packed with chips, that one is a big hit in my house too.
Troubleshooting (So They Stay Light, Airy, and Soft)
Most cookie problems come down to moisture, mixing, or oven temp, and the good news is those are easy fixes. These are meant to be light airy cookies, not dry or dense, so here’s how to get back on track fast.
- Problem: Cookies spread too much. Fix: Drain the ricotta more, and chill the dough (or scooped portions) before baking. Also make sure your butter is softened, not melty.
- Problem: Dough feels too wet or slumps flat. Fix: Chill the dough 30 to 60 minutes. If it’s still loose, add flour 1 tablespoon at a time until it holds a mound.
- Problem: Cookies feel dense. Fix: Cream butter and sugar until fluffy, and stop mixing as soon as the flour disappears. Also check that your baking powder is fresh.
- Problem: Cookies seem dry. Fix: Pull them when edges are set but centers are still soft. Overbaking dries them out fast. Let them finish setting on the hot pan for a few minutes.
- Problem: Uneven baking or browned bottoms. Fix: Use parchment, bake on the middle rack, and rotate the pan halfway through if your oven has hot spots.
When these come out right, they have that soft, tender bite that makes people ask if they’re from a bakery. That’s the goal, and you’re closer than you think.
Make-Ahead, Freezing, and Serving Ideas
These are my kind of make-ahead cookies because you can do the “messy part” earlier, then bake when you actually need them. I love making the dough the night before a gathering, then baking fresh the next day so the house smells like vanilla and everyone thinks I have my life together. (I do not. I just planned cookies.)
- Make-ahead option: Make the dough, cover, and chill up to 24 hours. Let it sit on the counter 10 minutes if it’s too firm to scoop.
- Portion first, then chill: Scoop dough onto a tray, then chill. This makes baking day feel easy, just line the pan and go.
- Freeze dough scoops: Freeze scooped portions on a tray until solid, then store in a freezer bag. Bake from frozen with a couple extra minutes.
- Freeze baked cookies: Freeze fully cooled cookies in a single layer, then store airtight. Dust with powdered sugar after thawing for the prettiest finish.
- Serving ideas: Add them to a holiday cookie tin, bring them to a brunch, or stack them on a platter with fruit and coffee.
- Party tray tip: Dust with powdered sugar right before you walk out the door, it looks fresh and bakery-perfect.
If you’re building a dessert spread and want a fancy cookie idea for party trays, that one pairs so well with these.

Frequently Asked Questions about Cannoli Cookies
Q: How do you drain ricotta for Cannoli Cookies so they don’t spread?
Answer: Spoon the ricotta into a fine-mesh strainer set over a bowl and let it drain until it looks thicker and less glossy. For faster results, gently press with a spoon or wrap in clean cheesecloth and squeeze lightly. The goal is to reduce excess moisture so the dough stays thick and holds its shape in the oven.
Personal Detail: When it stops looking shiny and starts looking fluffy, it’s ready.
Q: Why is my Cannoli Cookies dough too wet, and how do I thicken it?
Answer: Dough can turn wet if the ricotta has extra moisture, the butter is overly soft, or the flour was measured a bit light. To thicken it, chill the dough 30 to 60 minutes, or add flour 1 tablespoon at a time until it’s scoopable and holds a mound. Avoid adding too much flour at once so the cookies stay tender.
Personal Detail: If it slumps flat in the bowl, it needs a chill.
Q: Can I substitute cottage cheese for ricotta in Cannoli Cookies?
Answer: Yes, but for the smoothest cookie texture, blend cottage cheese until creamy and drain it well first. Because it can be wetter than ricotta, chilling the dough is especially helpful. Expect a slightly different crumb, but you can still get soft, airy cookies with good draining and gentle mixing.
Personal Detail: I like it best when the dough feels plush, not runny.
Q: How do I keep Cannoli Cookies light and airy instead of dense?
Answer: Use room-temperature butter (not melted), cream the butter and sugar until fluffy, drain the ricotta well, and avoid overmixing once the flour goes in. Also make sure your baking powder is fresh. Pull the cookies when the edges are set and the centers still look soft, overbaking can make them feel heavier and drier.
Personal Detail: I look for a matte top and a gentle spring-back.
Q: How long do Cannoli Cookies take to bake, and how do I know they’re done?
Answer: Bake time depends on scoop size, but most batches land around 10 to 14 minutes at a standard cookie temperature. They’re done when the edges look set and the tops no longer look wet or glossy. The centers should still be soft, they’ll finish setting as they cool on the tray for a few minutes.
Personal Detail: I let them rest on the pan 5 minutes before moving them.
Q: Can you make Cannoli Cookies in a slow cooker, and what timing would you use?
Answer: You can, but the texture will be more cake-like and less crisp at the edges than oven-baked cookies. Line the slow cooker with parchment, place dough portions with space between, cover with a lid (a towel under the lid can help catch condensation), and cook on High until the tops look set, often 60 to 90 minutes depending on your slow cooker. Let them cool before lifting out.
Personal Detail: It’s a handy option when the oven’s busy and the house already feels full.
Q: How do you store Cannoli Cookies to keep them soft?
Answer: Store fully cooled cookies in an airtight container at room temperature. Add a piece of parchment between layers to protect the tops. If you want the powdered sugar finish to look fresh, dust right before serving. For longer storage, refrigerate in a sealed container and bring to room temp before eating for the softest texture.
Personal Detail: I use a tin for gifting and a tight-lid box for snacking.
Q: Can you freeze Cannoli Cookies (baked or as dough)?
Answer: Yes. Freeze baked cookies in a single layer until firm, then transfer to a freezer bag or container. For dough, scoop portions onto a tray, freeze until solid, then store frozen scoops. Bake from frozen by adding a couple of extra minutes, watching for set edges and soft centers.
Personal Detail: Future-you will be so happy on a busy weeknight.
Q: How do you reheat Cannoli Cookies without drying them out?
Answer: Warm cookies briefly, just enough to take the chill off. A few seconds in the microwave works well; stop while they still feel soft. If using an oven or toaster oven, use a low temperature and a short time, and don’t reheat longer than necessary. Dust with powdered sugar after reheating if you want the prettiest finish.
Personal Detail: That warm vanilla smell is the giveaway they’re ready.
These Cannoli Cookies are the kind of small, sweet win I love most. They’re easy enough for a weeknight bake, but pretty enough for a party tray, and that soft ricotta cookies texture makes them feel like a true bakery treat. If you make them, take a second to enjoy the powdered sugar snowfall moment, it’s oddly calming, and you earned it.
Thank you for cooking with me, I’m so glad you’re here in my little NYC kitchen.
Come hang out with me on Pinterest for more cozy, family-friendly bakes.
Print
Cannoli Cookies (Light & Airy Ricotta Cookies)
- Total Time: 34 minutes
- Yield: 24 cookies 1x
- Diet: Vegetarian
Description
Bake Cannoli Cookies with ricotta for a light, airy bakery-style bite, vanilla-sweet, studded with mini chips, and finished with a powdered sugar topping.
Ingredients
1 cup unsalted butter, softened
1 cup granulated sugar
1 cup full-fat ricotta cheese, well-drained
1 large egg
1 teaspoon vanilla extract
2 ¼ cups all-purpose flour
1 teaspoon baking powder
½ teaspoon salt
¾ cup mini chocolate chips
Powdered sugar, for dusting
Instructions
1. Preheat your oven to 350°F. Line two baking sheets with parchment paper.
2. Spoon ricotta into a fine-mesh strainer set over a bowl. Let it drain until it looks thicker and less glossy.
3. In a large bowl, beat the softened butter and granulated sugar until light and fluffy, about 2 to 3 minutes.
4. Beat in the drained ricotta, then the egg, then the vanilla extract. Scrape down the bowl so everything mixes evenly.
5. In a medium bowl, whisk together the flour, baking powder, and salt.
6. Add the flour mixture to the wet mixture and mix on low just until the flour disappears.
7. Stir in the mini chocolate chips by hand so you don’t overwork the dough.
8. Use a cookie scoop (about 1 ½ tablespoons) and place mounds on the baking sheet, leaving about 2 inches between them.
9. Bake for 10 to 14 minutes, depending on your scoop size and oven.
10. Let cookies cool on the baking sheet for 5 minutes, then transfer to a rack to cool completely. Dust with powdered sugar only after cooling.
Notes
Drain the ricotta well to prevent spreading.
Chill the dough if your kitchen is warm.
Use a scoop for even baking.
Dust with powdered sugar after cooling for the best finish.
- Prep Time: 20 minutes
- Cook Time: 14 minutes
- Category: Dessert
- Method: Baked
- Cuisine: Italian
Nutrition
- Serving Size: 1 cookie
- Calories: 150
- Sugar: 10
- Sodium: 50
- Fat: 8
- Saturated Fat: 5
- Unsaturated Fat: 2
- Trans Fat: 0
- Carbohydrates: 18
- Fiber: 1
- Protein: 2
- Cholesterol: 25