
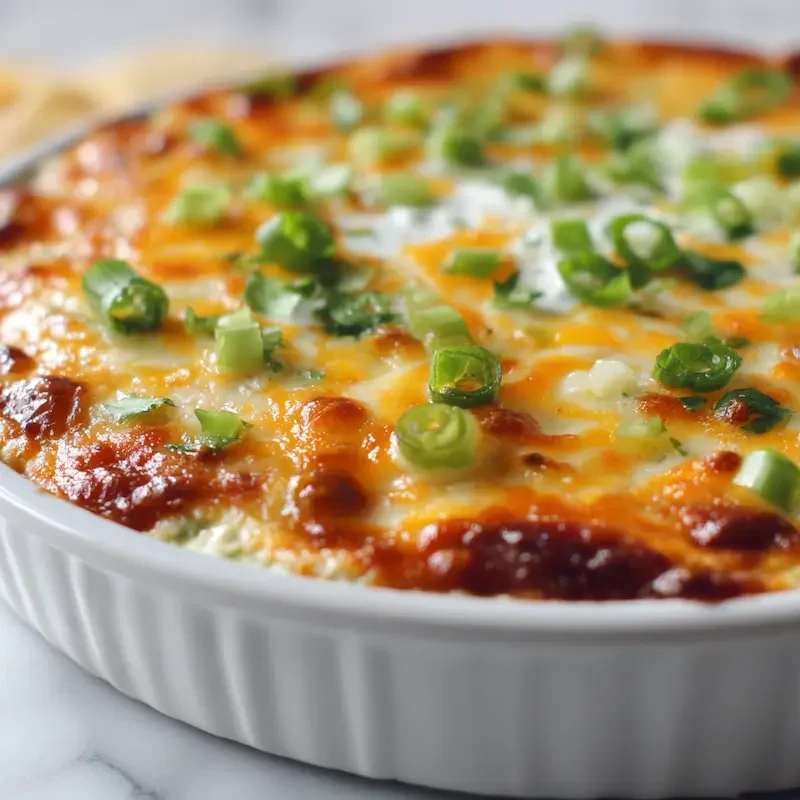
This cheesy layered bean dip is creamy, flavorful, and easy to make with pantry staples. Perfect for game day, potlucks, or family snacking.
A Bean Dip That Never Lasts Long
There’s something about bean dip that brings people together—and I’m not just saying that because I’ve scraped the bottom of the dish more times than I can count.
This cheesy bean dip is one of those accidental hits that turned into a family favorite. I first made it for a neighbor’s game day potluck—frantically layering canned refried beans and salsa in my old glass pie dish while the kids shouted over each other and the oven timer beeped. I topped it with whatever cheese I had and hoped for the best. That dish didn’t just get eaten… it got devoured.
Now? It’s a staple. We make this for casual Fridays, birthdays, lazy Sundays, and whenever someone says “Should we just do snacks for dinner?” My son Noah always circles back for seconds, usually with a handful of tortilla chips and a proud look on his face like he made it.
Whether it’s game night or just snack o’clock, this is the kind of bean dip that disappears before the next round starts.
Eva’s Note:
I’ve brought this to more school potlucks and backyard parties than I can remember. One time, I made a double batch thinking I’d have leftovers… nope. One neighbor even licked the serving spoon. I won’t name names.
And if you’re already planning your next crowd-pleasing party appetizer, don’t miss my Honey BBQ chicken rice. It’s another comfort classic around here.
Ingredients You’ll Need
This layered bean dip is made with pantry staples and a few fridge regulars — nothing fancy, just good, comforting flavor in every scoop. Here’s what you’ll need for this creamy, crowd-pleasing Tex-Mex appetizer:
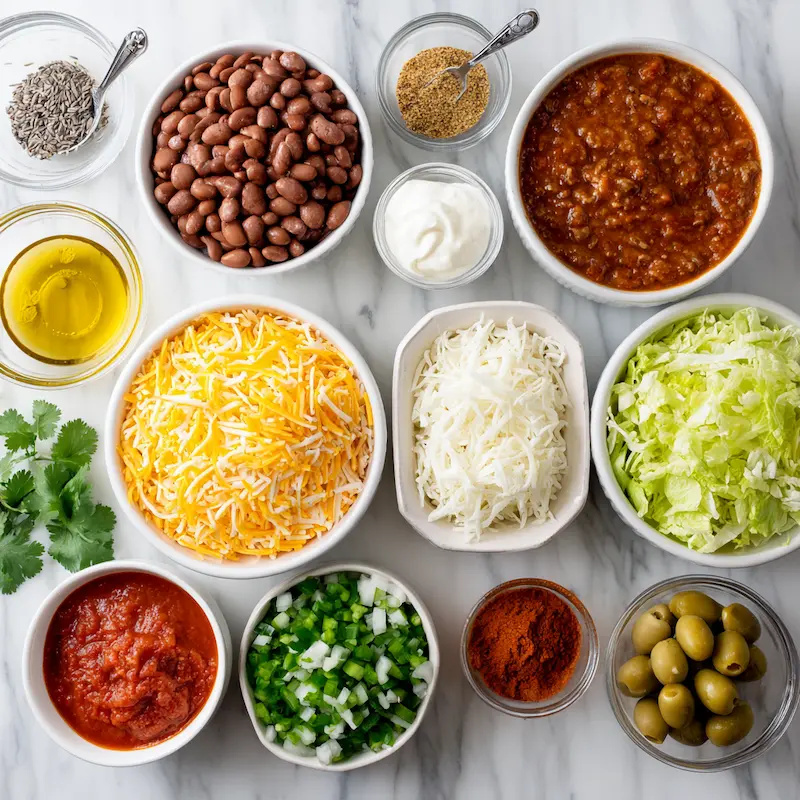
• 2 tablespoons oil – I usually go with avocado or olive oil to sauté the aromatics.
• 2 teaspoons cumin seeds – Toasted first for warm, earthy depth.
• 3–4 green chilis, finely diced – Add as much or as little as your family can handle!
• 1 large white onion, finely diced – Sweet and mellow once sautéed.
• 3 (15 oz) cans refried pinto beans or black beans – Either works great, but I tend to use pinto beans for that classic creamy bean dip texture.
• 1 (1.25 oz) packet taco seasoning – Adds a perfect mix of spice without needing a full spice rack.
• 1 teaspoon ground cumin – Doubles down on the warm flavor.
• 1 teaspoon chili powder – For that gentle kick of smoky heat.
• 24 ounces bottled salsa – Chunky or smooth—use what you love. The salsa adds moisture and brightness to balance the beans.
• 16 ounces whole milk Greek yogurt – This is my swap for sour cream. It makes the dip tangy and rich but not overly heavy.
• 32 ounces shredded Mexican blend cheese, divided – Half goes in the middle, half gets golden on top.
• ⅓ cup chopped cilantro – Freshness that cuts through the richness.
• ½ head iceberg lettuce, shredded – Adds crunch and contrast on top.
• 1 bunch scallions, sliced – I love the mild oniony bite here.
• 1 cup pico de gallo – Optional, but makes the top layer pop.
• Optional: jalapeños or olives, sliced for garnish – For anyone who loves a salty or spicy bite.
Eva’s Tip – Yogurt for Balance:
Whole milk Greek yogurt is my secret for a creamy texture that doesn’t feel too heavy. It softens the heat from the chili powder and green chilis, especially if you’re serving little ones or spice-sensitive guests.
Step-by-Step: How to Make This Cheesy Bean Dip
This bean dip comes together in easy layers—no fancy technique, just comfort food at its finest. I like to use a 9×13 baking dish or my well-loved cast iron skillet for a rustic table-ready look. If you’re hosting, that skillet keeps things warm longer, which means less fuss, more dip.
Here’s how to make it:
1. Sauté your aromatics.
In a large skillet, heat 2 tablespoons oil over medium heat. Add the cumin seeds and toast for 30 seconds until fragrant. Then stir in the diced green chilis and onion, cooking until the onions are soft and slightly golden—about 5–7 minutes.
2. Warm the beans.
Add the refried beans directly to the skillet. Stir in the taco seasoning, ground cumin, and chili powder. Mix everything together and cook for another 3–4 minutes, just to blend those flavors.
Eva’s Tip – Layer with Care:
Spoon the bean mixture into your dish evenly, creating that first warm layer. Smooth the top so the next ingredients sit nicely. If your salsa is chunky and bright red, it’ll contrast beautifully with the deeper bean layer. Makes for a gorgeous scoop!
3. Start layering.
Pour half the salsa over the beans, spreading it gently. Then dollop half the Greek yogurt on top and swirl just slightly—don’t mix it all the way in. Sprinkle half the cheese evenly over this layer.
4. Repeat the layers.
Now go back in: beans (if you’ve reserved any), salsa, yogurt, cheese. The final cheese layer should fully cover the top.
5. Bake.
Preheat your oven to 375°F (190°C). Bake the dip uncovered for about 20–25 minutes, or until bubbly around the edges.
6. Broil for a golden top (optional but worth it!).
Switch to broil and cook for 1–2 minutes, just until the cheese on top is golden and slightly crisp. Watch closely so it doesn’t burn.
Eva’s Tip – Broil for That Golden Top:
I swear by this quick step. That golden, bubbly finish makes all the difference—looks great and tastes even better.
7. Top with fresh garnishes.
Right before serving, scatter the shredded lettuce, chopped cilantro, sliced scallions, and pico de gallo. Add jalapeños or olives if using.
Eva’s Tip – Chop Fresh Before Serving:
If you prep the toppings too far ahead, they’ll wilt. I like to do a quick chop while the dip’s in the oven. It keeps everything crisp and fresh.
You can serve this straight from the oven or let it cool slightly. Either way, the layers hold beautifully, and the cheesy bean dip scoops like a dream.
And if you’re building a party platter, serve this with a side of mashed potato cheese puffs—seriously, they go so well together.
Make-Ahead & Storage Tips
One of the reasons I keep this bean dip recipe in heavy rotation? It’s super forgiving. Whether you’re prepping ahead for a busy day or wondering what to do with leftovers (if you’re lucky enough to have any!), here’s how to handle it:
Make Ahead Bean Dip
Yes, you can absolutely assemble this dip in advance. I often prep it the night before a party.
Assemble everything up to the cheese topping.
Cover tightly with foil or a lid and refrigerate.
When you’re ready to serve, bake as directed—just add 5 extra minutes since it’s starting cold.
Eva’s Note:
When I made this ahead for Emma’s birthday snack table last spring, I had it ready in the fridge while I tackled balloons and goodie bags. That saved my sanity—and the dip still got rave reviews!
Leftover Storage
Refrigerate leftovers in an airtight container for up to 4 days.
Reheat in the microwave (individual portions) or the oven (covered with foil at 350°F until hot).
The layers still hold, and the cheese melts just like it did the first time. Honestly, I think the flavors deepen overnight!
Can You Freeze Bean Dip?
Yes—but with one note. Skip freezing it after adding fresh toppings. Instead:
Freeze the baked dip without the garnishes.
Store in a freezer-safe dish, wrapped well.
Thaw overnight in the fridge and reheat in the oven at 350°F until hot all the way through.
This tip saved me before a long family weekend—we had people coming in from three different states, and I just popped the frozen bean dip in the oven before dinner. Zero stress.
What to Serve With Bean Dip
This bean dip is hearty enough to stand alone, but when it comes to serving, the right sides make it a full-on snack spread. Whether you’re planning a game day buffet or just a casual dinner-for-snackers, here are some of my favorite pairings.
Perfect Dippers
• Tortilla chips – Go for the sturdy ones! The creamy bean dip deserves a scoop that won’t snap.
• Pita chips – A little crunchier, a little fancier—great for dinner parties.
• Toasted baguette slices – Especially if you’re serving this as a warm appetizer before a meal.
• Crisp veggie sticks – Think carrots, celery, bell pepper strips, or even jicama for a fresh crunch.
Eva’s Note:
Emma loves this dip with baby carrots—she calls them “crunchy spoons.” Meanwhile, Noah refuses to eat it without classic tortilla chips. So yes, we always put out both.
Party Appetizer Pairings
Planning a snack board or appetizer table? Here’s what I usually serve alongside this bean dip:
• Roasted sweet potato rounds – Their natural sweetness pairs beautifully with the spicy, cheesy dip.
• Mini quesadillas – Cut into small triangles and served warm, they’re perfect for scooping or dipping.
• Grilled corn on the cob – If it’s summer, I brush it with lime and chili for a Tex-Mex twist.
• Fresh guacamole or chunky avocado salad – Because avocado makes everything better.
• Cilantro-lime rice – For a heartier setup that turns this into a full meal.
Hosting Tip:
If you’re serving this dip as a party appetizer, keep a second tray warming in the oven. The first one always disappears faster than expected—especially if someone brings a pitcher of limeade or sparkling mocktails.

Cheesy Layered Bean Dip Recipe
- Total Time: 40 minutes
- Yield: 10 servings 1x
- Diet: Vegetarian
Description
This cheesy layered bean dip is creamy, flavorful, and easy to make with pantry staples. Perfect for game day, potlucks, or family snacking.
Ingredients
2 tablespoons oil
2 teaspoons cumin seeds
3–4 green chilis, finely diced
1 large white onion, finely diced
3 (15 oz) cans refried pinto beans or black beans
1 (1.25 oz) packet taco seasoning
1 teaspoon ground cumin
1 teaspoon chili powder
24 ounces bottled salsa
16 ounces whole milk Greek yogurt
32 ounces shredded Mexican blend cheese, divided
⅓ cup chopped cilantro
½ head iceberg lettuce, shredded
1 bunch scallions, sliced
1 cup pico de gallo
Optional: jalapeños or olives, sliced for garnish
Instructions
1. In a large skillet, heat oil over medium heat. Add cumin seeds and toast for 30 seconds.
2. Add green chilis and diced onion. Cook until softened and golden, about 5–7 minutes.
3. Add refried beans, taco seasoning, ground cumin, and chili powder. Cook for 3–4 minutes.
4. Spread the bean mixture in a 9×13 dish or cast iron skillet.
5. Top with half the salsa, then dollop half the yogurt and sprinkle half the cheese.
6. Repeat the layers with remaining salsa, yogurt, and cheese.
7. Bake at 375°F for 20–25 minutes, until hot and bubbly.
8. (Optional) Broil for 1–2 minutes to brown the cheese on top.
9. Top with lettuce, cilantro, scallions, pico de gallo, and optional jalapeños or olives before serving.
Notes
Use Greek yogurt instead of sour cream for a lighter, tangy base.
Make ahead by assembling without toppings and refrigerate overnight.
Freezes well without fresh garnishes—just reheat and top when ready.
Pairs well with tortilla chips, pita, baguette slices, or veggie sticks.
- Prep Time: 15 minutes
- Cook Time: 25 minutes
- Category: Appetizer
- Method: Baking
- Cuisine: Tex-Mex
Nutrition
- Serving Size: 1/10 of recipe
- Calories: 320
- Sugar: 4g
- Sodium: 680mg
- Fat: 18g
- Saturated Fat: 9g
- Unsaturated Fat: 8g
- Trans Fat: 0g
- Carbohydrates: 28g
- Fiber: 6g
- Protein: 13g
- Cholesterol: 35mg