
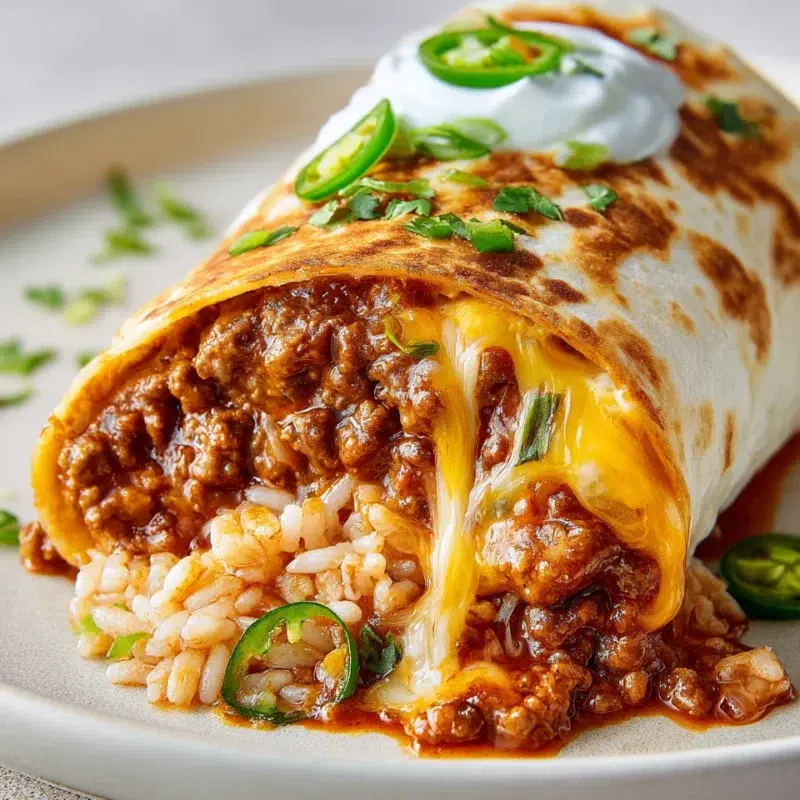
On those busy NYC weeknights when everyone walks in hungry at the exact same time, a Ground Beef Burrito is my little kitchen peace treaty. Lily wants something “not messy,” Noah wants big savory flavor, and Emma just wants to be in charge of sprinkling cheese. Burritos solve all of it because they’re a build-your-own dinner, which magically cuts the complaints in half.
And the second the onion hits the pan and those taco spices start blooming, the whole kitchen smells like Taco Tuesday in the best way. Cozy, a little smoky, and very “dinner is handled.” This is the cheesy ground beef burrito we lean on when we want comfort, flexibility, and a recipe that can pull double duty as make-ahead burritos and freezer burritos.
- Cheesy and saucy, with an easy option for burritos with enchilada sauce
- Family-friendly and great for a topping bar
- Meal prep and freezer friendly for future-you
- Two finishes, skillet-crisped or oven-baked and bubbly
If you love the flavors in this burrito, you’ll also like my easy taco rice bowl for nights when you want the same vibe without rolling anything.
Why This Burrito Works for Weeknights (and Meal Prep)
I’ve made a lot of Recipes For Burritos over the years, and this one sticks because it’s built for real life. The filling is thick (so it doesn’t leak), the flavors are bold but not fussy, and you can keep it mild for kids while putting jalapeños and hot sauce on the table for the brave souls.
It also fits my “two-path” dinner strategy. If it’s just us and I want that golden crunch, I crisp the burritos in a skillet. If I’m feeding a crowd (or I just want to get everything in the oven and breathe for a minute), I line them in a dish, top with enchilada sauce and cheese, and bake. Same Tortilla Wrap Recipes Ground Beef base, two different moods.
Choose your finish: Skillet or Oven
- Skillet: handheld, crunchy outside, melty inside
- Oven: saucy, cheesy, great for serving a bunch at once
And if you’re into cozy crowd-friendly dinners, my crockpot ground beef taco soup is another weeknight lifesaver.
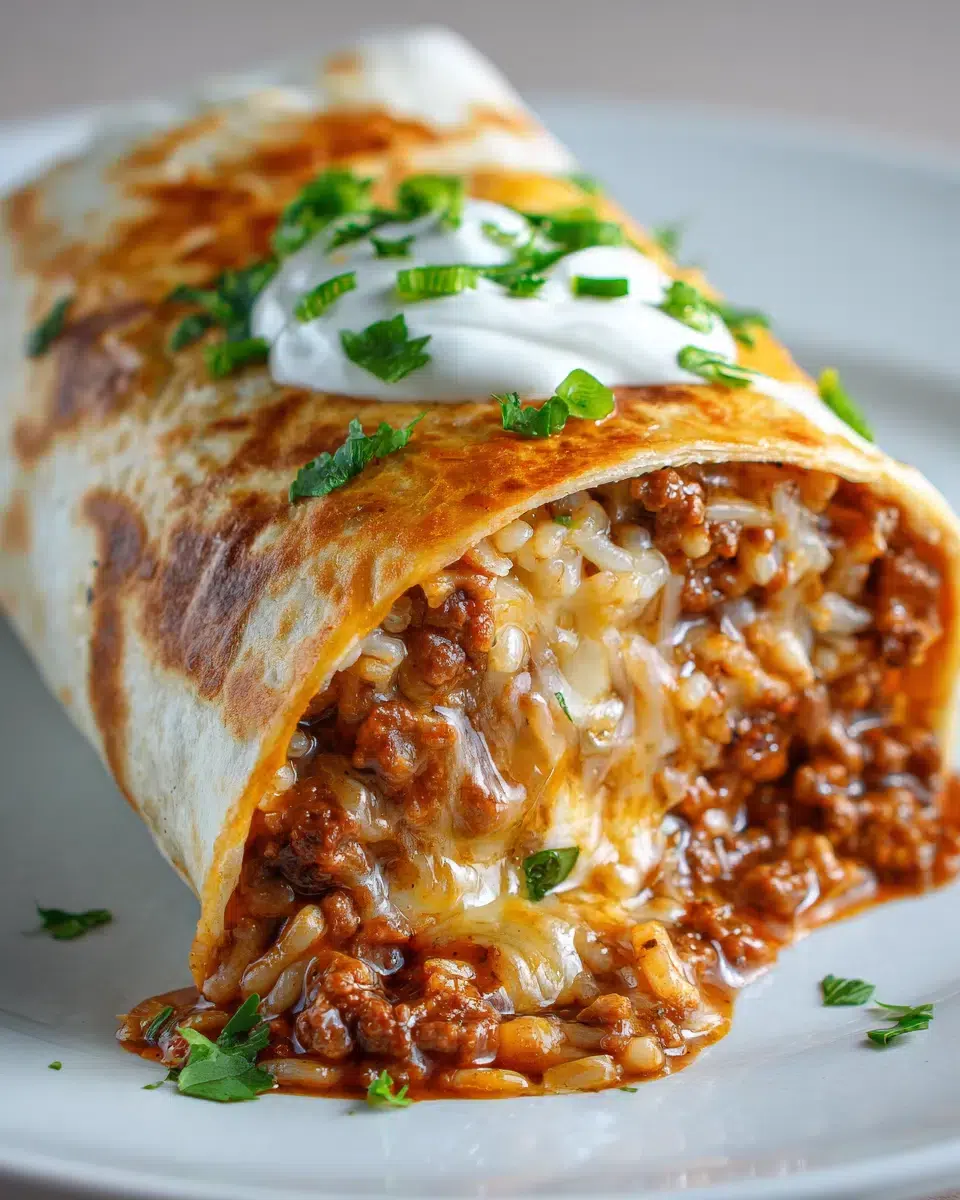
Ingredients You’ll Need
This is a classic Hamburger Burrito Recipe situation, meaning it’s mostly pantry-friendly and easy to shop for. I lean on a taco seasoning packet for speed, then add a couple extra spices to make it taste like you did more than you actually did (my favorite kind of cooking).
- Ground beef: 1 lb lean ground beef for a hearty, not-greasy filling
- Aromatics: 1 tbsp olive oil, 1 small onion (diced), 3 cloves garlic (minced)
- Seasoning: 1 packet taco seasoning, 1 tsp ground cumin, 1 tsp paprika, 1/2 tsp salt, 1/2 tsp black pepper
- Sauce: 1 cup enchilada sauce, divided (this is the secret to easy burritos with enchilada sauce)
- Structure: 1 cup refried beans, 1 cup cooked white rice (keeps it sturdy and scoopable)
- Cheese: 2 cups shredded Mexican cheese blend for that Mexican cheese burrito feel
- Tortillas: 6 large flour tortillas (large makes rolling so much easier)
- For serving: 1/2 cup sour cream, 1 jalapeño (sliced), 2 tbsp chopped cilantro, 2 tbsp chopped green onions
If you want another cheesy handheld dinner, you’ll probably love my cheesy ground beef quesadillas too.
Optional variations (clearly labeled):
- 1/2 cup corn (sweetness and texture)
- 1/2 cup diced bell pepper (more veggies)
- 1 to 2 tsp hot sauce (extra heat)
- 1 cup shredded lettuce + 1 diced tomato (serve fresh on the side, not inside for meal prep)
How to Make a Ground Beef Burrito (Step-by-Step)
This Burrito Ground Beef Recipe is all about building a filling that’s thick, flavorful, and easy to roll. You’ll cook the beef mixture until it clings to the spoon, then set up a quick assembly line so rolling feels calm instead of chaotic. (I say this as someone who has rolled burritos while answering homework questions and breaking up sibling debates.)
- Sauté the onion and garlic. Heat olive oil in a large skillet over medium heat. Add diced onion and cook 3 to 4 minutes until softened. Stir in garlic for 30 seconds, just until fragrant. Eva Tip: When the onion starts smelling sweet instead of sharp, you’re right on track.
- Brown the ground beef. Add ground beef and cook until no longer pink, breaking it up as you go. Drain excess grease if needed.
- Season it well. Sprinkle in the taco seasoning, cumin, paprika, salt, and pepper. Stir until the beef looks evenly coated and the spices smell warm and toasty.
- Add enchilada sauce and simmer. Pour in about 1/2 cup enchilada sauce (save the rest for baking or serving). Simmer uncovered for 3 to 6 minutes, stirring occasionally, until the filling thickens.
- Stir in beans and rice. Mix in refried beans and cooked white rice until combined. Cook 1 to 2 minutes more to warm through and help everything bind together. Eva Tip: This is the “barrier layer” magic in reverse, rice and beans make the filling sturdy and help prevent soggy tortillas later.
- Warm the tortillas. Warm tortillas so they’re flexible and don’t tear when you roll.
- Let the filling cool slightly. Take the skillet off the heat and let the filling sit 5 to 10 minutes. It should be warm, not steaming.
- Assemble the burritos. Add rice/beans (if you reserved any), then beef filling, then cheese, and a small swipe of sour cream if serving right away.
- Roll, then finish your way. Skillet-crisp for crunch or bake with sauce and cheese for a crowd.
Cook the Beef Filling
This is the heart of your Recipe For Burritos Ground Beef, and the biggest thing is making sure it’s not watery. Think thick, scoopable, and confident. The kind of filling that stays put when you roll, not the kind that sneaks out the ends the second you blink.
Start with onion and garlic, then brown the beef. Once the spices go in, give them a minute to bloom in the heat. That’s when your kitchen starts smelling like the best of taco Tuesday recipes ground beef, smoky, savory, and a little cozy.
- Doneness cue: beef is browned with no pink left
- Texture cue: after simmering with sauce, the filling should cling to the spoon
- Fix if it’s loose: simmer uncovered a few more minutes, stirring so it doesn’t scorch
Eva Tip: “Simmer until the filling clings to the spoon” is not just a cute line, it’s how you avoid a burrito that turns the tortilla gummy.
Warm Tortillas + Prep the Assembly Line
In my house, this is when it turns into a little burrito station. Bowls lined up, tortillas stacked, cheese in the middle like it’s the star of the show (because it is). Warming the tortillas is the easiest way to prevent tearing and helps you roll tighter.
- Microwave: stack tortillas, cover with a damp paper towel, heat 20 to 30 seconds
- Covered skillet: warm 15 to 20 seconds per side, keep covered with a clean towel
- Set up: tortillas, filling, cheese, sauce, and toppings in easy reach
Layer + Roll So It Seals (and Slices Cleanly)
The best burrito advice I can give you is this, less is more. A burrito that looks “a little small” rolls like a dream, and nobody complains once it’s crisped and cheesy. I learned that the hard way back when I used to make wraps for family road trips and tried to stuff them like suitcases.
Important: Cool the filling before rolling. If it’s steaming, it softens the tortilla fast. Give it a few minutes so the burritos stay sturdy and slice neatly.
Layering tip (anti-soggy): I like rice and beans down first because they hold everything in place and keep the tortilla from soaking up too much sauce.
- Step 1: Place filling slightly off-center in a horizontal line.
- Step 2: Fold the sides in toward the filling.
- Step 3: Fold the bottom up and over the filling, then tuck it snug.
- Step 4: Roll forward tightly until sealed, place seam-side down.
Choose Your Finish: Skillet-Crisped or Oven-Baked Cheesy
This is where your burritos go from “assembled” to “everyone suddenly appears in the kitchen.” The skillet finish gives you that golden tortilla with a little crunch. The oven finish gives you saucy, bubbly, cheesy comfort, especially if you’re going for full-on burritos with enchilada sauce on top.
Both are great, it just depends on the night. If I’m tired and want fast, I crisp them. If I’m feeding a crowd or want leftovers that reheat well, I bake a pan and call it a win.
If crispy handheld dinners are your thing, you might also like my cheesy beef chimichangas.
Skillet-Crisped Burritos (Handheld + Crunchy)
- Heat a dry skillet (or lightly oiled skillet) over medium heat.
- Place burritos seam-side down and cook 2 to 3 minutes until golden.
- Flip and cook another 2 to 3 minutes.
- Rest 1 minute, then serve.
Reheat burritos crispy: microwave just until warm, then crisp in a dry skillet for that golden outside without overcooking the filling.
Oven-Baked Cheesy Burritos (Great for a Crowd)
This is my “feed everyone without standing at the stove” method. Preheat the oven to 375°F. Spread a thin layer of the remaining enchilada sauce in a baking dish, then line up the burritos seam-side down. Pour the rest of the sauce over the top and sprinkle with extra Mexican cheese blend.
Bake 15 to 20 minutes until hot and bubbly. Let them sit 5 minutes before serving so they hold together.
Make it ahead: Assemble the dish, cover, and refrigerate. Bake when you’re ready, adding a few extra minutes if it’s going in cold.
Topping Bar + Easy Side Ideas
If you want a dinner that feels fun without extra work, do a topping bar. Everyone gets the burrito they want, and you don’t have to play short-order cook. I keep it mild by default, then set jalapeños and hot sauce on the table for anyone who wants a little kick.
- Classic toppings: sour cream, jalapeño slices, cilantro, green onions
- Optional: shredded lettuce and diced tomato (serve on the side, especially for meal prep burritos)
- Extra cheesy moment: a little more Mexican cheese blend on top right before serving
Easy sides:
- A simple salad with lime and salt
- Chips with salsa
- Roasted corn or sautéed peppers (if you’re adding veggies)
- Fresh fruit for a kid-friendly balance
- Or keep it easy and pair with my easy taco rice bowl components as a side situation
Make-Ahead, Storage, and Freezer Plan
This is where this becomes a true weeknight helper. When I do a little Sunday prep, I line burritos up on a sheet pan like soldiers, label them with dates, and future-me feels genuinely cared for. These are my favorite make-ahead burritos because they reheat like a dream if you wrap them well.
Best wrap method (wrap for the freezer like you mean it): Let burritos cool completely, then wrap each one tightly in foil (or a freezer-safe wrap), and place in a freezer bag. Tight wrapping keeps the edges from drying out, future-you gets a burrito that tastes freshly made.
- Fridge (meal prep burritos): Wrap tightly and store 3 to 4 days. Keep sour cream and fresh toppings separate.
- Freezer (freezer burritos): Freeze up to 2 to 3 months for best flavor and texture.
- Freeze and reheat burritos: Microwave from frozen for speed, then crisp in a skillet if you want that golden finish. Or warm in the oven until heated through.
Reheat two ways depending on the mood: Soft and cozy or crisp and golden, either way, it’s the same burrito doing double duty.
Troubleshooting (Watery Filling, Dry Burritos, Torn Tortillas)
I’ve done all of these at least once, usually while trying to move too fast. The good news is burritos are forgiving, and most problems have an easy fix.
- Problem: Burrito filling too watery
Cause: too much sauce or not enough simmer time
Fix: simmer uncovered until it thickens and clings to the spoon, stir often. You can also stir in a spoonful of refried beans to bind. - Problem: Burritos getting soggy
Cause: steaming-hot filling, too much sauce in the center, or wet toppings inside
Fix: cool the filling before rolling, use rice and beans as a barrier layer, and keep tomatoes and lettuce on the side for make-ahead. - Problem: Dry burritos
Cause: not enough sauce or overcooking during reheating
Fix: add a spoonful of enchilada sauce when serving, and reheat gently. Finish in a skillet only after the center is warmed. - Problem: Torn tortillas
Cause: tortillas are cold or overfilled
Fix: warm tortillas first and use less filling. Measure once, roll forever.
If you want another low-stress tortilla dinner, my cheesy ground beef quesadillas are a great backup plan.
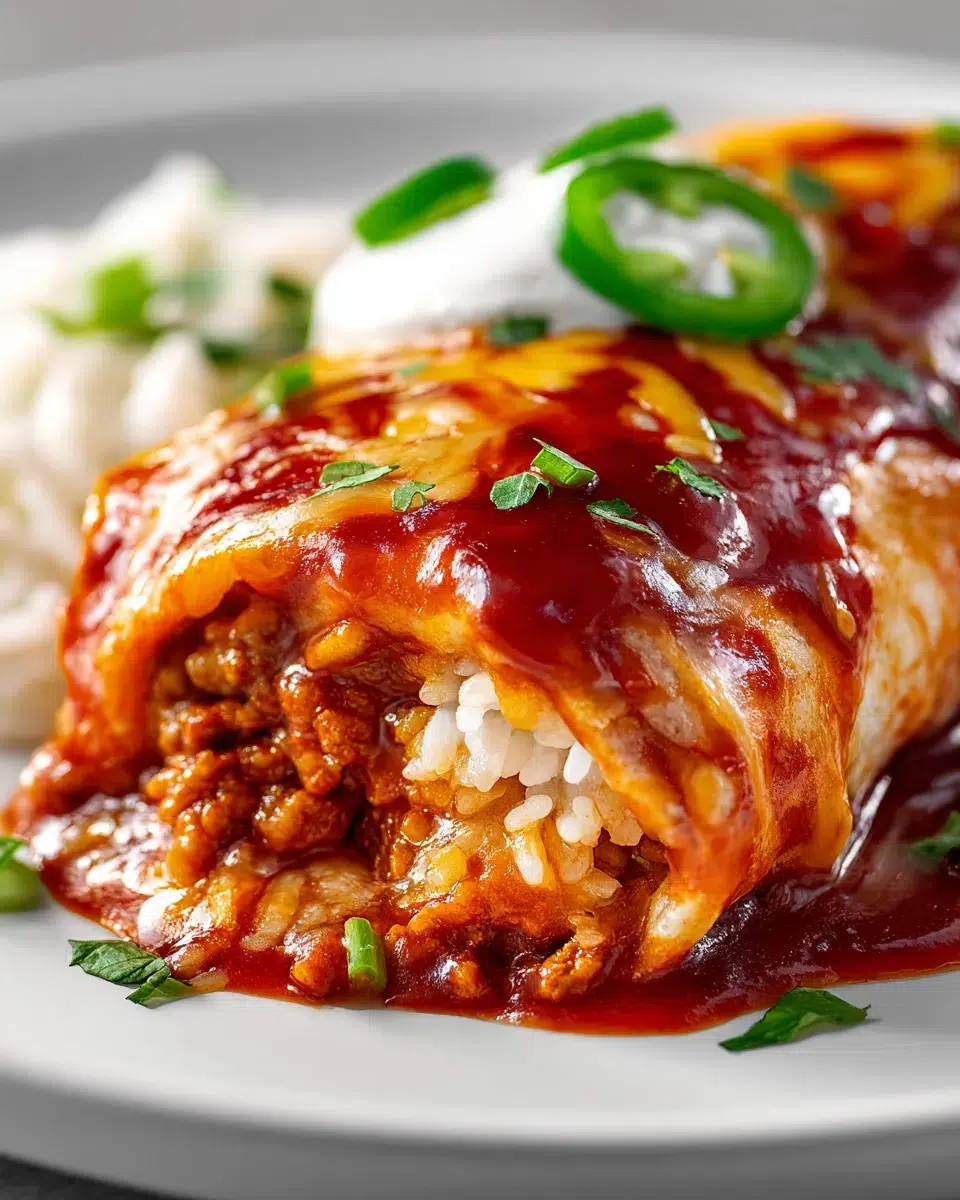
Frequently Asked Questions about Ground Beef Burrito
These burritos have become such a repeat request in my house that I could probably roll them with my eyes closed, but I still think the little details matter.
Q: How do you keep a Ground Beef Burrito from getting soggy?
Answer: Let the filling cool slightly before rolling, keep wet ingredients (extra sauce, fresh tomatoes) out of the center for make-ahead, and layer rice/beans first to create structure. If you’re baking with sauce, serve immediately so the tortillas don’t sit too long.
Personal Detail: I always aim for that first crisp bite when I skillet-finish them, it’s the best insurance against sogginess.
Q: Can I make Ground Beef Burritos ahead of time for meal prep?
Answer: Yes, assemble with cooled filling, wrap tightly, and store in the fridge for quick lunches/dinners. Keep toppings like sour cream, jalapeños, and herbs for serving so the burritos reheat cleanly.
Personal Detail: On Sundays I line them up, label them, and it feels like leaving a little love note for my weekday self.
Q: What’s the best way to freeze and reheat Ground Beef Burritos?
Answer: Freeze burritos fully cooled and tightly wrapped to prevent drying out. Reheat from frozen in the microwave for speed, then crisp in a skillet for the best texture, or warm in the oven until heated through.
Personal Detail: That sizzling sound when the tortilla turns golden in the pan makes it feel freshly made.
Q: Can I substitute enchilada sauce with salsa or taco sauce?
Answer: Yes. Salsa gives a fresher, chunkier filling; taco sauce is smoother and more uniform. If using a thinner sauce, simmer the filling a little longer so it stays thick and rollable.
Personal Detail: My family likes it mild on weeknights, but we keep heat on the table so everyone can choose their own adventure.
Q: How do I thicken the ground beef filling if it’s too watery?
Answer: Simmer uncovered to reduce liquid, and stir occasionally so it doesn’t scorch. You can also add a small spoonful of refried beans to bind the mixture, or reduce the amount of sauce added to the skillet and save more for serving.
Personal Detail: I watch it go from “soupy” to “spoon-clinging” in just a few minutes if I’m patient.
Q: How long do Ground Beef Burritos last in the fridge?
Answer: Stored tightly wrapped or in an airtight container, they’re best within 3 to 4 days. For the best texture, reheat and eat right away rather than letting them sit warm.
Personal Detail: I’ve definitely handed one to Noah as an after-school snack, still warm, still cheesy, still a win.
Q: What’s the best way to reheat burritos so the tortilla stays soft (or crispy)?
Answer: For soft: microwave briefly with a damp paper towel over the burrito. For crispy: warm first (microwave or oven), then finish in a dry skillet to crisp the outside without overcooking the filling.
Personal Detail: I choose soft and cozy on rainy nights, and crispy when I need a little crunch to turn the day around.
If you’re looking for the best burrito recipe to keep in your back pocket, this one checks all the boxes. It’s cozy, flexible, and it turns a regular weeknight into something that feels a little more special. Whether you go skillet-crisped or saucy and baked, this Ground Beef Burrito is the kind of dinner your family will ask for again.
Thank you for cooking with me, I’m so glad you’re here in my little kitchen corner.
Come hang out with me on Pinterest for more cozy, family-friendly recipes.
Print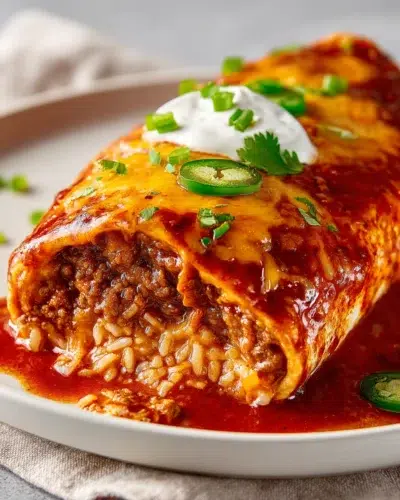
Ground Beef Burrito (Easy Cheesy Dinner Recipe)
- Total Time: 35 minutes
- Yield: 6 servings 1x
Description
Make a Ground Beef Burrito with seasoned beef, rice, beans, enchilada sauce, and melty cheese, perfect for Taco Tuesday, meal prep, or feeding a crowd.
Ingredients
1 lb lean ground beef
1 tbsp olive oil
1 small onion, diced
3 cloves garlic, minced
1 packet taco seasoning
1 tsp ground cumin
1 tsp paprika
1/2 tsp salt
1/2 tsp black pepper
1 cup enchilada sauce, divided
1 cup refried beans
1 cup cooked white rice
2 cups shredded Mexican cheese blend
6 large flour tortillas
1/2 cup sour cream
1 jalapeño, sliced
2 tbsp chopped cilantro
2 tbsp chopped green onions
Instructions
1. Heat olive oil in a large skillet over medium heat. Add diced onion and cook 3 to 4 minutes until softened. Stir in garlic for 30 seconds.
2. Add ground beef and cook until no longer pink, breaking it up as you go. Drain excess grease if needed.
3. Sprinkle in the taco seasoning, cumin, paprika, salt, and pepper. Stir until the beef looks evenly coated.
4. Pour in about 1/2 cup enchilada sauce. Simmer uncovered for 3 to 6 minutes, stirring occasionally.
5. Mix in refried beans and cooked white rice until combined. Cook 1 to 2 minutes more.
6. Warm tortillas so they’re flexible.
7. Take the skillet off the heat and let the filling sit 5 to 10 minutes.
8. Add rice/beans, then beef filling, then cheese, and a small swipe of sour cream if serving right away.
9. Roll, then finish your way: Skillet-crisp for crunch or bake with sauce and cheese for a crowd.
Notes
For skillet-crisped burritos, heat a dry skillet over medium heat and cook burritos seam-side down for 2 to 3 minutes until golden.
For oven-baked burritos, preheat the oven to 375°F, spread enchilada sauce in a baking dish, line up burritos, pour remaining sauce over, sprinkle with cheese, and bake 15 to 20 minutes.
- Prep Time: 15 minutes
- Cook Time: 20 minutes
- Category: Dinner
- Method: Skillet
- Cuisine: Mexican
Nutrition
- Serving Size: 1 burrito
- Calories: 450
- Sugar: 3
- Sodium: 800
- Fat: 20
- Saturated Fat: 10
- Unsaturated Fat: 8
- Trans Fat: 0
- Carbohydrates: 40
- Fiber: 4
- Protein: 25
- Cholesterol: 70