
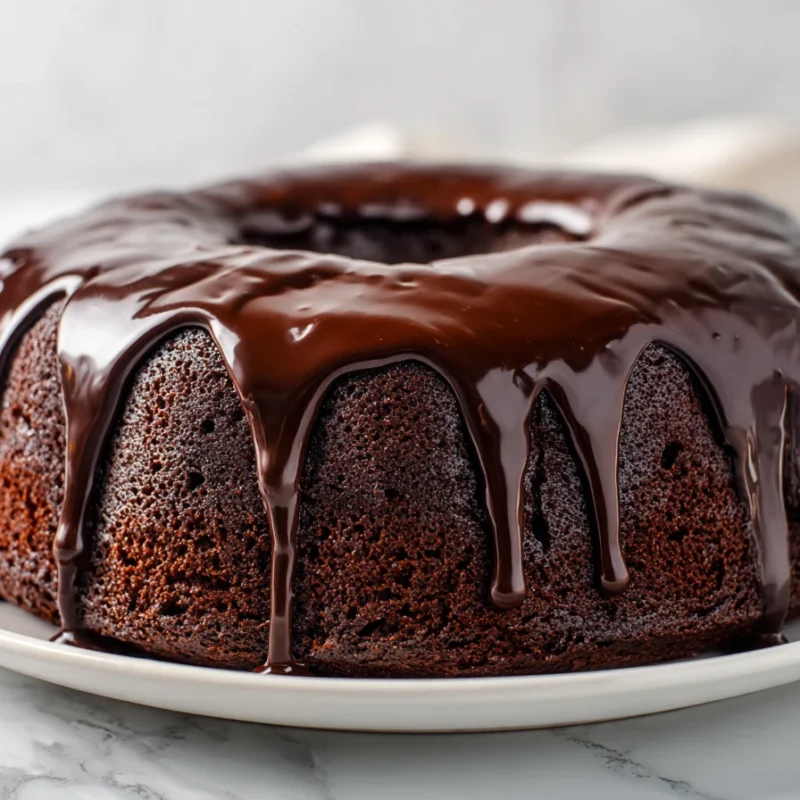
The first time I made this Mount Doom Cake, it was for a cozy living-room movie night with my kids, the lights dimmed, blankets everywhere, and that “okay, who’s getting the biggest slice?” energy buzzing in the air. We had our little spread of Lord Of The Rings Movie Night Food, salty snacks on one side, sweet on the other, and then this dramatic chocolate “volcano” right in the middle like it owned the table.
When the ganache finally poured from the top and started creeping down the sides, everyone got quiet for a second. Even my too-cool teenager. Then Noah goes, completely serious, “It’s lava.” That’s when I knew this was going into my keeper file of Lord Of The Rings Dessert ideas.
This is the centerpiece cake that makes the whole table feel like an adventure.
Why This Mount Doom Cake Works (Flavor + Structure)
This cake is rich without being fussy. The crumb bakes up moist and sturdy enough to hold that glossy ganache “lava flow,” which is exactly what you want for Lotr Inspired Food that looks dramatic but still slices cleanly. It’s the kind of Lord Of The Rings Themed Party Food that makes people pull out their phones before they even grab a fork.
One little trick that changed my chocolate cakes forever is hot coffee in the batter. You do not taste “coffee” in the finished cake, it just makes the cocoa taste deeper and bolder, like a bakery-level chocolate aroma filling your kitchen. The first time I poured ganache over the top, Emma stood on a chair (supervised, obviously) and gasped like it was a science experiment.
- What you’ll love: deep cocoa flavor
- What you’ll love: tender, moist crumb that stays soft
- What you’ll love: dramatic ganache finish that looks like lava
This is one of my favorite Fantasy Snack Ideas when you want the wow factor without a million tiny steps.
Ingredients You’ll Need
If you’ve ever looked at Lord Of The Rings Dessert Recipes and thought, “Cute, but I do not have time for wizard-level baking,” this one is for you. Most of what you need is pantry-friendly, and the rest is easy to grab on a regular grocery run. For movie-night baking, I always pull my eggs and dairy out early so they mix smoothly and the batter comes together fast.
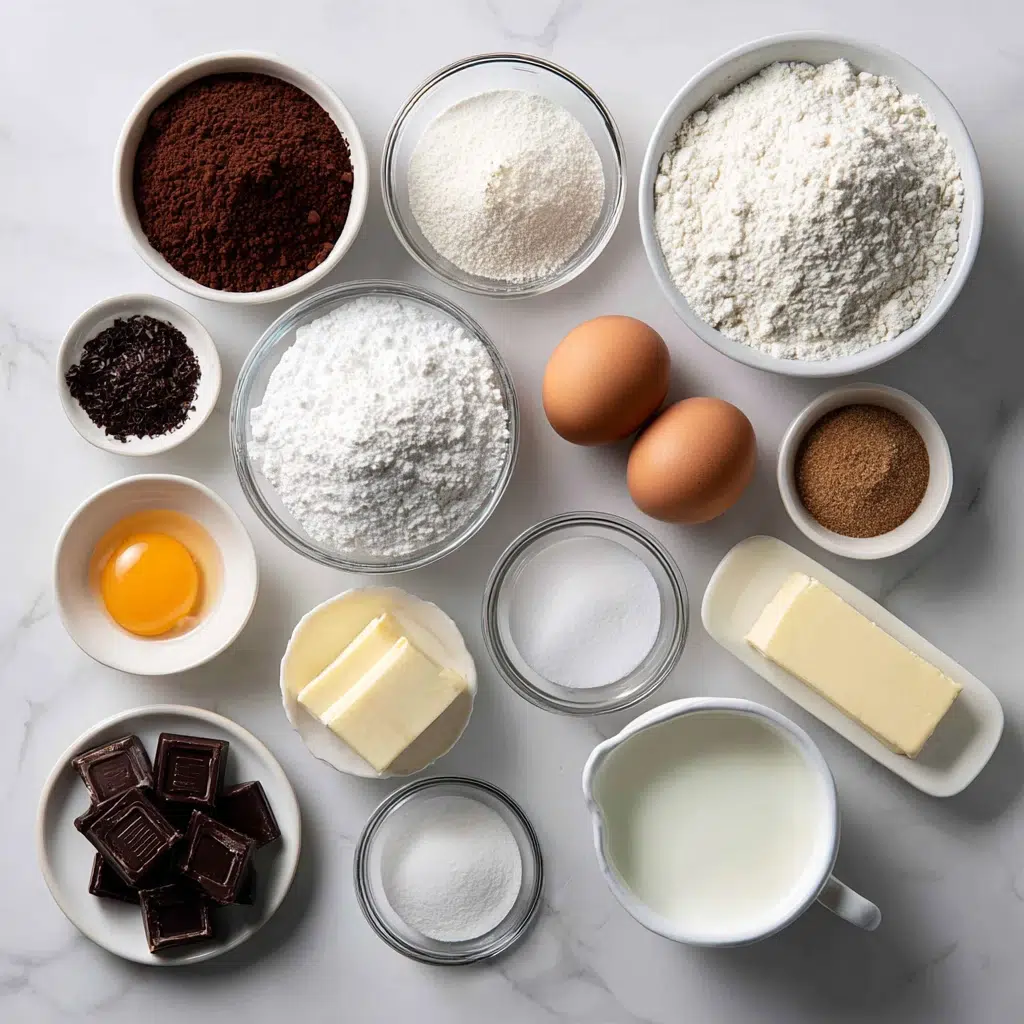
- 1 3/4 cups all-purpose flour
- 1 cup Dutch-processed cocoa powder
- 1 1/2 teaspoons baking soda
- 1 teaspoon baking powder
- 1/2 teaspoon salt
- 1 1/2 cups granulated sugar
- 1/2 cup brown sugar
- 2 large eggs
- 1 cup buttermilk
- 1/2 cup sour cream
- 1/2 cup vegetable oil
- 2 teaspoons vanilla extract
- 1 cup hot coffee
- 8 oz dark chocolate (70% or higher), chopped
- 1 cup heavy cream
- 4 tablespoons unsalted butter
Ingredient Spotlight (Cocoa + Dark Chocolate): Dutch-processed cocoa gives you that dark, dramatic color that fits right in with Hobbit Food Ideas and moody movie-night vibes. And using 70% (or higher) dark chocolate keeps the ganache rich and not overly sweet, which makes the “lava” look extra glossy.
Optional Variations (Clearly Marked):
- Add 1–2 teaspoons espresso powder to deepen the cocoa flavor
- Use two 8-inch layers for a taller “mountain” silhouette
- Add a pinch of flaky salt on top of the ganache for contrast
Tools + Pans (Pick Your “Volcano” Style)
I’ve made this for everything from casual family nights to a full-on Lord Of The Rings Bday Party, and the pan you choose really sets the vibe. If you want the easiest “volcano shape” shortcut, aim for a cake with a gentle dome or a stacked shape so the ganache naturally runs down like lava on a slope.
- Two 8-inch round pans: Tall, dramatic “mountain” look, great for a Lord Of The Rings Food Menu centerpiece (serves about 12).
- One bundt pan: The easiest natural “crater” effect, just pour ganache into the center and let it spill over (serves about 12–14).
- 9×13 sheet pan: Best for crowds and quick slicing, perfect if you’re feeding a busy party table (serves about 16–20).
- Cupcake tin: Quick grab-and-go for kids, and you can do mini lava drizzles on each (makes about 24).
If I’m transporting it, I go with a bundt or a sheet cake. Less wobble, less stress, more time to actually enjoy the movie.
How to Make Mount Doom Cake (Step-by-Step)
This batter comes together in a simple rhythm. Dry ingredients in one bowl, wet in another, then combine and bake. When my kids help, Lily usually measures (she’s precise), Noah “quality checks” the chocolate, and Emma insists on scraping the bowl like it’s her job.
- Preheat and prep. Heat your oven to 350°F. Grease and line your chosen pan(s) with parchment where you can, then lightly dust with cocoa powder (less white residue than flour).
- Mix the dry ingredients. In a large bowl, whisk together the flour, Dutch-processed cocoa, baking soda, baking powder, salt, granulated sugar, and brown sugar. Break up any cocoa lumps.
- Mix the wet ingredients. In a second bowl, whisk the eggs, buttermilk, sour cream, vegetable oil, and vanilla until smooth.
- Combine. Pour the wet mixture into the dry mixture and stir until most of the flour disappears.
- Add the hot coffee. Slowly pour in the hot coffee while stirring. The batter will look thin, that’s normal.
- Eva’s Tip: Don’t overmix. Once everything is combined and smooth, stop. Overmixing can make the cake tougher.
- Pour and bake. Divide batter evenly between pans if using layers, or pour into your prepared pan. Bake until a toothpick comes out with a few moist crumbs (times vary by pan choice).
- Cool in the pan briefly. Let the cake cool in the pan for about 10–15 minutes so it sets and releases more cleanly.
- Turn out and cool completely. Invert onto a rack, peel off parchment if used, and let it cool fully before ganache.
- Set up your snack table. While it cools, get your Lord Of The Rings Movie Night Snacks ready so you’re not rushing later.
If you love ganache desserts, you’ll also want to check out my go-to chocolate ganache technique for extra confidence and consistency.
Cooling Timeline (So the Ganache Looks Like Lava, Not a Puddle)
I got impatient once and poured ganache on a warm cake because the movie was starting and I thought, “It’ll be fine.” It was not fine. The ganache soaked in and turned more like a dark stain than lava trails. The patience payoff is real here.
- Signs it’s ready for ganache: the cake feels cool all the way through, not just on top.
- Signs it’s ready for ganache: the surface is dry to the touch and doesn’t feel steamy.
When the cake is fully cool, the ganache sets into glossy ribbons instead of disappearing into the crumb.
Dark Chocolate “Lava” Ganache (Pour vs Drip)
This is the moment where the whole Mount Doom Cake turns into a real Lord Of The Rings Dessert centerpiece. Ganache looks fancy, but it’s basically warm cream meeting chopped chocolate, then turning into something silky and dramatic.
How to make it: Place chopped dark chocolate in a heat-safe bowl. Warm the heavy cream until it’s steaming (not boiling), then pour it over the chocolate. Let it sit for 2–3 minutes, then stir slowly from the center outward until glossy. Stir in the butter until smooth.
Ganache consistency check (spoon test): Dip a spoon in, then lift it. It should coat smoothly and fall in a thick ribbon that holds a line for a second before melting back in.
- Pour Finish: Let ganache cool slightly so it thickens, then pour from the very top center and let it flow naturally down the sides.
- Drip Finish: Let ganache thicken a bit more, then use a spoon or squeeze bottle to control drips around the edge before filling the top.
If you want a deeper dive into getting that perfect sheen and texture, here’s my go-to chocolate ganache technique.
Decorating Mount Doom Cake to Look Like a Volcano
If you’re here because you want to decorate Mount Doom Cake like a volcano, you’re in the right kitchen. I like turning this part into a little craft moment. I set out small bowls like we’re doing a school project, and suddenly everyone wants to help (even the ones who said they were “not into baking”).
- Volcanic rim: Pile a little extra ganache at the top center, then nudge it toward the edges so it looks like a crater ready to spill.
- Cocoa “ash” dusting: Lightly dust Dutch-process cocoa around the top rim and a little at the base for that smoky, rugged look.
- Chocolate “rocks”: Use chopped dark chocolate chunks around the bottom edge to look like scattered stones.
- Crackle top: Let a thicker ganache layer set, then add a second warmer drizzle for a “cracked lava” feel.
- Flaky salt embers (optional): A tiny pinch on top makes the chocolate taste even richer.
Level Up: If you want a more “eruption” look, pour a small amount of slightly warmer ganache right before serving so it stays shinier and looks freshly flowing.
If you love dramatic chocolate desserts for Fairytale Food Ideas, you might also like molten chocolate lava cakes as a fun backup option for your dessert table.
Make-Ahead Plan for a Stress-Free Movie Night
On party days at my house, there’s always something happening, laundry humming, kids asking questions, someone looking for a missing shoe. So I build in a make-ahead plan whenever I can. This cake is perfect for that, which is why it’s such a win for Lord Of The Rings Movie Night Food.
- Day Before: Bake the cake, cool completely, wrap tightly, and keep at room temperature.
- Morning Of: Make the ganache and let it cool to your preferred pour or drip consistency.
- Right Before Serving: Pour ganache, add cocoa “ash” and chocolate “rocks,” then bring it to the table like the grand finale.
This also helps if you’re building a full Lord Of The Rings Food Menu and want dessert handled early.
Troubleshooting (So Your Volcano Looks Intentional)
- Cake seems dry: It may have baked a little long. Next time check early, and store slices covered so they don’t dry out.
- Layers sank in the middle: Oven may have been opened too early or leavening was off. Use fresh baking soda and baking powder, and avoid opening the door for the first 25 minutes.
- Ganache looks split or grainy: The cream may have been too hot or it got overheated. Stir gently, and if needed, warm very briefly and whisk slowly to bring it back together.
- Ganache too thin: Let it sit and cool a few minutes, stirring occasionally, until it thickens.
- Ganache too thick: Warm in very short bursts and stir, or add a tiny splash of warm cream and mix until smooth.
- Drips look messy: The cake may have been warm or the ganache too thin. Cool the cake fully and thicken ganache slightly before trying again.
- Cake looks rugged: Honestly, perfect. Volcanoes are not supposed to be smooth.
If you want more ganache troubleshooting help, my go-to chocolate ganache technique goes deeper without making it complicated.
Serving Ideas for a LOTR-Themed Party Table
For a Lord Of The Rings Bday Party or a cozy watch party, I love serving this on a big board or cake stand with little labels like we’re hosting an inn. Add candles, stack dessert plates, and let the cake be the star of your Lotr Themed Food spread.
When you slice, drag a little ganache onto the plate first, then set the slice on top so it looks like it’s sitting in a “lava flow.” It’s such a small detail, but it gets big reactions.
- Topping bar ideas: extra ganache, flaky salt, cocoa dust, chopped dark chocolate “rocks.”
- Pair with: simple Lord Of The Rings Inspired Snacks like popcorn, pretzels, and fruit for balance.
And if you want a second dessert option that fits the theme, molten chocolate lava cakes are always a hit.
Frequently Asked Questions about Mount Doom Cake
Q: How do you decorate Mount Doom Cake to look like a volcano?
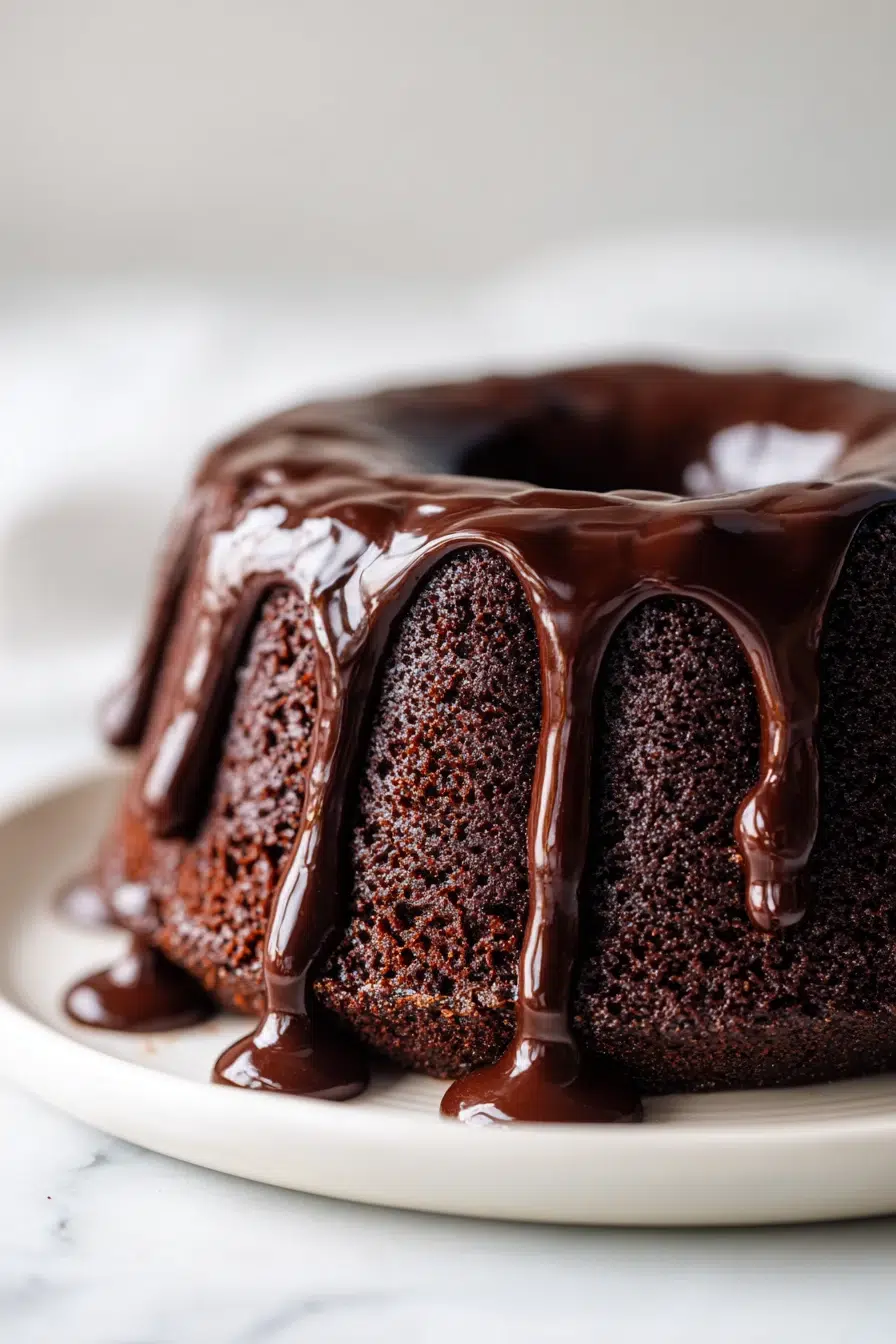
✅ Answer: Build height with stacked layers or a gently domed top, then pour ganache from the center so it flows down like lava. Finish with a dusting of cocoa “ash” around the rim and add chocolate “rocks” at the base for texture.
💡 Personal Detail: I love watching the exact moment the ganache hits the edge and starts crawling down the sides, it’s weirdly satisfying.
Q: Can I make Mount Doom Cake as cupcakes or a sheet cake?
✅ Answer: Yes—use the same batter and bake in lined cupcake tins or a sheet pan, then finish with ganache drizzles for a lava look. Cupcakes are great for parties, while a sheet cake is easiest for feeding a crowd and slicing fast.
💡 Personal Detail: At kids’ tables, the cupcakes disappear first, every single time.
Q: What can I use instead of buttermilk in Mount Doom Cake?
✅ Answer: You can use plain yogurt thinned with a little milk, or sour cream thinned with a little milk, to mimic the tang and moisture buttermilk provides. The goal is a pourable consistency similar to buttermilk so the crumb stays tender.
💡 Personal Detail: I keep yogurt and sour cream around for last-minute baking because someone always requests “chocolate cake” at the least convenient time.
Q: How do I thicken dark chocolate ganache if it’s too runny?
✅ Answer: Let it sit at room temperature for a few minutes to cool and naturally thicken, stirring occasionally. If it still seems thin, add a small amount of melted dark chocolate, stir until smooth, and re-test the consistency before pouring.
💡 Personal Detail: You’re aiming for glossy and spoon-coating, like it wants to move but not sprint.
Q: How long should Mount Doom Cake cool before adding ganache?
✅ Answer: Cool the cake in the pan briefly, then turn it out and let it cool completely on a rack before adding ganache. A fully cooled cake helps the ganache set on the surface for defined “lava” trails.
💡 Personal Detail: I use that cooling time to set the table, cue the movie, and pretend I’m not checking the cake every five minutes.
Q: Can you bake Mount Doom Cake in a slow cooker, and how long does it take?
✅ Answer: Yes—line the slow cooker with parchment, add the batter, cover with a clean towel under the lid to catch condensation, and cook on low until a tester comes out mostly clean. Timing varies by model, but it typically takes a few hours; start checking earlier rather than later to avoid drying it out.
💡 Personal Detail: The smell builds slowly all afternoon, like your whole home is turning into a chocolate bakery.
Q: How do I store Mount Doom Cake, and how long does it last?
✅ Answer: Store covered at cool room temperature for short-term serving, or refrigerate for longer keeping. For best texture, bring slices back toward room temperature before serving so the crumb softens and the ganache tastes richer.
💡 Personal Detail: The next-day slice is sneaky good, the chocolate flavor feels deeper after it sits.
Q: Can I freeze Mount Doom Cake (with or without ganache)?
✅ Answer: Yes—freeze the cake layers tightly wrapped for best results, then thaw before decorating. You can also freeze finished slices; wrap well and thaw in the fridge, then let sit briefly before serving for the best texture.
💡 Personal Detail: Having cake tucked away for a future movie night feels like a gift you forgot you bought yourself.
Q: What’s the best way to reheat slices so the cake stays moist?
✅ Answer: Warm slices gently in short bursts just until the crumb is soft and the ganache loosens slightly—overheating can dry the cake. Covering the slice while warming helps hold in moisture.
💡 Personal Detail: That just-warm bite, when the ganache turns silky again, is the kind of thing that makes you hide in the kitchen for “one more minute.”
Whether you’re planning a full Lord Of The Rings Inspired Food spread or just want one unforgettable dessert, this Mount Doom Cake is the kind of bake that makes people linger at the table. It’s rich, dramatic, and honestly pretty forgiving, which is exactly what busy life needs.
Thank you for cooking with me, it means so much to have you here in my little NYC kitchen.
For more cozy, themed treats, come follow me on Pinterest.
Print
Mount Doom Cake (Lord of the Rings Dessert)
- Total Time: 50 minutes
- Yield: 12 servings 1x
- Diet: Vegetarian
Description
Make Mount Doom Cake for a LOTR movie night: rich cocoa cake with silky dark chocolate ganache. A showstopping themed dessert for parties.
Ingredients
1 3/4 cups all-purpose flour
1 cup Dutch-processed cocoa powder
1 1/2 teaspoons baking soda
1 teaspoon baking powder
1/2 teaspoon salt
1 1/2 cups granulated sugar
1/2 cup brown sugar
2 large eggs
1 cup buttermilk
1/2 cup sour cream
1/2 cup vegetable oil
2 teaspoons vanilla extract
1 cup hot coffee
8 oz dark chocolate (70% or higher), chopped
1 cup heavy cream
4 tablespoons unsalted butter
Instructions
1. Preheat and prep. Heat your oven to 350°F. Grease and line your chosen pan(s) with parchment where you can, then lightly dust with cocoa powder (less white residue than flour).
2. Mix the dry ingredients. In a large bowl, whisk together the flour, Dutch-processed cocoa, baking soda, baking powder, salt, granulated sugar, and brown sugar. Break up any cocoa lumps.
3. Mix the wet ingredients. In a second bowl, whisk the eggs, buttermilk, sour cream, vegetable oil, and vanilla until smooth.
4. Combine. Pour the wet mixture into the dry mixture and stir until most of the flour disappears.
5. Add the hot coffee. Slowly pour in the hot coffee while stirring. The batter will look thin, that’s normal.
6. Eva’s Tip: Don’t overmix. Once everything is combined and smooth, stop. Overmixing can make the cake tougher.
7. Pour and bake. Divide batter evenly between pans if using layers, or pour into your prepared pan. Bake until a toothpick comes out with a few moist crumbs (times vary by pan choice).
8. Cool in the pan briefly. Let the cake cool in the pan for about 10–15 minutes so it sets and releases more cleanly.
9. Turn out and cool completely. Invert onto a rack, peel off parchment if used, and let it cool fully before ganache.
10. Set up your snack table. While it cools, get your Lord Of The Rings Movie Night Snacks ready so you’re not rushing later.
Notes
Add 1–2 teaspoons espresso powder to deepen the cocoa flavor.
Use two 8-inch layers for a taller “mountain” silhouette.
Add a pinch of flaky salt on top of the ganache for contrast.
- Prep Time: 20 minutes
- Cook Time: 30 minutes
- Category: Dessert
- Method: Baked
- Cuisine: American
Nutrition
- Serving Size: 1 slice
- Calories: 450
- Sugar: 35
- Sodium: 250
- Fat: 25
- Saturated Fat: 15
- Unsaturated Fat: 8
- Trans Fat: 0
- Carbohydrates: 55
- Fiber: 5
- Protein: 6
- Cholesterol: 80