
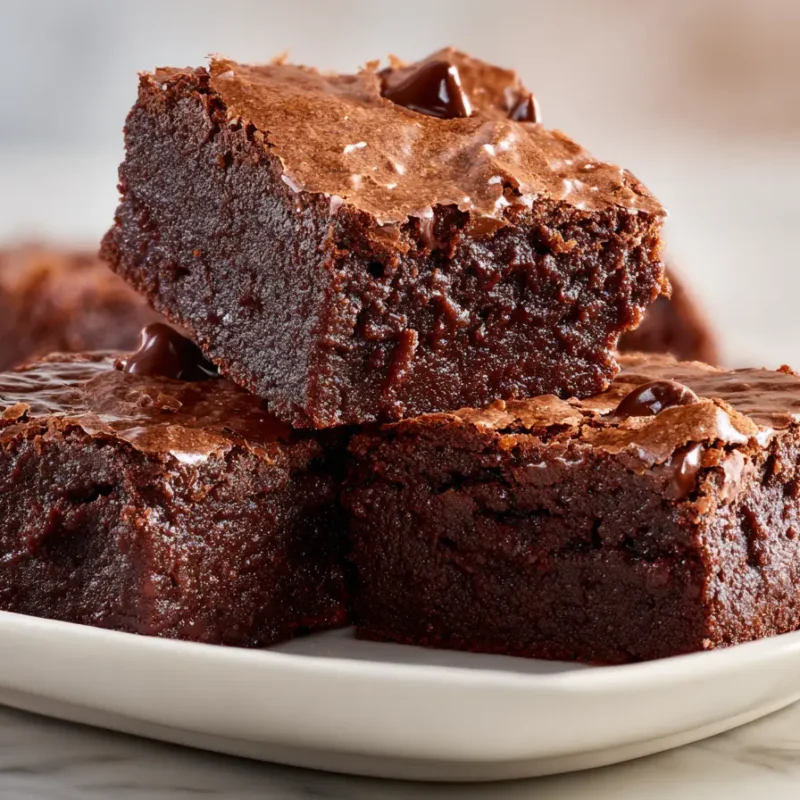
If you have ever wished your brownies tasted like your favorite coffee shop treat, these Mocha Espresso Brownies are for you. They are the kind of best homemade dessert that feels a little fancy, but still totally doable on a weeknight when you are tired and just want something sweet that actually delivers.
I first made these during one of those New York afternoons when the sky cannot decide if it is rain or sunshine. Lily was studying at the counter, Noah was “taste testing” chocolate chips like it was his job, and Emma was begging to stir something, anything. I added espresso powder on a whim, and the whole kitchen instantly smelled like brownies and a cozy coffee bar had a baby.
“Deep chocolate, bold coffee, chewy edges, and a fudgy center that makes you close your eyes for a second.”
Why Espresso Enhances Chocolate Flavor
Espresso does not make these taste like you are eating a spoonful of coffee grounds, promise. What it does is make the chocolate taste louder, deeper, and more grown-up, in the best way. That is why espresso brownies show up again and again in my favorite coffee chocolate recipes.
In our house, coffee is not just for mornings. It is part of dessert, too. My mom used to tuck a tiny bit of coffee into chocolate cakes, and I did not fully understand why until I started baking for my own kids. The first time I stirred espresso powder into brownie batter, it transformed a basic pan of chocolate into something that tasted like a brownie coffee dream.
- Deeper cocoa flavor: espresso boosts the chocolate notes instead of competing with them.
- More “mocha” vibe: that classic chocolate-and-coffee pairing feels bakery-level.
- Richer aroma: your kitchen will smell like chocolate coffee brownies before they even finish baking.
Perfecting the Espresso Flavor: Start with the amount listed, then next time you bake, you can bump it up slightly if your family loves a bolder mocha bite. Noah always votes “more coffee,” Lily votes “keep it balanced,” and Emma just wants the corner piece.
Ingredients and Their Roles
These ingredients are simple, but each one is doing something important. When you understand the “why,” you can bake with more confidence, even on a hectic day when your brain feels like it has 27 tabs open.
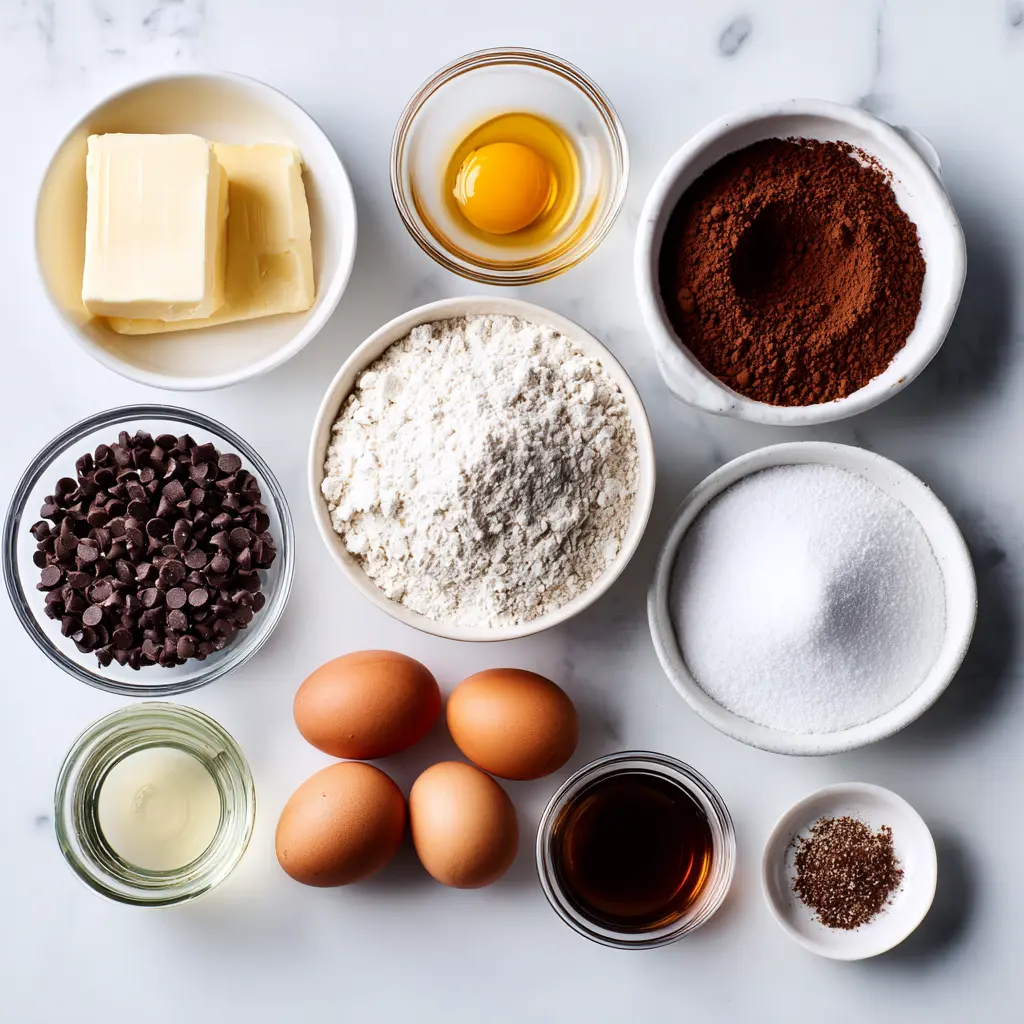
- 1 cup + 2 tablespoons butter, melted with chocolate for that fudgy base and glossy batter.
- 1 cup + 4 tablespoons chocolate chips, melted into the batter for richness (and that bakery-style chocolate depth).
- 1 cup all-purpose flour, just enough structure so they slice cleanly but stay soft.
- 3 tbsp cocoa powder, adds that bold brownie backbone.
- 2 tbsp espresso powder, the magic for true mocha flavor.
- 1/2 tsp salt, makes the chocolate taste more like chocolate.
- 1/4 teaspoon baking powder, a tiny lift so they are not dense like fudge candy.
- 1 1/4 cups + 2 tablespoons sugar, sweetness plus that shiny, crackly top.
- 3 eggs, room temperature, for structure, chew, and that classic brownie texture.
- 1/2 tbsp + 1/4 teaspoon vanilla extract, rounds out the coffee and chocolate.
Choosing the Right Chocolate: I learned this through trial and error with the kids hovering nearby. Dark chocolate chips make the brownies taste richer and less sugary. If I use a lower-quality bag, the flavor falls a little flat. Now I grab a good dark chocolate chip whenever I can, because it makes every bite count.
Eva’s Note: If your eggs are cold, place them in a bowl of warm water for 5 minutes. Room-temp eggs blend better, which helps the batter bake evenly and keeps the texture fudgy.
How to Make Mocha Espresso Brownies
These mocha espresso brownies come together in one bowl (plus the pot you melt butter in). They are a favorite “bake and breathe” recipe for me, especially when the day has been long and I want a sure win.
- Preheat and prep: Heat oven to 350°F. Line a 9×13-inch pan with parchment paper (leave a little overhang for lifting later). Lightly grease the parchment.
- Melt butter and chocolate: In a saucepan over low heat, melt 1 cup + 2 tablespoons butter with 1 cup + 4 tablespoons chocolate chips. Stir until smooth, then take off the heat.
- Whisk in sugar: Add 1 1/4 cups + 2 tablespoons sugar to the warm chocolate mixture. Whisk until glossy.
- Add eggs and vanilla: Whisk in 3 room-temperature eggs one at a time, mixing well after each. Stir in 1/2 tbsp + 1/4 teaspoon vanilla extract. The batter should look thick and shiny.
- Mix dry ingredients: Sprinkle in 1 cup flour, 3 tbsp cocoa powder, 2 tbsp espresso powder, 1/2 tsp salt, and 1/4 teaspoon baking powder. Fold gently until you no longer see streaks of flour. Do not overmix.
- Bake: Spread batter evenly into the pan. Bake 22 to 28 minutes, depending on your oven. Start checking at 22 minutes.
- Cool and slice: Let brownies cool in the pan at least 30 to 45 minutes before slicing. For the cleanest cuts, cool completely.
When I bake these with the kids, it turns into a whole event. Lily is in charge of lining the pan neatly, Noah calls dibs on the corner pieces, and Emma insists she must “help” by tapping the spoon on the bowl until I surrender and give her a spatula to lick.
Eva’s Note: If you want extra chewy edges, use a light-colored metal pan and do not underfill it. A glass dish can work, but it tends to bake differently and can make the edges cook faster than the center.
Achieving Fudgy Centers and Chewy Edges
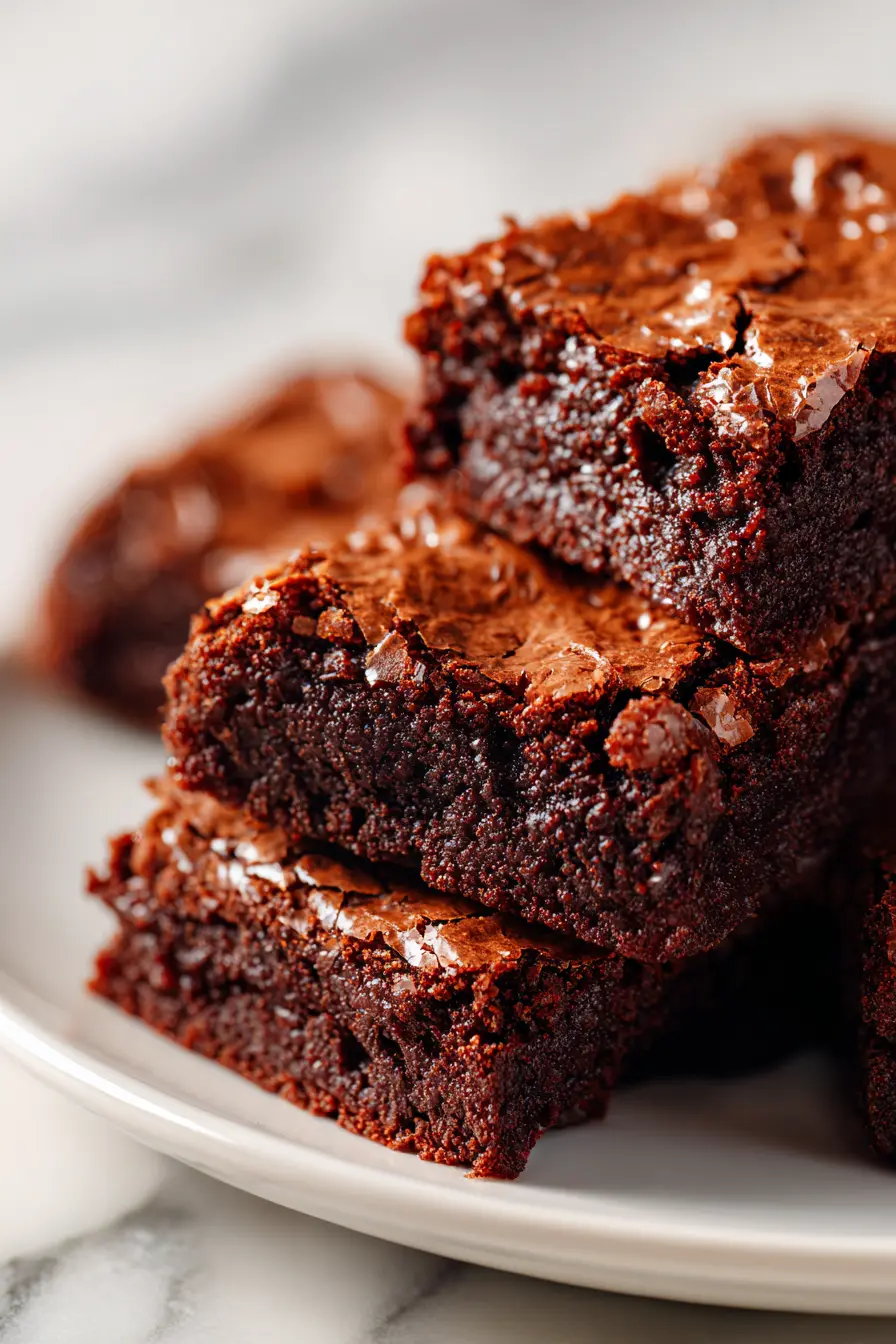
If you want fudgy instead of cakey, the biggest secret is not baking until the toothpick is clean. Clean toothpick brownies are usually overbaked brownies. And overbaked brownies are the kind that make you reach for a glass of milk like you are trying to survive a desert.
I learned this the hard way years ago, when I was still in my “rules are rules” baking phase. I baked until the center looked totally set, and the brownies were fine, but not the chocolate coffee brownies of my dreams. Now I pull them when they still look slightly soft in the middle, because they finish setting as they cool.
Ideal Texture Every Time (key tips):
- Do not overmix: Fold dry ingredients just until combined.
- Watch the bake time closely: Start checking early, ovens vary a lot.
- Cool before slicing: Cooling is part of the “bake,” especially for a fudgy center.
Espresso Powder vs Instant Coffee
If you are baking recipes with instant coffee, you might wonder if it works here. It can, but the flavor is different. Espresso powder is more concentrated and gives that true mocha punch.
- Espresso powder: Bold, smooth coffee flavor, dissolves well, best for espresso brownies.
- Instant coffee: Works in a pinch, usually milder and sometimes a little more bitter.
Here is a quick comparison to make it easy:
- Flavor strength: Espresso powder is stronger, instant coffee is lighter.
- Mocha “bakery” taste: Espresso powder wins.
- Availability: Instant coffee is easier to find in many pantries.
In my kitchen, espresso powder is my go-to. But I have tested instant coffee when I ran out, and the kids still happily ate them, which is honestly the most important review panel I have.
Troubleshooting Common Brownie Issues
Brownies are forgiving, but a few small things can throw off the texture. If your brownie coffee batch does not come out perfect the first time, you are not alone. I have had pans that were too gooey, too dry, and one memorable batch that stuck so badly to the pan that we ate it with spoons and called it “brownie pudding.”
Troubleshooting checklist:
- Problem: Dry edges
Fix: Check your oven temperature (many run hot). Bake a few minutes less next time, and use a light-colored metal pan if possible. - Problem: Underbaked center that will not set
Fix: Let the pan cool completely before judging. If it is still raw after cooling, bake 3 to 5 minutes longer next time. - Problem: Cakey texture
Fix: Mix less, and make sure you are not adding extra flour. Spoon flour into the measuring cup, then level it. - Problem: No crackly top
Fix: Whisk sugar into the warm chocolate mixture well, and fully incorporate the eggs. That glossy batter helps create the shiny top. - Problem: Coffee flavor too strong
Fix: Reduce espresso powder slightly next time, or pair with a sweeter topping like a drizzle.
Sometimes the “mistakes” become the version your family requests. Noah still talks about the extra-gooey batch like it was the best thing I ever did on purpose.
Serving Suggestions
These are the brownies I make when I need something that feels special without a lot of extra work. They fit right in at a bake sale, on holiday dessert trays, or even as a cozy Friday night treat when everyone is finally in pajamas.
Creative Serving Ideas: I love setting up a coffee-themed dessert board with these brownies as the centerpiece. I add strawberries, pretzels, chocolate chips in little bowls, and a simple drizzle option so everyone can “decorate” their own square.
- Warm brownie + ice cream: A classic, especially if you slightly warm a piece for 10 seconds.
- Brownie sundae bar: Set out toppings and let everyone build their own.
- Bake sale ready: Slice into neat squares, wrap individually, and label them “Mocha Espresso Brownies.” People love anything that sounds like a coffee shop treat.
- Holiday tray mix: Pair with cookies and something colorful for contrast.
If you want another brownie that looks stunning on a dessert table, these Red Velvet Cheesecake Brownies are always a showstopper next to a pan of chocolate coffee brownies.
Storage and Reheating Tips
Brownies might be one of the best “make it once, enjoy it all week” desserts. The espresso and chocolate flavors actually deepen after a day, so they are even better on day two.
Storage Secrets: I wrap brownies individually when I know we will be grabbing them one at a time. It keeps them softer, stops them from drying out, and makes lunchbox packing ridiculously easy.
- Room temperature: Store in an airtight container up to 4 days. Keep them out of direct sunlight.
- Refrigerator: You can refrigerate for up to 1 week, but they will firm up. Let sit at room temp before serving.
- Reheat: Warm a square in the microwave for 8 to 12 seconds for that fresh-baked feel.
Variations and Add-Ins
Once you have the base recipe down, you can have a lot of fun with it. I keep the original version for true mocha lovers, but sometimes I let the kids pick the add-in, and we end up with a pan that feels brand new.
- Extra chocolate chips: Fold in a handful before baking for more melty pockets.
- Chocolate drizzle: Drizzle with a simple topping after cooling for bakery vibes.
- Mocha drizzle shortcut: Warm and drizzle Homemade Chocolate Syrup over each square.
- Nutty crunch: Add chopped walnuts or pecans if your crew likes texture.
- Halloween desserts for bake sale: Top with festive sprinkles after a drizzle and slice into smaller squares for sharing.
If you love a fun twist, you should also try my Pecan Pie Brownies. They are sweet, cozy, and perfect when you want something a little extra.
Frequently Asked Questions about Mocha Espresso Brownies
Q: How do you make Mocha Espresso Brownies fudgy instead of cakey?
Answer: The key is using the right balance of ingredients and slightly underbaking. Pull them from the oven when a toothpick comes out with a few moist crumbs, not totally clean. I still remember a family debate where Noah wanted them super gooey, Lily wanted neat slices, and we all agreed that slightly underbaked is the sweet spot.
Q: Can you use instant coffee instead of espresso powder?
Answer: Yes, but it might slightly alter the intensity of the coffee flavor. Instant coffee is usually milder, so the mocha taste will be softer. I have tested both, and my family’s taste test verdict was that espresso powder gives the most “coffee shop brownie” flavor.
Q: What type of chocolate chips work best in Mocha Espresso Brownies?
Answer: High-quality dark chocolate chips enhance the richness. They balance the sugar and pair beautifully with espresso. I have a favorite dark chocolate chip I grab again and again because it melts smoothly and tastes deep and chocolatey, even after the brownies cool.
Q: How do you know when Mocha Espresso Brownies are done baking?
Answer: A toothpick inserted should come out with a few moist crumbs. The center should look set but still slightly soft. This is the stage where my kids start hovering by the oven like it is a live show, waiting for me to say, “Okay, they’re coming out.”
Q: Can you make Mocha Espresso Brownies ahead of time?
Answer: Yes, they can be made a day in advance and stored properly. In fact, the flavor gets even better overnight. I often bake them the day before a family get-together so I am not scrambling at the last minute, and it is one less thing to juggle.
These Mocha Espresso Brownies are the kind of treat that makes a regular day feel a little softer around the edges. If you are craving espresso brownies with that deep mocha flavor, chewy corners, and a fudgy middle, this is one of those best homemade recipes you will come back to whenever you want a reliable chocolate-and-coffee win.
Thank you for cooking with me, it means the world to have you in my little New York kitchen.
Come hang out with me on Pinterest for more cozy, family-friendly recipes.
Print
Mocha Espresso Brownies Recipe
- Total Time: 43 minutes
- Yield: 12 servings 1x
- Diet: Vegetarian
Description
Mocha Espresso Brownies are rich, fudgy, and deeply chocolatey with bold espresso flavor and chewy edges for the ultimate coffee lover dessert.
Ingredients
1 cup + 2 tablespoons butter, melted
1 cup + 4 tablespoons chocolate chips
1 cup all-purpose flour
3 tbsp cocoa powder
2 tbsp espresso powder
1/2 tsp salt
1/4 teaspoon baking powder
1 1/4 cups + 2 tablespoons sugar
3 eggs, room temperature
1/2 tbsp + 1/4 teaspoon vanilla extract
Instructions
1. Preheat and prep: Heat oven to 350°F. Line a 9×13-inch pan with parchment paper. Lightly grease the parchment.
2. Melt butter and chocolate: In a saucepan over low heat, melt butter with chocolate chips. Stir until smooth, then take off the heat.
3. Whisk in sugar: Add sugar to the warm chocolate mixture. Whisk until glossy.
4. Add eggs and vanilla: Whisk in eggs one at a time, mixing well after each. Stir in vanilla extract. The batter should look thick and shiny.
5. Mix dry ingredients: Sprinkle in flour, cocoa powder, espresso powder, salt, and baking powder. Fold gently until you no longer see streaks of flour. Do not overmix.
6. Bake: Spread batter evenly into the pan. Bake 22 to 28 minutes, depending on your oven. Start checking at 22 minutes.
7. Cool and slice: Let brownies cool in the pan at least 30 to 45 minutes before slicing. For the cleanest cuts, cool completely.
Notes
If your eggs are cold, place them in a bowl of warm water for 5 minutes. Room-temp eggs blend better, which helps the batter bake evenly and keeps the texture fudgy.
If you want extra chewy edges, use a light-colored metal pan and do not underfill it. A glass dish can work, but it tends to bake differently and can make the edges cook faster than the center.
- Prep Time: 15 minutes
- Cook Time: 28 minutes
- Category: Dessert
- Method: Baked
- Cuisine: American
Nutrition
- Serving Size: 1 brownie
- Calories: 350
- Sugar: 30
- Sodium: 150
- Fat: 20
- Saturated Fat: 12
- Unsaturated Fat: 6
- Trans Fat: 0
- Carbohydrates: 40
- Fiber: 2
- Protein: 4
- Cholesterol: 80