
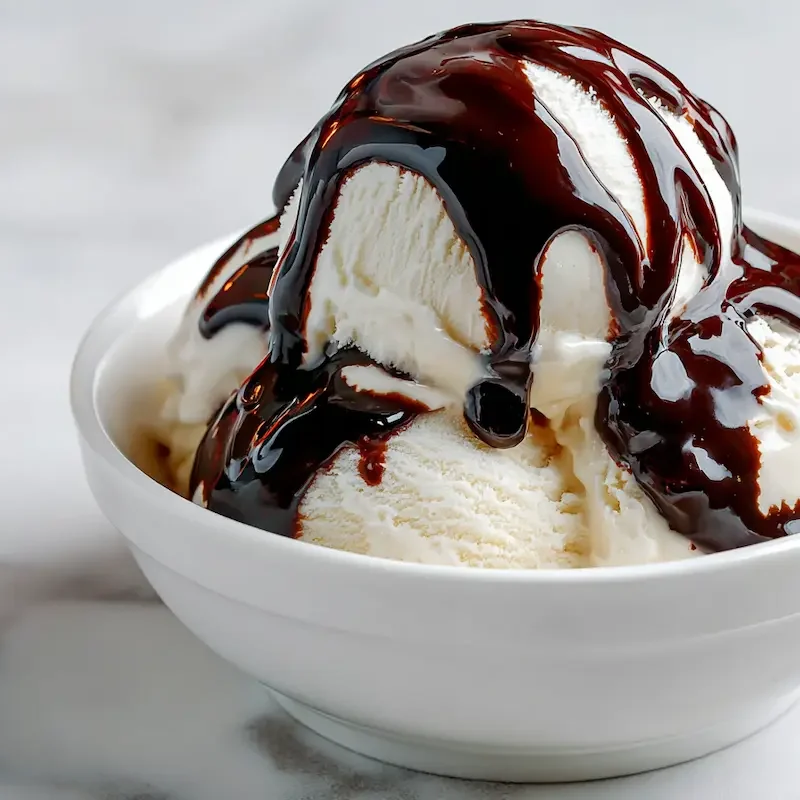
This Homemade Chocolate Syrup is rich, smooth, and made with simple pantry ingredients. Perfect for milk, ice cream, and desserts.
The Sweet Comfort of Homemade Chocolate Syrup
There is something deeply comforting about stirring a spoonful of Homemade Chocolate Syrup into a tall glass of milk. The way it swirls from dark and glossy to soft and creamy always takes me back to after school afternoons at our kitchen table.
Back then, chocolate milk felt like a reward for surviving math homework. Now, making my own Easy All Natural Chocolate Syrup feels like a little gift to my own kids. It is simple, affordable, and tastes so much better than anything from a squeeze bottle.
This Diy Chocolate Syrup comes together with ingredients you probably already have in your pantry. No complicated steps, no mystery additives, just pure chocolate flavor that smells like childhood and comfort.
The first time I made it for my family, Noah dipped his spoon straight into the saucepan and said, “This tastes like melted brownie.” That was all the review I needed.
If you love rich chocolate desserts, this syrup is also incredible drizzled over my molten chocolate lava cakes. It melts right into the center and creates the dreamiest finish.
Eva’s Note:
When I was little, my mom would warm milk on chilly evenings and stir in chocolate syrup while telling stories about the places we had lived. The kitchen always smelled like cocoa and safety.
Why Cocoa Powder Creates a Deep, Rich Flavor
A good cocoa powder syrup starts with quality cocoa powder. It might seem simple, but the difference between basic cocoa and a rich, dark variety is noticeable in every spoonful.
When cocoa powder gently simmers in water and sugar, it blooms. The flavor deepens, the aroma grows stronger, and the texture becomes smooth and glossy. That blooming step is what turns a simple chocolate sauce recipe into something special.
This Homemade All Natural Chocolate Syrup works beautifully because cocoa powder offers:
• Rich concentrated chocolate flavor
• Smooth texture
• Pantry-friendly ingredients
• Naturally dairy-free
You do not need cream or butter to make something decadent. Sometimes the simplest ingredients shine the brightest.
How to Make Homemade Chocolate Syrup
This Homemade Chocolate Syrup Recipe is one of those back pocket recipes you will memorize after making it once. It is quick, forgiving, and perfect for Diy Chocolate Syrup For Milk or desserts.
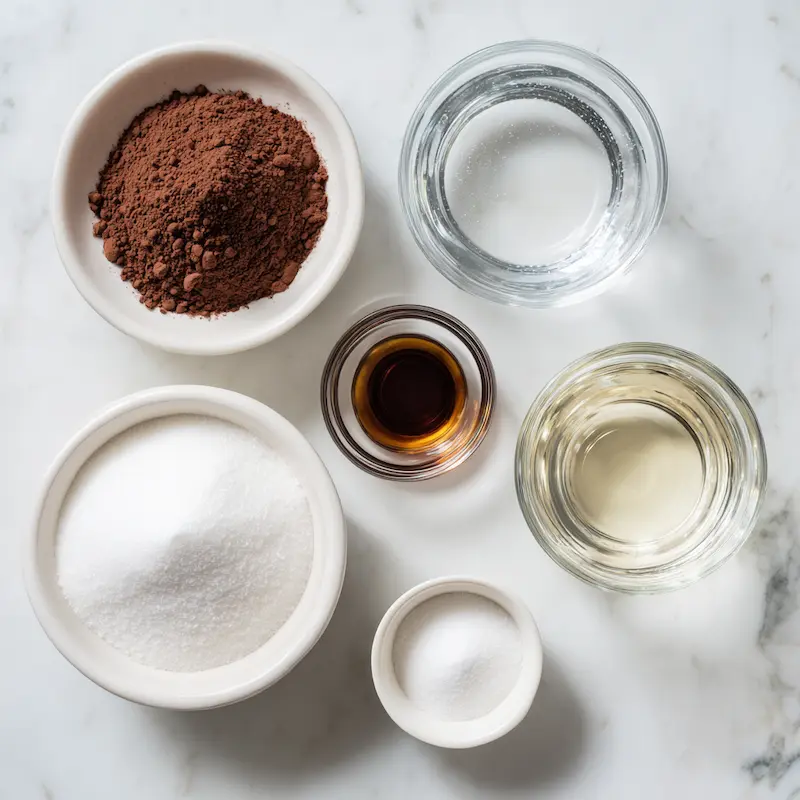
Ingredients
• ½ cup unsweetened cocoa powder
• 1 cup granulated sugar
• 1 cup water
• ⅛ teaspoon salt
• 1 teaspoon vanilla extract
Optional variations:
• ½ teaspoon espresso powder
• Pinch flaky sea salt
• ¼ teaspoon cinnamon
Step-by-Step Instructions
- In a medium saucepan, whisk together ½ cup unsweetened cocoa powder, 1 cup granulated sugar, 1 cup water, and ⅛ teaspoon salt.
- Place the saucepan over medium heat. Whisk continuously as the mixture heats. This prevents clumps and ensures the cocoa blends smoothly.
- Once smooth, bring the mixture to a gentle simmer. Do not rush this step. A gentle simmer creates that glossy finish perfect for sundaes. Let it cook for 3 to 5 minutes, until slightly thickened.
- Remove from heat and stir in 1 teaspoon vanilla extract.
- Allow the syrup to cool completely before transferring it to a jar.
It will look slightly thin when hot, but it thickens as it cools. Patience really matters here. I have learned the hard way not to judge it too soon.
This Home Made Chocolate Syrup Recipe takes less than 10 minutes from start to finish, and it tastes richer than anything store bought.
How to Adjust the Thickness
If you are wondering, How do you thicken chocolate syrup if it’s too thin, the answer is simple. Simmer time controls everything.
• Simmer longer for thicker syrup, especially if you want it for ice cream.
• Add 1 to 2 tablespoons of water if it becomes too thick after cooling.
• Remember it thickens as it cools, so always let it rest before adjusting.
For chocolate milk, I prefer it slightly thinner so it blends easily. For brownies or sundaes, I let it reduce a bit more.
Tips to Prevent Graininess & Ensure Smooth Texture
If you have ever asked, Why is my chocolate syrup grainy, you are not alone. I made that mistake early on.
Graininess usually happens for a few simple reasons:
• Not whisking enough while heating
• Cooking over high heat instead of medium
• Sugar not fully dissolved
• Skipping the gentle simmer
Whisking constantly helps dissolve the sugar evenly. Cooking too quickly can cause separation or uneven texture. Slow and steady wins here.
If it ever turns grainy, you can gently reheat it and whisk again to smooth it out.
Making It All Natural
One of my favorite parts about this Homemade All Natural Chocolate Syrup is knowing exactly what goes into it.
Choose a good quality cocoa powder with no added fillers. Use pure vanilla extract instead of imitation flavoring. These small choices make a difference.
When you make it yourself, you control the sweetness, the thickness, and the flavor. There are no preservatives, no artificial colors, and no ingredients you cannot pronounce.
It is just honest chocolate syrup made in your own kitchen.
Flavor Variations to Try
Once you master the base, you can play with Diy Chocolate Syrup Recipes and customize them to your mood.
• Add espresso powder for deeper chocolate flavor
• Stir in a pinch of flaky sea salt for contrast
• Use dark cocoa powder for intense color and richness
• Add cinnamon for warmth
• Add a tiny drop of mint extract for a cool twist
In winter, I sometimes add cinnamon and use it for warm milk at night. In summer, a touch of sea salt makes it perfect over vanilla ice cream.
How to Store Homemade Chocolate Syrup
If you are wondering, How long does homemade chocolate syrup last in the fridge, the answer is up to 2 weeks when stored properly.
• Store in an airtight glass jar
• Refrigerate up to 2 weeks
• Reheat gently and stir well before serving
Using a glass jar helps preserve the flavor and makes pouring easier. When it is cold, the syrup will thicken. To reheat, warm it gently in short microwave bursts or over low heat on the stove.
If you are asking, How do you store and reheat homemade chocolate syrup, the key is gentle warming and a quick stir to bring back that smooth texture.
In our house, it rarely lasts the full two weeks.
Creative Ways to Use Chocolate Syrup
This syrup is not just for Homemade Chocolate Syrup For Milk, although that is still a family favorite.
Here are some delicious ways to use it:
• Stir into cold or warm milk for classic chocolate milk
• Drizzle over ice cream for the ultimate chocolate syrup for ice cream
• Spoon over fluffy homemade pancakes on Sunday mornings
• Pour over a slice of rich chocolate pound cake
• Swirl into yogurt
• Drizzle over brownies
• Blend into milkshakes
Emma loves it swirled into plain yogurt with strawberries. Lily uses it to decorate desserts with careful little drizzles. And Noah, well, he still sneaks spoonfuls straight from the jar.
Frequently Asked Questions about Homemade Chocolate Syrup
How do you make Homemade Chocolate Syrup with cocoa powder?
Whisk cocoa powder, sugar, water, and salt in a saucepan. Simmer gently until thickened, then stir in vanilla and cool. The scent of cocoa filling the kitchen is absolutely worth those few minutes of stirring.
How long does homemade chocolate syrup last in the fridge?
Stored in an airtight container, it lasts up to 2 weeks refrigerated. In my house, it disappears long before that.
How do you thicken chocolate syrup if it’s too thin?
Simmer a few minutes longer until reduced slightly. It thickens more as it cools, so always let it rest before deciding. I had to learn not to rush that simmer.
Can I reduce the sugar in Homemade Chocolate Syrup?
Yes, though reducing sugar may slightly thin the texture and reduce sweetness balance. I tested a lower sugar batch once, and it was still delicious, just a bit lighter in body.
Can I use brown sugar instead of white sugar?
Yes, brown sugar adds subtle caramel depth and slightly darker color. I love this cozy version in warm milk during colder months.
Why is my chocolate syrup grainy?
Graininess usually comes from undissolved sugar or cooking at too high heat. Whisk thoroughly and simmer gently. That lesson came from one of my early rushed attempts.
How do you store and reheat homemade chocolate syrup?
Store in a sealed jar in the refrigerator. Reheat gently in short microwave bursts or over low heat, stirring until smooth. There is nothing better than warm syrup over cold ice cream.
Can I use this syrup for chocolate milk?
Absolutely. Stir 1 to 2 tablespoons into cold or warm milk for rich chocolate milk. It reminds me of those after school glasses at the kitchen table.
Making Homemade Chocolate Syrup at home is one of those small kitchen wins that feels bigger than it is. It is quick, comforting, and made from ingredients you trust. I always suggest making a double batch because it disappears faster than you expect.
Thank you so much for cooking with me today.
Come follow along on Facebook for more cozy recipes and kitchen stories at https://www.facebook.com/notedrecipes
Homemade Chocolate Syrup (Easy & All Natural)
- Total Time: 10 minutes
- Yield: 1 1/2 cups 1x
- Diet: Vegetarian
Description
This Homemade Chocolate Syrup is rich, smooth, and made with simple pantry ingredients. Perfect for chocolate milk, ice cream, and drizzling over your favorite desserts.
Ingredients
1/2 cup unsweetened cocoa powder
1 cup granulated sugar
1 cup water
1/8 teaspoon salt
1 teaspoon pure vanilla extract
Optional: 1/2 teaspoon espresso powder
Optional: pinch of flaky sea salt
Optional: 1/4 teaspoon cinnamon
Instructions
1. In a medium saucepan, whisk together cocoa powder, sugar, water, and salt until fully combined.
2. Place the saucepan over medium heat and whisk continuously as the mixture warms to prevent clumps.
3. Bring the mixture to a gentle simmer and cook for 3 to 5 minutes, stirring often, until slightly thickened and glossy.
4. Remove from heat and stir in the vanilla extract until smooth.
5. Allow the syrup to cool completely, it will thicken as it cools.
6. Transfer to a clean glass jar with a lid and refrigerate until ready to use.
Notes
Whisk constantly while heating to prevent graininess.
Do not boil rapidly, a gentle simmer creates the best smooth texture.
The syrup thickens more as it cools, so avoid overcooking.
Store in an airtight glass jar in the refrigerator for up to 2 weeks.
Reheat gently in short microwave bursts or over low heat and stir before serving.
- Prep Time: 5 minutes
- Cook Time: 5 minutes
- Category: Dessert
- Method: Stovetop
- Cuisine: American
Nutrition
- Serving Size: 2 tablespoons
- Calories: 98
- Sugar: 20g
- Sodium: 15mg
- Fat: 1g
- Saturated Fat: 0.5g
- Unsaturated Fat: 0.5g
- Trans Fat: 0g
- Carbohydrates: 24g
- Fiber: 1g
- Protein: 1g
- Cholesterol: 0mg