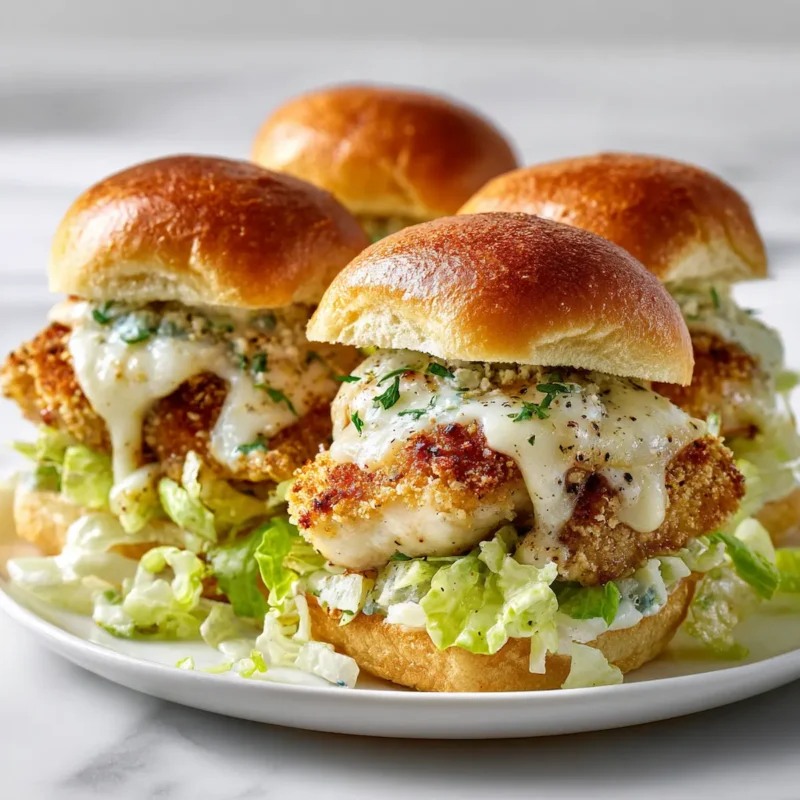
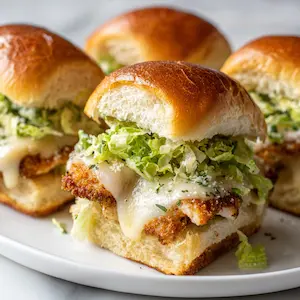
These chicken parm Caesar salad sliders are crispy, creamy, and ready in 30 minutes—perfect mini sandwiches for parties, game day, or busy weeknights!
A Crispy-Creamy Summer Classic
There’s something downright magical about summer evenings in our little NYC apartment. The windows are open, the ceiling fan hums, and the kitchen is alive with the kind of chaos that means something delicious is on the way. Last July, we had a small backyard BBQ at my sister’s place in Queens—just family, a folding table of snacks, and kids running through the sprinkler. That’s when these chicken parm Caesar salad sliders made their debut.
I was standing over the stove frying cutlets while Emma, 9 years old and full of opinions, took her “salad tossing job” very seriously. She stirred that Caesar like it was a science experiment—probably because I told her the anchovy paste was a secret ingredient that “magically” made everything taste better. (She raised one eyebrow and said, “Like a potion?” I nodded. She was sold.)
We stacked crispy chicken, melty mozzarella, and that creamy Caesar crunch onto sweet Hawaiian rolls and brought the tray outside. Within minutes? Gone. Not a crumb left. My teenage niece asked if I had “a few more dozen” in the oven. Even my brother, who thinks salads don’t belong in sandwiches, had two.
Eva’s Note: That BBQ day lives rent-free in my memory—not just because the sliders were a hit, but because it was one of those rare afternoons where everything just felt right. And now, these are our official summer party appetizer. If you love bold flavors, my hot honey garlic sliders are another party go-to.
Ingredients You’ll Need for Chicken Parm Caesar Salad Sliders
These Caesar chicken sliders come together with pantry staples and a few simple fresh ingredients. Here’s what you’ll want to grab:
- 1 pack King’s Hawaiian Sweet Rolls (or mini brioche buns)
- 2–3 chicken cutlets (or frozen breaded cutlets for a shortcut)
- 3 eggs
- 1 cup Italian breadcrumbs
- 1 cup oil (for frying—or swap for the baking method below)
- ½ cup marinara sauce
- 4 oz mozzarella (sliced or shredded)
- 1 cup chopped romaine
- ¼ cup shredded parmesan
- ¼ cup Caesar dressing (store-bought or homemade)
- 1 tsp black pepper
Optional Add-Ins (Highly Recommended):
- Red onion slices
- Tomato
- Pickles (Emma’s go-to—see note below)
- Crushed red pepper flakes (for a little grown-up heat)

Eva’s Note: In Italy, I learned that even simple sandwiches can be packed with flavor. One trick I picked up? Add just a dab of anchovy paste to your Caesar dressing. It doesn’t taste fishy—promise! It just gives that deep, restaurant-style flavor. And yes, Emma always asks for extra romaine and a pickle on the side. She calls it her “crunch stack.”
How to Make Chicken Parm Caesar Salad Sliders
This recipe is a little hands-on, but it’s easy enough to pull off on a weeknight—and fun enough for a Saturday cooking session with the kids. You can fry the chicken for that classic crispy bite, or use the oven if you’re short on time (or patience—I’ve been there).
1. Prep the Chicken
- Pound the cutlets to an even thickness (about ½ inch) if they’re not pre-cut.
- Set up a breading station: one bowl with beaten eggs, another with Italian breadcrumbs.
- Dip each cutlet into egg, then coat in breadcrumbs. Press gently so it sticks.
Kid Helper Tip: Little hands are great at the breadcrumb station—just keep a “clean hand” and a “dipping hand” rule. Noah’s a pro at this now.
2. Cook the Chicken
Stovetop Method (crispiest):
- Heat 1 cup oil in a large skillet over medium heat.
- Fry cutlets for 3–4 minutes per side, until golden brown and cooked through.
- Drain on paper towels.
Oven Shortcut (weeknight version):
- Place breaded cutlets on a wire rack set over a baking sheet.
- Spray lightly with cooking oil and bake at 425°F for 18–20 minutes until crispy.
Eva’s Note: On hectic school nights, I skip the frying and use this oven method. It saves time and clean-up—plus, I can keep an eye on math homework while it bakes.
3. Make the Caesar Salad
In a bowl, toss together:
- 1 cup chopped romaine
- ¼ cup Caesar dressing
- ¼ cup shredded parmesan
- 1 tsp black pepper
Optional: Stir in a tiny bit of anchovy paste if you have it on hand—it gives the salad that restaurant Caesar kick we love in our similar parmesan cream base pasta recipe.
4. Melt the Cheese & Warm the Sauce
- Warm the ½ cup marinara sauce in a small pan or microwave.
- Top each cooked chicken cutlet with mozzarella, then melt briefly under a broiler or in the oven.
Slider Assembly & Make-Ahead Tips
This is the part where everything comes together—and if you’ve prepped your components ahead of time, the final step is a total breeze. Whether you’re serving these for a game day crowd or a casual weeknight dinner, here’s how to get them just right.
How to Assemble the Sliders
- Slice the King’s Hawaiian rolls in half horizontally (keep them connected if you can—it’s easier).
- Lay the bottom halves on a baking sheet.
- Add a spoonful of marinara to each roll, then place the cheesy chicken cutlets on top.
- Top each one with a generous scoop of Caesar salad.
- Close with the top buns, then lightly brush with olive oil or melted butter (optional, but makes them golden).
- Broil for 3–5 minutes, just until the tops are warm and toasty and the cheese is bubbly.
Eva’s Note: These come together so fast once everything’s ready—it’s a lifesaver on game day! I love that I can finish the last step while everyone’s settling in with drinks and snacks.
Make-Ahead Magic
You can absolutely get ahead with these:
- Prep the chicken cutlets up to 24 hours ahead—store in an airtight container in the fridge.
- Mix the Caesar salad (just leave the dressing off until you’re ready to assemble).
- Assemble the sliders just before serving, then broil for 5 minutes to heat and melt the cheese.
Bold Make-Ahead Tip: Assemble everything the morning of, refrigerate, and broil before serving.
Mini Buffet Bar Idea: For birthday parties, I set out a slider station with toppings—pickles, red onion, shredded lettuce, even crushed chips. The kids build their own mini chicken sandwiches and somehow it makes dinner more exciting (and less picky).
If you’re looking for another cheesy garlic bread option that holds up well to prepping ahead, I highly recommend my cheesy garlic bread option.
Seasonal Variations to Try
One of the reasons I come back to these chicken parm Caesar salad sliders again and again? They’re endlessly flexible. Whether it’s a sunny summer barbecue or a cozy winter movie night, you can tweak them to fit the mood—and the fridge.
Summer Fresh
- Tomato-Basil Caesar: Add fresh tomato slices and a sprinkle of chopped basil before broiling.
- Lemon Caesar Dressing: Swap in a lemony Caesar for a lighter, citrus-forward twist.
- Grilled Chicken Option: Use grilled chicken instead of fried—less heat in the kitchen!
Eva’s Note: We did this version for a picnic in Prospect Park last July. The lemony Caesar + juicy tomatoes were chef’s kiss on a 90-degree day.
Fall Comfort
- Roasted Red Pepper Marinara: Adds a warm, smoky note that pairs beautifully with crispy chicken.
- Sourdough Slider Buns: Heartier and tangy—perfect with a cozier Caesar.
Winter Cozy
- Spicy Jalapeño Caesar: Add diced jalapeños to your Caesar dressing for a warming kick.
- Melty Provolone Swap: It’s stretchier than mozzarella and so satisfying on cold nights.
Spring Light
- Baby Greens Mix: Swap romaine for a spring mix for extra color and texture.
- Shaved Asparagus Ribbons: Toss into the Caesar for a delicate crunch.
No matter the season, these mini chicken sandwiches bring comfort and crowd-pleasing flavor. I’ll often just peek in the crisper drawer and let whatever’s hanging out guide the add-ins.
Frequently Asked Questions about Chicken Parm Caesar Salad Sliders
Can I make sliders ahead of time?
Yes! You can prep everything in advance—just keep components separate until you’re ready to serve. Fry or bake the chicken, chop the romaine, and mix the Caesar dressing. When it’s go time, assemble and broil for 5 minutes to melt the cheese and warm the buns.
Eva’s Note: I love this for hosting—it means I get to chat with guests instead of scrambling in the kitchen. One less thing to stress about!
What cheese goes best with chicken parm sliders?
Fresh mozzarella is my first pick—it melts beautifully and has that creamy stretch. But don’t stress if it’s not in the fridge. Provolone adds richness, and shredded mozzarella works just as well for picky eaters (and picky eaters are welcome here).
Eva’s Note: We’ve even used cheddar when that’s all we had—it was still a hit. Melty cheese is happy cheese.
Can I use Caesar salad in sandwiches?
Absolutely! Caesar salad brings creamy crunch and bold flavor to all kinds of sandwiches and wraps. It’s especially good with crispy or grilled chicken—like in these sliders.
Eva’s Note: I first tried it as a leftover hack after a pizza night. It was so good, it ended up in our school lunchboxes the next week. Now it’s a regular thing.
Thanks for being here in my kitchen today—I hope these sliders bring joy to your table like they do to ours.
For more cozy, crave-worthy ideas, come hang out with me on Pinterest.
Chicken Parm Caesar Salad Sliders
- Total Time: 30 minutes
- Yield: 12 sliders 1x
Description
These Chicken Parm Caesar Salad Sliders are crispy, creamy, and packed with flavor—perfect for parties, game day, or busy weeknight dinners.
Ingredients
1 pack King’s Hawaiian Sweet Rolls (or mini brioche buns)
2–3 chicken cutlets (or frozen breaded cutlets)
3 eggs
1 cup Italian breadcrumbs
1 cup oil (for frying or baking option)
½ cup marinara sauce
4 oz mozzarella (sliced or shredded)
1 cup chopped romaine
¼ cup shredded parmesan
¼ cup Caesar dressing (store-bought or homemade)
1 tsp black pepper
Optional: red onion slices, tomato, pickles, crushed red pepper flakes
Instructions
1. Pound chicken cutlets to about ½ inch thickness.
2. Set up breading station with beaten eggs and Italian breadcrumbs.
3. Dip cutlets in egg, then breadcrumbs; press to coat.
4. Fry in oil over medium heat for 3–4 mins per side or bake at 425°F for 18–20 mins.
5. Warm marinara sauce; melt mozzarella on chicken under broiler or in oven.
6. Toss romaine with Caesar dressing, parmesan, and black pepper.
7. Slice Hawaiian rolls in half and lay bottom halves on baking sheet.
8. Add marinara, cheesy chicken, and Caesar salad to each bottom bun.
9. Top with remaining buns and brush with oil or butter.
10. Broil sliders for 3–5 minutes until warmed and golden.
Notes
To make ahead: prep chicken and salad, then assemble and broil before serving.
Add a dab of anchovy paste to your Caesar dressing for deeper flavor.
Kids love customizing these—set up a slider bar with extra toppings!
Mozzarella is classic, but provolone or shredded mozzarella works too.
- Prep Time: 15 minutes
- Cook Time: 15 minutes
- Category: Appetizer
- Method: Broil
- Cuisine: American-Italian
Nutrition
- Serving Size: 1 slider
- Calories: 280
- Sugar: 4g
- Sodium: 420mg
- Fat: 14g
- Saturated Fat: 5g
- Unsaturated Fat: 7g
- Trans Fat: 0g
- Carbohydrates: 22g
- Fiber: 1g
- Protein: 15g
- Cholesterol: 60mg