
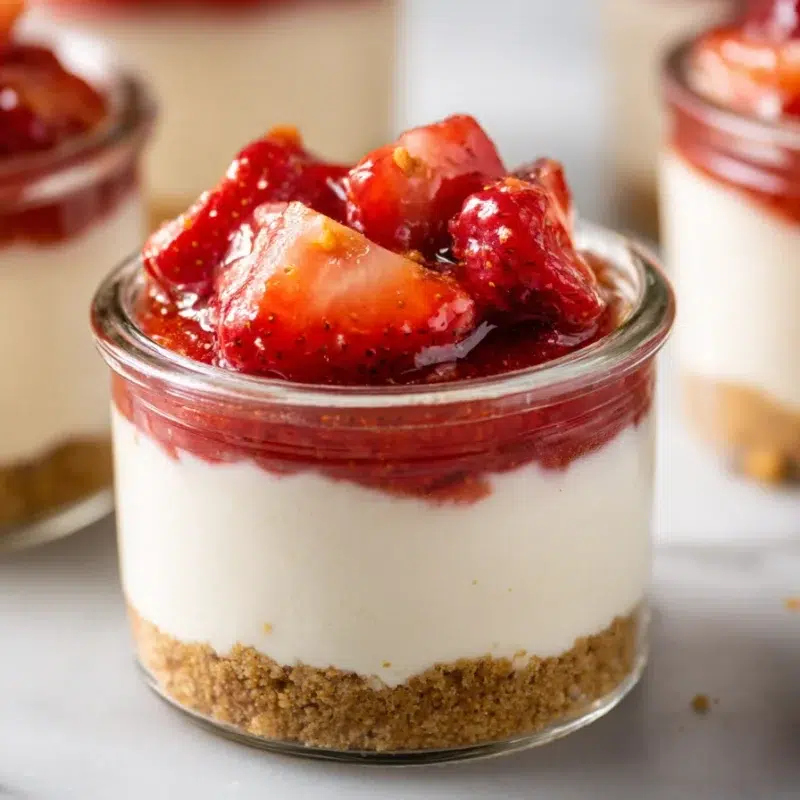
Some days, I just need a little win that fits between homework questions, laundry piles, and the “What’s for dinner?” chorus. That’s exactly why I keep these High-Protein Cheesecake Jars in the fridge. They feel like a real dessert, but they eat like a high-protein snack jar you can grab with one hand while life keeps moving.
I started making them as a no-bake protein dessert for those afternoons when I want something sweet, but I also want it to actually hold me over. And because they’re a single-serve cheesecake situation, everyone in my house can have their own jar. Lily likes extra strawberries, Noah wants his with a thicker crust, and Emma would happily add chocolate chips to everything if I let her.
- No-bake (no oven, no stress)
- High-protein and creamy, thanks to Greek yogurt and protein powder
- Customizable toppings for picky eaters
- Portable and perfect for meal prep sweet treats
What You’ll Need (And Why Each Ingredient Matters)
My “grocery cart” rule is simple, I try to buy ingredients that can pull double-duty. If it can work for breakfast, a snack, and a dessert, it earns its spot in my kitchen. That’s why these strawberry cheesecake jars lean on basics like Greek yogurt, cream cheese, and strawberries. You get that classic cheesecake vibe, plus the bonus of desserts with protein that don’t feel like a compromise.
And don’t skip the vanilla and lemon. Vanilla makes the filling taste like a real protein powder cheesecake moment (not just “yogurt with stuff in it”), and lemon juice wakes up the strawberries so they taste extra fresh and bright.
- Graham cracker crumbs (Crust): That toasty, cozy base that makes this feel like a true single-serve cheesecake.
- Butter, melted (Crust): Helps the crumbs pack down and stay together.
- Cream cheese, softened (Cheesecake layer): Classic cheesecake flavor and a thicker set.
- Greek yogurt (Cheesecake layer): Adds protein and a tangy, creamy texture (hello, high protein Greek yogurt parfait energy).
- Vanilla protein powder (Cheesecake layer): Turns this into high protein cheesecake jars no bake style.
- Honey or maple syrup (Cheesecake layer): Sweetens gently and keeps the filling smooth.
- Vanilla extract (Cheesecake layer): Makes it taste like dessert, not a “fitness snack.”
- Fresh strawberries, chopped (Strawberry layer): The star of the show for strawberry protein cheesecake flavor.
- Lemon juice (Strawberry layer): Brightens the berries and balances sweetness.
- Cornstarch (optional) (Strawberry layer): Helps thicken a quick sauce, but you can skip it.
Jar Size + Tools (So the Layers Look Clean)
You don’t need fancy equipment here, but a few simple tools make the layers look crisp and pretty (even if you’re eating it in the carpool line).
- 4 small jars (6 to 8 oz each) with lids (perfect for meal prep)
- 2 mixing bowls
- Hand mixer or sturdy whisk
- Rubber spatula
- Measuring cups and spoons
- Small saucepan (only if making the cooked strawberry topping)
- Paper towel (my make-it-pretty habit: wipe the inside of the jar before layering for clean stripes)
How to Make High-Protein Cheesecake Jars (Step-by-Step)
This is my Sunday reset dessert. I’ll make a few jars while the kitchen is already clean, then stack them in the fridge like little edible rewards. The method is simple: crust, creamy filling, strawberry layer, chill. That’s it. If you’ve ever wanted dessert ideas for one that also count as sweet protein recipes, this one checks all the boxes.
Before you start layering, do yourself a favor and taste the cheesecake filling. Protein powders vary a lot, some are sweeter, some are stronger, and some need a little extra vanilla to taste “right.” One quick taste now saves you from four jars that aren’t quite what you wanted.
Step 1: Make the Graham Cracker Crust
- In a bowl, stir together 1 cup graham cracker crumbs and 4 tablespoons melted butter until the crumbs look evenly coated.
- Spoon the crust into 4 small jars and press it down firmly with the back of a spoon.
- The texture should look like wet sand, not powdery.
- If it feels dry, add a tiny bit more melted butter (1 teaspoon at a time).
- Pressing firmly is what makes it feel bakery-style and sturdy in a single-serve jar.
Step 2: Whip the Cheesecake Layer (Creamy, Thick, Not Gritty)
- In a mixing bowl, beat 1 cup softened cream cheese until smooth.
- Add 1 cup Greek yogurt, 1 scoop vanilla protein powder, 3 tablespoons honey or maple syrup, and 1 teaspoon vanilla extract.
- Mix until creamy and thick, scraping down the bowl as needed.
- Taste and adjust sweetness if needed, then set the bowl aside.
Eva Tip: I give the cream cheese a head start so the filling tastes like a real cheesecake bite, no little lumps hiding in there.
Eva Tip: Taste the filling before layering. Some scoops are sweeter than others, and one quick taste saves you from a jar that’s too sweet, or not sweet enough.
Texture Fixes:
- Too thick? Add 1 to 2 tablespoons more Greek yogurt and mix again.
- Too thin? Add 1 to 2 tablespoons more protein powder, or chill the bowl for 15 minutes to help it firm up.
Step 3: Strawberry Layer (Two Easy Options)
When strawberries are in season, this topping feels like a little luxury. The second they hit lemon juice, the whole bowl smells like bright berries and citrus, and suddenly these strawberry cheesecake jars feel “special,” even on a regular Tuesday.
Option A: Fresh macerated strawberries (fastest)
- In a bowl, combine 1 1/2 cups chopped strawberries with 1 tablespoon lemon juice.
- Let sit for 10 to 15 minutes so the berries soften and get juicy.
Option B: Quick cooked strawberry topping (thicker)
- Add 1 1/2 cups chopped strawberries and 1 tablespoon lemon juice to a small saucepan.
- Cook over medium heat for 6 to 10 minutes, stirring often, until the berries break down and the liquid looks glossy.
- If you want it thicker, stir 1 teaspoon cornstarch with 1 tablespoon water, then stir it into the pan and cook 30 to 60 seconds more.
- Remove from heat and cool completely.
Eva Tip: Let the strawberry layer cool before building for the cleanest layers. Warm topping melts right into the cheesecake layer. Cooling it gives you that pretty, spoonable stripe.
Step 4: Layer, Chill, and Serve
- Spoon or pipe the cheesecake layer over the crust in each jar.
- Add the strawberry layer on top.
- Cover and chill at least 2 hours (overnight is even better).
Eva Tip: If you’re serving kids or guests, set out the components and let everyone build their own jar. It turns dessert into an activity, and you get fewer “Can I have less fruit?” requests.
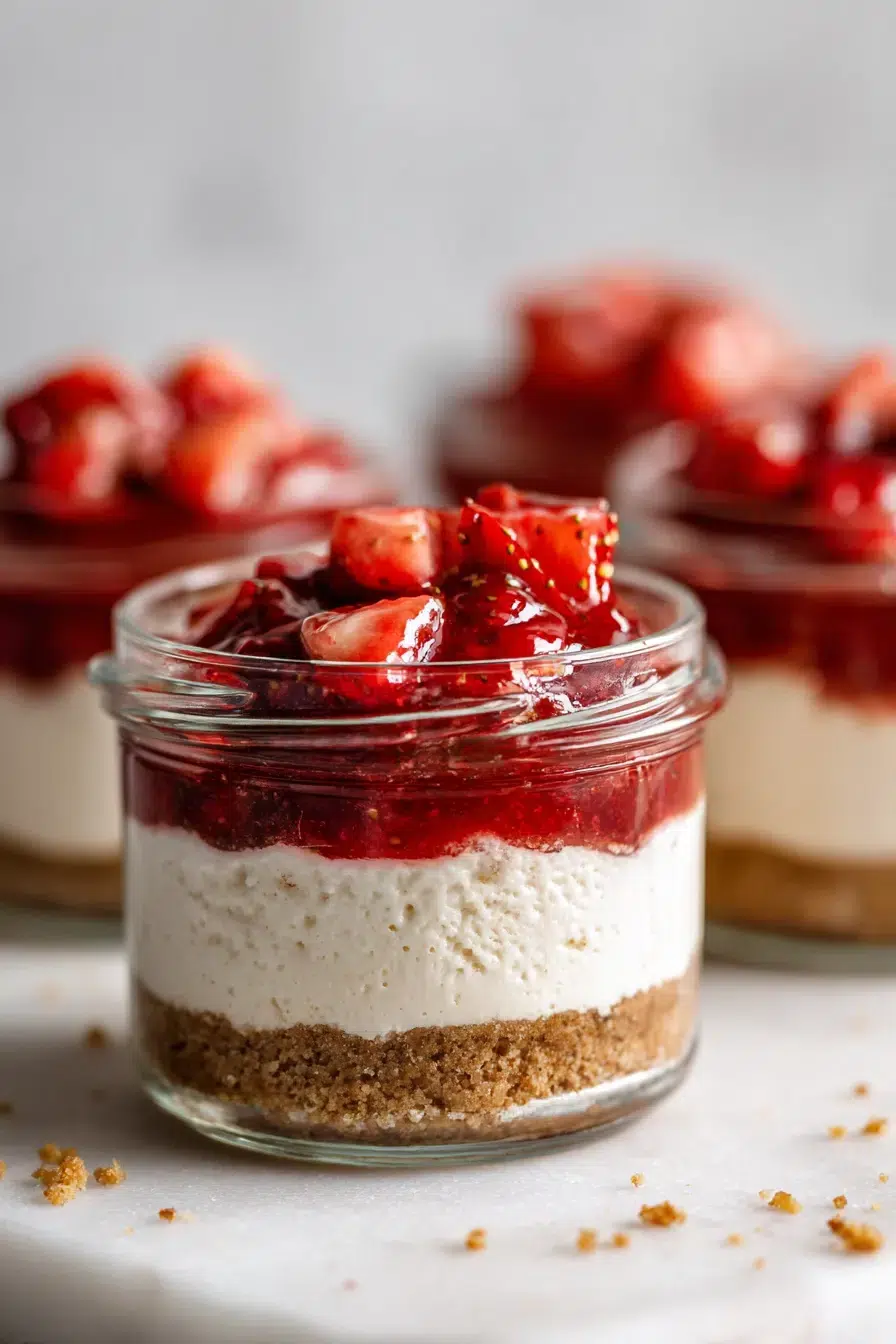
- Layering ratio guide: about 2 to 3 tablespoons crust, 1/2 cup cheesecake filling, then 2 to 3 tablespoons strawberries.
- That first cold spoonful should give you crust, cool creamy filling, and bright berries all at once.
If you love no-bake desserts, you might also want my no-bake strawberry cheesecake dessert for a crowd.
Layering Guide: How to Get the Best Texture (And Avoid Soggy Crumbs)
I learned the soggy crumb lesson the hard way. I once prepped these jars for a busy week, felt very proud of myself, then opened one on day three and the crust had turned into sweet mush. Still tasty, yes. But not the texture I wanted.
Now I follow a few simple rules to keep the graham cracker crumbs from getting soggy, especially when I’m meal prepping.
- Do: Pack the crust firmly so it holds its shape.
- Do: Add a thin “crumb barrier” layer of cheesecake filling over the crust before the fruit.
- Do: Chill jars covered so condensation doesn’t drip into the crust.
- Don’t: Pour warm strawberry topping straight onto the filling.
- Don’t: Overload the jar with extra juicy fruit if you want a crisp base.
My best meal prep trick is simple, give the crust a cozy little blanket of cheesecake filling before the berries go in.
Flavor Variations (Same High-Protein Base, New Vibes)
Once you have the base, you can keep making these high-protein cheesecake jars with totally different “café special” vibes. My family has favorites, Lily likes lemony and bright, Noah votes for chocolate, and Emma wants sprinkles in a world where sprinkles are not always necessary.
- Strawberry-lemon: Add 1/2 teaspoon lemon zest to the strawberry layer for a brighter pop.
- Chocolate-strawberry twist: Stir 1 to 2 tablespoons mini chocolate chips into the cheesecake layer.
- Mixed berry: Swap part of the strawberries for blueberries or raspberries for a jammy, tangy topping.
- Parfait-style crunch: Sprinkle a little extra graham crumb on top right before eating for that high protein Greek yogurt parfait feel.
If you want more bright, fruity cheesecake ideas, here’s some lemony cheesecake inspiration you’ll probably love.
Meal Prep, Storage, and Make-Ahead Notes
Future-you will be grateful for these. I line up the jars like little trophies in the fridge, and suddenly I have grab-and-go high-protein snack jar options that feel like dessert. They’re also perfect as desserts with protein when you want something sweet after dinner but don’t want a whole baking project.
- Fridge timeline: Store covered for 3 to 4 days. Flavor gets even better on day two, when everything settles and tastes more like classic cheesecake.
- Topping timing: If you want the cleanest layers, cool the strawberry topping completely before adding it.
- Peak texture tip: If you want that “just-made” feel on day three, keep the crust separate and sprinkle it on right before eating.
- Serving tip: Let the jar sit at room temperature for 5 minutes before eating if you like a softer, creamier bite.
Freezing for meal prep: Yes, you can freeze the cheesecake layer and strawberry topping in freezer-safe jars. Leave a little space at the top. Thaw overnight in the fridge for the creamiest texture, then add the graham crumbs after thawing so they stay crisp.
If you’re building a stash of freezer treats, you might also like this freezer-friendly berry snack.
Troubleshooting: Sweetness, Thickness, and Clean Layers
This recipe is forgiving. Even if your layers aren’t perfect, it still tastes like a creamy, no-bake protein dessert that hits the spot. Here are my quick fixes when I’m in a rush.
- Problem: Filling tastes gritty
Cause: Protein powder didn’t hydrate fully
Fix: Whisk longer, then let the filling rest 5 minutes and whisk again. - Problem: Filling is too runny
Cause: Yogurt was thin or cream cheese was too warm
Fix: Chill the filling 15 to 30 minutes, or add 1 tablespoon protein powder. - Problem: Filling is too thick
Cause: Some powders thicken aggressively
Fix: Stir in 1 to 2 tablespoons Greek yogurt until smooth. - Problem: Strawberry layer is watery
Cause: Berries are extra juicy
Fix: Simmer longer to reduce, mash some berries, and chill. This thickens the strawberry layer naturally without cornstarch. - Problem: Layers look messy
Cause: Warm topping or smudged jar sides
Fix: Cool the topping fully, and wipe the inside of the jar before adding the next layer.
If you’re in a big no-bake cheesecake mood, this no-bake strawberry cheesecake dessert for a crowd is another fun option when you’re feeding more than just yourself.
Frequently Asked Questions about High-Protein Cheesecake Jars
Q: How do you make high-protein cheesecake jars without baking?
Answer: Mix a simple graham cracker crust and press it into jars. Whip together cream cheese, Greek yogurt, vanilla protein powder, sweetener, and vanilla until smooth and thick. Add a strawberry layer (fresh macerated or a quick cooked-down topping), then chill the jars until set and cold.
Personal Detail: That first cold spoonful after chilling is the best, cool, creamy filling with bright berries.
Q: Can I swap the cream cheese for more Greek yogurt in cheesecake jars?
Answer: You can reduce the cream cheese and increase Greek yogurt, but the jars will taste tangier and set softer. For a thicker, more cheesecake-like texture, keep at least some cream cheese, and chill longer to help the filling firm up.
Personal Detail: In my house, the tanginess is a personality test. Some of us love it extra bright, and some want it more classic and mellow.
Q: What protein powder works best for high-protein cheesecake jars?
Answer: A vanilla protein powder that mixes smoothly and tastes good on its own works best. If your powder is very thickening, start with a slightly smaller scoop and add more only after mixing. If it’s gritty, whisk longer and let the filling rest a few minutes so it hydrates.
Personal Detail: I follow my taste test rule before layering. If I wouldn’t eat it by the spoonful, I adjust sweetness or vanilla.
Q: How do I thicken the strawberry layer without cornstarch?
Answer: Simmer chopped strawberries with lemon juice until they release juices, then keep cooking until the liquid reduces and turns glossy. Mashing some berries helps it thicken naturally. Chilling also thickens the topping further.
Personal Detail: The topping is ready when it coats the back of a spoon and smells like warm berries and citrus.
Q: How long do high-protein cheesecake jars last in the fridge?
Answer: Stored covered in the fridge, they’re best within 3 to 4 days. For the freshest texture, keep the crust separate or add it shortly before serving so it stays crisp.
Personal Detail: Day two is my favorite, the flavors settle and it tastes even more like cheesecake.
Q: Can you freeze high-protein cheesecake jars for meal prep?
Answer: Yes, freeze the cheesecake layer and strawberry topping in freezer-safe jars, leaving a little space at the top. Thaw overnight in the fridge for a creamy texture. For best results, add the graham crumbs after thawing so they don’t soften.
Personal Detail: Pulling one out as an afternoon treat feels like a mini celebration, even on a regular workday.
Q: Can I make these cheesecake jars in a slow cooker, and how long would it take?
Answer: These jars are designed to be no-bake, so a slow cooker isn’t needed. If you want a warm strawberry topping, you can cook the strawberries separately until thickened, then cool completely before layering into the jars.
Personal Detail: That cozy kitchen smell from gently cooking berries on a weekend prep day is half the reason I do it.
Q: What’s the best way to reheat the strawberry topping (if making it ahead)?
Answer: Reheat the topping gently in a small saucepan over low heat, stirring until loosened and warm. You can also warm it in short bursts in the microwave, stirring between bursts. Let it cool before adding on top of the cheesecake layer for clean layers.
Personal Detail: I love watching it turn glossy again as it warms, like it’s waking back up.
Q: How do I keep graham cracker crumbs from getting soggy in cheesecake jars?
Answer: Pack the crust firmly, add a thin layer of cheesecake filling as a barrier before the fruit, and chill the jars covered. For meal prep, store crumbs separately and add them right before serving, or sprinkle a small amount on top for crunch.
Personal Detail: I’m always aiming for that contrast, creamy filling with that little sandy crunch at the bottom.
When you want something sweet that still feels like it’s taking care of you, these High-Protein Cheesecake Jars are my favorite little fridge miracle. Make a couple, label them if you’re feeling organized, and enjoy that no-bake strawberry goodness all week long.
Thank you for cooking with me, it means so much to have you here in my little NYC kitchen.
Come hang out with me on Pinterest for more cozy, family-friendly recipes.
Print
High-Protein Cheesecake Jars (No-Bake Strawberry)
- Total Time: 15 minutes
- Yield: 4 servings 1x
Description
High-Protein Cheesecake Jars are a no-bake, single-serve sweet treat with creamy yogurt cheesecake layers and quick strawberry topping, great for meal prep.
Ingredients
1 cup graham cracker crumbs
4 tablespoons melted butter
1 cup softened cream cheese
1 cup Greek yogurt
1 scoop vanilla protein powder
3 tablespoons honey or maple syrup
1 teaspoon vanilla extract
1 1/2 cups chopped strawberries
1 tablespoon lemon juice
1 teaspoon cornstarch (optional)
Instructions
1. In a bowl, stir together 1 cup graham cracker crumbs and 4 tablespoons melted butter until the crumbs look evenly coated.
2. Spoon the crust into 4 small jars and press it down firmly with the back of a spoon.
3. In a mixing bowl, beat 1 cup softened cream cheese until smooth.
4. Add 1 cup Greek yogurt, 1 scoop vanilla protein powder, 3 tablespoons honey or maple syrup, and 1 teaspoon vanilla extract.
5. Mix until creamy and thick, scraping down the bowl as needed.
6. In a bowl, combine 1 1/2 cups chopped strawberries with 1 tablespoon lemon juice.
7. Let sit for 10 to 15 minutes so the berries soften and get juicy.
8. Spoon or pipe the cheesecake layer over the crust in each jar.
9. Add the strawberry layer on top.
10. Cover and chill at least 2 hours (overnight is even better).
Notes
Taste the cheesecake filling before layering to adjust sweetness.
Let the strawberry layer cool before building for the cleanest layers.
Store covered for 3 to 4 days in the fridge.
- Prep Time: 15 minutes
- Cook Time: 0 minutes
- Category: Dessert
- Method: No Cook
- Cuisine: American
Nutrition
- Serving Size: 1 jar
- Calories: 320
- Sugar: 20
- Sodium: 180
- Fat: 15
- Saturated Fat: 9
- Unsaturated Fat: 5
- Trans Fat: 0
- Carbohydrates: 30
- Fiber: 2
- Protein: 12
- Cholesterol: 40