
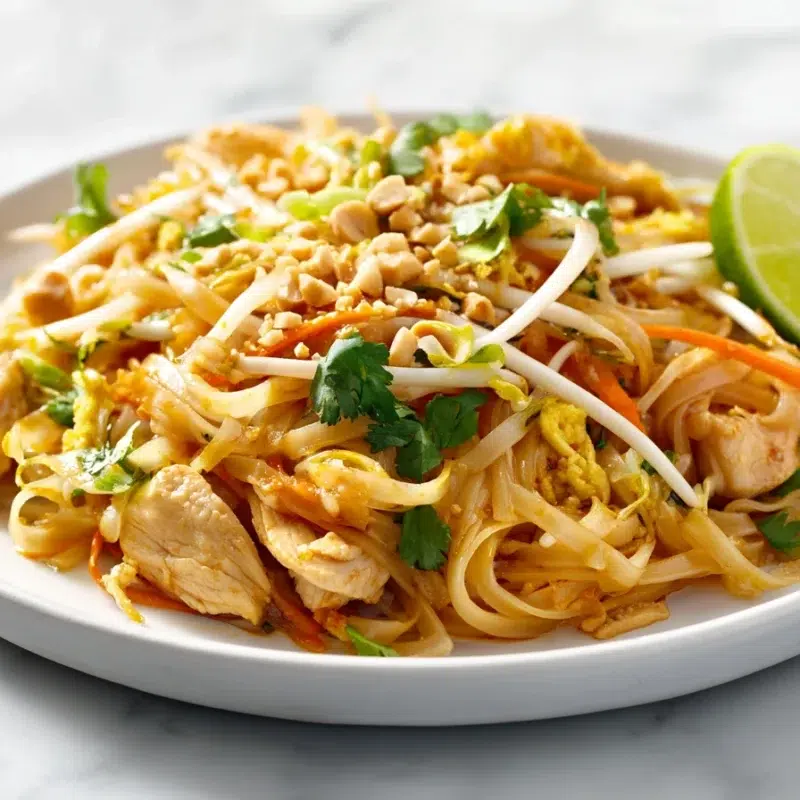
Chicken Pad Thai is my go-to rescue dinner for the nights when everyone is hungry right now, the kind of hungry where my kids start “helping” by opening every cabinet like the answer is hiding behind the cereal. This easy chicken pad thai comes together faster than takeout once you get your little rhythm going, hot pan, quick toss, done.
Sweet-tangy sauce + tender chicken + chewy noodles + crunchy toppings.
The first time I really nailed the noodles, not too soft, not clumpy, still a little chewy, I felt like I deserved a tiny trophy. It’s one of those Homemade Thai Food wins that makes a regular Tuesday feel a little brighter, and it doubles as one of my favorite Thai Lunch Recipes the next day.
Why This Chicken Pad Thai Works on a Weeknight
This Thai Pad Thai Recipe is built for real life. I’m talking backpacks on the floor, homework questions mid-stir, and someone asking for a snack while you’re literally cooking dinner. The secret is keeping it simple and cooking in quick stages so your skillet stays hot and everything tastes bold, not steamed.
If you’ve ever tried Pad Thai Rice Noodle Recipes that felt fussy, this one is the opposite. It’s a calm, repeatable routine that fits right into easy weekly dinners.
- Fast: Once the sauce is mixed and noodles are ready, it cooks in minutes.
- Flexible: Add extra veggies or keep them on the side for picky eaters.
- Lunchbox-friendly: Leftovers make excellent meal prep lunches.
- Topping bar fun: Everyone can do peanuts, lime, cilantro, and heat their own way.
- Minimal dishes: One pan, one bowl for sauce, and a cutting board.
If you’re in a “stir-fry saves the day” season, my pineapple chicken stir-fry is another weeknight helper I lean on when time is tight.
Ingredient Spotlight: Building Classic Pad Thai Flavor
Pad Thai is all about balance. When the chicken pad thai sauce hits a hot pan, it smells sweet and tangy at the same time, then it turns glossy and starts clinging to everything in the best way. That’s the moment I always do a quick taste check, usually by coating a noodle and tasting that, because noodles change how the sauce “reads.”
Pad Thai flavor balance = tangy + sweet + savory + heat.
Here’s what’s doing the heavy lifting:
- Tamarind paste: The signature tang that makes it taste like a real Thai Pad Thai Recipe.
- Fish sauce: Salty, savory depth. A little goes a long way.
- Brown sugar: Rounds out the tang and helps the sauce turn shiny as it melts.
- Soy sauce: Adds color and an extra savory note.
- Garlic + shallot: That fragrant base that makes your kitchen smell like you know what you’re doing.
- Eggs: Soft curds that weave through the noodles.
- Bean sprouts, carrots, green onions: Crunch, freshness, and a little sweetness.
- Peanuts + lime + cilantro: The finishing trio that makes pad thai noodles with chicken feel complete.
If you love Thai-inspired dinners but want something cozy and straightforward, you might also like my easy Thai red curry chicken for another comforting homemade option.
Sauce Mix (Do This First)
I learned the hard way, once the noodles go in, there’s no time to measure. Mix your homemade pad thai sauce first, then you can cook fast and stay calm.
- 2 tbsp tamarind paste
- 3 tbsp fish sauce
- 1 tbsp soy sauce
- 2 tbsp brown sugar
- 1 tsp chili powder (optional, to taste)
Rice Noodle Success (No Clumps, No Mush)
Rice Noodle Pad Thai lives or dies by noodle texture. My family likes them chewy, not soft, and I’ve found the best way to get there is to undersoak the noodles slightly, then let them finish in the pan while they drink up the sauce.
Think of it like this, the noodles are still cooking even after you drain them. They soften more when they hit heat, sauce, and steam. So if they feel perfect in the bowl, they’ll probably be a little too soft on the plate.
- Soak until pliable, not fully tender. They should bend without snapping but still feel a bit firm.
- Drain well. Extra water is the fastest road to runny sauce and mushy noodles.
- Keep them moving in the pan. Gentle tossing helps them stay intact.
- Finish in the sauce. That’s where the glossy, clingy texture happens.
Troubleshooting quick fixes:
- Clumping: Drain well and toss gently right away in the pan so they separate as they warm.
- Sticking: Make sure your pan is hot and you have enough oil to coat the surface.
- Too soft: Next time, soak less. For now, add toppings for texture and serve immediately.
If you want another fast, veggie-friendly skillet that’s great for busy nights, this chicken and cabbage stir-fry is a regular in my rotation.
Soak vs. Boil (What to Watch For)
Most Pad Thai rice noodle recipes do best with soaking, but you can boil in a pinch. Either way, your goal is the same, get them flexible, then finish them in the pan.
Soak method (my usual):
- Cover noodles with warm water and stir once or twice so they don’t glue together.
- Start checking early. Drain when they bend easily but still have a little firmness.
Boil method (if you need speed):
- Boil briefly, then drain quickly.
- Rinse lightly with cool water to stop cooking, then drain very well before adding to the pan.
How to Make Chicken Pad Thai (Step-by-Step)
This is the part where everything moves fast, in a good way. Once the pan is hot, you’ll hear that sizzle, and it’s basically a quick remove-and-return rhythm so nothing steams. I always keep a clean plate nearby so I can pull the chicken out, scramble eggs, then bring everything back together at the end.
Bold weeknight tip: Mix the sauce before the pan gets hot. Once you start cooking, you won’t want to pause.
- Soak the noodles. Place the 8 oz flat rice noodles in a large bowl and cover with warm water. Stir once or twice. Soak until pliable but still a bit firm, then drain well and set aside.
- Mix the sauce. In a small bowl, whisk together 2 tbsp tamarind paste, 3 tbsp fish sauce, 1 tbsp soy sauce, 2 tbsp brown sugar, and chili powder (if using). Set it right next to the stove.
- Prep the aromatics and toppings. Mince 2 cloves garlic, chop 1 shallot, slice 3 green onions, crush 1/4 cup roasted peanuts, and cut 1 lime into wedges. Rinse and dry the bean sprouts if needed.
- Cook the chicken. Heat 1 tbsp vegetable oil in a large skillet or wok over medium-high heat. Add the thinly sliced chicken breast and cook, stirring, until cooked through and lightly browned. Transfer to a clean plate.
- Scramble the eggs. Add the remaining 1 tbsp oil to the pan. Add the garlic and shallot and cook for about 30 seconds, just until fragrant. Pour in the lightly beaten eggs and scramble quickly. Keep them soft.
- Add noodles and sauce. Add the drained noodles to the pan, then pour in the sauce. Toss gently but constantly for 1 to 2 minutes, letting the noodles finish cooking in the sauce. If the sauce looks thin, give it heat and time, not more ingredients. Keep tossing until it turns glossy and clings.
- Add veggies and chicken. Add 1/2 cup shredded carrots, 1 cup bean sprouts, and the cooked chicken back into the pan. Toss for another 30 to 60 seconds, just until warmed and lightly softened. Stir in most of the green onions, saving a little for the top.
- Finish and serve. Turn off the heat. Top with crushed peanuts, cilantro, and a generous squeeze of lime. Serve immediately while it’s hot and springy.
Weeknight Workflow (Prep Order That Makes It Easy)
This is the part I do before anyone asks what’s for dinner. Once these are done, cooking is fast and you’ll feel like you’re in control, even if the day was not.
- Whisk the chicken pad thai sauce and set it by the stove.
- Soak the rice noodles until pliable, then drain well.
- Slice chicken thin so it cooks quickly.
- Chop garlic, shallot, and green onions.
- Crush peanuts and set aside some for the top.
- Wedge the lime and rinse cilantro.
Topping Bar (Make Everyone Happy)
This is my favorite part because it turns dinner into a choose-your-own-adventure situation. The kids usually go heavy on peanuts, my husband is all about extra lime, and I always sneak more chili powder onto my own bowl.
- Extra crushed peanuts (save some for the top)
- Lime wedges (non-negotiable in my house)
- Fresh cilantro
- Extra green onions
- More chili powder for heat
Serve right away so the noodles stay bouncy, and add the crunchy ingredients at the end so they stay crunchy.
Variations (Protein + Veggie Swaps)
These Tai food recipes dishes are meant to flex with your fridge. I love a clean-out-the-fridge night, and this method is forgiving as long as you keep the pan hot and don’t drown the noodles with extra moisture.
- Protein:
- Use chicken thighs instead of breast for a juicier bite.
- Use cooked shredded chicken if you’re in a hurry, add it at the end just to warm through.
- Veggies:
- Add 1 to 2 cups extra veggies like sliced bell pepper or snap peas.
- Keep bean sprouts extra crisp by tossing them in at the very end.
- Heat level:
- Skip chili powder for a mild version.
- Add 1 to 2 tsp more chili powder if you want it spicier.
If you’re on a roll with skillet dinners, you can also check out my chicken and cabbage stir-fry, it’s another easy weekly dinners favorite around here.
Leftover Remix: Chicken Pad Thai Casserole-Style Bake
I know “Pad Thai” and “bake” sounds a little wild, but hear me out. This Chicken Pad Thai Casserole moment is pure next-day comfort food, warm noodles, little crispy edges, and a fresh sprinkle of peanuts on top that makes it feel brand new.
- Heat oven to 375°F.
- Spread leftover pad thai noodles with chicken into an 8×8-inch baking dish (or similar size).
- Splash 1 to 2 tablespoons of water over the top so it doesn’t dry out.
- Cover loosely with foil and bake 12 to 15 minutes, until hot.
- Uncover for the last 2 to 3 minutes if you want slightly crisp edges.
- Finish with extra crushed peanuts, lime, and cilantro.
Doneness cue: It should be hot all the way through, and the noodles should look glossy again, not dried out.
Storage, Meal Prep, and Reheating
This is one of my favorite Thai lunch recipes because it holds up surprisingly well if you store it the right way. The biggest trick is keeping your bright, crunchy toppings separate so everything tastes fresh when you’re ready to eat.
Fridge
Store Chicken Pad Thai in an airtight container and refrigerate promptly. It keeps well for about 3 to 4 days. If you can, store peanuts, lime wedges, and cilantro separately.
Reheat
To reheat without drying out, warm it in a skillet over medium heat with a small splash of water. Toss gently until hot and glossy again. The microwave works too, just add a teaspoon of water, cover loosely, and heat in short bursts so you don’t overcook the noodles.
Lunchbox tips
For meal prep lunches, pack lime and herbs separately. That fresh squeeze right before eating wakes everything up and keeps the noodles from feeling heavy.
If you like meal-prep-friendly chicken dinners, my slow cooker teriyaki chicken is another one that makes weekday lunches feel taken care of.
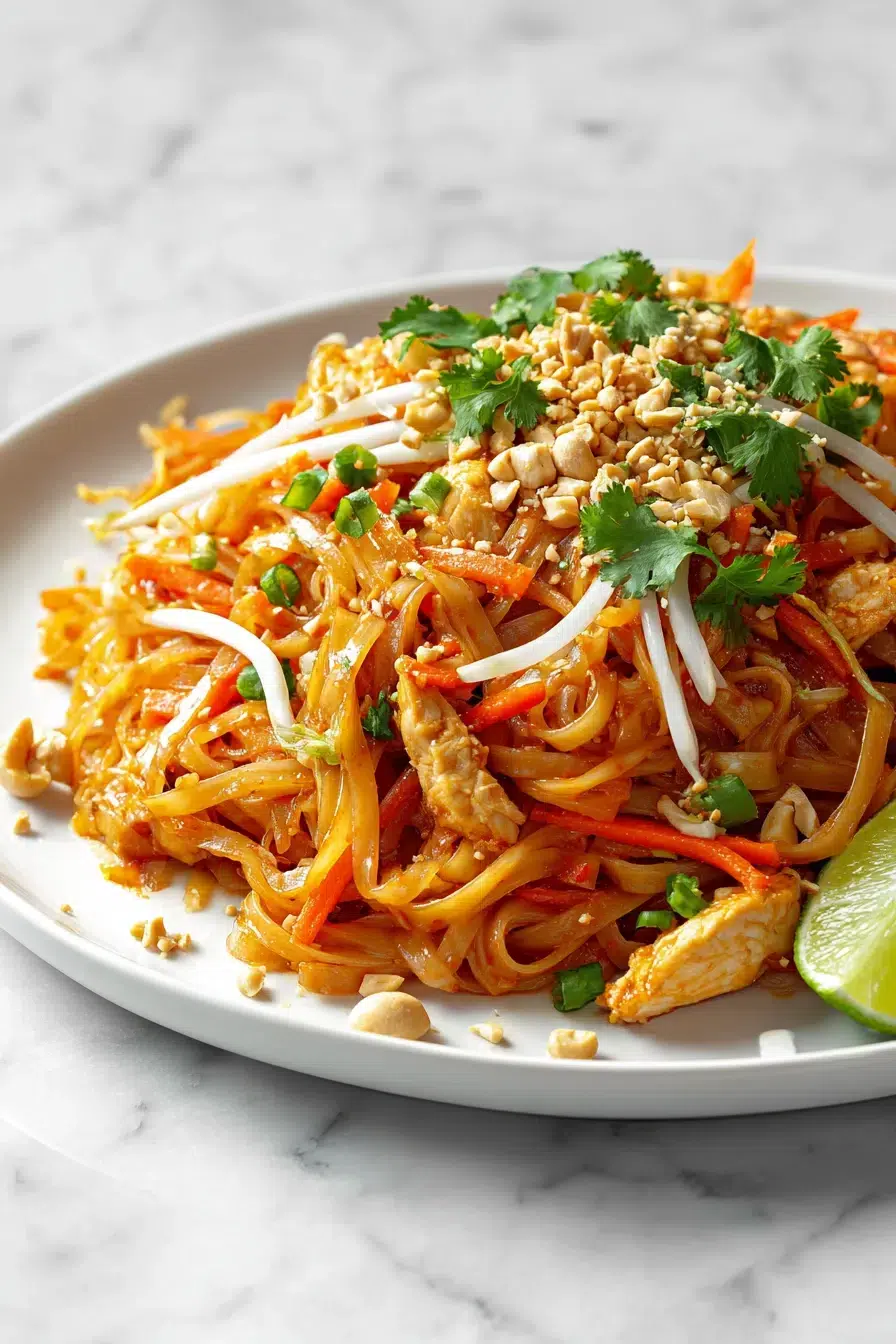
Frequently Asked Questions about Chicken Pad Thai
Q: How do you keep rice noodles from getting mushy in Chicken Pad Thai?
✅ Answer: Soak noodles just until pliable (they should bend without snapping but still feel a bit firm), then drain well. Finish softening them in the hot pan with the sauce for a minute or two. Avoid letting soaked noodles sit in water, and don’t over-stir once they’re tender, gentle tossing keeps them intact.
💡 Personal Detail: My crew likes that chewy-but-not-soft bite, so I always test one noodle before draining. If it still has a tiny bit of resistance, it’s ready for the pan.
Q: Can I make Chicken Pad Thai without tamarind paste?
✅ Answer: Yes, aim for a similar tangy-sweet balance by using a small amount of citrus juice plus a touch of brown sugar, then adjust to taste. Start modestly, toss with the noodles, and add more in tiny increments so the sauce stays balanced and doesn’t turn sharply sour.
💡 Personal Detail: I taste the sauce on a noodle, not on a spoon. The noodles mellow the tang, so that’s the most honest way to know what you’ll actually taste at dinner.
Q: What can I use instead of fish sauce in Chicken Pad Thai?
✅ Answer: You can replace it with a mix of soy sauce and a little extra savory depth (like a pinch of mushroom seasoning or a small spoon of miso dissolved in warm water). Add gradually and taste, fish sauce is potent, so you’re trying to recreate saltiness plus savory complexity without overpowering the dish.
💡 Personal Detail: I keep a tiny tasting bowl nearby and adjust before serving. It’s a lot easier to fix saltiness in the pan than at the table.
Q: How do I thicken Pad Thai sauce if it’s too runny?
✅ Answer: Turn the heat up slightly and toss for 30 to 90 seconds so the sauce reduces and clings to the noodles. Make sure excess water is drained from the noodles and veggies, extra moisture is usually the culprit. If needed, add a small spoon of brown sugar and keep tossing; it helps the sauce turn glossy as it melts and reduces.
💡 Personal Detail: There’s a moment when the sauce goes from watery to shiny, and you can actually hear the pan sizzle again. That’s when you know you’re back on track.
Q: How long does Chicken Pad Thai last in the fridge?
✅ Answer: Store it in an airtight container and refrigerate promptly; it keeps well for about 3–4 days. For best texture, store toppings (peanuts, lime, cilantro) separately and add them right before eating.
💡 Personal Detail: Day-two pad thai is a favorite lunch in my house, especially with a fresh squeeze of lime right before eating and a new sprinkle of peanuts for crunch.
Eva’s Note (Little Things That Make It Taste Like Your Favorite Takeout)
If you try this on a busy night, I want you to know it counts as a win. You made Homemade Thai Food happen in real life, with real-life chaos in the background. That’s the kind of cooking I love most.
- Don’t rush the hot pan. A little heat and movement makes the sauce glossy and the noodles happy.
- Finish strong. Lime and peanuts at the very end are what make Chicken Pad Thai taste like the version you crave.
If you make it, tell me what toppings your crew picked. I’m always curious who goes extra lime and who hoards the peanuts.
Thank you for cooking with me today. It means so much to have you here in my little NYC kitchen corner.
For more cozy, family-friendly ideas, follow along on Pinterest.
Print
Chicken Pad Thai (Easy Rice Noodle Stir-Fry)
- Total Time: 25 minutes
- Yield: 4 servings 1x
Description
Chicken Pad Thai with rice noodles, tamarind sauce, eggs, and crunchy peanuts, an easy weeknight Thai lunch or dinner you can make at home. This easy chicken pad thai comes together faster than takeout once you get your little rhythm going.
Ingredients
2 tbsp tamarind paste
3 tbsp fish sauce
1 tbsp soy sauce
2 tbsp brown sugar
1 tsp chili powder (optional)
8 oz flat rice noodles
2 cloves garlic
1 shallot
3 green onions
1/4 cup roasted peanuts
1 lime
1 tbsp vegetable oil
1 lb thinly sliced chicken breast
2 eggs
1/2 cup shredded carrots
1 cup bean sprouts
Instructions
1. Soak the noodles. Place the 8 oz flat rice noodles in a large bowl and cover with warm water. Stir once or twice. Soak until pliable but still a bit firm, then drain well and set aside.
2. Mix the sauce. In a small bowl, whisk together 2 tbsp tamarind paste, 3 tbsp fish sauce, 1 tbsp soy sauce, 2 tbsp brown sugar, and chili powder (if using). Set it right next to the stove.
3. Prep the aromatics and toppings. Mince 2 cloves garlic, chop 1 shallot, slice 3 green onions, crush 1/4 cup roasted peanuts, and cut 1 lime into wedges. Rinse and dry the bean sprouts if needed.
4. Cook the chicken. Heat 1 tbsp vegetable oil in a large skillet or wok over medium-high heat. Add the thinly sliced chicken breast and cook, stirring, until cooked through and lightly browned. Transfer to a clean plate.
5. Scramble the eggs. Add the remaining 1 tbsp oil to the pan. Add the garlic and shallot and cook for about 30 seconds, just until fragrant. Pour in the lightly beaten eggs and scramble quickly. Keep them soft.
6. Add noodles and sauce. Add the drained noodles to the pan, then pour in the sauce. Toss gently but constantly for 1 to 2 minutes, letting the noodles finish cooking in the sauce. If the sauce looks thin, give it heat and time, not more ingredients. Keep tossing until it turns glossy and clings.
7. Add veggies and chicken. Add 1/2 cup shredded carrots, 1 cup bean sprouts, and the cooked chicken back into the pan. Toss for another 30 to 60 seconds, just until warmed and lightly softened. Stir in most of the green onions, saving a little for the top.
8. Finish and serve. Turn off the heat. Top with crushed peanuts, cilantro, and a generous squeeze of lime. Serve immediately while it’s hot and springy.
Notes
Store Chicken Pad Thai in an airtight container and refrigerate promptly. It keeps well for about 3 to 4 days. If you can, store peanuts, lime wedges, and cilantro separately. To reheat without drying out, warm it in a skillet over medium heat with a small splash of water. Toss gently until hot and glossy again.
- Prep Time: 15 minutes
- Cook Time: 10 minutes
- Category: Dinner
- Method: Skillet
- Cuisine: Thai
Nutrition
- Serving Size: 1 bowl
- Calories: 500
- Sugar: 10
- Sodium: 1200
- Fat: 20
- Saturated Fat: 3
- Unsaturated Fat: 17
- Trans Fat: 0
- Carbohydrates: 50
- Fiber: 3
- Protein: 30
- Cholesterol: 150