
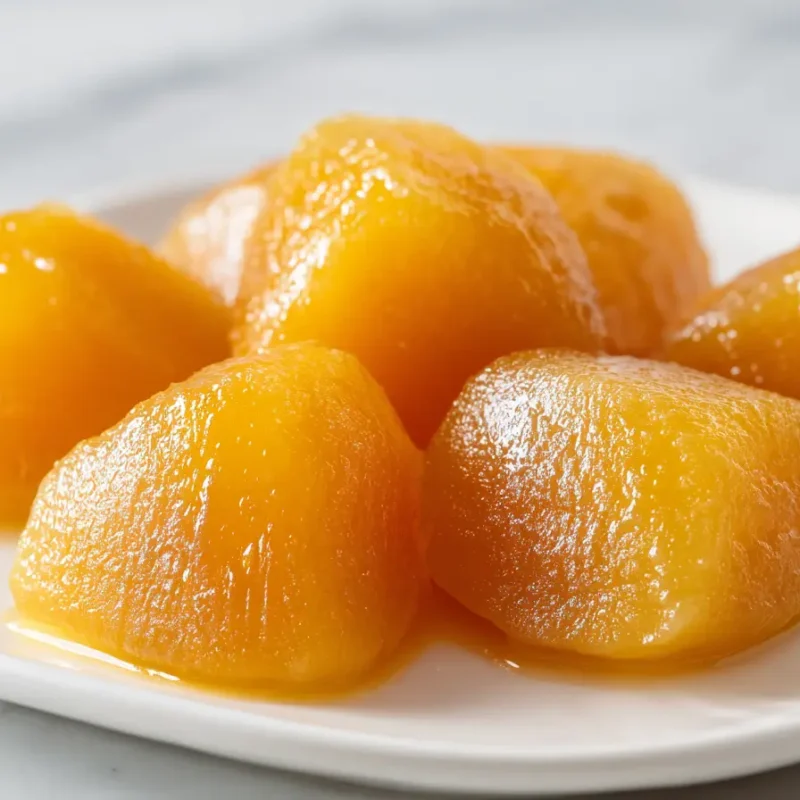
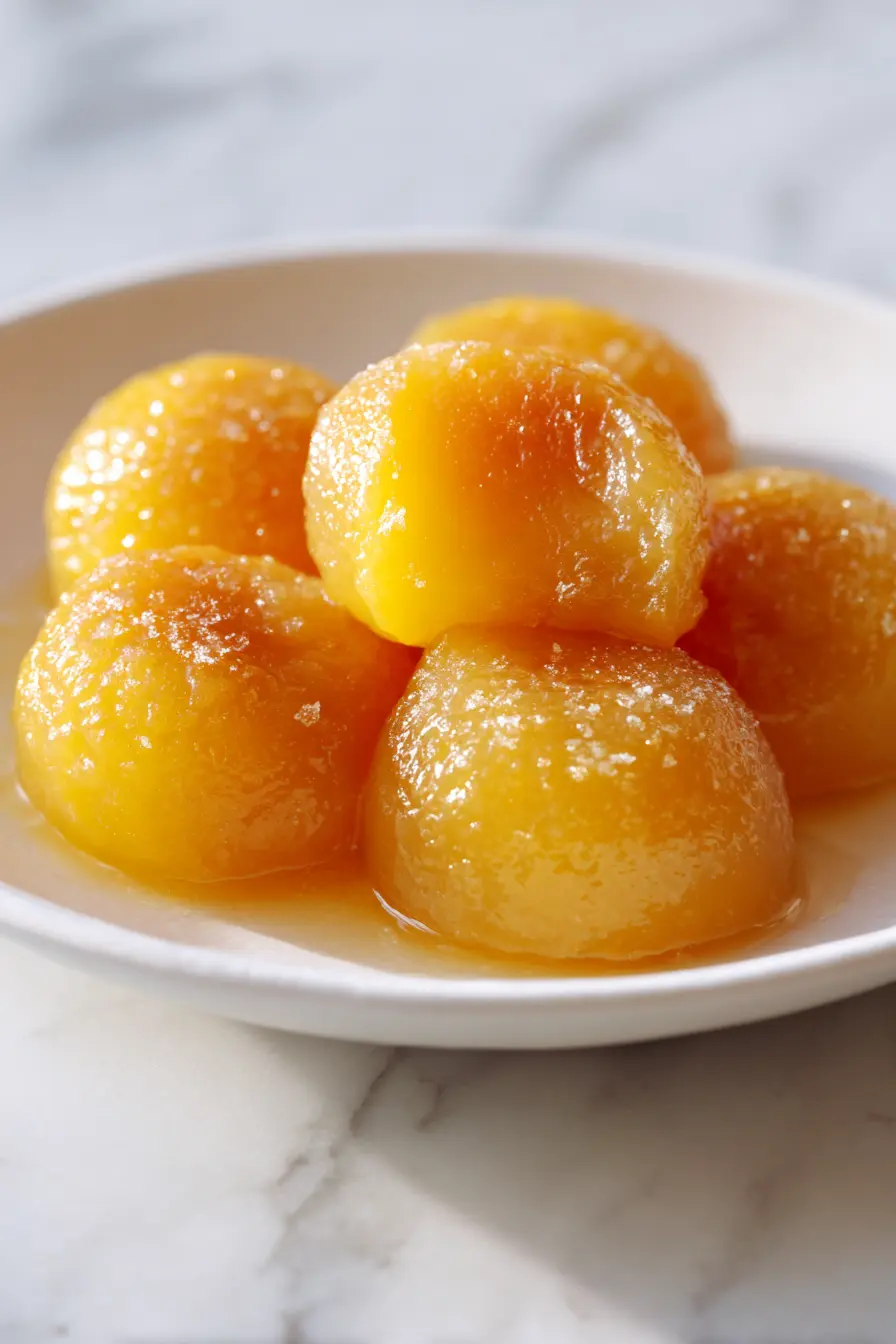
The first time I made Homemade Mango Mochi, I honestly thought, “This is either going to be adorable, or it’s going to look like a sticky science project.” It ended up being both, in the best way. You get this bouncy, soft-and-chewy mochi wrapper and a bright mango center that tastes like sunshine. If you’ve been looking for Things To Do With Mangoes that feels special but still doable on a busy afternoon, this is it.
And yes, this is vegan mochi as written. No fancy ingredients, no complicated tools, just a little patience and a lot of starch for dusting.
Why You’ll Love This Homemade Mango Mochi
This Homemade Mango Mochi is one of those Asian Sweet Snacks that feels like a tiny celebration, even if you’re just grabbing one between school pickup and laundry. The texture is the real magic. It’s a chewy rice cake dessert that bounces back when you press it, and the mango flavor is sweet, fruity, and bright without being heavy.
I love making these on a weekend when the kids are hovering in the kitchen looking for something “fun.” Mochi is basically edible play dough (the good kind). Lily likes to dust everything like she’s working in a bakery. Noah is in charge of “quality control,” meaning he tries to sneak the mango filling. Emma just wants to pinch the edges closed like tiny little purses. The first bite is always my favorite, that soft stretch, then the mango hits and it’s like, yep, we’re making these again.
- Chewy (that soft-and-bouncy bite)
- Fruity and bright, perfect mango dessert snacks
- Lunchbox-friendly for a sweet treat
- Freezer-friendly for future you
Ingredients You’ll Need (Plus Smart Swaps)
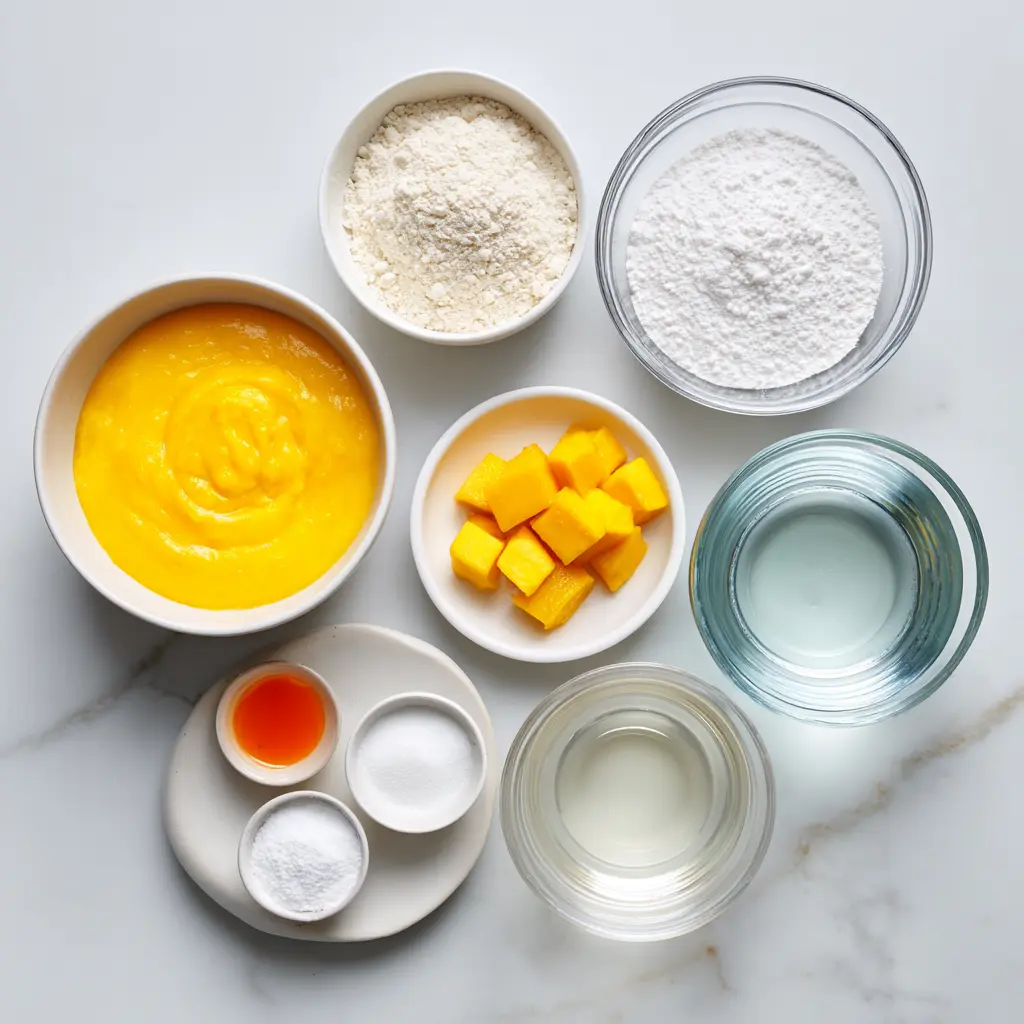
Here’s what you’ll need for this easy mochi recipe. It’s a short list, but each ingredient has a job, especially in a glutinous rice flour dessert where texture is everything.
- 1 cup fresh ripe mango puree
- 2 tablespoons sugar
- 1 tablespoon cornstarch
- 1 cup glutinous rice flour
- ¼ cup sugar
- ¾ cup water
- Optional: food coloring (a tiny drop for extra “mango” color)
- ½ cup cornstarch or potato starch (for dusting)
- Optional: extra mango puree or small mango chunks (for filling)
My rule with mangoes is simple: pick the ones that smell like sunshine. At the store, I give them a gentle squeeze. You want a little give, not mush. Then I sniff near the stem end. If it smells strongly fruity, you’re in business. This is one of my favorite Food Recipes Vegetarian Easy because it feels special, but it’s still built from pantry basics and fruit.
Smart swaps: For dusting, potato starch is amazing and feels extra silky on the outside. Tapioca starch also works if that’s what you have. For the filling, you can fold in finely diced mango pieces for a chunkier center, which makes it feel like a fruity version of those nostalgic Gummie Recipes vibes, only fresher and more “healthy fun food.”
Glutinous rice flour ≠ regular rice flour
Glutinous rice flour (often labeled “sweet rice flour”) is what gives mochi that signature stretch. Regular rice flour will make it crumbly and chalky, not soft and chewy.
Mango Puree: Fresh vs. Frozen (Texture Matters)
You can use fresh mango or frozen mango puree (made from thawed frozen mango). The biggest difference is water content. Frozen mango tends to release more liquid, which can make your mango mochi filling runnier unless you thicken it.
When I blend mango, the blender gets loud for a second, then suddenly it turns into this smooth, glossy, deep golden puree. I do a quick “spoon test.” I dip a spoon in, lift it, and watch. If it pours like juice, it needs thickening. If it falls in slow ribbons and coats the spoon, it’s perfect.
- Blend until completely smooth
- Strain (optional) if your mango is fibrous
- Spoon test for thickness before filling
If you’re brainstorming Things To Do With Mangoes, mochi is a fun one because it turns simple fruit into a handheld treat that feels like a bakery snack.
Equipment + Prep (So Nothing Sticks)
Mochi is sweet and innocent right up until it’s warm, then it sticks to everything like it has a personal vendetta. I learned this the hard way years ago when I skipped dusting “just for a second” and ended up with a mangoy mess glued to my cutting board. The fix was simple: prep your space first, then cook.
- Mixing bowl
- Whisk
- Rubber spatula
- Small saucepan (for the mango filling)
- Microwave-safe bowl or a steamer setup for cooking the dough
- Parchment paper
- Sifter or fine mesh strainer (for dusting starch)
Dusting starch options: cornstarch, potato starch, or tapioca starch. The goal is a light “nonstick jacket” on your tools, hands, and surface.
How to Make Homemade Mango Mochi (Step-by-Step)
This is one of those recipes where it looks a little odd halfway through. Trust the process. Mochi dough goes from “milky slurry” to “sticky blob” to “glossy stretchy dough,” and that last stage is where the magic lives. When it’s done, it should look shiny, feel elastic, and stretch without any dry flour pockets.
“Dust early, dust often.”
Step 1 — Make the Mango Filling (And Thicken If Needed)
In a small saucepan, whisk together 1 cup mango puree and 2 tablespoons sugar. In a tiny bowl, mix 1 tablespoon cornstarch with a splash of water (just enough to dissolve), then whisk it into the mango puree.
Cook over medium heat, stirring constantly, until it thickens. You’ll see it change from loose sauce to jammy ribbons that fold back into themselves. This usually takes 3 to 6 minutes, depending on how watery your mango is.
- Spoon trail test: drag your spoon through the filling. The path should stay visible for a moment before slowly closing.
- Mound test: a small spoonful should sit in a soft mound, not puddle out flat.
- Coat test: it should coat the back of a spoon, not slide right off.
Let the filling cool completely. If you try to fill mochi with warm puree, it will melt into the dough and leak. Cool filling is your best friend.
Step 2 — Mix and Cook the Mochi Dough
In a microwave-safe bowl (or a heat-safe bowl for steaming), whisk together 1 cup glutinous rice flour and ¼ cup sugar. Add ¾ cup water and whisk until smooth. If you want a brighter mango color, add a tiny drop of food coloring here.
Microwave method: Cover loosely. Microwave for 1 minute, stir well with a spatula. Microwave another 1 minute, stir again. Then microwave in 30-second bursts, stirring each time, until the dough turns thick, glossy, and stretchy (usually 2½ to 3½ minutes total, depending on your microwave).
Steaming method: Place the bowl in a steamer and steam for about 15 to 20 minutes, stirring once halfway through, until glossy and elastic.
This is the “cook until glossy” moment. The dough goes from cloudy to shiny, like it’s suddenly waking up. That gloss is the chew signal for soft and chewy mochi.
Troubleshooting note: If it seems grainy or you see dry flour streaks, keep cooking and stir more aggressively. Mochi needs heat and mixing to fully hydrate.
Step 3 — Cool, Dust, Portion, Fill, and Seal
Dust a sheet of parchment heavily with cornstarch or potato starch. Scrape the hot mochi dough onto it. Dust the top generously too. Let it cool for about 10 to 15 minutes, just until you can handle it without burning your fingers, but it’s still pliable.
Here’s the trick that saves my sanity: dust your hands, not just the counter. A light coating on your fingertips keeps the dough from clinging, so you can pinch seams neatly without tearing.
With dusted hands (or food-safe gloves, also dusted), pat the dough into a thick log and divide into 8 to 10 pieces. Smaller portions seal better, and they’re less likely to blow out. Overfilling is the fastest way to get a sticky mess. Think “bite-sized surprise,” not “overstuffed.”
- Portion size: 8 to 10 pieces for easy handling
- Filling amount: about 1 to 2 teaspoons thick mango filling per piece
- Pinch pattern: bring edges up like a pouch, pinch in a circle, then twist and press to seal
Press a thumb indent in the center of each piece, spoon in the cooled mango filling (and a few small mango chunks if you want), then pinch closed. Flip seam-side down and roll gently to smooth. Brush off excess starch once shaped.
At my house, this is where Emma gets involved. She likes making the thumb dent and announcing, very seriously, “I’m the mango keeper.” Honestly, it’s one of my favorite kinds of kitchen chaos.
Texture Troubleshooting (Chewy, Not Rubbery)
Mochi is surprisingly forgiving, but it does have opinions. If your texture is off, you usually just need a small tweak. Here are my go-to rescue moves for that perfect soft chew.
- Problem: Rubbery mochi
Likely cause: Undercooked dough or too little water
Fix: Cook until glossy and elastic, measure water carefully, and stir well during cooking. - Problem: Gummy center
Likely cause: Dry flour pockets that never hydrated
Fix: Whisk the batter smooth before cooking, then stir thoroughly between heating rounds. - Problem: Dry edges after chilling
Likely cause: Not stored airtight
Fix: Wrap airtight (pieces tucked close together), and reheat gently to bring back bounce. - Problem: Dough tears while shaping
Likely cause: Not enough dusting, or dough too hot and sticky
Fix: Cool 10 to 15 minutes, dust hands and surface, and handle with quick, confident movements. - Problem: Filling leaks out
Likely cause: Filling too runny or mochi overfilled
Fix: Thicken mango filling, cool completely, and use smaller portions that seal better.
If you’re chasing that soft and chewy mochi texture, remember the two big signals: glossy dough and thick, cooled filling. Everything else is just little adjustments.
Fun Variations (Snack Board + Lunchbox Ideas)
These are already adorable little mango dessert snacks, but you can make them even more fun with a few simple twists. I love serving them on a family movie-night snack board with fruit, something crunchy, and something cold. It’s my favorite kind of Healthy Fun Food, because it feels playful without turning into a whole project.
- Chunky center: fold in finely diced mango pieces for a juicy bite
- Extra jammy: cook the mango filling a minute longer for a thicker, smoother center
- Mini mochi bites: make 12 to 14 smaller pieces for lunchboxes
- Color pop: a tiny drop of food coloring for a brighter mango look
- Snack-board vibe: pair with fresh berries and crunchy cereal for a “fruit snacks vegan” moment
Kid pick: My kids vote for the mini mochi bites every time. They feel like little treats you can grab straight from the fridge.
If you’re building a cold-and-snacky spread, I also love adding easy frozen snack bites for summer alongside the mochi for a fun mix of chewy and icy.
Storage, Freezing, and Serving (Keep Them Soft)
Let’s talk “next-day mochi” honestly. Mochi is best the day it’s made, when the wrapper is pillowy and bouncy. Overnight, it tends to firm up a bit, especially in the fridge. The good news is you can store it well and refresh it so it’s still a treat, not a jaw workout.
- Fridge (storing mochi): Store in an airtight container, pieces tucked close together. Keep them lightly dusted. Best within 1 to 2 days for the softest texture.
- Freezer (freezing and thawing mochi): Freeze pieces spaced apart on a parchment-lined tray until firm, then transfer to an airtight container or freezer bag.
Do: Wrap airtight to prevent dry edges. Mochi dries quietly, so sealing well matters.
Don’t: Store uncovered or loosely covered, it will toughen fast.
Serving and reheating mochi: If it feels firm, a quick gentle warm-up brings back that fresh chew. Warm it just enough to soften, not enough to melt or turn sticky.
If you love make-ahead snacks, you might also like keeping a batch of chia seed pudding with almond milk in the fridge. It’s another calm, grab-and-go option for busy weeks.
Frequently Asked Questions about Homemade Mango Mochi
Q: How do you make Homemade Mango Mochi soft and chewy (not rubbery)?
Answer: Cook the dough until it turns glossy and elastic, and make sure there are no dry pockets of flour. Rubberiness often comes from undercooking or an off balance of liquid to flour. Measure carefully, stir well during cooking, and let the dough rest briefly before shaping so the texture settles into a soft chew. When it’s ready, it stretches like a warm, bouncy ribbon.
Q: Can I use frozen mango to make mango puree for mochi?
Answer: Yes. Thaw frozen mango completely, then blend until very smooth. If the puree looks watery, simmer it briefly to concentrate the flavor and thicken it before using it as a filling. A thicker puree is easier to portion and less likely to leak during shaping. I love how the color deepens after simmering, and the mango aroma gets stronger.
Q: What can I substitute for cornstarch when dusting mochi (potato starch, tapioca starch)?
Answer: Potato starch and tapioca starch both work well for dusting. Use a light, even coating on the work surface and your hands, then brush off excess once shaped. The goal is to prevent sticking without leaving a heavy powdery layer on the outside. When it’s dusted just right, the surface feels almost silky.
Q: How do I thicken mango puree filling if it’s too runny?
Answer: Simmer the puree gently while stirring until it reduces and becomes spoonable. You can also whisk a small amount of cornstarch with a little water first, then stir it into the warm puree and cook until it thickens. Let it cool fully before filling so it sets up and stays put. Look for the spoon trail, when the spoon leaves a path that slowly closes.
Q: Can I reduce the sugar in Homemade Mango Mochi without ruining the texture?
Answer: You can reduce sugar, but do it gradually. Sugar affects softness and moisture, so cutting too much may make the mochi feel drier or firmer. Start by reducing a small portion, keep the liquid measurements the same, and rely on very ripe mango for natural sweetness and flavor. I always choose mangoes that smell fragrant even before slicing.
Q: How long does Homemade Mango Mochi last in the fridge?
Answer: It’s best within 1–2 days for the softest texture, though it can last a bit longer if stored airtight. The outer layer tends to firm up as it chills. Keep pieces well-dusted and tightly sealed to prevent drying, and refresh gently before serving if they feel firm. Day one is pillowy chew, day two is a slightly firmer bite.
Q: Can you freeze mango mochi, and how do you thaw it?
Answer: Yes, freeze pieces spaced apart first, then store airtight once firm. Thaw in the fridge or at cool room temperature until the center is no longer icy. If it feels stiff after thawing, a very gentle warm-up can bring back chew. You’ll feel the moment the center goes from frosty to soft when you press it.
Q: What’s the best way to reheat mochi so it’s chewy again?
Answer: Reheat briefly and gently, just enough to soften. Overheating can make it overly sticky or cause filling to seep. Use short bursts and check often, you’re aiming for warm and pliable, not hot. When you press it, you want that quiet give, then a little spring back.
Q: Can you make mango mochi in a slow cooker, and how long would it take?
Answer: Yes, it can work if you use a heat-safe bowl set inside the slow cooker with a little water to create steady steam. Timing varies by model, but expect roughly 1–2 hours, stirring occasionally, until the dough turns glossy and elastic. Keep the lid on as much as possible to maintain consistent heat. It’s a cozy countertop simmer situation, warm kitchen, slow pace, low stress.
Q: Why is my mochi sticking to everything, and how do I prevent it?
Answer: Mochi sticks when it’s warm, under-dusted, or handled with damp hands/tools. Dust your surface and hands generously, work with slightly cooled dough, and use parchment where helpful. Also, brush off excess starch only after shaping, too early can make the dough grab again. I once tried shaping too soon and ended up with a sticky tangle, so now I cool it just enough to handle.
If you make this Homemade Mango Mochi, I hope it brings a little bright, fruity joy to your day. It’s one of those sweet little kitchen projects that feels calming once you get into the rhythm, stir, cook until glossy, dust early, dust often, and then enjoy that chewy bite.
Thank you for cooking with me, I’m so glad you’re here in my kitchen at Noted Recipes.
Come hang out with me on Pinterest for more cozy, family-friendly recipes.
Print
Homemade Mango Mochi (Chewy, Sweet & Fruity)
- Total Time: 25 minutes
- Yield: 8 servings 1x
- Diet: Vegan
Description
Homemade Mango Mochi is a chewy, fruity Asian sweet snack made with mango puree and glutinous rice flour. Easy, vegan-friendly, and fun to roll.
Ingredients
1 cup fresh ripe mango puree
2 tablespoons sugar
1 tablespoon cornstarch
1 cup glutinous rice flour
¼ cup sugar
¾ cup water
Optional: food coloring
½ cup cornstarch or potato starch (for dusting)
Optional: extra mango puree or small mango chunks (for filling)
Instructions
1. In a small saucepan, whisk together 1 cup mango puree and 2 tablespoons sugar. In a tiny bowl, mix 1 tablespoon cornstarch with a splash of water, then whisk it into the mango puree.
2. Cook over medium heat, stirring constantly, until it thickens. Let the filling cool completely.
3. In a microwave-safe bowl, whisk together 1 cup glutinous rice flour and ¼ cup sugar. Add ¾ cup water and whisk until smooth. Add a tiny drop of food coloring if desired.
4. Microwave method: Cover loosely. Microwave for 1 minute, stir well. Microwave another 1 minute, stir again. Then microwave in 30-second bursts, stirring each time, until the dough turns thick, glossy, and stretchy.
5. Dust a sheet of parchment heavily with cornstarch or potato starch. Scrape the hot mochi dough onto it. Dust the top generously too. Let it cool for about 10 to 15 minutes.
6. With dusted hands, pat the dough into a thick log and divide into 8 to 10 pieces. Press a thumb indent in the center of each piece, spoon in the cooled mango filling, then pinch closed. Flip seam-side down and roll gently to smooth. Brush off excess starch once shaped.
Notes
For dusting, potato starch feels extra silky. Tapioca starch also works. For the filling, you can fold in finely diced mango pieces for a chunkier center. Store in an airtight container, best within 1 to 2 days for the softest texture.
- Prep Time: 15 minutes
- Cook Time: 10 minutes
- Category: Dessert
- Method: Microwave
- Cuisine: Asian
Nutrition
- Serving Size: 1 piece
- Calories: 120
- Sugar: 10
- Sodium: 5
- Fat: 0
- Saturated Fat: 0
- Unsaturated Fat: 0
- Trans Fat: 0
- Carbohydrates: 28
- Fiber: 1
- Protein: 1
- Cholesterol: 0