
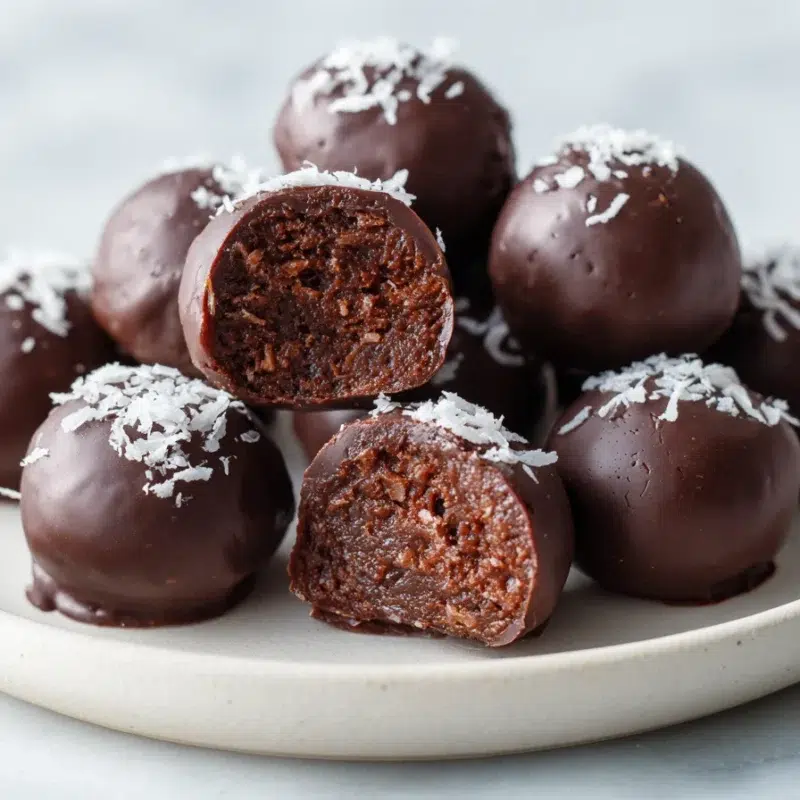
There’s something about a “little treat” in the fridge that makes a regular Tuesday feel like it has its life together. These Coconut Chocolate Balls are my favorite kind of kitchen win, no oven, no mixers, no drama. They taste like chocolate coconut truffles from a fancy candy case, but you can pull them off while dinner finishes or while the kids are hunting for their missing sneakers.
In my house, Noah is the chocolate-first kid, and Emma is the coconut fan who will happily “taste test” the center about six times. I love that these set up with a firm, sweet coconut center and a smooth chocolate shell, so they feel special without being fussy.
- No-bake and fast, the fridge does the hard work
- 6-ingredient no-bake dessert with pantry staples
- Make-ahead friendly for snacks, lunchboxes, and treat plates
- Party-pretty like classic chocolate coconut truffles
Why These Coconut Chocolate Balls Work (And Don’t Fall Apart)
The “secret” to Coconut Chocolate Balls that actually hold together is not a secret at all. It’s the simple ratio of shredded coconut to sweetened condensed milk, plus enough chill time to let everything firm up. When the coconut is fully moistened, it binds into a dense, candy-like center that rolls easily and stays put during dipping.
I learned the chilling part the hard way. The first time I made these, I got impatient and tried to roll them right after mixing. The mixture stuck to my hands, stuck to the counter, and somehow even stuck to the dog’s fur (long story, very New York apartment). Ten minutes later, after a quick chill, it was a totally different situation. Calm, rollable, and actually cute.
- They’re sturdy because the coconut is fully coated and “glued” together.
- They’re cleaner to dip because cold centers don’t soften the chocolate.
- They fit the vibe of coconut energy bites and no-bake energy balls, but with a more dessert-like finish.
Texture Check: What you should see/feel
- It should look like coconut that’s evenly damp, not dry patches and not swimming.
- When you press a spoonful, it should hold together like soft playdough.
- If it slumps or feels greasy-soft, it needs a short chill (or a bit more coconut).
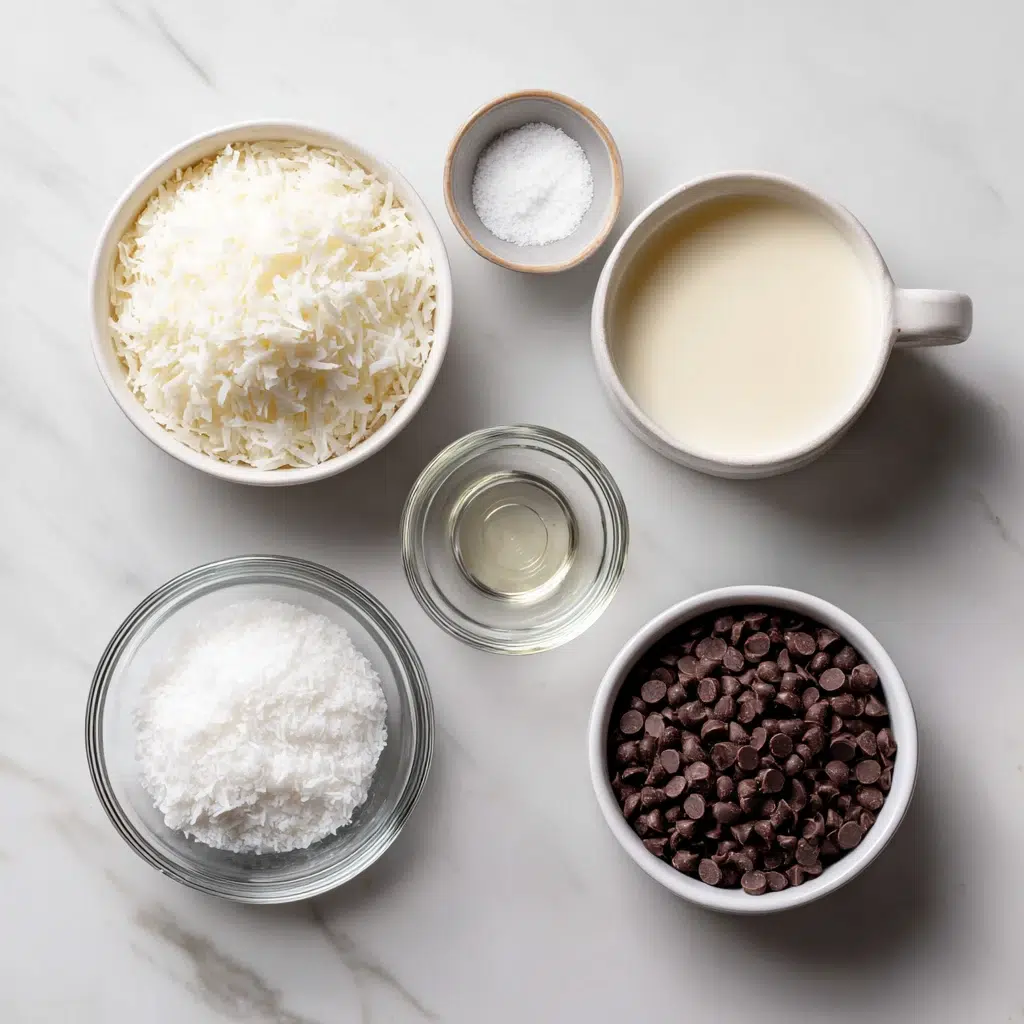
Ingredients You’ll Need
This is one of those recipes I love because the ingredients are reliable. I keep most of them around for last-minute sweet cravings, surprise guests, or when my kids ask for “something chocolate” at 8:47 p.m. These Coconut Chocolate Balls no bake like a dream, and each ingredient has a job.
- 2 cups shredded sweetened coconut, this is the body and texture, and it helps the center set firm.
- 1 cup sweetened condensed milk, the binder and sweetness that turns coconut into a rollable “dough.”
- 1 teaspoon vanilla extract, rounds out the sweetness and makes the center taste like candy-shop filling.
- 1 pinch salt, small but mighty, it keeps the flavor from tasting flat.
- 2 cups semi-sweet chocolate chips, for that classic chocolate shell.
- 1 tablespoon coconut oil, helps the chocolate melt smoother and dip thinner with a nice sheen.
Optional variations (same base): extra vanilla for a stronger vanilla note, flaky salt on top for a sweet-salty finish, mini chocolate chips mixed into the center, or extra coconut to roll the finished balls in before the chocolate sets.
If you love easy, sweet, no-bake projects like this, you might also like another simple chocolate treat for gifting trays, especially around the holidays when you need something quick that still looks thoughtful.
How to Make Coconut Chocolate Balls (Step-by-Step)
This is my favorite kind of recipe rhythm. Mix the center, let the fridge do its thing, roll while you’re waiting on life to happen, then dip and set. If you’re aiming for easy no-bake chocolate balls that look neat and uniform, a small cookie scoop is your best friend.
And if you’re making these as coconut chocolate energy balls for grab-and-go snacks, you can keep them smaller. If you want more of a dessert bite, make them a little bigger and finish with flaky salt. Either way, the method is the same.
- Line a tray. Line a baking sheet or plate with parchment paper. Make sure it fits in your fridge or freezer.
- Mix the coconut center. In a medium bowl, stir together the shredded sweetened coconut, sweetened condensed milk, vanilla extract, and a pinch of salt until everything is evenly moistened and thick.
Eva’s Tip: Do the “Squeeze Test.” If you squeeze a spoonful and it holds together like soft playdough, you’re ready. If it slumps, a short chill makes everything easier.
- Chill the mixture. Cover the bowl and refrigerate for 10 to 15 minutes so it firms up enough to scoop and roll cleanly.
Eva’s Tip: This is where patience pays off. Ten minutes can turn sticky chaos into a calm, rollable mixture.
- Scoop and roll. Use a small cookie scoop or tablespoon to portion the mixture, then roll into balls and place on the parchment-lined tray.
Eva’s Tip: Uniform size equals easier dipping. When they’re all the same size, they chill evenly and dip evenly, so you don’t end up with a few that feel too soft while the others are perfect.
- Freeze briefly for cleaner coating. Pop the rolled balls into the freezer for about 10 minutes (or refrigerate for 20 to 30 minutes) so they’re extra firm before dipping. This helps the chocolate grab quickly for that neat “truffle” look without puddles.
- Melt the chocolate. Melt the semi-sweet chocolate chips with the coconut oil until smooth (choose your preferred melting method in the section below).
- Dip and set. Dip each chilled ball into the melted chocolate, let excess drip off, then place back on parchment to set. Add flaky salt or a sprinkle of coconut on top before the chocolate firms up, if you’d like.
If you’re in a big make-ahead season, I’m right there with you. I’ll often pair these with easy frozen yogurt bites for make-ahead snacking so the fridge and freezer both have something sweet ready to go.
Mix the Coconut Center
Stir the coconut, condensed milk, vanilla, and salt until the coconut is fully moistened. You’re looking for a thick, scoopable mixture that feels sticky but moldable, like it wants to be shaped.
- It should hold together when pressed (hello, energy balls with coconut texture).
- It should not look dry or crumbly, which means it needs more mixing (or a tiny bit more condensed milk if you measured short).
- It should not feel runny, which usually means it just needs chill time.
Chill, Scoop, and Roll
Chill the mixture, then scoop and roll. This is the step that makes these feel like no-bake energy balls instead of a sticky coconut situation. If your hands are getting messy, lightly dampen them with cool water and keep going.
- 10 to 15 minutes to chill the bowl before rolling
- 10 minutes in the freezer (or 20 to 30 minutes in the fridge) after rolling, before dipping
Dip and Set
This is where the “truffle tray” magic happens. Once the centers are cold, dipping is smoother, cleaner, and faster. Use a fork to lower a ball into the chocolate, then lift it out and tap the fork gently on the side of the bowl so the excess drips off.
- Fork method: easiest for letting excess chocolate drip off cleanly.
- Toothpick method: works well, just twist gently to release onto parchment.
- Parchment set: always set on parchment, then let them firm up without sticking.
If you want them party-pretty, set them on parchment, then touch up the bottoms after they set. Just add a tiny swipe of chocolate to the base to cover any little “foot.” It’s my quiet bakery tray trick when I’m bringing a plate somewhere.
Chocolate Coating Methods (Microwave, Double Boiler, Slow Cooker)
I’ve done all three methods depending on the day. If I’m in a hurry, I microwave. If I’m making a bigger batch for a holiday tray, I like the double boiler. And if I’m doing a long, cozy kitchen afternoon, the slow cooker can be a gentle option.
Whichever method you choose, that tablespoon of coconut oil matters. It makes the chocolate flow like a ribbon, which is honestly the best way to dip smoothly. You get a thinner, shinier coating that sets with a nice snap.
- Microwave
Best for: quick batches on a weeknight
Watch-outs: heat in short bursts and stir often so it doesn’t scorch - Double boiler
Best for: steady, controlled melting and smooth dipping
Watch-outs: keep steam and water away from the chocolate - Slow cooker on LOW
Best for: keeping chocolate warm for longer dipping sessions
Watch-outs: stir occasionally and don’t rush it, melt chocolate in slow cooker on low gently for best texture
If you’re building a little gift box moment, add another simple chocolate treat for gifting trays alongside these. It’s the kind of combo that looks like you planned ahead, even if you definitely did not.
Variations & Serving Ideas
I love the base recipe as-is, but these are also very forgiving if you want to make them your own. They can lean more snacky, like coconut energy bites, or more dessert-forward, like a truffle. Either way, they’re one of my favorite “healthy-ish” sweet fixes when I want something small but satisfying.
- Extra vanilla: add 1/2 teaspoon extra vanilla for a stronger, bakery-style sweetness.
- Sweet-salty finish: top with 1 to 2 pinches flaky salt while the chocolate is still wet.
- Crunchy center: stir 1/2 cup mini chocolate chips into the coconut mixture.
- Snowy topping: sprinkle 2 to 3 tablespoons extra coconut over the chocolate before it sets.
- Chocolate swap: use darker chocolate chips if you like a less-sweet shell.
If you’re looking for a coconut chocolate balls recipe healthy enough to feel like a smarter treat, keep them smaller and pair with fruit. I’ll do a little “movie night board” with these, strawberries, pretzels, and hot tea, and everyone feels like it’s a whole event.
And if you’re in full no-bake mode, you might also love a no-bake dessert for parties and potlucks when you need something that feeds a crowd.
Make-Ahead, Storage, and Freezing Tips
These Coconut Chocolate Balls are one of my favorite make-ahead treats because they actually taste better chilled. The center gets dense and candy-like, and the coating stays snappy. I keep a small container in the fridge for lunchboxes and afternoon pick-me-ups, and somehow it always empties by midweek.
- Fridge: Store coconut chocolate balls in an airtight container for up to 1 week. Separate layers with parchment to prevent scuffs and sticking.
- Freezer: Freeze coconut chocolate balls in a single layer until solid, then transfer to a sealed container with parchment between layers. They keep well for about 2 months.
- Thawing: Thaw in the refrigerator so the coating stays neat and you don’t get condensation. Let them sit a few minutes before serving for the best bite.
If you’re stacking your freezer with little treats, I also keep a batch of high-protein frozen peanut butter Greek yogurt bites around for the days when I need something sweet that also feels like a snack.
Troubleshooting (Sticky Centers, Thick Chocolate, Messy Dipping)
If something feels off, take a breath. You didn’t ruin anything. This recipe is very fixable, and most problems come down to temperature. Coconut firms up when cold, and chocolate behaves best when it’s warm and fluid, not overheated.
- Problem: The centers are sticky and won’t roll
Cause: mixture is warm or too soft
Fix: chill first, then roll with lightly damp hands - Problem: The balls won’t hold together, they crumble
Cause: coconut wasn’t fully moistened or mixture is too dry
Fix: mix longer, then add a small splash more condensed milk if needed - Problem: You need to thicken coconut ball mixture
Cause: too much moisture or not enough coconut
Fix: add extra shredded coconut 1 tablespoon at a time, then chill - Problem: Chocolate is too thick for a smooth coating
Cause: chocolate cooled down or needs more fat for flow
Fix: rewarm gently and stir well, add a tiny bit more coconut oil if needed - Problem: Messy puddles under each ball
Cause: centers were too warm or too much chocolate clung on
Fix: keep centers cold, tap off excess, and set on parchment, then touch up the bottoms after they set
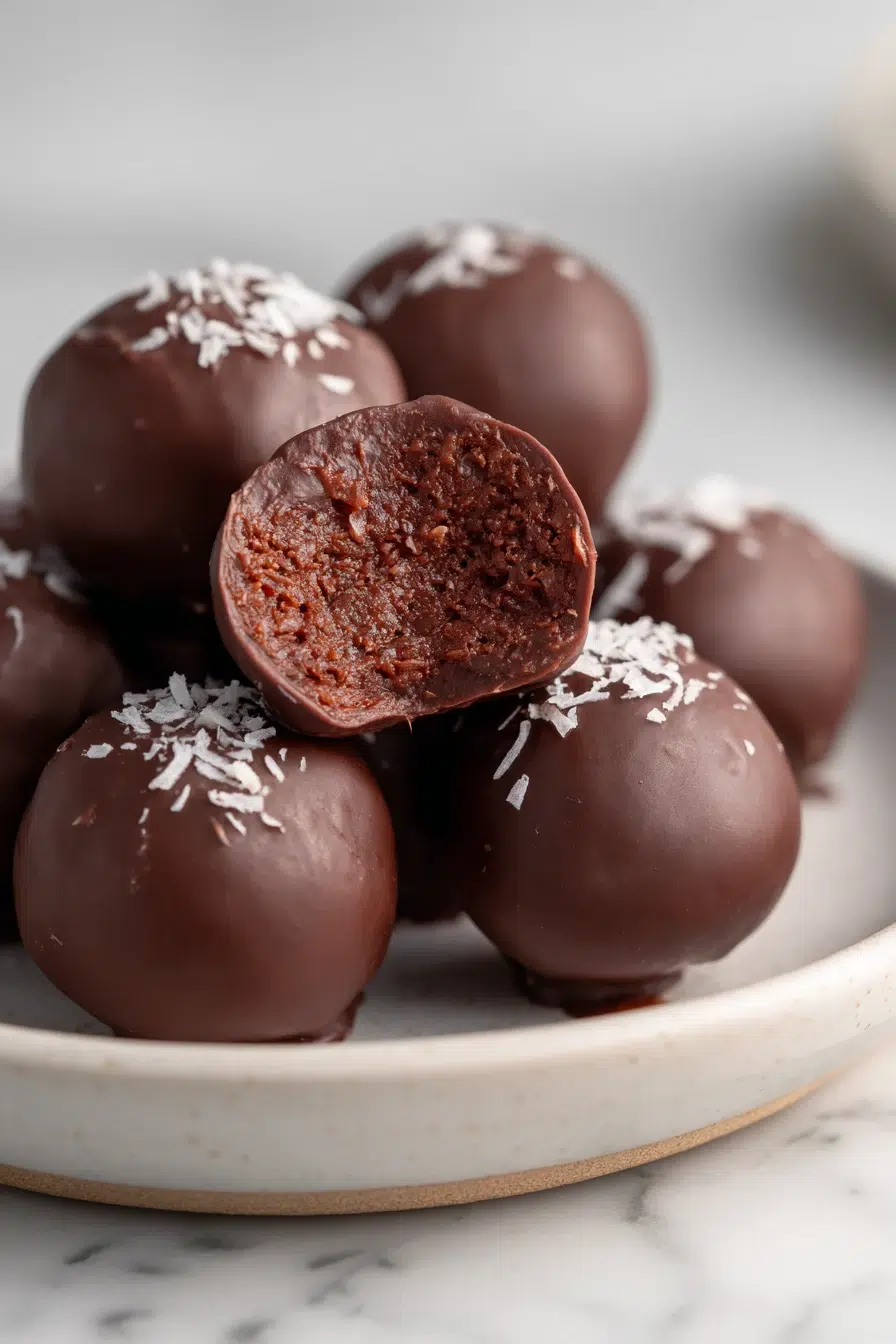
Frequently Asked Questions about Coconut Chocolate Balls
Q: How do you keep Coconut Chocolate Balls from falling apart?
Answer: Make sure the coconut is fully moistened by the condensed milk, then chill the mixture until it’s firm enough to roll without sticking heavily to your hands. Rolling with lightly damp hands also helps, and keeping the balls cold before dipping makes them sturdier during coating.
Personal Detail: I know they’re ready when the coconut mixture feels cool and holds its shape like a little snowball in my palm.
Q: What can I use instead of sweetened condensed milk in Coconut Chocolate Balls?
Answer: You can use a thick, sweet binder such as coconut cream that’s been chilled until very thick, or a homemade condensed-style mixture made by gently reducing milk with sugar until syrupy and cooled. The key is a sticky, concentrated sweetness that binds the coconut firmly.
Personal Detail: You’re aiming for a center that’s dense and candy-like, not fluffy, the same texture that makes these feel like a real treat.
Q: How do I thicken the coconut ball mixture if it’s too sticky or soft?
Answer: Chill the mixture first, because coconut firms up as it cools. If it’s still too soft, mix in a small amount of extra shredded coconut a tablespoon at a time until it becomes scoopable and holds together when pressed.
Personal Detail: This is my kitchen patience lesson, 10 minutes in the fridge can change everything.
Q: How long do Coconut Chocolate Balls need to chill before dipping in chocolate?
Answer: Chill the rolled balls until they feel firm all the way through, typically about 20–30 minutes in the refrigerator, or a shorter stint in the freezer if you’re in a hurry. Firmer centers dip more cleanly and help the coating set faster.
Personal Detail: I use that chill time to line the tray with parchment and set up my little dipping station, because future-me appreciates it.
Q: Can I melt the chocolate in a slow cooker, and how long does it take on LOW?
Answer: Yes. Add the chocolate chips and coconut oil to the slow cooker and heat on LOW, stirring occasionally, until smooth. Timing varies by slow cooker, but plan for roughly 30–60 minutes and keep an eye on it so the chocolate melts gently.
Personal Detail: It’s a cozy “set it and stir” rhythm, and the whole kitchen smells like warm chocolate while you work.
Q: What’s the best way to dip and coat Coconut Chocolate Balls smoothly?
Answer: Keep the centers cold, use melted chocolate that’s fluid (not thick), and dip using a fork or dipping tool so excess chocolate can drip off. Tap gently on the side of the bowl, then slide the ball onto parchment. Work in small batches, keeping the rest chilled.
Personal Detail: My favorite finishing touch is a pinch of coconut or flaky salt right before the coating sets.
Q: How do you store Coconut Chocolate Balls, and how long do they last?
Answer: Store them in an airtight container in the refrigerator to keep the centers firm and the coating snappy. They’ll stay at their best for about 1 week. For stacking, separate layers with parchment to prevent sticking and scuffs.
Personal Detail: I keep a grab-and-go container front and center, and it mysteriously empties by midweek.
Q: Can you freeze Coconut Chocolate Balls, and how do you thaw them?
Answer: Yes, freeze in a single layer until solid, then transfer to a sealed container with parchment between layers. Thaw in the refrigerator so they come back evenly and the coating stays neat. Let them sit a few minutes before serving for the best bite.
Personal Detail: The first bite after thawing is my favorite, cool, dense, and extra fudgy.
Q: How do you fix chocolate that seizes or gets too thick while coating?
Answer: If the chocolate becomes too thick, gently warm it again and stir well. A small amount of coconut oil can help loosen the texture and make it smoother for dipping. Also avoid introducing moisture, which can make chocolate clump.
Personal Detail: It looks scary for a minute, but it usually comes back with gentle heat and stirring.
Q: How do you reheat/melt the chocolate coating again if it starts setting during dipping?
Answer: Rewarm the chocolate briefly and gently (short bursts if using a microwave, or low heat over a double boiler), stirring between warm-ups until it’s fluid again. Keep the bowl covered between dips to hold warmth, and work in batches for the smoothest finish.
Personal Detail: I do it assembly-line style, dip a few, set a few, then warm the chocolate if needed.
If you need a treat that feels a little fancy but fits into real life, Coconut Chocolate Balls are it. They’re the kind of coconut chocolate balls no bake recipe that makes you look like you planned ahead, even if you made them in your pajamas while the dishwasher ran.
Thank you for cooking with me today, it means so much to have you here in my little NYC kitchen.
Come hang out with me over on Pinterest for more cozy, family-friendly recipes.
Print
Coconut Chocolate Balls (No-Bake, 6 Ingredients)
- Total Time: 25
- Yield: 24 1x
- Diet: Vegetarian
Description
Coconut Chocolate Balls are an easy no-bake treat with coconut, condensed milk, and a smooth chocolate coating, perfect for make-ahead snacks.
Ingredients
2 cups shredded sweetened coconut
1 cup sweetened condensed milk
1 teaspoon vanilla extract
1 pinch salt
2 cups semi-sweet chocolate chips
1 tablespoon coconut oil
Instructions
1. Line a tray. Line a baking sheet or plate with parchment paper. Make sure it fits in your fridge or freezer.
2. Mix the coconut center. In a medium bowl, stir together the shredded sweetened coconut, sweetened condensed milk, vanilla extract, and a pinch of salt until everything is evenly moistened and thick.
3. Chill the mixture. Cover the bowl and refrigerate for 10 to 15 minutes so it firms up enough to scoop and roll cleanly.
4. Scoop and roll. Use a small cookie scoop or tablespoon to portion the mixture, then roll into balls and place on the parchment-lined tray.
5. Freeze briefly for cleaner coating. Pop the rolled balls into the freezer for about 10 minutes (or refrigerate for 20 to 30 minutes) so they’re extra firm before dipping.
6. Melt the chocolate. Melt the semi-sweet chocolate chips with the coconut oil until smooth.
7. Dip and set. Dip each chilled ball into the melted chocolate, let excess drip off, then place back on parchment to set. Add flaky salt or a sprinkle of coconut on top before the chocolate firms up, if you’d like.
Notes
Store coconut chocolate balls in an airtight container for up to 1 week. Separate layers with parchment to prevent scuffs and sticking.
Freeze coconut chocolate balls in a single layer until solid, then transfer to a sealed container with parchment between layers. They keep well for about 2 months.
- Prep Time: 10
- Category: Dessert
- Method: No Cook
- Cuisine: American
Nutrition
- Serving Size: 1 ball
- Calories: 120
- Sugar: 10
- Sodium: 20
- Fat: 7
- Saturated Fat: 5
- Unsaturated Fat: 1
- Trans Fat: 0
- Carbohydrates: 14
- Fiber: 2
- Protein: 2
- Cholesterol: 5