
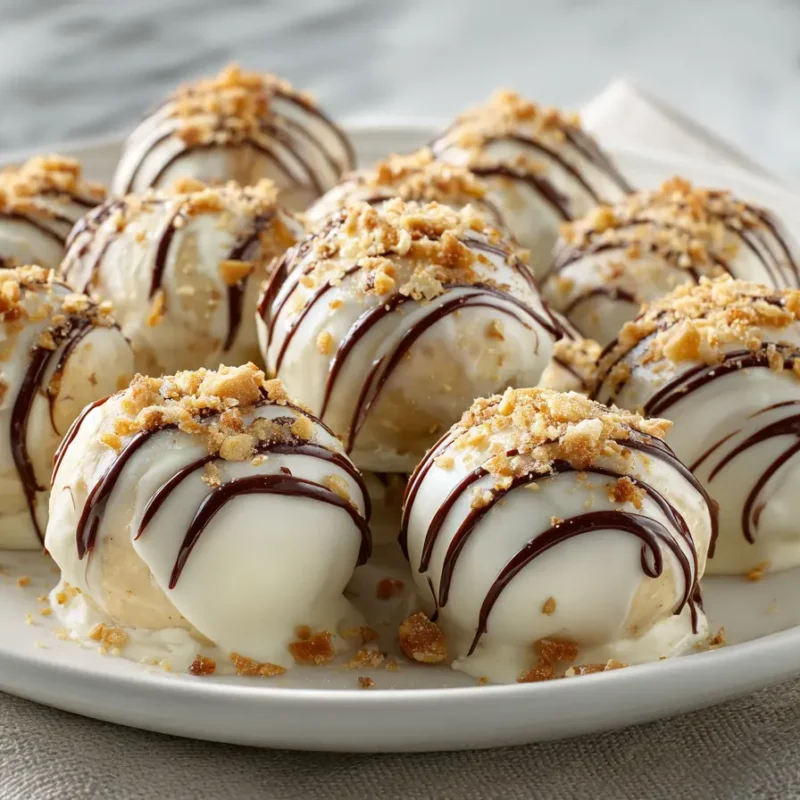
No-Bake Peanut Butter Cheesecake Balls are the kind of little treat that makes you feel like you “did the thing” in the kitchen, even when your day has been a lot. They’re creamy, sweet, and snackable in the best way, like cheesecake you can pick up with your fingers. And because they’re bite-size desserts, they’re perfect for parties, school events, or those nights when you just want something cozy after dinner without turning on the oven.
The first time I made these, it was one of those New York afternoons where everyone came home hungry and chatty at the exact same time. Lily was doing homework at the counter, Noah was “taste testing” everything within reach, and Emma was begging to be in charge of stirring. I needed a win that didn’t require baking, and these peanut butter dessert balls saved the day.
Eva’s Note: If your house loves peanut butter as much as mine does, you’ll probably also love these Frozen peanut butter treats. They’re a lifesaver when you want something sweet and cold.
Why Peanut Butter and Cream Cheese Make a Perfect Pair
Peanut butter and cream cheese together is one of those combos that just makes sense once you taste it. The cream cheese brings that tangy, cheesecake-like flavor, and the peanut butter adds richness and a toasty, nutty sweetness. When you mix them, you get a peanut butter filling that tastes like a dessert you’d pay too much for at a fancy bakery, but you made it in your own kitchen, in leggings, with a kid asking for a snack every six minutes.
Texture-wise, it’s also a dream. Cream cheese makes everything smooth and creamy, while peanut butter gives it structure so your cheesecake balls don’t feel like plain frosting. And then the graham cracker crumbs come in and do their job, adding that classic “cheesecake crust” vibe without any baking or pressing into a pan.
“It’s like cheesecake met a peanut butter cup, and they decided to become best friends.”
I’ve tested these a few different ways, mostly because my crew has opinions. Noah likes them extra peanut buttery, Lily prefers a smoother center, and Emma just wants the chocolate coating, then asks if she can have “one more tiny one” five times. The good news is, this recipe hits that sweet spot where everyone feels like it was made just for them.
Ingredient Notes
These Peanut Butter Cheesecake Balls are made with simple grocery store ingredients, but each one has a job to do. Here’s what to know before you start, especially if you’re trying to keep the texture just right for rolling and dipping.
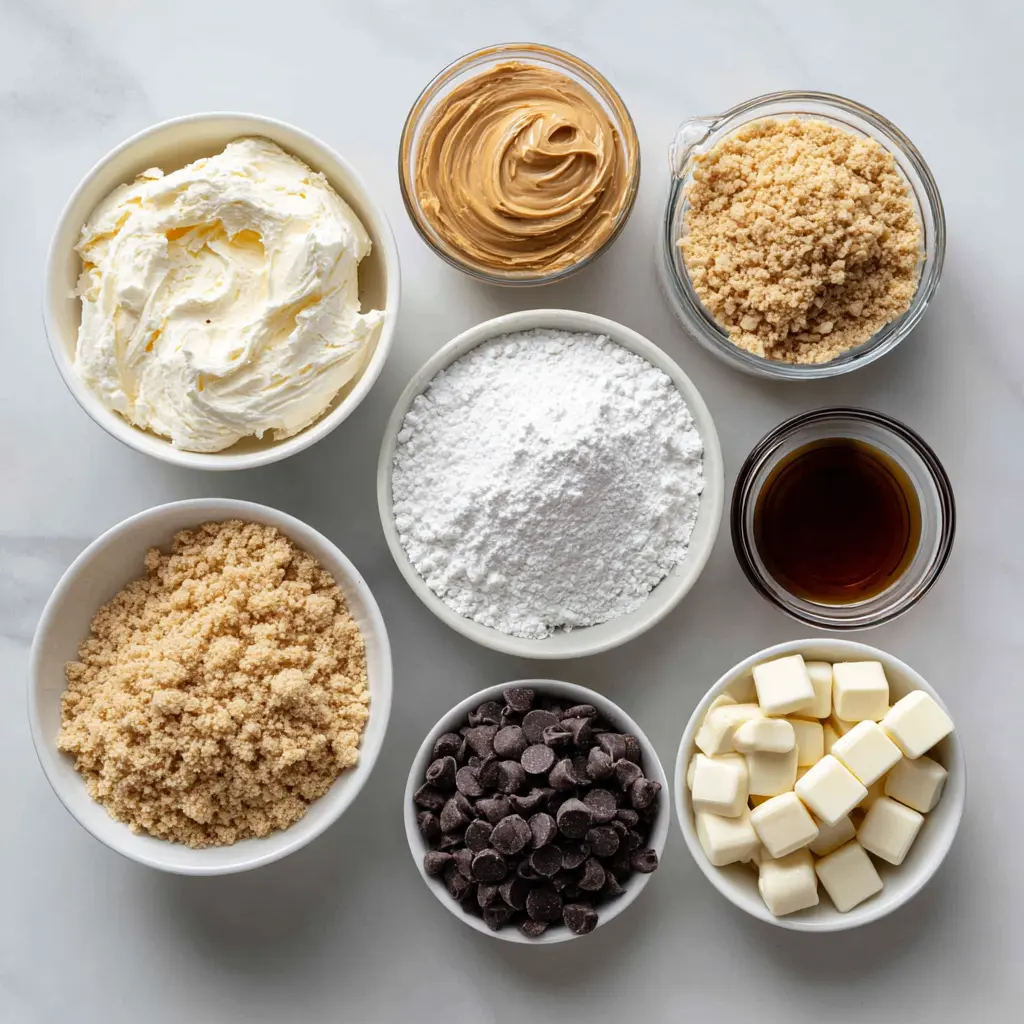
- 8 oz cream cheese, softened, this is the base of your cheesecake flavor, so let it sit out until it’s easy to mix.
- 1/2 cup creamy peanut butter, creamy keeps the filling smooth and easy to shape.
- 1 cup powdered sugar, sweetens and also helps firm up the mixture.
- 1 tsp vanilla extract, makes everything taste warmer and more “dessert shop.”
- 1 cup graham cracker crumbs (divided use), for that classic cheesecake crust feel, plus extra helps with rolling and texture.
- 1 1/2 cups white chocolate chips, sweet, creamy coating that looks pretty on a platter.
- 1/2 cup semisweet or dark chocolate chips, great for drizzling or dipping for that chocolate contrast.
- 1/4 cup crushed peanuts or extra graham cracker crumbs for topping, adds crunch and makes them look “gourmet desserts” level with almost no effort.
If you can, grab a cream cheese block instead of the whipped kind in a tub. The tub version can be softer, which makes no bake cheesecake bites harder to roll. I learned that the messy way, with sticky hands and a tray of “abstract” shapes.
How to Make No-Bake Peanut Butter Cheesecake Balls
This is the fun part, and it’s honestly pretty low stress. You’re basically mixing, chilling, rolling, and dipping. The biggest “secret” is giving yourself enough chill time so the cheesecake balls behave.
- Mix the base. In a medium bowl, beat the softened cream cheese and creamy peanut butter until smooth and fully combined.
- Sweeten and flavor. Add the powdered sugar and vanilla extract. Mix again until the mixture looks thick and creamy.
- Add graham crumbs. Stir in 3/4 cup of the graham cracker crumbs (save the rest for rolling or adjusting texture). The mixture should look like a soft dough.
- Chill the mixture. Cover the bowl and refrigerate for at least 1 hour, or until it’s firm enough to scoop and roll.
- Roll into balls. Scoop out small portions (about 1 tablespoon each) and roll into smooth balls. If the mixture sticks to your hands, lightly coat your palms with a little of the remaining graham crumbs.
- Chill again. Place the balls on a parchment-lined baking sheet and refrigerate for 20 to 30 minutes while you melt the chocolate.
- Melt the chocolate. Melt the white chocolate chips in a microwave-safe bowl in short bursts, stirring often until smooth. Melt the semisweet or dark chocolate chips in a separate bowl the same way.
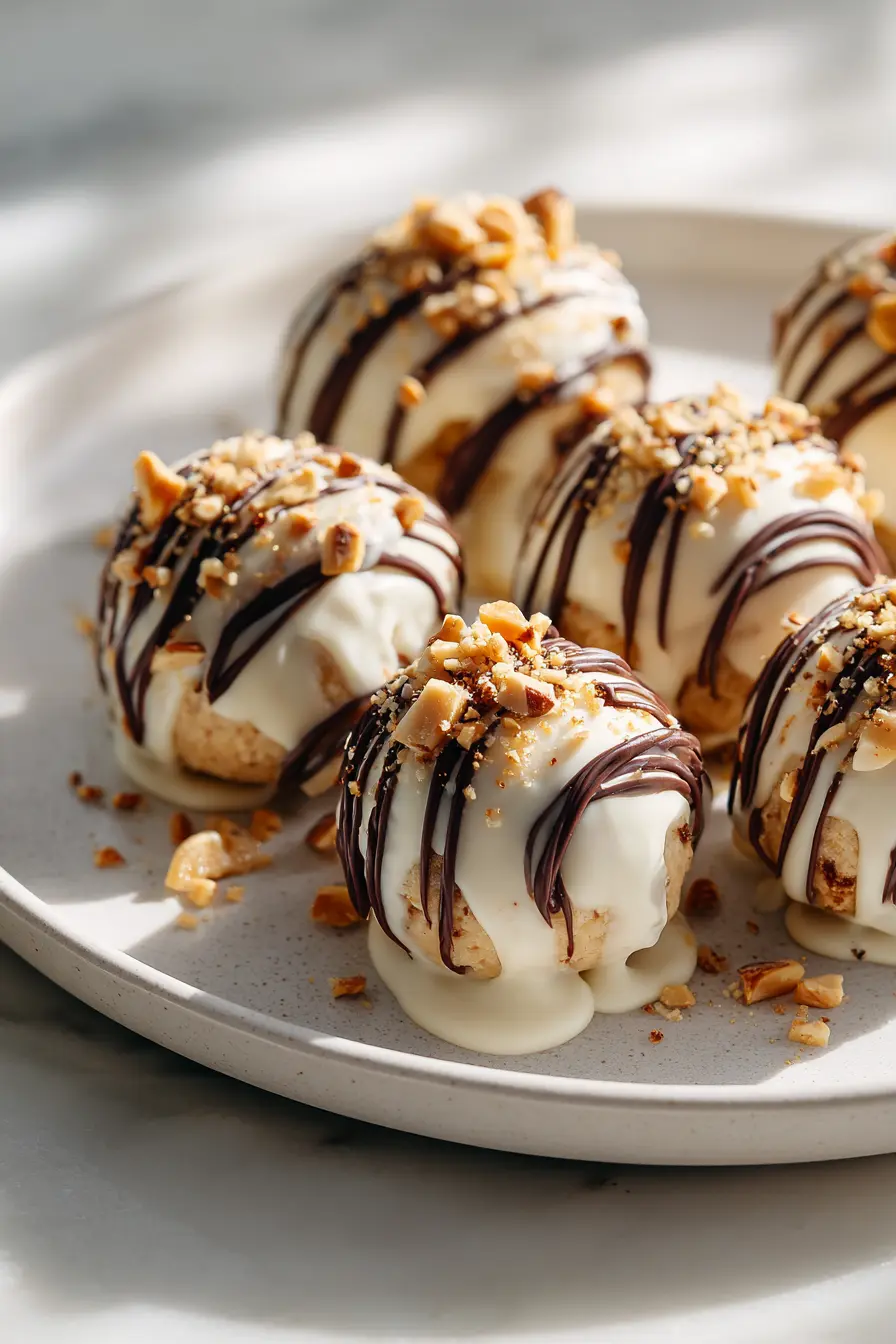
- Dip and decorate. Dip each ball into white chocolate, let the excess drip off, then place back on the parchment. Drizzle with the darker chocolate or dip some fully for variety. Sprinkle with crushed peanuts or extra graham cracker crumbs before the coating sets.
- Set the coating. Refrigerate until the chocolate is firm, about 20 minutes. Then they’re ready to serve.
Eva’s Note: If you’re building a whole dessert table, I always like pairing these with other Chocolate and peanut butter recipes. It’s a crowd-pleasing theme, and it makes you look wildly organized.
Quick tip: If your mixture feels too soft even after mixing, stir in a little more of the reserved graham cracker crumbs, 1 tablespoon at a time, then chill. It’s an easy fix.
Chilling and Shaping Tips
Chill time matters here, truly. I once rushed the chill time, and the results were less than ideal. Think sticky hands, lopsided cheesecake balls, and Emma calling them “peanut butter snowballs” because they were so messy. A little patience goes a long way, and it turns these into neat, rollable no bake cheesecake bites.
- Chill before rolling: Refrigerate the mixture at least 1 hour. If your kitchen is warm, you may need longer.
- If they’re too soft: Pop the bowl back in the fridge for 20 to 30 minutes, then try again.
- Sticky hands fix: Rub a little graham cracker crumb on your palms before rolling.
- Keep the tray cold: If you’re working slowly, refrigerate the tray of rolled balls while you melt chocolate so they stay firm enough to dip.
Troubleshooting callout: If the mixture is firm but cracking when you roll, let it sit at room temperature for 5 minutes, then roll again. Cream cheese can stiffen up a little too much if it gets very cold.
Chocolate Coating Options
The chocolate coating is where these go from “easy snack” to “gourmet desserts” energy. My family is split on favorites. Lily loves the white chocolate look, Noah votes for dark chocolate every time, and Emma wants sprinkles, even when we are not using sprinkles.
- White chocolate coating: Sweet and creamy, and it makes the drizzle stand out beautifully.
- Semisweet chocolate: Classic, balanced, and not too sweet.
- Dark chocolate: Richer and a little more grown-up tasting, especially nice with the peanut butter filling.
- Two-tone finish: Dip in white chocolate, then drizzle semisweet or dark chocolate over the top for that bakery-style look.
Chocolate coating hack: Try using a double boiler for a smooth melt. It’s a trick my grandmother always used. If you go the microwave route, keep the bursts short and stir often so the chocolate doesn’t scorch.
Serving and Presentation Ideas
Because these are bite size desserts, you can make them look festive with almost no effort. I love serving them on a big platter with a mix of white and dark chocolate coatings so it looks like you planned a whole “dessert moment.” If it’s a holiday or a school gathering, I’ll add little paper liners, the mini cupcake kind, and suddenly they look like fancy candy shop treats.
- Dessert board: Add fruit, cookies, and a few chocolate-coated cheesecake balls for a simple spread.
- Party tray: Arrange in neat rows and sprinkle crushed peanuts right in the center of each one for a polished look.
- Giftable treats: Pack in a small container with parchment between layers, then keep chilled until gifting.
Presentation flair: Adding a sprinkle of crushed peanuts gives it that extra crunch and visual appeal. It also helps people quickly spot which ones are “peanut butter forward,” which matters when you’ve got a tray of mixed sweets.
If you’re in a full cheesecake mood, I also love pointing folks toward Decadent cheesecake options for when you want the slice-and-fork version.
Storing and Freezing Tips
These Peanut Butter Cheesecake Balls are a make-ahead dream, which is a big deal in my house. If I know we have a busy week coming, I’ll make a batch on Sunday night after the kitchen is finally quiet. Then when someone asks for “something sweet,” I can pull out a few cheesecake balls and feel like I’m winning at life.
- Refrigerator: Store in an airtight container in the fridge for up to 1 week.
- Layering tip: Place parchment paper between layers so the chocolate coating stays pretty.
- Freezer: Freeze in a freezer-safe container for up to 2 months. Thaw overnight in the fridge for the best texture.
- Serving from cold: They taste great chilled, but if you want a softer bite, let them sit out for 5 to 10 minutes before serving.
Eva’s Note: For family gatherings, I store them in a flat container so they don’t get squished. It’s not fancy, but it works, and that’s my favorite kind of kitchen tool.
Frequently Asked Questions about No-Bake Peanut Butter Cheesecake Balls
Q: How do you make No-Bake Peanut Butter Cheesecake Balls firm enough to roll?
Make sure to chill the mixture thoroughly before shaping. If they’re still too soft, extend the chilling time. I had to experiment with chill time the first time I made them, and once I stopped rushing, they rolled like a dream.
Q: Can you use crunchy peanut butter instead of creamy peanut butter?
Yes, but expect a chunkier texture. It adds a delightful crunch some people enjoy. Noah is that person in my house, he loves the extra crunch and claims it makes them “more snackable.”
Q: Do No-Bake Peanut Butter Cheesecake Balls need to be refrigerated?
Yes, keep them refrigerated to maintain their shape and freshness. I keep them in an airtight container and pull out a small plate at a time when we have friends over so they stay chilled.
Q: How do you melt the chocolate smoothly for coating?
Use a microwave or double boiler, stirring frequently to avoid burning. My first attempt years ago was overheated and grainy, and now I stick to short microwave bursts and lots of stirring, or I use a gentle double boiler when I have a few extra minutes.
Q: Can you make No-Bake Peanut Butter Cheesecake Balls ahead of time?
Absolutely, they’re perfect for making ahead and storing in the fridge. I love prepping them before holidays because it’s one less thing to do on the day everyone is hungry and you’re trying to keep the kitchen clean.
Q: How do you store No-Bake Peanut Butter Cheesecake Balls?
Store in an airtight container in the fridge for up to a week. I use a wide, flat container so they don’t stack too high, and I always add parchment between layers to keep the coating looking nice.
If you’re craving a sweet treat that feels special without making your whole kitchen look like a bakery exploded, No-Bake Peanut Butter Cheesecake Balls are it. They’re creamy, chocolatey, and easy to tuck into the fridge for whenever you need a little pick-me-up. If you make them, I hope they bring the same cozy, happy energy they bring to my table.
Thank you for cooking with me, it means more than you know.
Come hang out with me on Pinterest for more cozy, family-friendly recipes.
Print
No-Bake Peanut Butter Cheesecake Balls
- Total Time: 1 hour 45 minutes
- Yield: 24 balls 1x
- Diet: Vegetarian
Description
No-Bake Peanut Butter Cheesecake Balls are creamy, bite-sized desserts with peanut butter, graham cracker crumbs, and chocolate for easy sweet treats.
Ingredients
8 oz cream cheese, softened
1/2 cup creamy peanut butter
1 cup powdered sugar
1 tsp vanilla extract
1 cup graham cracker crumbs (divided use)
1 1/2 cups white chocolate chips
1/2 cup semisweet or dark chocolate chips
1/4 cup crushed peanuts or extra graham cracker crumbs for topping
Instructions
1. Mix the base. In a medium bowl, beat the softened cream cheese and creamy peanut butter until smooth and fully combined.
2. Sweeten and flavor. Add the powdered sugar and vanilla extract. Mix again until the mixture looks thick and creamy.
3. Add graham crumbs. Stir in 3/4 cup of the graham cracker crumbs (save the rest for rolling or adjusting texture). The mixture should look like a soft dough.
4. Chill the mixture. Cover the bowl and refrigerate for at least 1 hour, or until it’s firm enough to scoop and roll.
5. Roll into balls. Scoop out small portions (about 1 tablespoon each) and roll into smooth balls. If the mixture sticks to your hands, lightly coat your palms with a little of the remaining graham crumbs.
6. Chill again. Place the balls on a parchment-lined baking sheet and refrigerate for 20 to 30 minutes while you melt the chocolate.
7. Melt the chocolate. Melt the white chocolate chips in a microwave-safe bowl in short bursts, stirring often until smooth. Melt the semisweet or dark chocolate chips in a separate bowl the same way.
8. Dip and decorate. Dip each ball into white chocolate, let the excess drip off, then place back on the parchment. Drizzle with the darker chocolate or dip some fully for variety. Sprinkle with crushed peanuts or extra graham cracker crumbs before the coating sets.
9. Set the coating. Refrigerate until the chocolate is firm, about 20 minutes. Then they’re ready to serve.
Notes
If your mixture feels too soft even after mixing, stir in a little more of the reserved graham cracker crumbs, 1 tablespoon at a time, then chill. It’s an easy fix.
Store in an airtight container in the fridge for up to 1 week. Place parchment paper between layers so the chocolate coating stays pretty.
Freeze in a freezer-safe container for up to 2 months. Thaw overnight in the fridge for the best texture.
- Prep Time: 15 minutes
- Cook Time: 0 minutes
- Category: Dessert
- Method: No Cook
- Cuisine: American
Nutrition
- Serving Size: 1 ball
- Calories: 120
- Sugar: 10
- Sodium: 60
- Fat: 8
- Saturated Fat: 4
- Unsaturated Fat: 3
- Trans Fat: 0
- Carbohydrates: 12
- Fiber: 1
- Protein: 2
- Cholesterol: 15