
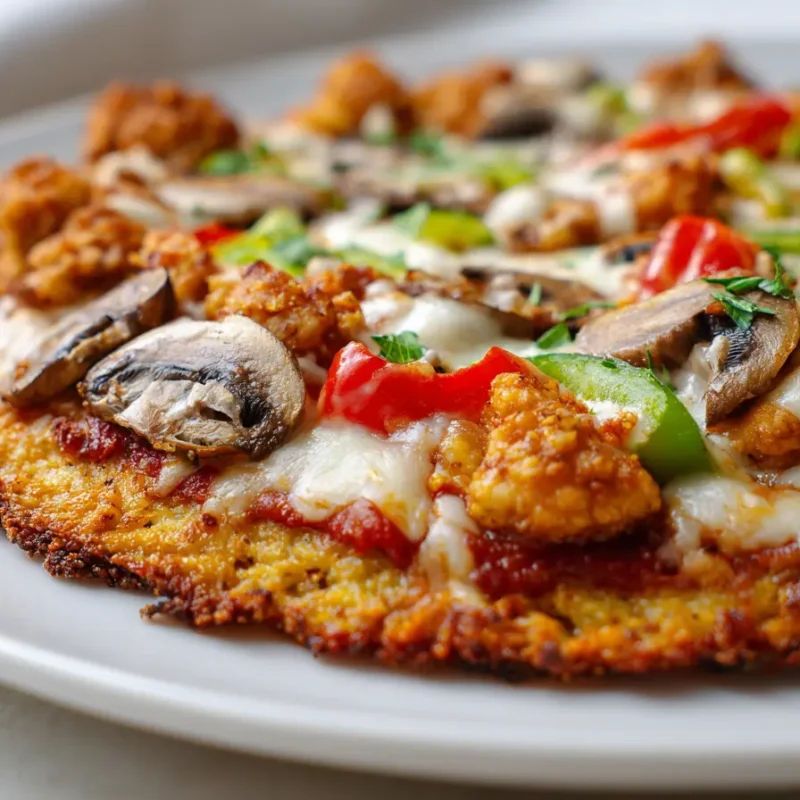
High Protein Chicken Crust Pizza is a low-carb, high-protein dinner with a crispy chicken base, melty cheese, and easy pizza night comfort.
When you want pizza night comfort without the heavy carb crash, this High Protein Chicken Crust Pizza is the little miracle that shows up right on time. It’s cheesy, satisfying, and honestly fun to make, especially if your week has been a lot. I love that it fits into low carb meals easy plans, but still feels like a real treat, not a “diet dinner.”
In my house, pizza night is basically a family meeting with extra cheese. Lily likes to “manage” the toppings like she’s running a tiny restaurant. Noah goes full food critic. Emma tries to sneak shredded cheese like it’s her job. This chicken crust pizza slid into our routine when I needed more healthy high protein meals that still made everyone happy at the table.
Why This High Protein Chicken Crust Pizza Is Perfect for Low-Carb Dinners
If you’ve ever tried to do pizza night while aiming for high protein recipes dinner goals, you know the struggle. Traditional crust can be delicious, but it can also leave you hungry again an hour later, or just feeling weighed down. This recipe flips the script by making the crust out of chicken, eggs, and cheese, so the base is the protein.
What I love most is how “normal” it feels once it’s baked and topped. You still get that warm, melty, pizza-shop vibe, but it lands more like one of those healthy food dishes that actually keeps you full. It’s also naturally gluten-free, and it’s a great low carb pizza recipe option when you want something cozy but still aligned with your week.
Pull quote: Low-carb dinners don’t have to feel like you’re missing out. Sometimes they just need a smarter crust.
If you’re the kind of person who likes to keep a few “backup dinners” in your pocket, this one belongs on that list. And if you want more ideas in the same comfort-food lane, I’ve shared other low-carb pizza alternatives that are just as weeknight-friendly.
How to Make High Protein Chicken Crust Pizza
The first time I made this, I was honestly skeptical. Chicken as a crust sounded like something the internet made up at 2 a.m. But I had ground chicken in the fridge, I needed a high protein dinner that didn’t require a million sides, and my kids were begging for pizza. So I tried it.
When it came out of the oven, Noah took one bite and did that rare “silent nod” that means it’s actually good. Lily asked if we could make it again, which is basically a five-star review in teenager language. Emma, of course, just wanted to hold the biggest slice possible.
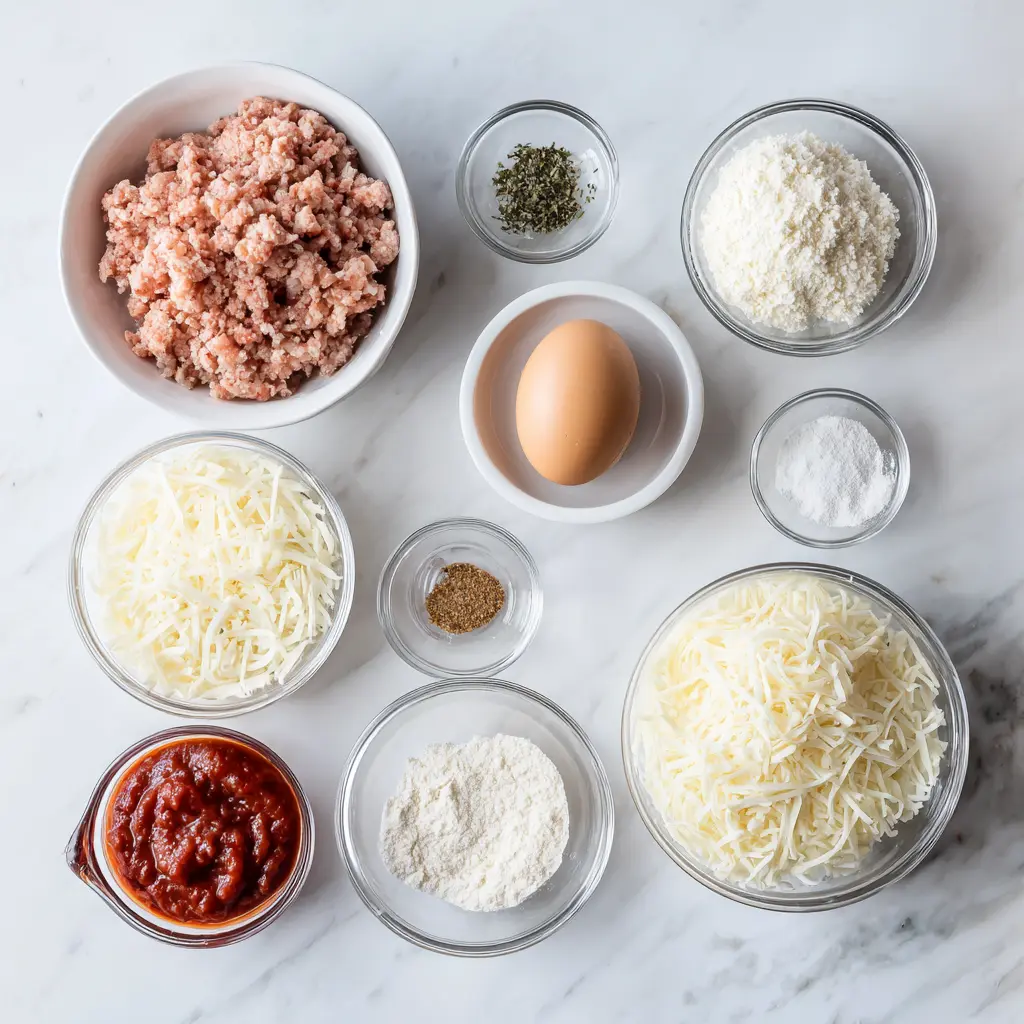
Ingredients (Chicken Crust Pizza)
- • 1 pound ground chicken
- • 1 large egg
- • 1/2 cup shredded mozzarella cheese (plus more for topping)
- • 1/4 cup grated Parmesan cheese
- • 1 teaspoon Italian seasoning
- • 1/2 teaspoon garlic powder
- • 1/2 teaspoon onion powder
- • 1/2 teaspoon salt
- • 1/4 teaspoon black pepper
- • 1/2 cup pizza sauce (or marinara)
- • 1 to 1 1/2 cups shredded mozzarella cheese (for topping)
- • 1 to 2 cups toppings of choice (see ideas below)
Step-by-step instructions
- Prep your oven and pan. Heat the oven to 425°F. Line a baking sheet with parchment paper (this matters, it helps prevent sticking).
- Mix the crust. In a large bowl, combine the ground chicken, egg, 1/2 cup mozzarella, Parmesan, and all seasonings. Mix until it looks evenly combined.
- Shape it. Place the mixture on the parchment and press it into a thin circle or rectangle, about 1/4-inch thick. Try to keep the thickness even so it bakes evenly.
- Prebake. Bake for 15 to 18 minutes, until the top looks set and lightly golden, and you see some moisture bubbling at the edges.
- Blot and flip (optional but helpful). Carefully blot any excess moisture with paper towels. If you want extra crispness, gently flip the crust and bake 5 minutes more.
- Add sauce and toppings. Spread the pizza sauce on top, sprinkle on the cheese, and add your toppings.
- Bake again. Return to the oven for 8 to 12 minutes, until the cheese is melted and bubbly.
- Rest, slice, and serve. Let it rest for 5 minutes so it firms up, then slice and enjoy.
Eva’s Note: The smell when you mix the chicken with garlic, Italian seasoning, and cheese is the moment you realize this is not “sad diet food.” It smells like real dinner, the kind that makes everyone wander into the kitchen asking, “What are we having?”
Best Tips for Shaping and Prebaking the Crust
Shaping is where this recipe goes from “interesting idea” to “wow, this actually works.” The goal is a crust that’s sturdy enough to hold toppings, but still tender inside.
- • Use parchment paper, not foil. Parchment makes flipping and lifting so much easier.
- • Press it thin, about 1/4-inch. A thick crust stays soft and can feel a little steamy.
- • Even thickness matters. If the edges are super thin, they can overcook before the center sets.
- • Prebake until set. If it still looks wet and jiggly, it’s not ready for sauce.
- • Rest before slicing. Give it 5 minutes to firm up, especially if you loaded on toppings.
If you’re the kind of cook who likes extra reassurance, I also share more tips for a sturdy crust in another pizza-style recipe that’s great for busy nights.
Getting a Crisp Chicken Crust Without Drying It Out
Here’s the balance: you want crisp edges and a firm base, but you don’t want the whole thing to turn into dry chicken cardboard. (We’ve all had a kitchen experiment like that, right?) I tested this a few times, and the best results came from two things: going thin and managing moisture.
Critical crispness tips:
- • Blot after prebaking to remove surface moisture before you add sauce.
- • Flip for 5 minutes if you want a sturdier bite, especially if you plan to pick up slices with your hands.
- • Don’t overload sauce. Keep it to about 1/2 cup, or the center can soften.
- • Use a hot oven at 425°F to encourage browning.
When you nail it, the first bite has that satisfying little crunch at the edge. It’s the kind of “I did that” moment that makes a weeknight feel less chaotic.
Easy Topping Ideas and Simple Swaps
This is where you can make it your own, and it’s also how I keep it exciting for my kids. We treat toppings like a mini pizza bar, which turns dinner into something fun instead of another task. And if you’re also hunting for healthy snacks recipes, leftover slices are honestly great cold or reheated.
Topping ideas (mix and match):
- • Classic: mozzarella, pepperoni-style turkey slices, mushrooms, and bell peppers
- • Veggie-loaded: spinach, red onion, mushrooms, and olives
- • BBQ-ish: BBQ sauce swap for pizza sauce, cooked chicken pieces, red onion, and cheddar
- • White pizza: olive oil, garlic, mozzarella, spinach, and a sprinkle of Parmesan
- • Spicy: jalapeños, red pepper flakes, and extra cheese
Simple swaps:
- • Ground turkey can replace ground chicken.
- • Dairy-free cheese can work, but it may be a little less sturdy.
- • Marinara works if you don’t have pizza sauce.
Our family favorite is mushrooms, peppers, and extra cheese, mostly because Noah says it tastes “like real pizza,” which makes me laugh every time since, well, it is.
Meal Prep, Storage, and Reheating Tips
Leftovers in my house are a competitive sport. If I don’t pack them up quickly, someone will “accidentally” take a second slice while cleaning up. This recipe is a lifesaver for low carb meals easy lunches, and it holds up better than you’d expect.
- • Fridge: Store slices in an airtight container for 3 to 4 days.
- • Best container trick: Put parchment between slices so they don’t stick together.
- • Reheat (best): Oven at 375°F for 8 to 10 minutes on a baking sheet.
- • Reheat (fast): Skillet over medium heat, cover with a lid for 4 to 6 minutes.
- • Microwave: Works in a pinch, but the crust will soften.
If you like having a few protein-forward meals in rotation, you might also want these storage and reheating tips for another cozy, high-protein favorite.
Make-ahead and freezing guidance
- • Make-ahead crust: Prebake the crust, cool completely, then refrigerate (wrapped well) for up to 24 hours. Add toppings and bake when ready.
- • Freeze: Freeze baked slices for up to 2 months for best quality.
- • Freeze tip: Wrap slices individually, then store in a freezer bag to prevent freezer burn.
- • Reheat from frozen: Bake at 375°F for 12 to 15 minutes, until hot and bubbly.
Common Mistakes to Avoid
I’ve made every one of these mistakes so you don’t have to. The first time, I got a little too confident with sauce and ended up with a soft center. It still tasted great, but it was more “pizza casserole on a crust” than sliceable pizza.
- • Making the crust too thick: Press it thinner so it can crisp up.
- • Skipping the prebake: The crust needs time to set before toppings.
- • Over-saucing: Too much sauce makes it soggy fast.
- • Not draining wet toppings: If you use mushrooms or spinach, cook off moisture first.
- • Slicing too soon: Rest 5 minutes so it holds together.
Serving Ideas for a Balanced High Protein Dinner
This pizza can absolutely be the whole meal, especially on busy nights. But if you want it to feel more like a complete, sit-down healthy high protein meals dinner, a simple side goes a long way.
- • Big salad with cucumbers, tomatoes, and a simple vinaigrette
- • Roasted broccoli or roasted Brussels sprouts
- • Cauliflower “breadsticks” or roasted cauliflower florets
- • Crunchy veggie tray with ranch or Greek yogurt dip
If you’re building out a week of dinners that feel nourishing but still comforting, you’ll find more ideas in these balanced protein meals that are made for real life.
Frequently Asked Questions about High Protein Chicken Crust Pizza
Q: What is high protein chicken crust pizza made of?
✅ Answer: High protein chicken crust pizza is made with ground chicken, eggs, cheese, and seasonings.
When I mix it up, the garlicky, herby smell hits first, then the cheese, and it already feels like pizza night before it even goes in the oven.
Q: How do you keep chicken crust pizza from falling apart?
✅ Answer: Use eggs and cheese as binders and prebake the crust for stability.
I learned this after a too-soft first attempt, once I prebaked until fully set and let it rest before slicing, it held together like a champ.
Q: Can I use ground turkey instead of ground chicken?
✅ Answer: Yes, ground turkey can be used as an alternative.
I’ve swapped turkey in when it was what I had, and it still gave me that sturdy, savory crust with a slightly lighter flavor.
Q: How do you make chicken crust pizza crispy?
✅ Answer: Prebake the crust and ensure it’s thin enough to crisp up.
That thin crust is the secret, when you get it right, the edge has a real, satisfying crunch.
Q: How long does chicken crust pizza last in the fridge?
✅ Answer: It lasts 3–4 days when stored properly.
I love grabbing a slice for a quick lunch, it’s one of those leftovers that actually feels like a treat.
Q: What is the best way to reheat chicken crust pizza?
✅ Answer: Reheat in the oven or a skillet to maintain crispness.
My go-to is the skillet with a lid for a few minutes, it brings back the crisp bottom without drying out the top.
Q: Can I make chicken crust pizza in a slow cooker?
✅ Answer: It’s not recommended as it may become soggy.
I’ve tried “creative” methods when my oven was tied up, and this one really needs that dry, hot heat to set and crisp.
Q: How long does chicken crust pizza take to bake?
✅ Answer: The pizza takes about 25–30 minutes to bake.
It’s the longest 30 minutes because the smell is so good, everyone starts hovering and asking when it’ll be ready.
Q: Can I use different toppings on chicken crust pizza?
✅ Answer: Absolutely, customize with your favorite toppings.
In our house, the family favorite combo is mushrooms, peppers, and extra cheese, it disappears fast.
Q: Can you freeze chicken crust pizza?
✅ Answer: Yes, freeze for up to 2 months for best quality.
Freezing a few slices has saved me on nights when I’m juggling everything, it’s like future-me left a gift in the freezer.
If you’ve been craving pizza but also trying to keep dinner a little more balanced, I hope this High Protein Chicken Crust Pizza brings you that cozy, cheesy comfort without the stress. It’s one of my favorite ways to make pizza night work for real life, and it’s a keeper in the rotation for anyone who loves healthy high protein meals that still feel fun.
Thank you for cooking with me, I’m so glad you’re here in my little NYC kitchen corner.
Come hang out with me on Pinterest for more cozy, family-friendly recipes you can actually make on a weeknight.
Print
High Protein Chicken Crust Pizza Recipe
- Total Time: 40 minutes
- Yield: 4 servings 1x
Description
High Protein Chicken Crust Pizza is a low-carb, high-protein dinner with a crispy chicken base, melty cheese, and easy pizza night comfort. It’s cheesy, satisfying, and honestly fun to make, especially if your week has been a lot.
Ingredients
1 pound ground chicken
1 large egg
1/2 cup shredded mozzarella cheese (plus more for topping)
1/4 cup grated Parmesan cheese
1 teaspoon Italian seasoning
1/2 teaspoon garlic powder
1/2 teaspoon onion powder
1/2 teaspoon salt
1/4 teaspoon black pepper
1/2 cup pizza sauce (or marinara)
1 to 1 1/2 cups shredded mozzarella cheese (for topping)
1 to 2 cups toppings of choice
Instructions
1. Prep your oven and pan. Heat the oven to 425°F. Line a baking sheet with parchment paper.
2. Mix the crust. In a large bowl, combine the ground chicken, egg, 1/2 cup mozzarella, Parmesan, and all seasonings. Mix until it looks evenly combined.
3. Shape it. Place the mixture on the parchment and press it into a thin circle or rectangle, about 1/4-inch thick.
4. Prebake. Bake for 15 to 18 minutes, until the top looks set and lightly golden.
5. Blot and flip (optional but helpful). Carefully blot any excess moisture with paper towels. If you want extra crispness, gently flip the crust and bake 5 minutes more.
6. Add sauce and toppings. Spread the pizza sauce on top, sprinkle on the cheese, and add your toppings.
7. Bake again. Return to the oven for 8 to 12 minutes, until the cheese is melted and bubbly.
8. Rest, slice, and serve. Let it rest for 5 minutes so it firms up, then slice and enjoy.
Notes
The smell when you mix the chicken with garlic, Italian seasoning, and cheese is the moment you realize this is not “sad diet food.” It smells like real dinner, the kind that makes everyone wander into the kitchen asking, “What are we having?”
- Prep Time: 10 minutes
- Cook Time: 30 minutes
- Category: Dinner
- Method: Baked
- Cuisine: American
Nutrition
- Serving Size: 1 slice
- Calories: 320
- Sugar: 3
- Sodium: 600
- Fat: 18
- Saturated Fat: 8
- Unsaturated Fat: 8
- Trans Fat: 0
- Carbohydrates: 5
- Fiber: 1
- Protein: 35
- Cholesterol: 120