
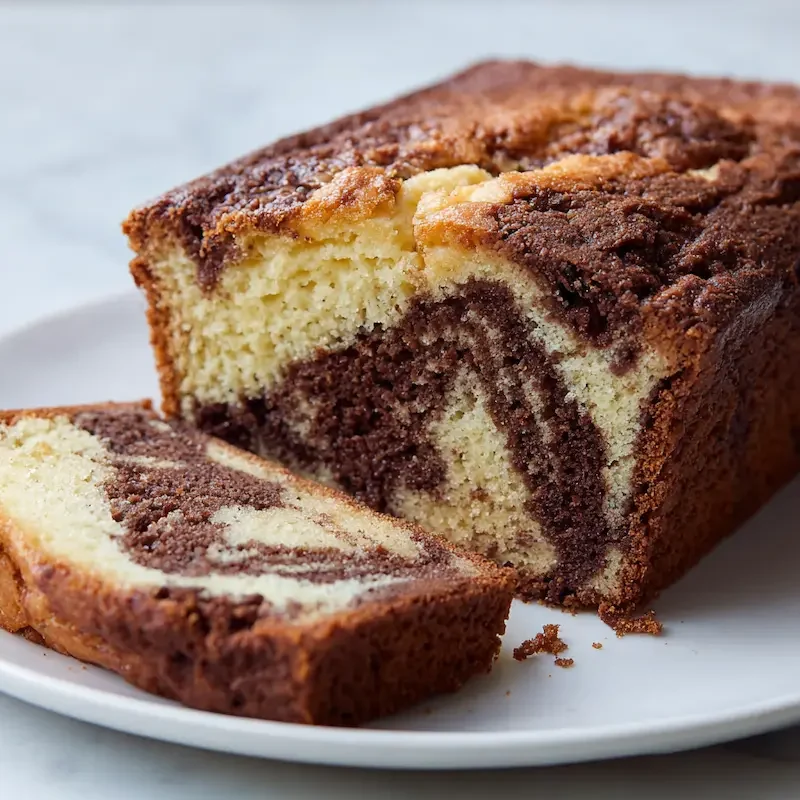
Marble Cake Recipe with rich chocolate and vanilla swirls in a soft, buttery loaf. Easy step-by-step marble loaf cake baking tutorial.
There is something magical about slicing into a loaf and seeing those chocolate and vanilla ribbons swirl together like a little edible painting. This Marble Cake Recipe has been my go to when I want something simple, comforting, and just a little bit special. It is the kind of Chocolate Vanilla Marble Cake that looks impressive but feels completely doable, even on a busy weeknight.
The first time I baked this Homemade Marble Cake with my kids, Lily carefully counted the spoonfuls, Noah hovered near the oven, and Emma insisted on doing the swirling. When we cut into that Classic Marble Loaf and saw the pattern inside, we all gasped.
“Every slice is a little work of art.”
And the smell, warm butter, sweet vanilla, and deep cocoa, filled our kitchen in the best way.
This loaf is perfect with coffee, tucked into lunchboxes, or served alongside other fluffy breakfast treats like my favorite fluffy breakfast treats. It is simple, nostalgic, and always welcome at our table.
Why This Marble Cake Recipe Is a Family Favorite
There are dozens of cake recipes out there, but this Marble Cake Recipe holds a special place in our home. It feels timeless, like something your grandmother might have baked on a quiet Sunday afternoon.
The beauty of a Chocolate Vanilla Marble Cake is in the contrast. You get the soft sweetness of vanilla, like a Simple Vanilla Loaf Cake, paired with a rich chocolate ribbon that makes every bite interesting. It is not overly sweet, not too heavy, just balanced and comforting.
I still remember the first loaf I baked after leaving my office job and coming back to the kitchen full time. I wanted something classic, something that reminded me why I loved baking. When I sliced into that Classic Marble Loaf and saw those swirls, it felt like coming home.
Now, it is one of those recipes my kids request again and again. It is dependable, cozy, and beautiful without trying too hard. That is my favorite kind of dessert.
Marble Loaf Cake Ingredients
Let’s talk about the Marble Loaf Cake Ingredients and why each one matters. This Marble Cake Dessert Recipe is simple, but every ingredient plays a role.
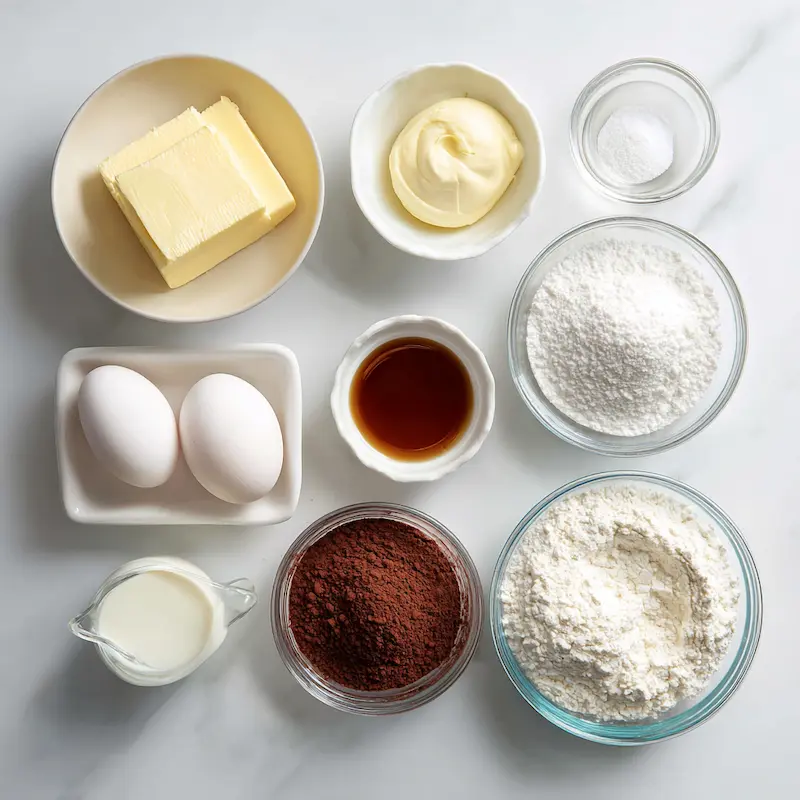
• 1 cup (225g) unsalted butter, softened
Real butter gives this loaf its rich flavor and tender crumb. Softened butter creams better with sugar, which creates air pockets and helps the cake rise beautifully.
• 1 cup (200g) granulated sugar
Sweetness, yes, but also structure. Sugar helps with browning and that lightly crisp top.
• 3 large eggs, room temperature
Room temperature eggs blend more smoothly into the batter. Cold eggs can cause the butter to firm up and create a dense texture.
• 2 cups (250g) all-purpose flour
The backbone of our Simple Vanilla Loaf Cake base.
• 2 tsp baking powder
This is our lift. It gives the cake that soft, fluffy texture. Make sure it is fresh.
• ½ cup (120ml) milk or yogurt
Moisture and tenderness. Yogurt adds a slight tang and makes the loaf extra soft.
• 2 tbsp cocoa powder (or 50g melted chocolate)
Cocoa gives a classic swirl. Melted chocolate creates a richer ribbon. If you love deeper flavor, you can even drizzle a little homemade chocolate drizzle over the top before serving.
• 1 tsp vanilla extract
Warm, sweet aroma that ties everything together.
• Pinch of salt
Just enough to balance the sweetness and enhance the chocolate.
The Secret to Fluffy Texture
The key is using room temperature butter and eggs. When you cream them properly, you trap air. That air expands in the oven and creates a light, tender crumb. It is a small detail that makes a big difference.
How to Make Marble Cake (Step-by-Step Marble Cake Baking Tutorial)
If you have ever felt nervous about baking, let this Marble Cake Baking Tutorial walk you through it. This Marble Cake Loaf Recipe is straightforward and forgiving.
1. Preheat and Prepare
Preheat your oven to 350°F (175°C). Grease and line a standard loaf pan with parchment paper for easy removal.
2. Cream the Butter and Sugar
In a large bowl, Cream the softened butter and sugar together until light and fluffy. This usually takes about 3 to 4 minutes. The mixture should look pale and slightly airy.
3. Add Eggs and Vanilla
Add eggs one at a time, mixing well after each addition. Stir in the vanilla extract. The batter should look smooth and glossy.
4. Combine Dry Ingredients
In a separate bowl, whisk together flour, baking powder, and salt.
5. Mix the Batter
Gradually add the dry ingredients to the wet mixture, alternating with milk or yogurt. Fold gently until just combined. Do not overmix.
Eva’s Note: Overmixing is the fastest way to turn an Easy Marble Cake into a dense one. Stop mixing as soon as you no longer see streaks of flour.
6. Make the Chocolate Batter
Divide the batter in half. Stir cocoa powder, or melted chocolate, into one half. If using melted chocolate, make sure it is slightly cooled before mixing.
7. Layer and Swirl
Spoon alternating dollops of vanilla and chocolate batter into the loaf pan. Swirl gently with a knife or skewer.
8. Bake
Bake for 50 to 60 minutes. The top should be golden with a slight crack down the center. Insert a toothpick into the middle. It should come out with moist crumbs, not wet batter.
If you enjoy loaf style cakes like this, you might also love my rich chocolate loaf cake, which has a deeper cocoa flavor but the same cozy feel.
Let the cake cool in the pan for 10 minutes before transferring to a wire rack.
Swirling Technique for Perfect Marble Patterns
How do you create perfect swirls in a marble cake? This is everyone’s favorite part.
Emma always asks for “one more swirl,” but I have learned that less is more.
Here is what works best:
• Use a butter knife or skewer, not a spoon
• Make gentle figure eight motions through the batter
• Stop after a few passes, do not overdo it
• Keep some distinct patches of vanilla and chocolate visible
A few gentle figure eights are all you need. Too much swirling blends the batters together and you lose that beautiful marble effect.
Loaf vs Round Pan, Baking Time and Texture Differences
This recipe is written as a loaf because it feels cozy and sliceable. A loaf pan gives you thicker slices and a slightly denser, moist crumb.
If you use a round 8 inch cake pan for a Vanilla Celebration Cake Loaf style dessert, the baking time will be shorter, around 35 to 45 minutes.
Quick comparison:
Loaf pan
• Bake time: 50 to 60 minutes
• Texture: Slightly denser, very moist
• Best for: Snacking, gifting, everyday baking
Round pan
• Bake time: 35 to 45 minutes
• Texture: Slightly lighter
• Best for: Celebrations, frosting, layering
Both work, but I reach for the loaf pan most often.
Common Marble Cake Mistakes (And How to Fix Them)
I have made every mistake possible with this cake, especially in my early days.
Why did my marble cake turn out dense? My first loaf was heavy because I rushed the creaming step and used cold eggs.
Here are common problems and fixes:
• Dense texture → Cream butter and sugar longer, use room temperature ingredients, avoid overmixing.
• Chocolate layer sinking → How do I keep the chocolate layer from sinking? Stir in a spoonful of flour to slightly thicken the chocolate batter before layering.
• Dry cake → Do not overbake. Check at the 50 minute mark.
• Swirls disappeared → Do not over swirl. A few gentle motions are enough.
That small adjustment of thickening the chocolate batter made a huge difference for me. Baking really is about tiny lessons that add up.
Eggless Marble Loaf Cake Variation
Can I make this marble cake without eggs? Yes, you can.
When baking for neighbors with egg allergies, I tested an Eggless Marble Loaf Cake version that turned out beautifully soft.
Here are simple substitutions:
• Replace each egg with ¼ cup plain yogurt
• Or use ¼ cup unsweetened applesauce per egg
The texture is slightly more tender and a bit less structured, but still moist and flavorful. Make sure not to overmix, since eggless batters can become dense more easily.
My kids honestly could not tell the difference once it cooled.
Storage, Freezing and Serving Tips
How should I store marble cake to keep it moist? Once completely cooled, wrap the loaf tightly in plastic wrap or parchment and store at room temperature for up to 3 days.
For longer storage:
• Refrigerator: Up to 5 days, wrapped well
• Freezer: Up to 3 months, double wrapped
Can I freeze marble cake? Absolutely. I like to slice it first, then wrap individual slices. That way I can pull one out when guests drop by unexpectedly.
The flavor actually deepens overnight. That next day slice tastes even richer.
What’s the best way to reheat leftover marble cake?
• Microwave for 10 to 15 seconds for a soft, warm slice
• Toast lightly for slightly crisp edges
A toasted slice with a little butter melting into the swirls is pure comfort on a quiet morning.
Frequently Asked Questions about Marble Cake Recipe
How do you create perfect swirls in a marble cake?
Drop alternating spoonfuls of vanilla and chocolate batter into the pan. Use a knife to gently swirl in figure eight motions. Do not overmix. My youngest always begs for one more swirl, but stopping early keeps the pattern clear and beautiful.
Can I use melted chocolate instead of cocoa powder?
Yes. Melted chocolate gives a richer, slightly denser ribbon and a deeper aroma when you slice the cake. If the batter feels too loose, reduce the milk slightly or add a spoonful of flour to balance it.
Why did my marble cake turn out dense?
Overmixing or using cold ingredients often causes a heavy texture. Cream butter and sugar thoroughly and fold the flour in gently. I learned this the hard way with my very first loaf.
Can I make this marble cake without eggs?
Yes. Replace each egg with yogurt or applesauce for moisture and structure. I often do this for school events where allergies are a concern, and it still tastes wonderful.
How long does a marble loaf cake bake?
Typically 50 to 60 minutes at 350°F (175°C). Look for a golden top with a small crack down the center. A toothpick should come out with moist crumbs, not wet batter.
How do I keep the chocolate layer from sinking?
Thicken the chocolate batter slightly with a spoonful of flour and avoid over swirling. That small trick keeps the layers balanced.
How should I store marble cake to keep it moist?
Wrap it tightly and store at room temperature up to 3 days. Refrigerate up to 5 days if needed. Keeping it well wrapped is the key.
Can I freeze marble cake?
Yes. Wrap tightly and freeze up to 3 months. Thaw at room temperature while still wrapped to maintain moisture.
What’s the best way to reheat leftover marble cake?
Microwave briefly for a soft texture or toast lightly for crisp edges. Both bring the flavors back to life beautifully.
There is something so comforting about a Marble Cake Recipe that never goes out of style. It is simple, nostalgic, and filled with little chocolate surprises in every slice. Whether you bake it for a Sunday afternoon, a school event, or just because you need something sweet with your coffee, this Chocolate Vanilla Marble Cake has a way of making ordinary moments feel special.
Thank you so much for baking with me today.
Follow along for more cozy recipes on Facebook.
Marble Cake Recipe (Chocolate Vanilla Loaf)
- Total Time: 1 hour 10 minutes
- Yield: 1 loaf (8 to 10 slices) 1x
- Diet: Vegetarian
Description
This Marble Cake Recipe features soft vanilla and rich chocolate swirls baked into a moist, buttery loaf that is perfect for dessert or an afternoon treat.
Ingredients
1 cup (225g) unsalted butter, softened
1 cup (200g) granulated sugar
3 large eggs, room temperature
2 cups (250g) all-purpose flour
2 teaspoons baking powder
1/2 cup (120ml) milk or plain yogurt
2 tablespoons cocoa powder or 50g melted chocolate
1 teaspoon vanilla extract
Pinch of salt
Instructions
1. Preheat oven to 350°F (175°C) and grease a 9×5 inch loaf pan, lining with parchment paper.
2. Cream softened butter and sugar together until light and fluffy, about 3 to 4 minutes.
3. Add eggs one at a time, mixing well after each addition, then stir in vanilla extract.
4. In a separate bowl whisk together flour, baking powder, and salt.
5. Gradually add dry ingredients to the butter mixture, alternating with milk or yogurt, mixing just until combined.
6. Divide the batter evenly into two bowls and stir cocoa powder or melted chocolate into one half.
7. Spoon alternating dollops of vanilla and chocolate batter into the prepared pan.
8. Use a knife or skewer to gently swirl the batters together in figure eight motions.
9. Bake for 50 to 60 minutes, or until a toothpick inserted in the center comes out with moist crumbs.
10. Cool in the pan for 10 minutes, then transfer to a wire rack to cool completely before slicing.
Notes
Use room temperature butter and eggs for a lighter, fluffier texture.
Do not overmix the batter or the cake may turn dense.
For deeper chocolate flavor, use melted chocolate instead of cocoa powder.
Store tightly wrapped at room temperature for up to 3 days or freeze for up to 3 months.
- Prep Time: 15 minutes
- Cook Time: 55 minutes
- Category: Dessert
- Method: Baking
- Cuisine: American
Nutrition
- Serving Size: 1 slice
- Calories: 320
- Sugar: 22g
- Sodium: 120mg
- Fat: 18g
- Saturated Fat: 11g
- Unsaturated Fat: 6g
- Trans Fat: 0g
- Carbohydrates: 36g
- Fiber: 1g
- Protein: 5g
- Cholesterol: 95mg